• Welcome to Smashboards, the world's largest Super Smash Brothers community! Over 250,000 Smash Bros. fans from around the world have come to discuss these great games in over 19 million posts!

    You are currently viewing our boards as a visitor. Click here to sign up right now and start on your path in the Smash community!

Make Your Move 24: Moveset Design Contest — Congrats to our Top 50! This contest is officially Dead™, tune in March 10 for our next installment!

BKupa666

Barnacled Boss
Moderator
Joined
Aug 12, 2008
Messages
7,788
Location
Toxic Tower
WELCOME TO MAKE YOUR MOVE 24!

Hey there, welcome to Make Your Move! Make Your Move (or MYM) is a moveset writing contest, where you can design a moveset for absolutely any character you want and show your writing and game design talent! By "any character," we really do mean any character – Nintendo, third-party, TV, comics, film, novels, OCs, ancient mythology, or even Real Life! There's no real limit on the character you can pick in terms of source medium. We focus on sets made in the Smash Bros. engine, most commonly Smash Ultimate as it's the current entry in the series. If you want, though, you can write for Smash 4, Brawl, Project M, or even Melee and 64 if you so choose. Whatever character and game you pick, give it your best shot!!

MYM Overview
Moveset Creation

A moveset is made up of 23 inputs:​
  • 4 Special Moves [ Neutral | Down | Side | Up ]
  • 5 Standard Attacks [ Jab | Dash Attack | Forward Tilt | Down Tilt | Up Tilt ]
  • 3 Smash Attacks [ Forward | Down | Up ]
  • 5 Aerial Attacks [ Neutral | Forward | Back | Up | Down ]
  • 6 Grab-Game Inputs [ Grab | Pummel | Forward Throw | Back Throw | Down Throw | Up Throw ]
  • Plus a Stats Section [ Movement | Size | Weight | any Unique Mechanics | etc. ]
You can list them in whatever order you want. Most movesets list Special Moves first, since their unique properties often tie a moveset together as a "core" and can be relevant to the rest of the moves. For example, Shulk's Monado Arts change up how the rest of his moves are used, so it'd be helpful to list his Special Moves at the beginning. Similarly, a character's Stats should go in the beginning bit.​
Outside of that, the order varies a lot, but moves are almost always grouped together into the five sections bullet-pointed above. Do whatever you'd like here!​
Other optional things you might want to include:​
  • Image of the character [ Recommended! ]
  • Intro writeup for the character [ Recommended! ]
  • Final Smash [ Recommended! ]
  • Taunts
  • Custom Specials
  • Situational Attacks [ Ledge Attack | Getup Attack ]
  • Miscellaneous Flavor [ Home Stage | Alternate Costumes | etc. ]
Having trouble writing a set? Just post in the thread or DM one of the five Leaders listed later in this post! We're always happy to check out WIP sets and provide feedback. :)
Traditionally, movesets are posted in the thread itself, as regular posts. However, a good number of MYMers instead host movesets offsite, such as with Google Docs, for the sake of formatting control, reliability or the like. For Google Docs in particular, there is a handy [ TEMPLATE ] you can use. If you're signed into Docs, just hit file > make a copy and you're good to go.​
Commenting

"Famous writers got to where they are due to reading a large amount of literature, and it’s the same with movesets. Commenting forces you to articulate that knowledge and put it to word; the helpfulness of this exercise cannot be overstated."
After reading a moveset, why not share your thoughts on it? That's what a Comment is! You can share your impressions, give advice / feedback on what you think could be improved, and / or praise the moveset's strengths. Just anything you want to say after reading the set! The author of the set'll really appreciate it! Also, do leave a Like on sets you read and enjoy, which while not as strong as a Comment still gets the idea across to an extent.​
Not only is reading and Commenting movesets helpful for the author of the set, but it can also help the Commenter's skills improve by learning from other sets' strengths and weaknesses. Also, in order to Vote at the very end of Make Your Move 24, a user must post [ at least 10 Comments ] throughout the course of the contest, to demonstrate that they have read enough movesets to give an informed vote.​
Ranking

If you want to take Commenting a step further, why not start your own [ Rankings ]? Rankings are a post (in the thread or otherwise) where you list the sets you've read, and say how good you think each set is. Many Rankings use a ten-star system, but other systems are definitely possible. Five-star, category-based, and other types of Rankings have all been used in the past, so just use whichever format you'd like. One common theme is "Ranking images," a funny or cool image posted along with each set's Ranking.​
You'll see Rankings from a lot of experienced MYMers, but anyone is free to make one of their own! You might want to consider putting them in a spoiler tag to avoid clogging up too much space, though this is not required. This also has the handy benefit of resizing images to be more uniform.​
I wouldn't be shy about making rankings, even if you're fairly new: They're ultimately an expression of how you feel of a set, which everyone has, and only through practice does someone become good at something. Several folks started their first rankings ages ago, back when they were but humble newbies, after all. We're always looking for more, so don't be worried or shy! :)

Contest's End

In the past, each Make Your Move contest ended around the time one hundred movesets had been posted in that contest. Ever since Make Your Move 19, however, a strict deadline has been used instead. For MYM24, that deadline is [ August 25th ]. Don't miss it!​
At the end of a contest, it's a MYM tradition to vote on all the sets posted in the thread! Any user who has posted at least 10 Comments may submit a Vote to one of the Vote Gurus via a Smashboards DM. You have 35 Votes to award to movesets you think deserve it, split between these categories:​
  • 15 Weak Votes [ 2 Points ]
  • 12 Regular Votes [ 5 Points ]
  • 8 Super Votes [ 9 Points ]
Give these Votes to sets you like, and the set with the most points wins! You don't have to use every single Vote, but you can't go over the maximum for each category.​
You may also choose to upgrade some of your Votes into [ Vote Pluses ], if you think that some sets in a Vote category on your list stand out among the rest. You may upgrade one Super Vote into a Super Vote Plus, making it worth 11 Points instead of 9 Points. The other two Vote types may each have three Vote Pluses, becoming worth 1 Point more than usual. Traditionally, your Super Vote Plus is given to the set you thought were the best, your Regular Vote Pluses to the Regular Votes you thought were the best and the Weak Vote Pluses to the Weak Votes you thought were the best. There are no actual rules to how you use your Vote Pluses, though.​
For a visual aid, here is FrozenRoy's votelist from Make Your Move 21, which used every vote it could!​
It goes without saying, but you can't vote on your own sets. Normally this would give those who vote a disadvantage in terms of placing well, so there are measures in place to compensate those who vote with extra points.​
Immediately after the contest ends, there is a Voting Period, where everybody has time to read movesets they missed, compile a Vote List, and submit it to the Vote Gurus. After that, the Leaders will work hard on completing the Top Fifty, a ranking of the top-voted movesets!​
Despite the name, the Top Fifty no longer always has fifty movesets, due to the deadline changes made in MYM19. Instead, any moveset with at least two Votes of any kind, OR at least one Super Vote, is eligible for the Top Fifty. Note, however, that the MAXIMUM sets that can get on remains fifty: If 51 sets qualify, then one of them isn't making it! It's posted in the thread along with some fanfare, as per tradition. Will your set place on the Top Fifty?​
For the Top Fifty, the Leaders will break ties when needed. There'll always be raw voting data available, so you can peek behind the curtain if you'd like.​
Beyond The Thread
MYM-Operated Communities and Sites

Make Your Move has a very active Discord chat, where all the discussion happens. There's a handy [ LINK ] to join it right away! Feel free to pop in and say hello after reading the rules.​
The Bunker [ LINK ] and The Stadium [ LINK ] have been around for ages, and collectively have racked up more than half a million views since their inception. You'll find comprehensive moveset lists for each contest dating back to MYM's halcyon days in the pre-Brawl era, and no shortage of resources, listicles and analyses.​
More recently launched, and still under construction, the MYM Hub [ LINK ] also boasts several moveset lists and articles of its own.​
Unaffiliated Resources

KuroganeHammer [ LINK ] and UltimateFrameData [ LINK ] both are treasure troves of technical details about moves in Smash Ultimate, as well as a handful of other games such as Smash 4. The latter even offers frame-by-frame hitbox visuals for every single attack in the game! Check them out if you want a reference point for how much damage a move should deal, how quick it should be, or anything like that.​
The Smash Wiki [ LINK ] also has a decent amount of data, including statistics like character jump height, terminology, Smash Bros trivia from across the series, and more information of possible interest.​
Redditor u/Nachowcheese has created an exhaustive spreadsheet [ LINK ] with KO percentages and trajectories for each of Ultimate's attacks, as experienced by the middling Mii Swordfighter from the center of Final Destination.​
There exists a thread on Smashboards [ LINK ] which houses GIFs for some characters' attack hitboxes. The data is from Smash 4 and not Ultimate, but it's still a handy resource for the range and animation of moves.​
Art of Smash [ LINK ] is a video series by Izaw about the intricacies of how Smash 4 is played. The first four videos are a little bit outdated, since Smash Ultimate has changes from Smash 4 (see the next paragraph for a better resource). The useful part is the videos that come after: an expansive list of character-specific videos, going over lots of tricks, combos, and techniques which can inspire moves in a MYM set. Most important, perhaps, is the videos' emphasis on the "playstyle" of a character, or the method by which one makes a moveset feel like a cohesive whole. In MYM, understanding this concept separates the wheat from the chaff.​
There's also an ongoing sequel series to Art of Smash, called Art of Smash Ultimate, made by the same person and for the same purpose: [ LINK ]
Leadership

The organizers of Make Your Move, the [ Leaders ] of the community make sure everything keeps running smoothly here in our little contest. Leaders are generally well-respected and usually very seasoned MYMers, sometimes having been in the community since MYM's inception! Feel free to hit us up via Smashboards or Discord if you want to chat, we're here to help.​
Here's some of our Leadership's crispest, freshest sets to date:​

Smash Daddy | "Smady"

poison​
First Contest
Make Your Move 3​
First Set
Vivi​
Highest Placing
1st [ Raiden - MYM5 | Death - MYM11 | Ameno-Sagiri - MYM12 | Fassad - MYM17 ]
Total Movesets
82, as of MYM23​
Notable Franchises
Dragon Quest [ King Korol - MYM17 (4th) | Ladja - MYM17 (7th) ]
Ace Attorney [ Kristoph Gavin - MYM18 (4th) | Ernest Amano - MYM23 (9th) | L'Belle - MYM17 (17th) ]
Shin Megami Tensei/Persona [ Ameno Sagiri - MYM12 (1st) | Matador - MYM18 (5th) | Kamoshida - MYM21 (4th) | Michael - MYM18 (15th) | Shadow Teddie - MYM18 (18th) ]
Final Fantasy [ Jecht - MYM18 (6th) | Adel - MYM18 (24st) ]
Resident Evil [ William Birkin - MYM17 (6th) | Albert Wesker - MYM15 (8th) | Dr. Marcus - MYM18 (10th) ]
One Piece [ Vander Decken - MYM16 (3rd) | Magellan - MYM19 (4th) | Caribou - MYM17 (8th) ]
Illbleed [ Michael Reynolds - MYM13 (5th) | Cashman - MYM13 (4th) ]
CD-i [ Hotel Mario Roy - MYM19 (9th) ]
Cuphead [ Goopy Le Grande - MYM20 (29th) | Wally Warbles - MYM20 (32nd) | Werner Werman - MYM20 (10th) | Djimmi the Great - MYM20 (17th) | Dr. Kahl - MYM20 (13th) ]
Five Nights at Freddy's [ Ennard - MYM22 (10th) ]
Street Fighter [ Hugo - MYM22 (16th) ]
Wario [ Rudy the Clown - MYM22 (4th) ]
Dark Crystal [ skekUng, The Garthim Master - MYM23 (6th) ]
Yu-Gi-Oh! [ Il Blud - MYM23 (16th) ]

FrozenRoy | "Froy" | "Roy"

frosty boi​
First Contest
Make Your Move 12​
First Set
Scizor​
Highest Placing
1st [ Sho Minamimoto - MYM14 ]
Total Movesets
101, as of MYM23​
Notable Franchises
Touhou [ Shou Toramaru - MYM23 (12th) | Utsuho Reiuji - MYM22 (19th) | Remilia Scarlet - MYM14 (8th) ]
Warcraft [ Baron Rivendare - MYM16 (13th) ]
RWBY [ Weiss Schnee - MYM15 (14th) ]
League of Legends [ Viktor - MYM16 (8th) ]
Dark Souls [ Artorias the Abysswalker - MYM18 (11th) ]
Defense of the Ancients 2 [ Anti-Mage - MYM18 (17th) ]
Yu-Gi-Oh! [ Night's End Sorcerer Remix - MYM15 (21st) ]
The World Ends With You [ Sho Minamimoto - MYM14 (1st) ]
Pokémon [ Elekid - MYM22 (38th) | Poochyena - MYM22 (43rd) | Poliwag - MYM21 (39th) | Toxicroak - MYM21(34th) | Haunter - MYM20 (18th) ]
Star Wars [ Count Dooku - MYM17 (18th) ]
Kingdom Hearts [ Xaldin - MYM21 (6th) | Lexaeus - MYM21 (21st) ]​
Street Fighter [ Alex - MYM22 (17th) ]
Mega Man [ Elpizo - MYM21 (28th) | Copy X - MYM21 (24th) ]
Wakfu [ Nox - MYM22 (11th) | Quilby - MYM22 (6th) ]
Jojo's Bizarre Adventure [ B. Polneraff - MYM22 (9th) | Hol Horse - MYM22 (2nd) ]
Final Fantasy [ Rufus Shinra - MYM23 (4th) ]

UserShadow7989 | "US" | "Professor Hawke"

[No Image Found]​
witches​
First Contest
Make Your Move 5​
First Set
Revolver Ocelot​
Highest Placing
1st [ “Lucky” Louise - MYM23 ]
Total Movesets
45, as of MYM23​
Notable Franchises
Original Character [ “Lucky” Louise - MYM23 (1st) | Hina Merrel - MYM23 (3rd) | Naomi Faren - MYM22 (8th) | Slime Witch Dahlia - MYM22 (21st) | Rime Marz - MYM21 (8th) | Knightly Witch Garnet - MYM18 (14th) ]
Mega Man [ PlanetMan.EXE - MYM21 (18th) | Colonel.EXE - MYM18 (35th) ]
Pokemon [ Butterfree - MYM19 (21st) | Tangrowth - MYM18 (36th) ]
Yu-Gi-Oh! [ Dragonmaid Hauskee - MYM22 (15th) | Dragonmaid Tillroo - MYM22 (30th) ]
Touhou [ Wriggle Nightbug - MYM23 (10th) ]
Donkey Kong [ Bleak - MYM23 (23rd) ]

BKUPA666 | "Kupa"

K. Rool D-Smash
First Contest
Make Your Move 3​
First Set
Timon & Pumbaa​
Highest Placing
1st [ Bowser Jr. - MYM9 ]
Total Movesets
91, as of MYM23​
Notable Franchises
Donkey Kong [ Baron K. Roolenstein - MYM10 (4th) | Necky - MYM9 (10th) | Kritter - MYM22 (33rd) | Dixie Kong - MYM24 (???) ]
Mario [ Bowser Jr. - MYM9 (1st) | Bowser - MYM11 (5th) | Gooper Blooper - MYM12 (17th) ]
Luigi's Mansion [ Jarvis - MYM12 (6th) | King Boo - MYM9 (8th) | Amadeus Wolfgeist - MYM23 (13th) ]
Disney [ Edgar - MYM10 (17th) | Professor Ratigan - MYM12 (19th) | Gaston - MYM11 (22nd) ]
Pixar [ Mr. Potato Head - MYM8 (3rd) | Slinky - MYM8 (16th) | Syndrome - MYM24 (???) ]
Horror [ Pennywise the Dancing Clown - MYM10 (2nd) ]
Marvel [ Mysterio - MYM23 (5th) | Vulture - MYM22 (14th) | Kingpin - MYM22 (37th) ]
Dark Crystal [ skekSil, the Chamberlain - MYM22 (5th) | skekMal, the Hunter - MYM23 (20th) ]
Punch-Out!! [ Soda Popinski - MYM24 (???) ]
Breaking Bad [ Walter White - MYM24 (???) ]

KATAPULTAR | "Kat"

a girl dragon​
First Contest
Make Your Move 5​
First Set
Tsuru Tsurulina III​
Highest Placing
1st [ Chou-Chou Infinite - MYM16 ]
Total Movesets
106, as of MYM23​
Notable Franchises
Anime [ Yui Hirasawa - MYM21 (9th) | Shinobu - MYM21 (11th) | Reigen Arataka - MYM22 (22nd) ]
Mugen Souls [ Chou-Chou Infinite - MYM16 (1st) | Altis - MYM16 (18th) | Marina Cannonvale - MYM18 (27th) ]
Yu-Gi-Oh! [ Dragonmaid Chame - MYM23 (11th) | Dragonmaid Nasary - MYM22 (18th) | Dragonmaid Parla - MYM22 (24th) ]
Atelier [ Ayesha Altugle - MYM23 (21st) | Shallotte Elmius - MYM21 (21st) | Regina Curtis - MYM17 (22nd) ]
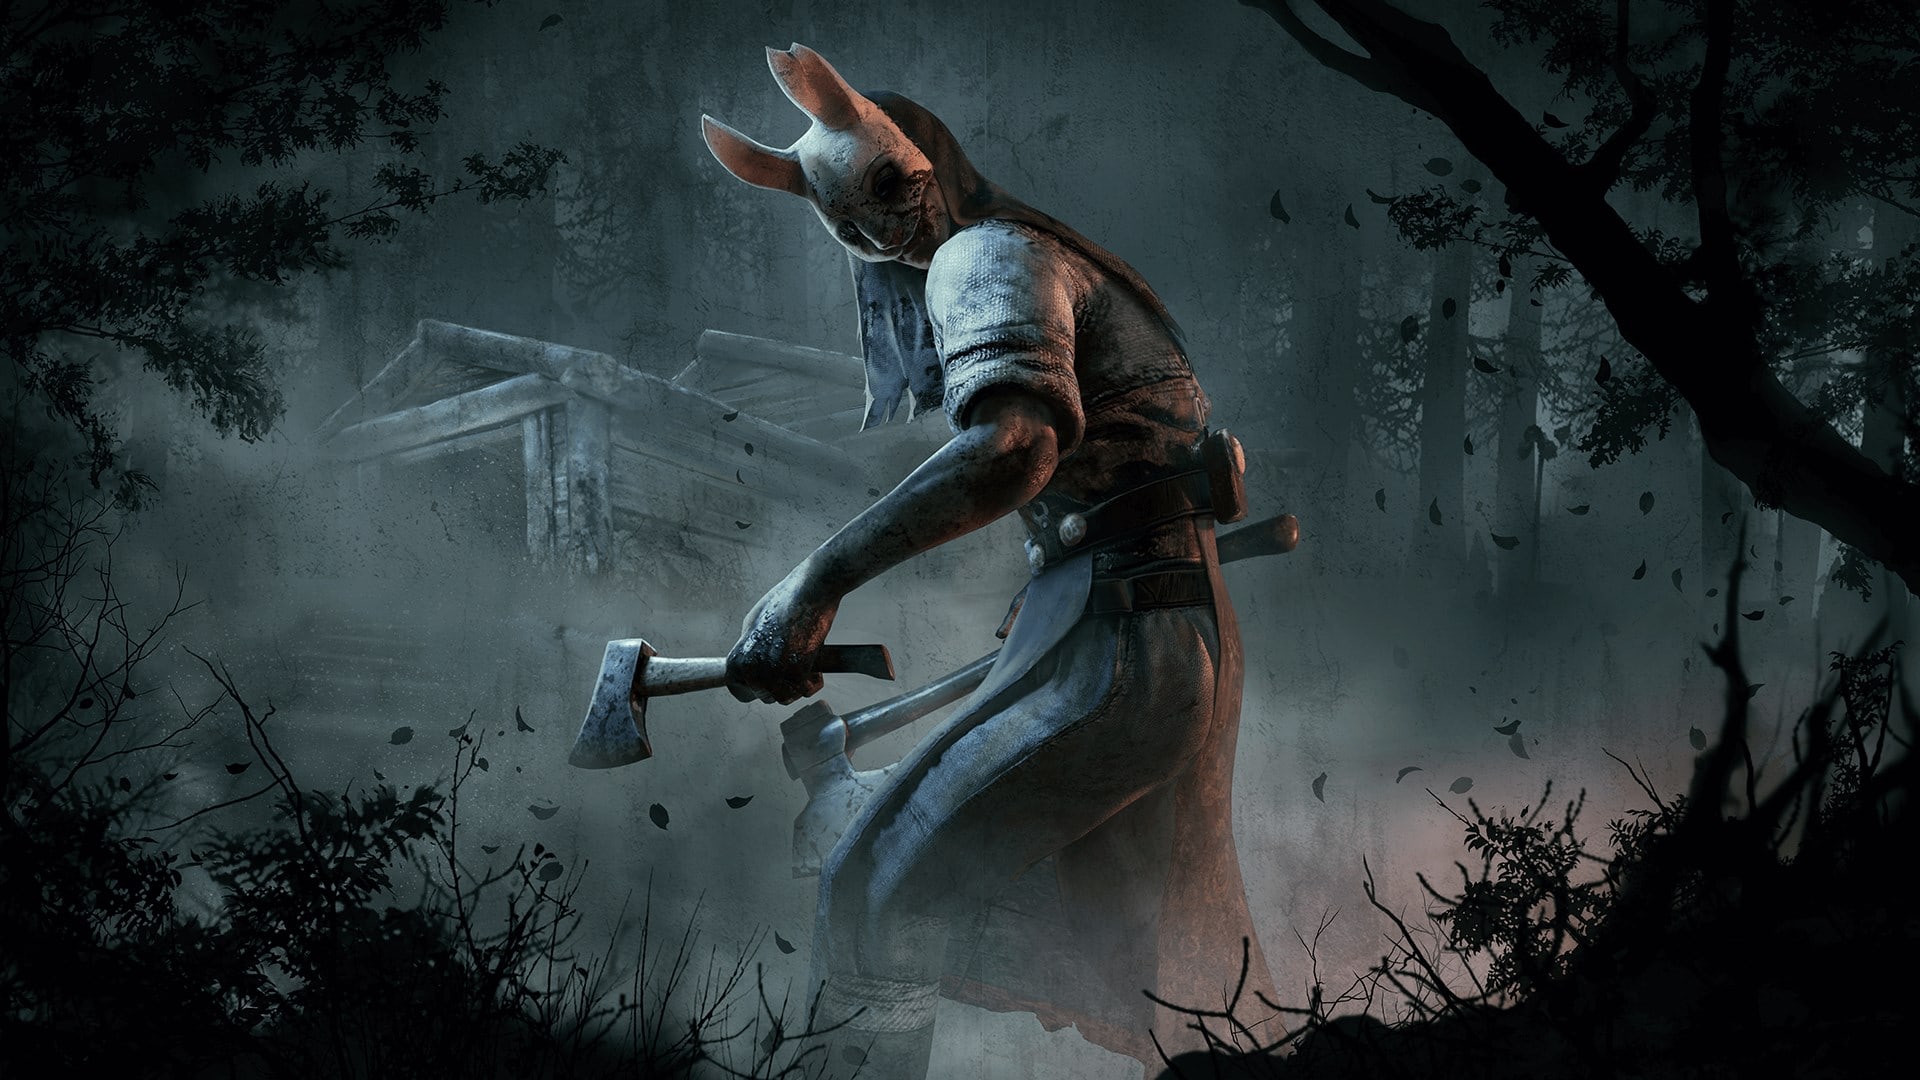
Horror [ Ghostface - MYM20 (3rd) | Pennywise the Dancing Clown - MYM23 (8th) | Jason Voorhees - MYM8 (N/A) ]
Zettai Bouei Leviathan [ Ziz - MYM20 (14th) | Leviathan - MYM15 (27th) | Bahamut - MYM16 (30th) ]
Disgaea [ Judge Nemo - MYM16 (4th) | Salvatore the Magnificent - MYM14 (4th) | Magic Knight - MYM14 (35th) ]
My Hero Academia [ Himiko Toga - MYM21 (10th) | Ochako Uraraka - MYM23 (19th) ]
Fate/Grand Order [ Jeanne d'Arc (Alter) - MYM23 (14th) | Kiyohime - MYM23 (32nd) ]
Ace Attorney [ Luke Atmey - MYM13 (14th) | Armie Buff - MYM22 (27th) ]
JoJo's Bizarre Adventure [ Funny Valentine - MYM15 (4th) ]
SNK [ Hotaru Futaba - MYM23 (15th) ]

Rules

This goes without saying, but MYM abides by the [ RULES ] set in place by the folks in charge of this website, so keep that in mind! Please remember to report posts that break the rules, instead of replying to them.​

And that's pretty much it! Go have fun writing, reading, and critiquing sets. Write your moveset, carve your legacy, Make Your Move!​
 
Last edited:

BKupa666

Barnacled Boss
Moderator
Joined
Aug 12, 2008
Messages
7,788
Location
Toxic Tower
"You know, I went through quite a few Supers to get (the Omnidroid) worthy to fight you, but man, it wasn't good enough! After you trashed the last one, I had to make some major modifications. Sure, it was difficult, but you are worth it. I mean, after all. . .I am your biggest fan."


Perhaps the best Pixar villain to date, and in all likelihood one they'll never top, Syndrome establishes himself as the counterweight to the Parr family in the 2005 film The Incredibles (you might have heard of it). A genius-level inventor from a young age, Buddy Pine starts down his path of darkness when Mr. Incredible opts to "work alone" rather than take on "Incrediboy" as a giddy ward. In the intervening 15 years, the man who would go on to identify as Syndrome amasses ridiculous wealth, becoming an elusive black-market arms dealer from his base within the volcanic, thematically-named Nomanisan Island. Fueled by resentment toward his former idol, Syndrome manipulates retired superheroes into becoming gerbils for him in upgrading Omnidroid battle robots, with fatal results.

Ultimately, the toxic fanboy seeks to validate his belief that heroism extends beyond innate superpowers to smarts and technology, even if it takes flattening a city with one of said death robots to prove it. Though the titular Incredibles ultimately put an end to Syndrome's scheme, underscoring the importance of "NO CAPES" in the process, his legacy lives on. In the Pixar canon and the minds of fans, Syndrome's blend of comedic, often pathetic yet still chilling antagonism has stood out in stark contrast over each of the last 17 years, especially in recent ones, as Disney continues retiring classic antagonism in lieu of forces of nature, twist villains with 10 seconds of screentime or tHe tRuE vIlLaIn BeInG tHe PrOtAgOnIsT's InSeCuRiTiEs ThE wHoLe TiMe.


STATISTICS

Aerial Movement \()/ 8.5 / 1.21 units (12th, between Falcon and Mario)
Jumps
\()/ 8 (comparable to Banjo & Kazooie)
Size
\()/ 7
Weight \()/ 6.5 / 104 units (19th, tied with Link, Yoshi and others)
Fall Speed
\()/ 6 / 1.65 units (29th, tied with Ganondorf, Sonic and others)
Ground Movement
\()/ 4 / 1.667 units (45th, between Pac-Man and Samus)


Syndrome stands tall on the battlefield, at least as tall as his less-than-imposing stature allows, occasionally clicking buttons on his wrist gauntlet in a bored manner or using a finger to wipe his nose. Though he presents a reasonably wide target, the upper portion of Syndrome's spiked hair is not part of his hurtbox, giving him some leeway to avoid ill-spaced attacks. An inexperienced physical combatant, Syndrome has relatively cumbersome controls on the ground, transitioning from a cocky, fist-swinging walk to a mediocre gliding dash, courtesy of his rocket boots. In the air, however, Syndrome boasts a second midair jump, better movement-wise than his first, akin to Banjo & Kazooie. Combined with fluid aerial mobility, this often will leave him opting for airborne approaches, or at least jetting around in spacing where he'll land for a grounded assault.

Unless otherwise stated, KO percentages are on Mario from the middle of Final Destination.


SPECIALS

NEUTRAL SPECIAL - OMNIDROID


Syndrome whistles as though calling a dog, summoning a miniaturized model of Omnidroid in front of him. About as large as a giant Kirby, the spherical battle robot spawns three training stage squares in the air above him over 25 frames, then drops down in ball form as fast as the pink puffball's Stone, dealing 16% and knockback sufficient to KO around 125%. Upon landing, the Omnidroid immediately sprouts five robotic legs, a Breath of the Wild Guardian conceived more than a decade earlier, and begins patrolling the stage at Ganondorf's walk speed.


If there's an opponent within five training square squares horizontally or 2.5 squares vertically, the robot's "eye" will turn from blue to red, popping out slightly in an approximation of "excitement" as it begins pursuing them. The Omnidroid will give chase as long as its target is within range, or until a different foe gets closer in a FFA, following the most direct path to reach them at any given point, with a few exceptions. As far as minions go, the Omnidroid is striking both in terms of its persistence and menacing artificial intelligence:

  • The Omnidroid tucks in its legs to roll after foes on the ground at Wario's dash speed.
  • An above-average grounded jump lets the Omnidroid keep pace into the air, followed by a midair one as needed, perhaps in ascending platforms. Both jumps could be likened to those of a far-less-floaty Samus, though the robot has poorer aerial mobility, comparable to that of K. Rool.
  • Similarly to a regular character, the Omnidroid can laglessly act out of its "dash" upon getting in range of its target (more on its actions in a bit). It does, however, undergo brief moments of lag when turning around or landing, creating limited openings for foes to play keepaway.
  • The Omnidroid will start passively patrolling again if an opponent either escapes from or launches it out of its chase range. It can perform a single (soon to be detailed) response if struck from too far away for its pursuit to kick in, or from afar when it's in the middle of another chase.
  • While in pursuit, the Omnidroid will leap over traps and other such damaging constructs to the extent it can, and will attempt the same if up against a non-attackable obstruction like a wall. If for whatever reason the robot cannot safely navigate through, or cannot surmount an obstacle, period, it will resume its patrol.
  • The Omnidroid will not outright target minions or attackable constructs, though if one is in its path, whether or not it is pursuing a foe, or inflicts damage from any distance, the Omnidroid will perform a single action against it before returning to its previous behavior.
  • The Omnidroid can hop offstage after opponents to a limited degree but won't pursue to the point where its midair jump can't land it safely back on solid ground, aborting an offstage venture if necessary to save itself. Upon this happening, the Omnidroid will resume its chase once its target has landed onstage or lost their ledge invulnerability, so long as it hasn't patrolled out of range by then.
Compared to a traditional minion, the Omnidroid eschews HP in favor of an invisible damage counter. Initially as easy to launch as R.O.B. at 30%, the Omnidroid begins to look progressively more scuffed-up as it takes hits, eventually starting to emit smoke after taking 50%, signaling its arrival at KO percent for most characters. It's not inordinately difficult to KO an Omnidroid, especially if it's sent far enough offstage to render its midair jump irrelevant, though fortunately for Syndrome, its durable design enables it to take two-thirds as much hitstun from attacks as regular characters. Even more crucially, the robot's self-teaching AI requires a more tactical approach from foes than Ultimate typically incentivizes.

The Omnidroid starts off with a set pattern of behavior, chosen by Syndrome and intended to counter a specific form of enemy offense or defense. However, depending on what the Omnidroid's target does once it reaches a certain proximity, the robot's programming automatically will shift, so as to instead counter that offensive or defensive behavior at the next available opportunity. Generally speaking, the Omnidroid's actions are powerful when they're successful but come bundled with their own exploitable vulnerability. And in between each action it undertakes, the Omnidroid pauses for 30 frames, spinning its "eye" around once to recalibrate and giving its target a moment to respond offensively or defensively in kind. Adaptive foes who monitor their movements against the robot can come out ahead, akin to knowing what's coming next in an ongoing game of "rock-paper-scissors," at least barring smart intervention from its master.

Programming Behavior #1 - Slice and Dice


Directly attacking is the Omnidroid's default behavior upon being summoned, after it gets within two training stage squares of its target, as well as if it successfully lands a hit against its victim. The robot's programming also will flip to these attacks when a foe's response to its arrival within this range is whiffing a move with a conventional or grab hitbox, moving, jumping or simply sitting still. In any case, once the Omnidroid enters this two-square range on the ground, it carries out a forceful one-two attack, stabbing two of its robotic legs, pincers closed as sharpened points, diagonally down that distance into the stage. Both pincer stabs deal 10%, plus a bonus 10% in shield damage, with the first having an impaling effect on foes that holds foes in place to be hit by the second, the diagonal knockback from which KOs around 95%.

Coming out on frame 3, the Omnidroid's first stab is very much capable of catching a foe off-guard, especially when the robot performs them out of a sudden rolling dash. Further bolstering the move, the hitbox on the Omnidroid's legs grant decent coverage of its frontal airspace, rather than just along the ground, and will pierce through, rather than clank with external hitboxes. On the less fortunate side, foes can exploit a 15-frame window between the two stabs if they dodge the first, or the Omnidroid's 24-frame cooldown as it pulls its legs out of the earth. As a partial defense, the robot's legs inflict above-average shieldstun, effectively putting it in a frame-neutral position to proceed to its next action after its end lag, though enemy dodges or parries can circumvent this.

Alternatively, if the Omnidroid's pursuit leaves it in midair upon getting within two training stage squares under the same enemy circumstances, it will face the screen, lifting two legs and rapidly spinning their blades such that they overlap with most of its body. As such, this blade rotation provides great coverage for a time, dealing five rapid hits between frames 6 and 31, the first of which deal 3% and a moment of trapping stun while the last deals 5% and diagonal knockback KOing offstage around 90%. Depending on its target's movement as it draws within range, the Omnidroid could initiate this aerial attack right after its midair jump, letting its lingering slices cover a pretty great range of enemy movement options, especially hasty or poorly-positioned ones.


Over the course of its spinning, the Omnidroid also will maneuver itself inward at its target, perhaps in cases where it's landed its grounded stabs at low to mid-percentages and is following its victim into the air. This maneuvering doesn't dramatically increase the likelihood of a hit, given the robot's relative inertia in the air, but situationally can allow it to cross up shields, for example, if it's dropped down into attacking range from a higher platform. As with its grounded attack, the Omnidroid's spinning legs will pierce through most non-disjointed enemy hits, a helpful quality when melee-range shorthop aerial spam frequently can trigger this option.

As flies in the ointment, however, the Omnidroid's 29-frame cooldown and mediocre landing lag leave it momentarily vulnerable to those swift enough to evade the hits. On a brief, separate note, the Omnidroid will perform one of the aforementioned two attacks when it gets within two squares of a minion or attackable construct, or one inflicts damage within that range, before resuming its patrol or pursuit — a helpful feature for whittling down enemy summons, at the cost of the robot rendering itself momentarily vulnerable.


Programming Behavior #2 - Counter-Crush


The Omnidroid's programming takes on a decidedly more tank-esque tack if a foe within two training stage squares successfully lands a hit, regardless of whether they also whiffed an attack or performed a jump, dash or so on within this range. Now, the next time the robot gets that close, or upon its first actionable frame, it will initiate a neat defensive trick — effectively a shield-counter hybrid maneuver. The Omnidroid suddenly steels itself, spreading all five legs slightly as a grid of blue energy appears around its spherical body. Now, if attacked between frames 5-28, the robot will take no damage, absorbing the hit with its energy shield as it near-instantaneously lifts and slams its body downward, catching and crushing the assailant for a counterattack.

This slam boasts a 1.35x damage multiplier (on par with Roy's counter), guaranteed to deal at least 10%, plus a piddling 5% shockwave hitbox a square to either side. Get too aggressive throwing out powerful hits to try finishing off an Omnidroid, and its ensuing counter very well could spell the end of a stock. With a shoulder button input during the startup of the robot's summoning, Syndrome even can gamble by having his robot approach and counter. This mix-up can quite literally knock foes expecting the default attacks for a loop, though it's by no means reliable. Foes who predict the Omnidroid's shield-counter safely can grab and throw it, akin to a Subspace mook of yore, and its 34 end lag frames do it absolutely no favors on whiff.

As a leg up on a conventional shield, the Omnidroid can initiate its shield-counter in midair, under the same circumstances as its grounded variant. The primary difference here is, rather than launching foes, the Omnidroid's slam will spike attackers with varying force. As scary as this sounds, it's a rare day when this will manifest in a cheap offstage gimp. You'll recall that the Omnidroid won't pursue opponents offstage to the point where it can't safely make it back. What's more, if knocked offstage, the robot only will perform offensive or defensive actions against targets if doing so would not inhibit it from leaping back to safety afterward. Here, the Omnidroid's counter only barely slows its descent which, given its end lag and rather high fall speed, restricts its potential for offstage counter spikes.

These remain situationally possible in cases where the Omnidroid is defensively programmed and right at the ledge as a target tries recovering high. Far more often, however, midair shield-counters require opponents to bob and weave with their aerial hits against the Omnidroid. Straightforward rushdowns could well result in the foe landing one aerial, before the robot's lessened hitstun lets it more quickly recover and counter the next; the ensuing spike then can subject the victim to a stage bounce for Syndrome to capitalize upon. From atop a high platform or from a sufficiently strong countered hit, that stage bounce even could lead to a rewarding screentop KO.

Upon successfully landing a shield-counter in the ground or air, the Omnidroid will revert to its attack programming, having registered the opponent's countered move as a whiffed attack.


Programming Behavior #3 - Grip and Tear
The Omnidroid comes prepared to deal with more than just offensive behavior from its targets. The robot's programming shifts when a foe within two squares shields, dodges or rolls, whether or not they also perform any other movements or attacks. This shift also occurs if they use a defensive or passive move without a standalone hitbox, like a stance charge or a counter, though moves that power up actual attacks, like a Smash, Giant Punch or Charge Shot, don't count.


Not to bury the lede, the next time the Omnidroid enters this range or has a chance, it will extend one leg 1.5 squares to either side to clutch the target in a pincer grab. Upon catching a victim, the Omnidroid will slam them bodily against the stage for 8% before flinging them forcefully behind itself, dealing another 7% and knockback that can KO at the ledge around 85%. Coming out on frame 8, the Omnidroid's grab has a few clear advantages when compared to most characters' vanilla counterparts. Chiefly, the robot's extended pincers remain an active grab hitbox for quite a bit longer, between frames 8-45, during which the legs also "track" their target's movement, up to a 60-degree angle within their reach.


These grab qualities together effectively allow the Omnidroid to laugh at most defensive maneuvers at close range before retaliating. Its ensuing throw either can send a victim inward at Syndrome — who can program the robot to approach with grab via a Z-button input during its summoning startup — or serve as a finisher at higher percentages. Those benefits definitely incentivize foes to make note of any defensive options they've used close to the Omnidroid, perhaps in dodging its regular attacks. Even if they land a punishing blow, they ought to remain on high alert to contend with the robot's grab shortly thereafter, and certainly not forget having shielded or dodged, lest they expect the robot to shield-counter and instead get blindsided by its grab.

Oppressive as this might seem, the robot's grab leaves a blind spot directly above itself and is followed by a heaping 52 frames of end lag, as it expels exhaust from its legs while reeling them in. Foes can find themselves in a world of hurt if they stubbornly stick to Ultimate's "run up and press shield" playbook, but properly spaced attacks still can empower them to win the exchange. A well-timed dodge away from the Omnidroid's pincers could even reward a target with time to charge a quick Smash against it before Syndrome can intervene.


Worth noting — an Omnidroid still is very much capable of grabbing and throwing a target it has pursued into range in midair. Upon grabbing a midair foe, however, the Omnidroid's descent briefly stalls, as it stretches its victim painfully between two legs before throwing them forcefully upward. These two hits inflict the same damage as the robot's grounded throw, with the vertical knockback now capable of KOing around 105%. This alternate knockback compared to the Omnidroid's grounded grab can prove helpful if it has chased a target closer to the upper blast zone, though oftentimes, the robot's aerial grab is less efficient than its grounded variant — the animation halts its midair movement, and its descent renders its pincers' tracking properties less potent, letting savvy targets navigate themselves into less dangerous airspace.


After both of the Omnidroid's throw variants, the typical one-second re-grab timer goes into effect. The robot's grip is also such that it will not relinquish grab victims struck by outside attacks, creating a window for Syndrome to pile on added damage before they're hurled, increasing the likelihood of a KO.

Programming Behavior #4 - Hot in Here


On the note of grabs, the Omnidroid has a unique programming response if a target within two squares specifically landed a grab against it. Simply put, upon its first actionable frame after being thrown, the robot will overheat, turning a fiery orange shade before resuming its previous programming. Like one of Min Min's throw-triggered Dragon ARM enhancement in reverse, the Omnidroid now boasts a 1.15x damage and knockback multiplier on its attacks, lasting either until it takes 15% or seven seconds have passed. What's more, if a character attempts to grab the Omnidroid during this window, with their grab itself or any physical command grab in their arsenal, they'll get burned, taking 5% and a moment of stun. This true-combos into the robot's own grab, which it always will follow up with as a one-off attack on the would-be grabber before resuming its prior behavior.

This overheating period isn't exclusively a buff, however, as the Omnidroid also will take 1.15x more damage and knockback from attacks, which foes still can land without getting scorched. On the whole, the overheated Omnidroid for a time becomes likelier both to KO a target or get KOed itself, all the while incentivizing foes to employ a mix of offensive options against it, beyond just grab, shifting its programming in the process.

Programming Behavior #5 - A Nice Boulder


The Omnidroid brings out one last programming tactic if a target successfully strikes it within pursuit range, at a distance greater than two training stage squares (generally with a projectile or disjointed hitbox). After its hitstun ends, and the robot lands on solid ground if launched, it will respond by planting its feet, tearing a Wario-sized boulder out of the stage and hurling it forcefully at the attacker's immediate position over 24 frames, before resuming its prior behavior. The boulder careens in that direction as fast as a Koopaling's charged cannonball up to 1.2x Final Destination's length, before similarly losing altitude and descending as far as those cannonballs before vanishing.

The boulder's hitbox begins at point-blank range, right as the Omnidroid is throwing it, and continues through its initial trajectory, dealing 18%, plus 10% in shield damage, and KOing at 80%. When descending, the boulder's figures dwindle down to 9% and knockback KOing around 105%. The Omnidroid has super armor throughout the entirety of its boulder toss, leaving it free to complete the animation regardless of any attacks it gets peppered with. If Syndrome is up against a character that favors mid-ranged strikes, the player can input A during the robot's summoning startup. The robot's initial approach then will have it venture to the outskirts of its two-square melee range before throwing a targeted boulder, baiting the target to get in closer and force a shift from this meaty hitbox. That being said, given the toss' 32-frame cooldown, those able to dodge the boulder have a choice opening for moving in, with grabs in particular capable of circumventing the throw animation's super armor.

Generally speaking, the Omnidroid will start passively patrolling again if an opponent either escapes from or launches it out of its chase range. The robot will, however, deploy at least one boulder against characters who strike it from beyond that distance, momentarily breaking from its patrol or pursuit of another character in a FFA if need be. Outside pursuit range, compared to at mid-range, the robot will throw one boulder for each 10% increment it is dealt, whether from a single strong distanced attack or multiple fast, weak ones that hit consecutively before it can react.

The Omnidroid still aims each of these boulders on the fly at its target's current position. This creates a scary, if relatively short-lived barrage to disincentivize camping, and on the flipside encourages foes to move in for the KO if they've launched the robot offstage with a strong projectile, lest it recover and begin raising hell with multiple boulders. A primary downside here, however, is that the Omnidroid remains committed to throwing whatever set number of boulders, regardless of its target's proximity. That character could choose to quickly dance around the boulders and land a grab, or skillfully land several quick hits so that, once the robot's super armor dissipates, it's far easier to launch and KO. Just don't get caught off-guard when the Omnidroid starts pursuing with its prior programming after throwing its last boulder.

A few items worth noting for this function: Ranged attacks must originate directly from a character to prompt the Omnidroid to begin throwing boulders — for example, Zelda could trigger this with Din's Fire, but Isabelle could not upon leaving a rocket planted across the stage. The Omnidroid automatically will throw a boulder at a minion or attackable construct that inflicts damage from the aforementioned mid-range; like with multiple foes in FFAs, it will pause from pursuing a target to throw one or more boulders at such a summons that hits from beyond chase range, too. And the Omnidroid's boulders cannot be absorbed or reflected by opponents, though sufficiently strong attacks can clank with them if timed well.


What can Syndrome do with an Omnidroid onstage?
Quite a bit, unsurprisingly. For starters, after whistling for the Omnidroid, Syndrome's first actionable frame comes right after the robot begins falling; this turns summoning the robot into a situational pseudo-counter while giving Syndrome a brief chance to position himself with relation to it. Then, with his excellent aerial movement and recovery, Syndrome can jet around to keep pace with his Omnidroid. He generally enjoys a symbiotic relationship with the robot, using his otherwise mediocre melee kit to set foes up for its powerful attacks or opportunistically landing his own riskier payoffs while they're occupied with the mechanical threat. The sky really is the limit, though Syndrome himself might on occasion find himself taking to the skies in playing optimally around his Omnidroid: While the robot will not approach or lash out at Syndrome unprovoked, it gains the ability to target him, the same as it would any other character, for the next seven seconds if he attacks it at any point.

The idea of contending with a hostile death robot in addition to your opponent might not immediately stand out as an appealing one. That being said, Syndrome can work being targeted to his advantage — he can tailor his offensive or defensive reactions to the Omnidroid, purposefully adjusting its behavior, before luring it to target his opponent and deploy that programming against them instead. This manual adjustment lets Syndrome actively reprogram the Omnidroid to the specific approach he wants — important, when it comes to later manipulations — rather than passively hoping his foe will behave in such a way to bring the robot around to that behavior. Taking a direct role in the Omnidroid's programming is a pathway to Syndrome's most rewarding setups, but still involves playing with fire to at least some degree. At the very least, attack spacing is pivotal for Syndrome in not needlessly provoking his robot's ire. Worth clarifying, attacks Syndrome has whiffed around an Omnidroid will not change its programming unless the robot already was hostile toward him.

In a pinch, Syndrome is capable of KOing his own Omnidroid. Someone needs to teach this hunk of -metal- a few -manners-! Losing a robot under any circumstances, however, comes with consequences. Specifically, Syndrome cannot summon another Omnidroid until 10 cumulative seconds have passed with his boots firmly on the ground. While not the harshest cooldown condition — Syndrome thanks his lucky stars he gets more than one minion per stock, unlike some great sets I could name — this most certainly is not the fanboy inventor's comfort zone. In contrast with something like a Smash 4 Rosalina, Syndrome cannot casually float around in midair to effortlessly bide time until this cooldown ends, instead having to earn a second Omnidroid with a ground game sufficiently good to counteract his lackluster standalone kit.

Upon reaching 10 cumulative grounded seconds, Syndrome's wrist gauntlet will flash briefly red, as he takes on a momentary cocky grin. If he becomes careless, or his opponent is just that good, however, they could juggle Syndrome to pile on damage or finish him off as their ultimate reward for successfully destroying an Omnidroid. If he's KOed before this cooldown expires, Syndrome can whistle for his robot right away upon respawning. As a side note, Omnidroid cooldown inhibits Syndrome from standing at the ledge and repeatedly summoning robots so they drop down to erase low recoveries. He can SPANK drop one once to do so, but as this KOs the Omnidroid before it even becomes operational, this generally isn't optimal unless Syndrome is sure he'll land the hit, and probably to take his foe's final stock to boot.

An obligatory footnote for MYM purposes: Syndrome's Omnidroids do not count as regular minions, and as such cannot be pocketed, eaten, mind-controlled or otherwise manhandled in such a way as a more traditional summons.


Even more Neutral Special inputs?!
Rounding out this gargantuan move, Syndrome has two additional Neutral Special inputs he can use with an Omnidroid out, given he sure as hell cannot repeat the input to have more than one onstage at a time. Tapping the B button has Syndrome start fiddling with his wrist gauntlet; should the player maintain the stance for a full 90 frames, the Omnidroid's programming will automatically revert back to what it was when initially summoned. The lengthy commitment here speaks for itself, and the 90-frame reset period does not roll over if this animation is interrupted or Syndrome cancels it, which he thankfully can do with a shield or defensive maneuver. Regardless, this manual reset can prove handy if Syndrome has bought himself some space and does not wish to put himself in the Omnidroid's crossfire in triggering a certain programming.


Lastly, holding the B button has Syndrome hold up a palm, where one of his robotic parrot drones appears before taking off with a squawk. Syndrome remains stationary as the player becomes able to guide the parrot — sized similarly to the duck in Duck Hunt — manually around the stage. In terms of control scheme and range, this functions comparably to Din's Fire, though the drone begins its flight at top speed, rather than accelerating over time. The parrot also has more flexible trajectory options, such as the ability to immediately travel in an arc up and behind Syndrome. In any case, when the input is released, the bird faces the screen over 14 frames and emits a cacophonous alarm. This creates a circular sound wave hitbox as large as Mewtwo's Confusion, dealing 7% and stun comparable to ZSS' max-charged paralyzer. With the right reads, Syndrome can waylay an opponent momentarily in place, rendering them susceptible to a bigger hit. In and of itself, however, the parrot isn't terribly threatening, as any move capable of inflicting hitstun will destroy it in a puff of feathers and gears.


The drone's real utility is in its ability to alert Omnidroids as to where to maneuver onstage — upon the alarm going off, the robot will make a beeline to the noise's inception point at pursuit speed, presumably to intercept an intruder it has identified. The Omnidroid will prioritize reaching the parrot's end point above chasing an opponent, even if it already was in pursuit, though its reactive programming resumes if attacked beforehand. The robot reverts to its previous behavior as soon as it reaches where the alarm went off or after five seconds, whichever comes sooner. This means, if Syndrome manages to catch a foe with the drone's stun, the Omnidroid has a surefire opening to land its attacks or grab.

Less immediately offensive options with the parrot involve guiding a patrolling Omnidroid into pursuit range of a foe, or in such a way that it boxes that target in, perhaps as they're coming down for a landing. And equally valuable is using the drone to micro-position the robot a short distance away from Syndrome, letting him combo into its attacks with less concern of accidentally striking it. With an Omnidroid chasing him, Syndrome can run down its seven-second clock by luring it away with the drone, so long as the player releases the input to sound the alarm before the robot attacks. Despite their versatility, Syndrome can eat punishment while maneuvering a parrot, and his first actionable frame comes 25 frames after a drone's alarm sounds as well. He also can't summon a second drone until the robot has reached a first one's alarm point, inhibiting parrot camping or erratic back-and-forth luring of Omnidroids.


SIDE SPECIAL - ZERO-POINT ENERGY
Syndrome puts to use a trademark weapon he's saved for himself, pointing forward with a finger to try freezing an opponent with his patented zero-point energy. This is a disjointed pseudo-command grab that functions differently depending on whether the player tapped or held the input. The former has Syndrome generate a Kirby-sized midair sphere of electric blue energy, three training stage squares in front of him, on frame 22.

The latter spawns a slightly smaller energy sphere, resembling a crosshair with a capital "S" in the middle, at the same distance on frame 14. The player can hold the input to direct this intangible energy crosshair around at Peach's float speed, up to five training stage squares in any direction — this includes inward at Syndrome, to cover the tapped grab's blindspot, though not through solid objects or drop-through platforms. Upon release, or after three seconds, the crosshair fills in to resemble the move's tapped counterpart, becoming active over 12 frames. With both move variants, the grab-esque hitbox lasts five frames, and comes with a punishing 34 cooldown frames. Under both versions, the player also can tilt the control stick diagonally up or down during startup to angle where the respective energy sphere or crosshair spawns.


Freezing a foe:


In any case, whenever a foe is caught, a thin energy laser — two training stage units thick — appears from Syndrome's finger, instantly creating a linear path to the energy sphere holding them. There, the victim effectively is grabbed, albeit frozen in the middle of whatever animation they were performing at the time. They're able to mash free with difficulty roughly equivalent to that of DK's Cargo Throw, which actually has a unique escape difficulty calculator compared to regular grabs. For as long as the victim is frozen, they take 1% per second, which isn't much by default, though Syndrome of course has ways of buttressing this.


Most directly, with control stick movements, he can roughly guide his victim in a side-to-side arc and slam them bodily into the stage! Each slam deals 8% without dislodging the victim; the number of slams Syndrome can pull off on average depends on how close or far away his target was upon getting caught. Because victims are locked that set distance from Syndrome for each Side Special's duration, he'll move them in shorter arcs, and thus perform slams more quickly, upon catching them the energy's minimum distance away — a reward to compensate for the risk of whiffing at close range. At the middle distance of four training stage squares, and on flat ground, Syndrome can accomplish one slam per second. Slams deal 8% and knockback KOing around 120% to external foes in free-for-alls, though this thankfully does not extend to Syndrome's own Omnidroids.


When it comes to racking up slam damage, drop-through platforms can be a hit or a miss for Syndrome. Though he's capable of slamming foes against them, and at a faster rate than usual with good spacing, sub-par positioning can have the laser's body simply pass through the platform, with its victim narrowly missing at its end point. If Syndrome's back is to a ledge, he'll lose a surface for slamming on one side, as he cannot guide a victim along his arc diagonally downward lower than a 45-degree angle. That being said, mechanically, the same slam hitbox still registers if he lifts his victim as high as 12 o'clock before bringing them down repeatedly on one side — an action that functionally takes as long as side-to-side slamming.

Syndrome also can maneuver his energy-trapped victim into such a position where they can be struck by an external hitbox, like those from an Omnidroid. Though the robot's attacks are all forceful enough to knock the victim out of Syndrome's energy, he doesn't undergo a grab-release animation when this takes place, instead having a fast first actionable frame that provides a window for his own follow up. Outside Omnidroid attacks prove similarly valuable if Syndrome is fortunate enough to have frozen a foe with Side Special while they were shielding. Though the victim's bubble thankfully will not diminish on its own while they're caught in the energy, the robot still can whittle its health down, knocking the foe away past the point where they're shield-poked, or even breaking their shield if it was sufficiently small when Syndrome landed Side Special. On a different note, an Omnidroid programmed to grab can snatch a foe out of Syndrome's energy and perform its own throw upon getting close enough, with the re-grab timer technically not yet in effect midway through Syndrome's own grab.

To some degree, Syndrome can use a foe suspended in energy to play Pied Piper with his Omnidroid, moving the victim around in an arc to lure the pursuing robot after them. Depending on the Omnidroid's programming, he can use this strategy to influence whether the robot uses the grounded or aerial variants of its attack and grab, and from where onstage — for instance, ensuring the robot uses its midair grab on a frozen victim closer to the screentop to increase the likelihood of a KO.

Lastly, Syndrome can personally toss a victim out of his energy's end point if the player presses B after catching one. Foes take 5% and are lightly pushed whichever linear direction the energy stream was facing at the time. Though this pseudo-throw's low force won't KO until towering percentages, not dissimilar to something like Marth's B-Throw, it's a great versatile positioning tool for Syndrome, who can cast his victim away at any point along his energy's arc. What's more, the ensuing knockback its unique in that, if Syndrome caught a victim in the middle of an attack animation, his foe will remain frozen in that pose for as long as they ordinarily would stay in hitstun. Immediately afterward, they'll carry out the rest of the animation from where they left off — even finishing grounded attacks in midair if need be — taking on any hitboxes left in the process. Those with poor recoveries in particular ought to be wary of being frozen midway through laggy moves with Syndrome close to the ledge, though as a silver lining, the aforementioned 45-degree limitation on how far diagonally downward he can guide a foe inhibits too many cheap gimps.


The ranged nature of Syndrome's energy, combined with the brief cooldown he undergoes after tossing a victim from it, mostly keeps him from following up on unfrozen foes stuck finishing attacks (outside niche scenarios where he throws an opponent caught early into something like Warlock Punch). Instead, he tends to get the most utility throwing mid-attack foes into an Omnidroid's path. This can backfire, if bad spacing or the wrong attack leaves the victim to inadvertently knock the robot into a compromising position.

Positioned well, however, Syndrome can toss a mid-move foe so they whiff right in front of an Omnidroid, or strike it with something unsafe on hit, turning its behavior so it attacks back. Alternatively, Syndrome could toss a victim such that a half-complete ranged attack nicks the robot from more than two training stage squares away, ensuring it retaliates specifically with a boulder toss. Especially juicy are moments where Syndrome can toss a mid-attack foe at an Omnidroid programmed to perform its shield-counter, which it will proceed to land as soon as they're close enough.


Freezing robots, boulders:
Syndrome isn't limited to grabbing just opponents — in fact, depending on the matchup, he may well find himself picking up his Omnidroids just as often. Like characters, the robots are frozen in whatever animation they were performing upon getting zapped, which they resume after however long it regularly would take for them to exit hitstun (which, as you'll recall, is slightly reduced compared to a fighter). Another differentiator is that Omnidroids can't mash free from the energy, instead remaining frozen for up to three seconds before falling out. Regardless of what action a robot is doing at the moment it is caught, Syndrome becomes able to use it as a bludgeoning weapon. Foes who collide with the Omnidroid's body as Syndrome is guiding it around his arc take 5-25% and diagonal knockback KOing from 155-70%, varying significantly based on how far he swung it beforehand. Simply nudging the robot a short distance into a foe is hardly hurtful, but swinging it up into the air above Syndrome turns its body into a potent vertical launcher, while whipping it all the way up and around to slam down into the stage behind him is a crushing, albeit predictable KO tool.


Syndrome has several devious options to pursue, depending on an Omnidroid's behavior upon getting caught. For starters, he can throw his robot while frozen in the middle of its pincer stabs so as to complete its grounded attack in the air, perhaps rendering its launching hitbox likelier to KO offstage. Catching an Omnidroid right before it throws its boulder gives Syndrome a means for altering the ranged hitbox's trajectory on the fly. If Syndrome manages to freeze an Omnidroid while it has a foe in its clutches, he can complete a cartoonish double-throw of sorts, first tossing the robot, which then proceeds to hurl away its victim.

This adds the energy's 5% throw hitbox onto that from the Omnidroid, though if the robot is frozen in its grounded throw animation upon being tossed into midair, it'll inflict 8% less damage, not having solid ground for its own stage slam. Regardless, the Omnidroid's ensuing backward toss can quite effectively polish off a stock if Syndrome first throws the robot and its victim closer to the blast zone. Catching an Omnidroid in the middle of an aerial grab also is worth noting, as Syndrome can toss it and its captive straight up, closer to the vertical blast zone for its own throw to KO slightly earlier.


For Syndrome, catching an Omnidroid with zero-point energy is not without risks and tradeoffs. Upon leaving the energy, and completing its animation, the robot overheats and temporarily becomes hostile toward Syndrome, by virtue of him having used a grab against it. Side Special gives Syndrome a manual way to trigger the fiery damage and knockback multipliers, but also puts him in temporary danger of being on the receiving end if he doesn't grab his robot from far enough away (he remains able to freeze and re-throw an Omnidroid pursuing him, though this resets its hostility timer). The robot also is not immune to the damaging portions of the pseudo-command grab, including its passive and throw damage, as well as if it is slammed on the ground (albeit not into a foe in midair). And that's to say nothing of foes' ability to knock the Omnidroid out of the energy, dealing damage while wrecking Syndrome's setup and potentially putting him in harm's way in one fell swoop.

One way Syndrome can mute some of these downsides, and record some sweet meme clips if he's lucky, is to freeze an Omnidroid in the middle of its shield. Doing so insulates the robot from damage, both from the energy and attackers, while steadily powering up the counter it will perform upon regaining mobility. As a rather scary setup, Syndrome can slam a shielding Omnidroid several times into the stage before throwing it at a target, leading the robot to "counter" the aggregate damage from the slams and inflict anywhere from solid to obscene damage and knockback. Remotely competent foes won't let Syndrome strengthen his robot's counter with several of their own attacks, though without too much effort, he can direct the shielding Omnidroid to tank all of a multi-hit attack's hitboxes before releasing it, letting it counter based on the full move's strength, rather than just that of the first light hit. Alternatively, Syndrome can guide the robot's shield-counter to sponge up hits from a foe's constructs, or, in a team match, have an allied Bowser F-Smash it once or twice before lobbing it as a mechanical ball of death. A well-placed grab can pluck the Omnidroid out of Syndrome's energy to render all this moot, though depending on its counter's strength, it'll take truly incredible nerves to attempt this.

Somewhat more situationally than grabbing an Omnidroid, Syndrome also can freeze any boulders thrown by one. As with robots, he can hang onto boulders for up to three seconds before canceling out of Side Special. Syndrome will throw the boulders with the same range, speed and hitboxes as the Omnidroid itself, though he can prolong their duration a bit more by hurling them straight or diagonally upward. When slammed into a foe or the stage, however, the boulder will shatter, dealing five light, stunning hits of 2% and minimal knockback. With a boulder in his possession, Syndrome can get the upper hand against mid-ranged targets by mixing up whether he hurls the land mass their way or slams it directly into them. In cases where the boulder hits a foe mid-energy arc, Syndrome's lack of a grab release animation lets him quickly move in for a follow-up hit — certainly a boon for shield pressure, as the boulder's multiple hits inflict a helpful amount of shieldstun in the process. Syndrome also can double the size of this stunning hitbox by guiding his own boulder into another in midair from an Omnidroid's toss, potentially sandwiching a foe in between him and his robot.


Miscellaneous energy properties:
At first, the grab-esque hitbox on Syndrome's zero-point energy is restricted to its energy sphere or triggered crosshair. That being said, a foe or Omnidroid can become frozen if they're caught in the thin energy stream Syndrome fires off from his finger to catch his initial target. When this happens, that first target takes 5% and is dropped from the energy, as if from grab-release, while Syndrome's stream shortens such that its end point now sits where the new captive made contact. Naturally, this freezing energy stream becomes more potent the farther away Syndrome has grabbed his first target, though with its thin breadth, foes are capable of dodging through a stream of any length to punish Syndrome if he's not careful.

With these energy stream mechanics, Syndrome can salvage instances where a foe has dodged his crosshair, moving it farther out to grab a different target, like an Omnidroid. By then snagging a foe in between in the stream, he ultimately creates a shorter arc, easier for slamming purposes. Freezing a foe so they drop an Omnidroid out of the energy stream also sets Syndrome up nicely to immediately throw them right at the robot, inherently positioned so that they're its closest target, even as it briefly turns antagonistic. On the flipside, Syndrome can guide his energy stream into an Omnidroid right as it's approaching a frozen foe with an attack. He'll release the victim such that he can then quickly throw his robot right into their face during their grab-release, a nasty trick if, say, they're offstage and the Omnidroid was in the middle of performing its aerial slices.

Lastly, Syndrome sees a few variations to Side Special upon using the move in midair. When the crosshair version is input, Syndrome's descent will briefly pause before gradually returning to his regular fall speed, with the crosshair tracking proportionally with him as he falls. If he freezes a target while airborne, Syndrome hovers in place with his rocket boots for the duration of the grab. One scenario where this often can manifest is during ledge getup, where, in a mix-up akin to Robin's Down Special, Syndrome can leap up and quickly use Side Special's tapped variant — endangering himself on whiff but likely sending his attacker offstage if he connects. Depending on where Syndrome is hovering, he becomes able to guide his frozen target in a full circle, rather than a restricted arc on the ground, opening up new angles for him in guiding and throwing them.

As a precaution, the already-not great knockback on Syndrome's energy toss is cut in half whenever he throws a foe downward at an angle steeper than 45 degrees. This usually rules out KOing with the throw itself, but positions Syndrome well to pursue with a footstool or a fast-falled D-Air. Situationally, Syndrome also can go offstage and catch a foe in an energy stream lengthy enough that he can casually navigate them right into a blast zone. Though this is frightening on its face, it's also treacherous to pull off, as Syndrome must generally navigate his crosshair to account both for his target's movement and his descent. The required positioning also generally places Syndrome either far from the ledge or close to the bottom blast zone, quite probably leaving him to pay for any mistakes — say, whiffing with the crosshair and undergoing its steep cooldown — with a stock.


DOWN SPECIAL - DETENTION BALLOON


Syndrome snaps his fingers for metallic doors to appear and slam open on a square area of stage at his feet, extending partly into the background; if he's in midair, these doors open on the nearest ground directly beneath him, though only if he's vertically within seven training stage squares. From this panel bursts a stumpy metal cannon, which fires a gooey black balloon in a forward arc. Compared to its MYM contemporaries, this Soccer Ball-sized projectile does not float, but rather travels smoothly through the air at a speed comparable to Mii Brawler's shot put. The balloon's default arc lands it five training stage squares away, peaking at four squares of height midway through. As the cannon rises, with startup comparable to that of Duck Hunt in summoning Wild Gunmen, the player can tilt the control stick diagonally up or down to angle its balloon shot. Up to five arc trajectories can be achieved this way, for added utility in covering air space and catching landings. The steepest arc sends the balloon up six squares vertically and lands it two squares horizontally away, while the longest sends it up two and out eight squares.

Should a balloon strike a foe, they'll take a piddling 5% but only minimal stun, as the big black sphere adheres to their person. Like a Pikmin, the balloon will attach to the general portion of a hurtbox it has impacted, which can vary slightly from character to character. From there, the balloon does no immediate harm but does slightly hamper the movement of its carrier, who can destroy it with attacks that exceed a certain knockback unit threshold. The balloon does, however, gradually grow in size with damage from any of the character's attacks that impact it without destroying it, as well as from Syndrome's own hits (which will not rid enemies of their balls). Larger balloons, in turn, both slow their victim down progressively more and require higher amounts of knockback units to destroy — neither of which are ideal for foes whose principal concern ought to be on any Omnidroid chasing them.

  • At its initial Soccer Ball size, the balloon removes 0.15 units from its carrier's walk speed, 0.25 units from their dash speed and cuts all of their jump heights by one quarter. These spheres take 55 knockback units, or as much force as Mario's U-Tilt exerts on Kirby at 0%, to destroy.
  • Upon absorbing 15%, the balloon will have become as large as a Smash Ball, reducing its victim's walk and dash speeds by an additional respective 0.15 and 0.25 units, and cutting their jump heights by one third. At this size, balloons require 95 knockback units, comparable to Mario's uncharged F-Smash on Kirby at 25%, to be destroyed.
  • After taking in 25%, the balloon — now the size of a Hothead — slows its host's walk and dash speeds by one more respective 0.15- and 0.25-unit increment (for 0.45- and 0.75-unit respective cumulative drops) and shortens their jumps by one half. Now, 135 knockback units, or approximately what Kirby experiences from Mario's uncharged U-Smash at 55%, must be dealt to destroy such a maximum-sized balloon.
Once a balloon has taken a full 30%, it will pulsate for a second before exploding in a messy black splat. This inflicts 30% along with a full second of stun, after which its carrier is launched with below-average set knockback that won't KO until obscene percentages. Characters remain capable of dodging this explosion with a well-timed defensive maneuver, though Syndrome can render this easier said than done by intervening or else positioning an Omnidroid on their tail at the right moment. The timing of said defensive maneuvers also is key; simply holding shield will stave off the balloon burst's knockback but inflicts an added 10% in shield damage plus shieldstun nearly equal to the stun that character already would have faced from the explosion. Thankfully for counterplay purposes, however, Syndrome cannot stack stun from a balloon and a bird drone. If a balloon has remained attached to a character for more than 10 seconds, it will automatically rip off of them and vanish, dealing 5% and brief stun regardless of its size — not totally useless for Syndrome's purposes but a clear downgrade from the payoff he can get from balloons manipulated to their capacity.

Balloons offer Syndrome another potential perk beyond their debuffs and eventual hitboxes: hitlag. That is to say, if one of his or his Omnidroid's attacks glances the sphere, its hitbox will remain momentarily prolonged, akin to those that strike the alien goo balls on Brinstar. Characters won't automatically take damage from hits that strike just the balloons they're carrying, but the larger the hitbox in question, the likelier they are to get hit. If they aren't careful, characters in the middle of a movement as their balloons are struck can find themselves nicked by hitlag from an attack that otherwise would have missed — in Ultimate, Link sometimes experiences this when a bomb he's dropping in midair prolongs a foe's rising U-Air. Moves that impact both the character and balloon still undergo hitlag, but the victim will not be hit twice (here, the lingering hitbox mostly is relevant to external foes). Because of the balloon's brief pulsating animation, its stunning burst very rarely will interfere with knockback from powerful prolonged attacks that otherwise would have KOed their victim, barring niche instances where the character is launched all the way across the stage.

Exactly how easily Syndrome can capitalize on balloon hitlag depends on where on his opponent's hurtbox the sphere has adhered. If he wants to strike the balloon while it's small, he might have to improvise to some extent, in terms of whether he attempts a frontal or aerial approach, or a cross-up. Syndrome has at least a few options in each of those areas, and his realm of possibilities expands as the balloon does into a larger target. Balloon hitlag even allows Syndrome or his Omnidroid to more successfully shield poke, with their ease in doing so varying based on the sphere's size and the shield's health. Though sufficiently full shields can block lingering attacks, the target's need to hold shield to avoid getting hit can open up the door for some scary shield pressure, especially if an Omnidroid is drawing near, ready to perform pincer stabs or its grab.

In what could be described as a blessing and curse, Syndrome's balloons also prolong hitlag from his opponent's attacks. These longer-lasting hitboxes can result in balloon carriers more easily landing hits against Syndrome and his Omnidroid. By the same token, these blows can switch the Omnidroid to pursue its shield-counter programming, during which the lasting hitboxes can increase the likelihood of the robot landing its retaliatory crush. More situationally, enemy hitlag gives Syndrome wider windows to power up Omnidroids he's navigating around frozen in their shield-counter stance with Side Special.


Stacking balloons:
Circling back to the balloon's inception point, Syndrome regains control on frame 41, once his cannon has fully risen and before it fires on frame 55. With the cannon present, the player can repeat the special input whenever Syndrome is not in hitstun — including in the middle of other attacks, so long as the inputs do not conflict — to fire additional balloons. There's a 20-frame pause before each subsequent balloon is expelled; during this window, players can reorient the cannon so its cargo flies in a different arc and better covers Syndrome's position. The cannon remains onstage for as long as Pac-Man's fire hydrant, albeit intangible to attacks and movement, before vanishing. That duration refreshes after each balloon is fired, though the cannon will disappear automatically after launching five of the spheres.

When any subsequent balloons strike a character already carrying one, the black orbs fuse together, becoming larger in size, as each balloon's 5% hit brings the mass that much closer to detonation. For instance, two fused balloons on a character equals one balloon that has taken 5%, while the maximum of five fused balloons amounts to a balloon that has taken 20% — just 10% away from detonation. If a sphere's 5% pushes an existing swollen balloon past its explosion threshold, the new balloon will be destroyed in the blast, rather than sticking to the stunned foe. Syndrome's ability to stack multiple balloons on a single target puts the impetus on them to try knocking the mass off with a sufficiently strong strike as soon as possible. They ought to be mindful as to their timing in doing so, however, as a nearby Omnidroid could register attempts to destroy the balloon as whiffed attacks before going on the offensive for added pressure.


Balloon traps:
Compared to something like an Omnidroid boulder, which vanishes after falling a set distance, Syndrome's balloons will continue in their arc until they reach solid ground or fall off the blast zone. Undistributed, spheres retain their size and shape on the ground for up to 10 seconds before vanishing. They'll adhere to and damage characters who come into contact (besides Syndrome, who can move through unimpeded), and can be destroyed in the usual manner, with enough knockback units. This trap function gives Syndrome some bang for his buck in bringing out the rather committal cannon, even if he can't immediately strike a foe. There's a tactical element to balloon placement, too. Syndrome could fire multiple spheres in one set location to create one large balloon, easier to burst and harder to destroy. Or, he could spray cannon fire across the stage, perhaps to hamper platform movement with hitlag-friendly, albeit more easily-dispatched minefield.

Syndrome is perfectly free to soak damage onto these stationary balloons to increase their potency — a sphere that has absorbed 20%, for example, will inflict that much damage to a target on contact. Balloons detonated on the ground also generate a Bowser-sized explosion, as compared to the sphere's usual on-hit effect on their carrier. Syndrome can harness these blasts for defensive, as well as offensive purposes, such as by exploding a balloon next to him as a harmless means for covering his end lag. Explosions from onstage balloons do, however, lose some potency, inflicting just 0.5 second of stun before the knockback kicks in, as compared to the full second when stuck to a foe.


The pinnacle of balloon setups comes when Syndrome has managed to grow two balloons right to their bursting point, one onstage and one on his foe. This can result in unnerving scenarios where that foe must avoid coming into contact with the onstage balloon at all costs, lest they take the combined damage from both, which can be as much as 58% (from two 29% balloons). Of course, taking the time to fire multiple disparate balloons, let alone manually grow them, is no small order, especially when foes with ranged disjoints can safely detonate grounded balloons from afar if uninterrupted. As such, Syndrome's resources sometimes are better spent juicing up just one balloon, leaving the others lying around for a rainy day. Worth noting, when re-summoning his cannon, Syndrome cannot fire more balloons than currently are onstage or stuck to a foe, regardless of their size.

Balloons and zero-point energy:
In a number of ways, detention balloons are quite complementary to Syndrome's zero-point energy. Whether Syndrome has grabbed a balloon from midair or the stage, or frozen a foe carrying a balloon, the energy slowly increases the sphere's damage at its usual 1% per second rate. On a frozen foe, the balloon also will absorb damage both from Syndrome's energy slam and toss. Balloons are capable of detonating in the middle of Side Special, which releases the carrier from Syndrome's energy as they take the hit, leaving him without a grab-release animation to boot. Syndrome enjoys freezing foes in the middle of attacks that otherwise would have knocked a balloon off of them, leaving the energy's damage to detonate it first. Timing a Side Special toss such that it triggers the detonation also gives Syndrome control over where the ensuing stun happens, a boon when an Omnidroid is lurking nearby. And should landing Side Special on a balloon-carrying foe prove difficult, Syndrome can space himself such that he slams a frozen victim down onto a grounded balloon, or guides them into one fired concurrently in midair.

Zero-point energy also is a handy tool for Syndrome in repositioning grounded balloons. When tossed out of Side Special, balloons travel with modest force in the chosen direction before falling back down at their usual pace. Unlike characters or an Omnidroid, if more balloons enter Syndrome's stream after it already is carrying a first, the initial balloon won't be cut off as a new energy end point forms. This effectively lets Syndrome scoop up rows of balloons at once and rain them down from above to threaten approaches, or else slam them into swollen balloons — on the ground or a carrier — to prompt explosions. An especially tricky setup involves capturing a line of balloons of varying size, and then allowing their damage to trickle up such that they explode, one after another, in a pseudo-chain reaction. Foes, however, will cut off balloons to make a new end point in the energy stream, and vice versa. As such, Syndrome can snag a target before tossing them right into the balloons, or else quickly pelt a foe dropped out of his stream with newly-acquired spheres.

Balloons and robots:
Omnidroids add yet another wrinkle into this balloon-y mix, for better or worse. The robots are capable of carrying around balloons and transferring them to foes they come into contact with, much like your standard gooey bomb. Shooting an Omnidroid directly to build up a balloon turns it but thankfully, the robot cannot transfer Syndrome's balls back to him, while the cannon's ranged nature nets him a boulder for his troubles. Syndrome also can position or drone bird-call his Omnidroid so it picks up grounded balloons by walking through; though predictable, this won't set the robot against its master, as it doesn't register the passive balloons as a direct attack from him.

Balloons stacked onto an Omnidroid can render the robots even scarier, prolonging their attacks in close quarters with a target while also disincentivizing enemy grabs. That being said, becoming a balloon carrier also turns an Omnidroid into even more of a glass cannon. Robots won't take stun or knockback from balloon explosions, but are perfectly vulnerable to the 30% damage, a potentially painful outcome if an Omnidroid wanders into a large grounded balloon while in possession of one of its own. To a lesser degree, balloons also can incentivize a foe to use stronger attacks against the Omnidroid, as they aim to destroy the robot's balloon and launch it away in one fell swoop. With smart moderation, Syndrome can weaponize some rather nutty setups combining his Omnidroid and balloons. Just take care not to overextend, or one invention can wipe away the other's longevity or usefulness, to his ultimate detriment.


UP SPECIAL - ROCKET BOOTS


Jets of blue flame spurt from Syndrome's feet as he takes to the skies, quickly lifting off three training stage squares courtesy of his patented rocket boots, perfected since his youth. I can fly, can -you- fly? Once airborne, Syndrome becomes able to jet around with a great deal of versatility, at least for up to four seconds, or until he lands, is attacked or cancels out with an aerial or dodge.

With repeated Up Special taps, Syndrome's boots emit small, 15-frame thrusts; each can be angled so he points his feet in the corresponding direction so the flames carry him vertically, diagonally upward or horizontally. Up to twelve thrusts can be performed in a row, each carrying Syndrome two training stage squares and capable of being buffered into the next so he soars seamlessly through the air. Alternatively, the player can hold the input for half a second for Syndrome to perform a more committal burst movement, using up three thrusts to dart six training stage squares over the next half second. This charged burst also can be used to initiate Up Special from the ground or air, at the expense of a more predictable startup and fewer thrusts to use during Syndrome's remaining flight.

Directional flight momentum and fall speed both factor into how far Syndrome can travel per vanilla thrust. If Syndrome is propelling himself horizontally and wishes to reverse course in the opposite direction, he must burn two thrusts to do so — one to cancel his momentum and another to move in the new trajectory. This same principle holds true if Syndrome is falling and wants to resume upward flight, as will be the case if he cancels Up Special into an aerial or dodge and then repeats the move. As such, single thrusts once he's started downward allow him to briefly levitate in place or stall his descent, both helpful for timing potentially dangerous onstage landings.

All in all, Syndrome's boots sputter out, albeit without leaving him in freefall, after he's used all thrusts or four seconds of flight time pass, whichever comes first. Doing the math, he theoretically can spend one entire Up Special to climb as high as 24 training stage squares, but only if he commits hard to doing so, with no deviation. Talk about becoming an Ascended Fanboy, in TVTropes parlance. In terms of cooldown, Syndrome must spend 45 frames on the ground to recharge the equivalent of one thrust, or nine seconds for the recovery's full strength, upon which he pumps both fists skyward in geeky, cancelable celebration.


In tandem with his two midair jumps, Up Special is a mighty handy tool for Syndrome in navigating the stage and his Omnidroid, though using it greedily is a quick recipe for regret. A thoughtless player could, for instance, jet out of reach to avoid the majority of a robot's hostile window, escaping short-term danger but costing themselves virtually all of their recovery if knocked offstage right after landing. Speaking of Omnidroids, a silver lining to the cumulative 10 seconds Syndrome must wait on the ground before summoning a replacement robot is that, if he's sent flying partway through this vulnerable time, he's likelier to have at least some thrust power generated so he can return to safety and finish the job.

Syndrome's rocket boots come bundled with a few different hitboxes worth noting. Used from the ground, his boots kick up a small dust hitbox to either side, lasting the first six frames of his liftoff animation. This hitbox extends one to 1.5 training stage squares outward in both directions, depending on whether Syndrome charged Up Special's initial thrust, in both cases dealing 4% and a moment of hitstun. As Syndrome becomes able to cancel out of his flight 25 frames in, quick thinking lets him fastfall with an aerial to punish a foe nicked by the dust, perhaps as they're rushing in on the ground. This isn't as directly possible with dust from Syndrome's longer Up Special burst, what with the height he gains, though that still can net him a good vantage point for covering his foe's reaction out of this stun.


The flames from Syndrome's boots also provide for a thin directional hitbox during the first six frames of each thrust. Flames from a regular thrust reach out 0.5 squares, dealing 6% and low set knockback, while a charged thrust extends out a full square, for a stronger 14% and horizontal knockback KOing offstage around 100%. Though not an optimal offensive option, Syndrome's weaker flame hitbox occasionally can extend aerial combos, while also becoming situationally more valuable as he's landing. In those cases, the fire's set knockback trajectory sends foes outward and downward once they're around mid-percentage, perfect for putting them in prone for a jab lock combo barring a near-instant tech. Syndrome can attempt this setup by approaching with Up Special out of a shorthop, though the flames' poor range means the timing likely will require practice.

Meanwhile, Syndrome's stronger flame burst can deter approaches from below or the sides, with the tradeoff of committing him to jet in that direction — an aspect foes could exploit by feinting one approach before intercepting his reactionary burst at its end point. Syndrome also can make hay from these longer flames by timing the burst to reach down and cover the ledge as an opponent is recovering, or horizontally as they're clambering back onstage. And the burst can be a boon for adjusting an Omnidroid's programming — offensively, with a near-miss, or defensively, with a hit — as it enables Syndrome to get out of his creation's way immediately afterward so it's likelier to go after a foe instead. Of course, Syndrome doesn't need to try hitting his robot while boosting out of its way; a charged Up Special from the ground can be great for making a quick escape, just so long as the Omnidroid isn't nicked by the dust hitbox in the process.


One more quirk to Syndrome's rocket boots — if a foe attacks him out of Up Special with a move dealing 10% or more to his lower half specifically, one of his boots will short out in a cloud of sparks. When this happens, Syndrome loses his ability to jet around with tactical thrusts, instead yelling wildly as he starts spinning uncontrollably around in midair. Fly -home-, Buddy. That's not to say that the player loses control — though Syndrome will soar in a random pattern at Fox's dash speed left to his own devices, his flight can be freely maneuvered via control stick, comparable to a human-sized PK Thunder energy ball, albeit clunkier to loop around. In this state, Syndrome's spinning front half becomes a physical hitbox, dealing four rapid stunning hits of 3%, followed by one powerful 12% blow, for 24% total damage and knockback capable of KOing at 85%.


He's able to tailspin around this way for up to 1.5 second if he had six or fewer Up Special thrusts left when he was struck, or up to three seconds if he had more remaining thrusts, after which he enters freefall. Syndrome can't attack or dodge to cancel out of this animation; rather, he can do so by snapping to the ledge or landing onstage, though with the latter option, he must time a tech, lest he faceplant into prone. Opponents still can knock Syndrome out of this more crazed flight, perhaps as he's looping around to land its hitbox, to finish him off for good; after a rocket boot breaks, he must remain on solid ground for 1.5 second before it and his Up Special are restored (after which any thrusts he previously used up will begin to replenish).

That being said, the true daredevils among Syndrome players can set out to intentionally get his boots ruptured in attempts to land flashy KOs with his ensuing strong hitbox. Ways to attain these could include Syndrome strategically recovering such that a foe — perhaps hanging from the ledge to very intelligently drop down and B-Air him — strikes his lower half. With any luck, he then can turn the tables and tailspin into them for what at higher damage levels can become an untechable stage spike. Syndrome also could use a hostile Omnidroid to his advantage, defying conventional wisdom and putting himself in harm's way to trigger his compromised flight. Pulled off optimally, he'll become able to zoom offstage and put the kibosh on anyone unfortunate enough to be recovering. Just be mindful of how much of his limited airtime Syndrome has remaining, or he's apt to find himself joining his target on a respawn platform.


GRAB-GAME

GRAB - TITANIC TENTACLE
Not the sort to get up close and personal in grappling, Syndrome points forcefully forward with a maniacal grin for a beefy Omnidroid leg to erupt from the stage and lash horizontally outward, attempting to grasp a victim. While not quite as large as its film counterpart's appendages, this robotic leg certainly is sized up from those of the Omnidroids that Syndrome summons via Neutral Special — a facet that quickly becomes apparent with its range. The leg reaches a rather startling six training stage squares, or six and a half squares from a pivot or dash grab, at the cost of a few more end lag frames on whiff; by comparison, Min Min's grab reaches four squares. Should its pincers close around a target, it will instantly snap back and bend in an arc to dangle its captor in front of Syndrome, who leans in uncomfortably close while leering. What have we here? Matching uniforms?

Naturally, that sort of grab reach is offset with the leg's sluggish frame data. The appendage takes on its grab hitbox as it lunges, between frames 18 and 24. This slightly longer-than-average grab duration evokes that of a tether grab, and allows Syndrome to scoop up foes anywhere along the leg's path as it extends to feature length. That being said, characters who successfully spot dodge midway through the leg's extension won't be caught, as its pincers shoot past them. All of Syndrome's grab or grab-adjacent hitboxes, including through Side Special and his Omnidroid's own grab, are subject to the same one-second cooldown timer.

After grabbing, whether it's thrown a target or whiffed, the robotic appendage begins retracting horizontally inward and back into the stage over three full seconds, through frame 204. Thankfully, Syndrome's own first actionable frame comes far earlier, on frame 57. While the Omnidroid leg is withdrawing, the player remains able to perform additional grab inputs. The difference here is, the leg won't shoot back out to maximum length, but rather pauses to clutch in place; this lack of extension in turn gives the grab a faster startup, at frame 11. A 25-frame end lag period, during which the leg continues retracting, bars players from repeatedly grabbing to keep the appendage out indefinitely.

Syndrome's grab comes with a certain give-and-take: that he can move as the Omnidroid leg retracts gives him a window during which he can perform grabs and throws from anywhere onstage. He pauses for his leering grab animation whenever the leg snares a victim from afar, regaining mobility after triggering a throw, perhaps now better positioned to follow up with additional attacks. During its retraction, the leg also will grab in the direction Syndrome is facing, whipping around to snatch to the opposite side if need be. Lurking near a retracting leg, Syndrome can threaten and potentially whiff-punish approaches from the ground, or alternatively, position himself along the appendage's length so it briefly can grab through him from behind for defensive coverage. As fun as these possibilities can be, however, Syndrome lacks the ability to repeatedly grab in place — a tactic most characters can use in reading spot dodges. He also must wait for the Omnidroid leg to fully retract before he can call it forth elsewhere onstage, giving foes the chance to box him in at melee range while he can't immediately threaten with a frontal grab hitbox.

To address the big black Girimehkala in the room, unlike with Side Special, Omnidroids in pursuit will pause in place for as long as the larger robotic leg is holding a victim (and, for that matter, whenever a character is grabbing Syndrome, too). Faraway robots will continue patrolling until they get close enough to where they would regularly give chase, upon which they stop. The potential for Omnidroids to follow up on thrown opponents gives Syndrome plenty of incentive to mind his grab spacing based on their proximity, or alternatively, to try pressuring foes inward at a retracting robotic leg so it can catch them at as optimal a length as possible.

Syndrome is capable of grabbing his own Omnidroids, upon which he can command his appendage to simply hurl them in the direction of his choice, rather than proceeding into his usual grab-game. This throw animation takes 15 frames, dealing no damage to the robot but prompting it to revert to ball form, as it travels at the approximate speed of Samus' charge shot, dealing 21% with knockback capable of KOing at 70%. Thrown to either side, an Omnidroid will travel six training stage squares in a low arc to the ground. The robot resumes its own movement if it falls more than three squares vertically, tossed off a platform or ledge. An upward throw has the Omnidroid chucked six squares upward — handy for positioning it on top platforms — with it regaining mobility at the throw's apex. And a downward throw has the robotic ball bounce up three squares, before falling down, bouncing back up two squares and then landing — a great means for giving Syndrome momentary frontal defense. During each of these trajectories, the Omnidroid boasts super armor to attacks, though carefully-positioned foes still can pile on damage before launching the robot as it exits ball form.


Syndrome sees a few key sweeteners in grabbing and throwing his own Omnidroids. For starters, grab is a rare attack that won't turn an Omnidroid hostile to him, a claim even the versatile Side Special can't make, on account of its damage (perhaps the robot recognizes one of its own kind). As such, when being chased by his own Omnidroid, Syndrome can pick it up and toss it away for some breathing room. Doing so doesn't erase the robot's hostility but doesn't refresh its duration either. Stalling out the Omnidroid's hostility period by having the robotic arm hold it in place is an option, too, albeit one that leaves Syndrome a stationary sitting duck in his grab stance.

One more perk, Syndrome is able to react virtually instantly after tossing a robot, versus the usual end lag characters experience after throwing a character victim. Beyond his ability to follow behind the Omnidroid as a battering pseudo-projectile, this comes in most handy for him in immediately using zero-point energy to freeze the robot in midair, upon which he can swing it around and re-throw it in a different direction. Side Special also paves the way for a crisp setup, where Syndrome throws the Omnidroid downward and then freezes a foe foolish enough to hold shield; if he's spaced right from where the leg initiated its throw, the robot will bounce down twice on the shield for a guaranteed break. As a Hail Mary, or else a stylish match-ender, Syndrome can throw his Omnidroid offstage to circumvent its self-imposed restriction on traveling farther out than it can recover, allowing it to assail recovering foes as it falls to its doom.

And, despite not being immediately responsive, Omnidroids remain capable of recognizing and adapting to enemy responses while in ball form. As such, in throwing the robots at foes, Syndrome can end up bringing about switches in their programming. By conditioning how his opponent reacts to thrown Omnidroids, Syndrome is likelier to trigger the robot behavior change of his choosing. For instance, throwing the Omnidroid at a berserker throwing moves like candy into thin air can prompt a switch to attack programming. A toss into an enemy hitbox, on the other hand, will result in the Omnidroid pursuing its shield-counter or, depending on spacing, its boulder toss, giving Syndrome more constructs to play with. And, of course, a throw into a foe's shield will incite the Omnidroid to bring out its own grab. Mechanically speaking, the grab cooldown timer does not come into play after Syndrome catches and throws a robot (here or with Side Special).


PUMMEL - CRUNCH
Syndrome punches a fist into his palm and grinds it with an evil grin, as his Omnidroid leg squeezes its individual pincers together on its victim, prompting a series of unpleasant crunching noises. Each pummel deals 3% at a moderate pace — a damage reward for Syndrome in landing his unorthodox grab, and rather effective at popping any Down Special balloons they're carrying, upon which the grab is interrupted, and Syndrome can capitalize on the ensuing stun if he's close enough. With good timing, Syndrome also can snag a victim at the edge of a platform and force them into an aerial grab release. An Omnidroid waiting below provides for a fun cinematic visual, akin to a metallic shark readying itself for live dangled bait, to say nothing of its follow-up potential. In addition, with their spacing truly mastered, the player can have Syndrome pummel his victim in place while having a nearby cannon fire one or more balloons onto them, to be enlarged with the damage from his subsequent pummels and throw. And similarly, Syndrome can fire balloons onto an Omnidroid held in the robotic leg's clutches so it adds insult to injury and transfers them to any foes it hits in ball form.

FORWARD THROW - BODY BLOW
The Omnidroid tentacle gyrates around 360 degrees, whirling its victim in front of and then behind it, before casting them diagonally forward. The throw itself deals 7% and knockback that won't KO until higher percentages, around 175%. When initiating F-Throw, the player can modify the length at which the Omnidroid leg swings its victim around by how firmly they tap or hold the control stick. A light tap has the appendage whirl the character around one training stage square to either side before tossing them; holding the stick extends them out three squares to either side, and somewhere in the middle (a typical input, perhaps) protrudes them bodily out two squares.

Because the leg releases its target at the chosen range, Syndrome often will want to tailor that to where he or his Omnidroid is positioned at the point of landing the grab. At low to mid-percentages, the victim won't travel far from Syndrome if he's right next to the appendage in initiating the throw. With this in mind, he enjoys a versatile 50/50 in those damage ranges, in which he can blast foes who opt not to react with F-Smash or catch those who leap away with an arcing balloon, a bird drone or an angled F-Air. If he's landed a grab from behind, however, Syndrome might prefer a lengthier extension, depending on how far the arm needs to reach for him to combo into an aerial (inward F-Throw to a strong N-Air variant or B-Air both stand out as meaty possibilities).

From a bird's eye view, tossing a victim in an Omnidroid's direction generally is a good idea for starting its pursuit. Because an Omnidroid will not begin moving until the robotic appendage has tossed its victim, the leg's whirling animation is capable of whipping the foe into a robot standing within three training stage squares to either side. A collision deals 5% both to the foe and Omnidroid — 5.8%, if the latter is overheated — though without knocking back the stationary robot. Depending on how far Syndrome opts to extend his robotic leg, he can trigger varied programming from his Omnidroid. An F-Throw swing that nears, but does not collide with the Omnidroid will count as a whiffed attack; with this setup, a robot close enough to the larger appendage will leap up and true combo the foe into its aerial pincer spin up to mid-percentages. An appendage whirl that does impact the Omnidroid will trigger its defensive shield-counter — not great for those whose reaction out of hitstun is to fastfall down with an aerial. And if the Omnidroid struck is behind the robotic arm, leaving the foe tossed several training stage squares in the opposite direction as it regains control, it will instead throw a boulder, as an easy way for Syndrome to get one in play, at the cost of a hit to his robot.


A few more setups worth noting — Omnidroid legs swing their victims just high enough off the ground to avoid grounded balloon traps until they've swollen up with 15% or more. Aiming balloon shots at the foe as they're swung around is a tricky proposition, though if a victim is swung into an Omnidroid carrying balloons, those will be transferred to their person, potentially even bursting with F-Throw's final damage to create even wider follow-up windows. And with enough length on his robotic appendage, Syndrome can have the leg toss its victim in one direction, before immediately turning around to have it pick up an Omnidroid on the opposite side, perfect for throwing at that victim in ball form for an added headache! It's not the easiest gambit in the world to pull off, and Syndrome may well have to use a bird drone to get his Omnidroid to ignore the opponent and effectively cross up his robotic leg so it's in position to be scooped up. Pulled off optimally, however, Syndrome's victim will have to time an air dodge, jump or fastfall into shield virtually perfectly to dodge the big black ball — perfect for flashy KOs!

BACK THROW - BATTLE BLADES


The Omnidroid leg lowers to place its victim on the ground, opening its gripping pincers and whirring them like a turbine against the character in one cohesive motion. If Syndrome lands his grab at the appendage's full six training stage-square range, it will slice and dice the foe in place with four multiple rapid hits of 2% before dealing vaguely horizontal knockback with a final 3% slash, for 11% total, somewhat reminiscent of a Greninja water shuriken. A grab landed after the leg has started withdrawing, however, will have it push the foe along to the edge of its six-square range or until it reaches an edge, where it inflicts the default hits and launch (before snapping back to where it left off retracting). The blade turbine deals one additional rapid hit per square it has traveled, giving Syndrome the potential to inflict as much as 23% if he lands grab right as his Omnidroid leg is about to slink back into the stage, no easy feat. The launching hit is capable of KOing around 100% at the ledge, rewarding Syndrome if he can snag a foe with a robotic appendage spaced such that they'll be pushed the maximum distance and shredded up to KO percentage before its final slash kicks in.

Standing up against the victim as the Omnidroid leg frappes them along the ground will harmlessly push Syndrome and his robots backward, too. Syndrome won't be pushed if he lands grab with the appendage's initial outreach, retaining utility from B-Throw as a spacer option and regaining mobility right before the Omnidroid leg inflicts its last slash — giving him a six-frame head start to leap up and give chase with an aerial. If Syndrome's tentacle catches a victim while retracting, however, he'll be escorted backward if he's standing close enough behind it. When this happens, he regains mobility slightly earlier, as the Omnidroid leg starts inflicting its final four rapid hits. This expands Syndrome's advantage to 30 frames, opening the door for him to land a more substantive follow-up hit on his hapless victim, perhaps altering their knockback trajectory from the appendage's slash or resulting in a situational kill confirm from an uncharged Smash at higher damage levels.

An Omnidroid getting pushed backward by the leg's blades will remain stationary until the final slash takes effect. With the robot's programming set to attack, it will be able to get off its first, but not the second pincer stab, tacking a bonus 10% onto B-Throw's damage output before the final slice takes effect. If the appendage's blades end up pushing their victim more than four training stage squares, the Omnidroid will regain sentience after the character's re-grab timer has expired. As such, with grab-oriented programming, the robot can snatch them in the middle of B-Throw's final rapid hits, holding them in place to soak up the damage before hurling them itself. And regardless of the robot's set behavior, having the Omnidroid tentacle to shove its victim into one means it invariably will be close enough to start its pursuit after they're launched — useful for steering that foe around or baiting a programming-altering defensive maneuver. That being said, it can be easier said than done to push around an Omnidroid this way; the setup requires landing grab while the appendage is retracting, and the robot is close enough to pause where it will be caught with B-Throw's blades, but not positioned to be picked up by the grab itself.


On a similar note, Syndrome's B-Throw also can work great in tandem with grounded Down Special balloon traps. Victims pushed into a balloon will have it stick to them and begin swelling with damage from the Omnidroid leg's blades. If the blade's hits burst a balloon attached to a foe early enough into B-Throw, they'll take the damage but continue to be pushed along, with the leg's whirring turbine catching them out of their stun. A balloon burst right at the throw's end, however, can prove valuable if Syndrome manages the timing — the sphere will flash while the victim is caught in B-Throw's final hits, before its stun effectively pauses their knockback from the final slash, as a perfect punish opportunity for him or an Omnidroid. Naturally, a victim will want to take special care to avoid being dragged in B-Throw through multiple grounded balloons, especially large ones that can result in a comically damaging payoff for Syndrome. With balloons prepared onstage this way, Syndrome may be tempted to fish for grab through them. The reward of those balloons adhering to victims as the leg snaps inward speaks for itself, though Syndrome still sees downsides from this option's predictability, not to mention committing his appendage to that spot for several seconds on whiff.

DOWN THROW - CONCRETE CRUSH


The Omnidroid leg lifts its dangled victim slightly upward before slamming them hard into the stage, dealing 6% and holding them down such that they're not immediately visible, underneath its pincers and obscured by a purely visual stage-cracking effect. The player can tap or hold the control stick down in initiating this throw to trigger one of two different outcomes. A tapped D-Throw has the appendage rip the foe roughly out of the ground, dealing an additional 6% and below-average diagonal knockback that won't KO but can effectively pop the foe up into the air for a follow-up hit at low to mid-damage levels.

A held input, however, leaves the foe pitfalled with strength comparable to that of K. Rool's D-Throw. For those unfamiliar, remotely competent mashing will let the victim free themselves near-immediately up until around 70%, and still in under a second as high as 150% for practiced mashers. Syndrome, however, can try to game his foe's mash by mixing up which D-Throw variant he uses. That the victim isn't immediately visible before the Omnidroid's pincers lift up can delay their reaction slightly, in avoidance of an adverse input. Too anticipatory a mash, and the character could buffer a wild, costly input out of launch from D-Throw's tapped variant, while too slow a mash can lend Syndrome the few frames he needs to blast away his buried foe with a stronger hit.

Omnidroids come in quite handy assisting Syndrome with a variety of coverage out of D-Throw. With its tapped variant, the robot can sandwich a foe against Syndrome, coaxing them either inward at him or up into the air. Unless the Omnidroid is right up against a victim as they're pitfalled, it generally won't have time to move in and land its attacks before they escape, though if a robot gets close enough, it still can register any attacks or dodges the player ends up inputting with the ferocity of their mash. Syndrome also can try taking advantage of knockback storage, landing a faster hit on his buried victim before his Omnidroid sends them flying with enhanced force, though this runs the risk of him mistakenly hitting his robot instead. And after both throw variants, Syndrome can immediately grab a sufficiently close Omnidroid and throw it in a threatening attempt to limit their movement options.

Landing Down Special balloons on a pitfalled victim requires some sharp timing on Syndrome's part before they mash free. That being said, by shooting balloons predictively into the air above where they're buried, he can try forcing their hand to make a quick, potentially dangerous landing after freeing themselves. Burying a balloon-toting victim generally isn't the fastest way to push the sphere to its bursting point. Even so, if Syndrome performs D-Throw from a short distance away, hitlag from a balloon either attached to that foe or stuck to the stage nearby can result in attacks that otherwise would have missed nicking them en route to freedom.


UP THROW - RAZOR-SHARP ROCKET


The Omnidroid tentacle stiffens up slightly before firing its pincers upward, victim still in tow, powered by a small thruster on their underside. The pincers travel vertically seven training stage squares — from where the foe is dangled one square off the ground — slightly faster than Isabelle's ascending rocket before exploding. The flaming blast deals 15% and vertical knockback KOing around 105%, or lower if Syndrome initiated the throw from atop a high platform. U-Throw stands out as Syndrome's most powerful vanilla throw, with vertical spacing properties to boot, albeit at the cost of his appendage's pincers and, thus, its ability to perform subsequent grabs until it completes its retraction.

U-Throw's solid knockback leaves the fewest immediate follow-up opportunities for Syndrome and his Omnidroids out of his grab-game, though that's not to say they don't exist. Syndrome's first actionable frame comes a short while into his pincers' ascent; as such, he can perform multiple jumps or Up Special boot thrusts into the air after his target. Here, the best results tend to come from mixing up whether he's actually aiming to land an aerial or is simply feigning this approach to bait out an ill-advised air dodge. If he's moved onto a high platform, above where his Omnidroid leg has landed grab while retracting, Syndrome can pile an extra hit or two onto his victim as they're caught in the rising pincers; this won't release them, but will boost the ensuing knockback with the added damage.

Should that sound a tad challenging, Syndrome always could take the simpler route of jetting his victim up through a platform's balloon. If the balloon bursts close enough to the top blast zone, its regularly paltry knockback could even polish off a stock, akin to Sephiroth's shadow flare. Even without leaving the ground, Syndrome enjoys riddling the airspace with hazards through which his foe must descend following U-Throw — often with an Omnidroid swung around or tossed with zero-point energy, or a cavalcade of balloons cannoneered toward a portion of stage the victim might otherwise find appealing for a landing.
Take your pick, Buh-Buh-Buh-Buddy boy!

STANDARDS

JAB - HERO SYNDROME
With a showboating flourish and an impish smirk, Syndrome performs a spin in place, swinging his cape out around him in the process. Who's super -now-? An unorthodox jab, Syndrome's cape extends out one training stage square, first in front of him between frames 4-7, and then behind him from frames 13-17. Foes whipped take 5% and a moment of stun, during which they're also spun around to face the opposite direction. As a first jab hit, Syndrome's cape has decent enough reach and, for a brief window, even can strike behind him as he spins around. Though two hits won't chain together, they can deter characters from rolling around Syndrome mid-jab, or else punish them if they're not careful in doing so. As a downside, he undergoes 34 frames of end lag if the player doesn't transition from his spin into his second and final jab hit. As such, he still can start off jab lock combos with his cape, but he'll generally only pull off two hits on the prone victim, as opposed to the three most characters can achieve with jab hits one and two, or two initial jab hits.

Should the player repeat the input before frame 25 — when Syndrome completes his spin to face forward again — he'll transition into a triumphant hero's punch! Or, at least, the closest equivalent a manboy genius of his stature is capable of pulling off. Blue-flamed thrusters in Syndrome's wrist gauntlet give him added oomph as he thrusts his fist skyward in an uppercut. The hitbox in his fist comes out between frames 5-6, scooping up foes in front with a 10% blow and vertical knockback capable of KOing around 125%. Syndrome's punch doesn't true combo from his cape, but foes whipped with jab hit one have a brief window to shield or dodge — unpracticed opponents will struggle to do so if Syndrome surprises them with jab. That being said, those who evade or parry Syndrome's uppercut have a clear opening; he undergoes a painful 58 frames of end lag, stumbling slightly as he repositions from a punch he's clearly not used to throwing.

Syndrome boasts an underhanded trick that can make landing jab a tad easier. If he swings his cape into an enemy's attack, it will crackle with energy and reverse the attack in the opposite direction! This design quirk — which Syndrome clearly modeled with inspiration from notorious super, Mario — gives him a degree of defense at melee range, as foes looking to get in and overwhelm him must take care not to get uppercutted after having a hasty attack spun around. Syndrome even can masquerade as a rushdown crimefighter, swooping in to punish overly-aggressive opponents this way, though he's apt to get smacked down the second they wise up, shield his uppercut and B-Air him in retaliation. Compared to that of the pasta-powered plumber, Syndrome's cape also lacks beginner-friendly reflective frames that linger after he spins away, and has a more horizontally-oriented hitbox foes will have an easier time leaping over with an aerial. That being said, Mario's flimsy fabric lacks interactions with his own personal death robot. Depending on an Omnidroid's proximity and programming, an enemy attack Syndrome reverses could register as a whiff and prompt its offensive behavior, or even collide perilously with its shield-counter.

Syndrome's cape is capable (heh) of reflecting projectiles, too, and though its 1.2x damage multiplier isn't anything to write home about, it can come in handy in a pinch. Namely, Syndrome alone is able to bat back an Omnidroid's boulders with a quick cape spin, regardless of whether it was hostile or not. If Syndrome doesn't mind provoking his robot's ire, he can blast it from afar, and with enough force, to trigger multiple boulder tosses. Thwapping the stones back in the opposite direction then becomes a perfect recipe for entrapping a foe in a no man's land of rocky horror, or else better positioning them to be picked up and smashed around with zero-point energy. Syndrome does run some risk of reflecting the boulders into his Omnidroid itself, though in a pinch, he can cape an approaching robot to bide himself a moment to flee, just so long as he times jab hit one around the reach of its legs.


DASH ATTACK - COWARD'S WAY OUT
Oh -no-. Things appear to have taken a turn for the worse, so it's time for Syndrome to make his leave. From his gliding dash, Syndrome quickly fires up his rocket boots to propel himself forward 4.5 training stage squares, and out of harm's way. As he does so, he turns his upper half to peer backward, firing two explosive energy lasers to the ground, representing squares two and three of his movement, to cover his escape path. Should Syndrome jet into a foe at close range, he'll ram through them, dealing 7% as he butts to the opposite side with an initial hitbox active between frames 8-11. Behind him and in hitstun, the opponent then will be caught in two ensuing Kirby-sized 5% blasts, the first of which stuns the foe for the latter to launch diagonally backward with force capable of KOing around 175%. Syndrome's front also retains a weak, decidedly-unsafe 5% hitbox between frames 12-21 of the 66-frame animation.

An unorthodox dash attack, with the meat of its hitboxes coming into being behind Syndrome, this move's value hinges largely on his timing in bringing it out. He's able to cross up opponents and shields upon initiating dash attack within two training stage squares, in the latter case requiring them to hold their bubble out to avoid the two explosions. If the player buffers a jump, Syndrome also will boost into the air immediately having reached his maximum air speed, giving him the ability to double back with his airy midair movement to aim a N-Air or B-Air. Any further away, however, and Syndrome won't ram with enough force for the cross-up, instead leaving him jetting weakly against his target, in perfect position to be shield-grabbed.

Some other dash attack uses worth noting — if the player holds, rather than taps the input, Syndrome won't complete the animation in place at the ledge but rather will jet off, canceling the move into that odd flip characters do when running off ledges that the competitive scene appears not to have bothered to give a wacky, unfitting technical name yet. Coupling this property with a successful cross-up, Syndrome can ram through a foe near the ledge before immediately leaping backward with an aerial, either for a two-hit combo or a touch of shield pressure. In a pinch, and spaced right, Syndrome can jet through hostile Omnidroids, potentially blasting it back a short ways with his final explosion for some breathing room. And by using dash attack through grounded balloons, Syndrome can carry out some drive-by inflation with the three hits, or even burst a fuller sphere to shake a foe off his tail.


FORWARD TILT - THUNDEROUS APPLAUSE
Syndrome brings both hands together in a close-ranged clap, holding the pose for 28 frames as blue energy can be faintly seen between his palms. Immediately afterward, a bubble of blue energy erupts outward, overlapping with the outer half of his gloves. A smug expression breaks out across Syndrome's face as this happens, with him seeming to have triggered the blast to create the appearance of having delivered a forceful clap!

Syndrome has a few hitboxes to speak of within his F-Tilt. His initial clap takes place between frames 7-8 and extends outward one training stage square, dealing 8% and diagonal knockback that will KO around 155% from center stage. Twenty frames later, Syndrome's energy blast comes into play, extending another half-square from his hands between frames 39-40. This deals a stronger 12% and knockback KOing far earlier, around 110% from the stage and lower closer to the ledge. Lastly, if Syndrome claps a foe at point-blank range, right on frame 7, he'll stun them with a touch of zero-point energy, dealing the clap's usual damage and guaranteeing a true combo into the ensuing energy explosion.


With its coverage from successive hitboxes, Syndrome's F-Tilt is capable of threatening approaches, and even can be angled slightly up or down to deter aerial approaches or knock a foe into prone if they miss their tech. The two hits don't combo together outside of giant or metal foes, and foes have a window to interrupt Syndrome in between his clap and energy blast. If they're caught off-guard, however, his blast will catch them as they exit a panicked spot dodge. Against those who think themselves clever approaching and then rolling behind their opponent, Syndrome also can be predictive and clap backward right beforehand, zapping them as their roll ends. His vulnerability mid-move positions F-Tilt as an attack Syndrome won't want to throw out frivolously, given his relative weakness on the ground. That being said, throwing caution to the winds and rushing in to perform the freezing point-blank clap on a tempting target — perhaps caught by a bird drone or buried with D-Throw — can prove a real rush.

One more handy use for F-Tilt is in poking and prodding enemy shields. Syndrome's energy blast inflicts an additional 10% in shield damage, putting even more of an onus on foes to not just properly time shield, but also hold it for long enough. If the foe drops shield too quickly after Syndrome's clap, his own energy bubble will launch them back, while if they hold shield too long, F-Tilt's second hitbox could start to shield poke — especially if that character is stuck with a hitlag-enhancing balloon. And Omnidroids up the ante still further; if Syndrome keeps his opponent stuck in shieldstun as the robot gets close enough, it will adjust to its grab programming after completing its prior action.


DOWN TILT - UPLIFTING ENERGY
From his squatting crouch, Syndrome zaps the ground right at his feet with zero-point energy to rip a small chunk of stage, a little larger and wider than a Pokeball, and levitates it two training stage squares into the air in front of him. After the chunk reaches its apex, Syndrome cuts off his energy, prompting the earth to fall back down to the ground. Coming out on frame six, the chunk breaks on impact with an opponent; those struck while it's rising, from frames seven to 19, take five rapid flinching hits of 2%, the last of which pops them up lightly with knockback that won't KO until nutty percentages. Those hit as the chunk falls, through frame 44, instead take one solid 10% hit, capable of knocking grounded foes lightly diagonally backward and launching aerial foes downward, not forcefully enough for a full-on spike but enough to put those characters in prone if they miss their tech.

Syndrome often will find himself making hay of D-Tilt to stave off approaches and try turning the tables on foes who get too cute moving in on him. Timed right, D-Tilt can become a great combo starter, as, if Syndrome successfully hits a foe during the chunk's ascent, he'll cancel out of the remainder of the animation, gaining a first actionable frame on frame 19. Against low-damage targets, he can juggle characters with a subsequent ground chunk or two, perhaps walking forward as needed to prod at his midair target or bait an adverse air dodge.

Rising D-Tilt and falling D-Tilt on a grounded opponent both are great setups for a shorthopped aerial. Should the falling chunk bring an aerial foe back down to earth, Syndrome can go for a jab-lock combo or tech chase. Spamming D-Tilt is an invitation for foes to time an aerial overtop Syndrome's falling chunk, though it thankfully isn't especially countered by melee-range shields. Even if a nearby opponent blocks the rising or falling chunk, its hitboxes bring a moment of shieldstun — not quite fast enough to true-combo into a grab, but still enough time for Syndrome either to poke at their feet with continued D-Tilts or retreat.

Rounding out D-Tilt's uses, if Syndrome uses the move on a midair platform, the falling chunk's hitbox will poke ever-so-slightly through upon landing, creating a headache for tall characters or those looking to spam U-Tilt underneath. Syndrome's chunk will shatter upon hitting a solid ceiling, ending the move early, or upon traveling up through a drop-through platform and landing on the surface above Syndrome. He can't drop stage chunks off the ledge, but D-Tilt has utility both as a two-framing option or for bonking foes who linger hanging from the ledge. As a notable weakness, D-Tilt is almost always a poor option to employ against Omnidroids during windows of hostility. The robots' diminished hitstun allow them to recover quickly from the chunk's low knockback and put Syndrome in a world of hurt.

D-Tilt's usual properties are bended slightly when it comes to balloons. Rather than shattering immediately against a sphere, Syndrome's chunk will lift it skyward, with the tilt's damage only getting absorbed upon the chunk landing or hitting a foe. Lifting up a balloon with D-Tilt can enhance the chunk as an anti-air threat; if it connects with a victim, the sphere not only will stick to them, but the chunk's knockback will leave them in a prime spot for Syndrome to strike them — and the balloon — to capitalize upon its hitlag. D-Tilt also gives Syndrome a quicker, albeit less versatile alternative to Side Special for repositioning balloons on platforms, or even bringing one balloon up and down onto another above him to trigger their blast. These D-Tilt interactions are all well and good, though Syndrome should take care in employing them in certain match-ups, where foes with ranged aerials could turn a rising balloon's hitlag against him.


UP TILT - DRONING ON


Syndrome leans back slightly and holds an arm out, beaming with malice, as his wrist drone enlarges and flies up from his wrist gauntlet to above his head, spinning around in a blur to slice foes with its wings. The drone rises just high enough to poke through a low Battlefield platform, covering about half of one horizontally with its hitboxes. Coming out on frame 10, the drone's wings deal four rapid hits through frame 23, the first three of which deal 2%, while the fourth deals 6% and vertical knockback KOing around 130%. Syndrome regains control a moment later on frame 39, after the drone descends back into his gauntlet.

A simpler move among Syndrome's bombastic tilts, the drone's hitbox comes active a hair before it reaches its apex, giving its owner utility for scooping up foes standing to either side. Without all that much lag, Syndrome can make use of U-Tilt as a vertical launcher, sending an opponent into the air in scenarios where he's prefer his Omnidroid to use its aerial attack or grab variant. The drone also is helpful for needling shielding foes on platforms or covering their getup rolls from below, especially if there's a balloon sitting to one side. Beyond steering that character's movement, the balloon's hitlag will prolong each individual hit of Syndrome's drone, significantly increasing the likelihood that they find their mark. The only standout downside of U-Tilt is Syndrome's momentary vulnerability to either side after his drone has ascended. Foes who avoid the drone's rising hit can poke Syndrome horizontally with a tilt or dash attack; some smaller characters even can crouch under the move's startup and attempt a grab or other more substantive punishment.

SMASHES

FORWARD SMASH - INCREDI-BOMB


In one fluid motion, Syndrome removes a blinking 'i'-shaped explosive from his wrist gauntlet, gives it an underhand toss two training stage squares into the air in front of him and squints while pointing a fist at it to take aim. The bomb descends to the ground over the course of Syndrome's initial 60 frames of charge, as he slowly lowers his fist to track its movement; for the remaining charge duration, he keeps his fist pointed at the Pikmin-sized bomb as it sits upright on the ground. Upon release, Syndrome fires an energy laser at the bomb to detonate it in an explosion that ranges from Kirby's size to that of Hero's Kafrizz, depending on charge, dealing 22-31% and diagonal knockback KOing from 80-45%. Try -this- one on for size, big boy!


Syndrome's unorthodox charging animation gives F-Smash a series of distinct properties, compared to your more garden-variety Smash. Tossing the explosive into midair takes 24 frames, after which Syndrome is free to blow it up at any point with his eight-frame laser shot. Normally, the bomb's explosion reaches full power after it lands onstage, though if the explosive impacts a foe or shield mid-charge, it will pinwheel briefly in midair before continuing to fall. Syndrome keeps his laser trained on the bomb during this time, letting him true-combo its piddling 3% and flinch into a higher-charged explosion than he otherwise could muster in midair. Enemy attacks also can hit the bomb after Syndrome has fully tossed it, detonating it prematurely if they inflict 8%. They'll take damage from the explosion if they used a physical attack, though stronger disjoints or projectiles can literally blow Syndrome's scheme up in his face. He won't take damage from his own bomb here, but will be forced into his unpleasant 45 frames of end lag, as he shakes his wrist in an annoyed manner, as though to deactivate his charged laser. If Syndrome is knocked away from his bomb while charging, the explosive will vanish harmlessly in the middle of its trajectory.


Unique to Syndrome's F-Smash, the player can cancel him out of his charging animation at any point after he's thrown his bomb with a strong directional press of the control stick. When this happens, he'll shuffle a short distance to the side over a few frames, akin to Ryu or Ken canceling out of their Down Special, leaving his bomb to continue falling to the ground. The explosive will remain onstage for five seconds, or about twice as long as Snake's grenades, after which it explodes with force proportional to how long Syndrome powered up F-Smash before exiting his charge. Sufficiently strong attacks still will detonate the bomb, including from Syndrome himself, though he now must take care not to get too close, lest he suffer the damage and knockback, too. Only one bomb can be placed at a time this way; though Syndrome can use another F-Smash with an explosive onstage, it will vanish if he cancels out of that subsequent charge.

The variable positioning of where Syndrome's bomb will explode, as well as his option to exit his charge, can create little mid-match standoffs. From a coverage standpoint, Syndrome must contend with a frontal blindspot until approximately the halfway point of F-Smash's charge, when his explosive falls down from its starting point diagonally above him. As such, foes have an early window where they can pelt him underneath his bomb, in addition to their opening to carefully jump or dodge over a grounded explosion and punish Syndrome's end lag. A foolish commitment to F-Smash's charge can spell immense trouble, while a fearful kneejerk exit from the charge can cost Syndrome a prime early KO opportunity — for instance, if a foe air dodges right in front of him, such that they descend right alongside his strengthening bomb. The flipside is, depending when he cancels out of charge, Syndrome has tactics for punishing impulsive attempts to strike at both blindspots. These could include detonating his bomb manually with a ranged attack, using jab's cape hit to flip the enemy's hitbox into the explosive, or catching the opponent with zero-point energy and slamming them into the bomb, or vice versa.

On the note of Side Special, F-Smash explosives will take gradual damage from Syndrome's zero-point energy. This gives him a limited window to guide them around, during which he can go for a mix-up as to whether he slams the bomb down to detonate it immediately or stops just short so a timed explosion goes off a moment later within the energy stream. Syndrome also can seek to connect the explosive hitbox by tossing a bomb into an enemy's stray attack, or casting an opponent's frozen hitbox at a stationary bomb. From a more defensive standpoint, Syndrome also can position his bomb away from where an Omnidroid is chasing a foe, as like their master, the robots become vulnerable to the explosions after F-Smash is canceled. One potential payoff, of course, is the chance to freeze an Omnidroid in the middle of its shield-counter and slam it into a bomb to create a truly harrowing threat. What's more, Syndrome can direct a bomb into an Omnidroid boulder to produce the same shattering hitbox he can access by slamming one boulder into another; here, the multi-hits register on victims caught in the crossfire before the explosion's knockback takes effect.

Even more extravagant setups come into play when Down Special balloons enter the picture. Given F-Smash's damage output, and corresponding capacity to explode balloons that have grown much at all beyond their default size, foes will want to be extra wary of shielding with a sphere adhered. If the bomb blast lands, it will keep its victim in shieldstun just long enough that they can't evade the balloon's subsequent explosion, netting Syndrome a guaranteed shieldbreak. With great spacing and timing, Syndrome can fire a balloon such that it lands onstage overlapping with his bomb. That way, he can trigger their blasts back to back, the former aided by the balloon's hitlag, and the latter covering the former's end lag, even if its hitbox whiffs. Slamming an explosive down onto grounded spheres generally isn't a great idea, as the bomb blast often covers that of the balloons in such a way that Syndrome can't meaningfully benefit from both. The best, albeit most trickiest setup comes from dropping an F-Smash bomb onto a swollen balloon, such that its 3% falling hitbox prompts the sphere to detonate, followed by the explosive. Unfortunate foes caught here will be stunned by the balloon, right in range for the ensuing F-Smash blast, in a comically damaging one-two punch reminiscent of what Sephiroth can achieve with a fully-charged Neutral Special.


Syndrome will cancel out of F-Smash automatically if he uses the move right at an edge, and his bomb falls more than the two squares it normally would take to reach the ground. In essence, he can't manually detonate his bomb under the lip of a stage to gimp opponents, though its weak falling hitbox could waylay foes attempting to recover vertically from directly under the ledge. If those with damaging recoveries don't wait out the bomb's descent, they also risk exploding it themselves, potentially resulting in a KO or untechable stage spike at high enough damage levels. When Syndrome is feeling in a particularly sacrificial mood, he can try timing F-Smash at the ledge after an Omnidroid has pursued a foe offstage. With any luck, the robot's midair attack will detonate the bomb, likely sending it too far away to recover but increasing the odds its target is gimped or stage-spiked in return. As a balance safeguard, as long as one bomb remains falling (usually offstage), Syndrome will not leave behind a second bomb in canceling out of another F-Smash, whether manually onstage or automatically at an edge.

DOWN SMASH - STEALTHY SNOOP


Syndrome leans almost mockingly to one side, as his wrist drone, first seen in U-Tilt, enlarges and begins humming electronically as it rotates a cone-shaped blue laser from side to side. Upon release, the drone beeps twice ominously, as the laser cone flashes sharply red twice to incinerate anyone who happens to be intruding in front of it. Each a hair lower and shorter than K. Rool's blunderbuss suction, the two laser flashes won't connect into one another outside of giant or metal characters. The first flash deals 15-21% and knockback KOing from 105-70%, between frames 20-22, while the latter is a touch stronger, dealing 18-25% and knockback KOing from 90-55%, from frames 31-33. Life reading, negative...Mister Incredible terminated.


Befitting the drone's nature as an instrument of surveillance, the side-to-side positioning of its two laser flashes will vary, based on the opponent's melee-range movement during Syndrome's charge. Used in a vacuum, the drone will emit its flashes in front of Syndrome. However, if an opponent gets within two training stage squares, in front of or behind Syndrome, the lasers will register their movement and adjust their subsequent two hits accordingly. Syndrome enjoys the prolonged coverage two laser flashes to one side can provide, for example, in threatening shorthop aerial approaches or attempting to two-frame a recovering foe. Characters who stand in front of him and shield will find themselves in for a rude awakening, with the two hits reducing their bubble to virtually nothing if they're too close to be moved out of range by the first hit's shield-push. That being said, they'll also have to be smart about crossing Syndrome up with a roll or jump; if he reads their movement and times D-Smash right, he can blast them from behind with the stronger of the two flashes. And in a pinch, D-Smash can help cover Syndrome's backside if he's darting away for more breathing room; if the hitbox connects at lower damage levels, he'll be facing the opposite direction, positioned well to follow up with a B-Air.

Context and timing both are vital to Syndrome in using D-Smash to its fullest potential, and also to keep foes from gaming his drone's mechanics. The lasers will log the most recent two side-to-side movements an opponent has made, in scenarios where they've crossed Syndrome up multiple times. That being said, after releasing D-Smash, Syndrome is locked into firing in that given hitbox configuration, undergoing 28 end lag frames afterward. As such, a character that successfully baits Syndrome into triggering his drone prematurely can feint over to his safe side — behind him, in the case of two same-side lasers, or to the side where the first laser has dissipated, if they're spread out — and make him pay for it. As with F-Smash, there's some standoff potential here, as foes weigh whether to aggressively try hitting Syndrome out of his charge or patiently luring him into a misfire, while he reacts accordingly, perhaps with further conditioning from well-timed balloon cannon fire from Down Special.

By default, Syndrome's drone will not target Omnidroids that come within two training stage squares during D-Smash's charge, giving him a great means for applying shield-pressure while a foe is contending with the robot, at the cost of potentially hitting his summons by accident. The drone will start training itself on Omnidroids once they've become hostile, giving Syndrome a means of defense at the cost of spreading his lasers' coverage a bit thinner; with multiple targets in range, such as in this situation, or a free-for-all, the drone will log the most recent two side-to-side movements from all hostiles — creating some potential for a quick foe to roll into and back out of range so they can punish while Syndrome fires to the opposite side.

Comparable to F-Smash, D-Smash can inject chaos into the proceedings when coupled with Syndrome's balloons. Two subsequent hits to one side will see their hitlag prolonged quite a bit, increasing the odds of snaring an approaching target. That the two hits will detonate any grounded balloon also gives Syndrome a reliable, albeit sluggish means for threatening with their stunning explosion hitbox, too. Whereas F-Smash's piddling bomb hitbox will detonate balloons such that hapless foes are dealt the explosive's powerful knockback last, both of D-Smash's laser flashes will go off in the pulsating interim between a full-sized sphere explodes. As such, with the perfect set-up, Syndrome can arrange for a foe to take D-Smash's powerful second hit, only to have the balloon's stun immediately cancel their knockback. Up there among his galaxy brain setups, this not only inflicts copious damage but leaves them a sitting duck for Syndrome to do as he pleases.


UP SMASH - ENTER THE FIST


Syndrome thrusts one electrified fist skyward with a triumphant laugh, basking in his own glory for a moment before squeezing it together to trigger a powerful energy blast above his head. His fist boasts two hitboxes to speak of — the first comes out as he's raising it, between frames 10-11, dealing 4-6% and launching foes vertically with below-average set knockback. This is the sort of hit that, on a less showboating or more experienced combatant, would true combo into the hit that follows. Alas, being neither of those things, Syndrome poses for 30 frames before his subsequent blast hitbox comes out. This outburst of energy covers a bit less vertical and horizontal airspace than Mewtwo's U-Smash but brings the move into contention for one of the strongest U-Smashes out there — dealing 23-32% and vertical knockback KOing from 75-40%, 5% earlier even than Lucas' fully-charged counterpart. Rounding off the move, Syndrome has 22 frames of end lag.

In essence, outside of hard reads, making the most out of U-Smash generally requires Syndrome to work synergistically alongside his Omnidroid. Used solo, most foes launched by Syndrome's weak hitbox won't have much difficulty maneuvering to the side before punishing his lag; some even can descend fast enough to D-Air him out of his interim pose. With a robot or balloons to either side, however, Syndrome can attempt to steer their landing, forcing a midair jump or air dodge to either side and closer into harm's way. On the flipside, U-Smash is a prime move where one of Syndrome's own hitboxes, as compared to that of an Omnidroid, could be considered an ultimate payoff. Once the player understands the knockback trajectories an Omnidroid's different attacks inflict on foes at varying damage levels, Syndrome can jet around to position himself accordingly. Then, with practice, he can time U-Smash such that he transitions from pose to blast, right as they're sailing by in midair for a satisfyingly crunchy finish.

Otherwise a relatively straightforward move, Syndrome's blast lingers three frames, not that long of a duration but still enough to warrant careful defensive timing — especially for opponents tall enough to be caught in the hitbox as they move in to attack from either side. Syndrome's blast reaches up high enough to strike foes on low platforms, instilling a special kind of panic when he's stunned them on top with a well-timed bird drone or they've fallen into prone with him underneath. The timing for Syndrome in punishing such get-ups is a bit different here, as U-Smash's baked-in lag requires more foresight for him to punish rolls to either side; as such, it's definitely key for foes not to instinctively get up the same way time and again. With virtually any charge, U-Smash's two hitboxes also will detonate grounded balloons. This persuasively can deter or punish a single landing on a platform, with the combined hitlag and balloon blast, at the cost of leaving the balloon to lock off that platform over a longer period.


AERIALS

NEUTRAL AIR - POWER BLITZ


Syndrome lifts his wrist gauntlet up at the screen, grinning as he begins spinning around in gradual rotations, his contraption sparking with energy. Coming out on frame six, Syndrome's energy creates a series of multiple rapid hits around his body, each of which deals 2.5% and a moment of stun. If the move's input is tapped, Syndrome will spin for 50 total frames, inflicting five hits through frame 23, the last of which deals a slightly boosted 5% and knockback KOing around 130% near the ledge.

At lower damage, Syndrome can chain two or three N-Airs together, depending on his target's size and how many midair jumps he's got left; at early percentages, a weak Up Special rocket boot flare also can serve as a worthy combo extender. With 12 frames of landing lag, Syndrome also can cancel out of his spin with a victim in its throes, allowing for a close-range follow-up into D-Tilt, U-Tilt, or even U-Smash's launching hit for a mix-up. In the alternative, if Syndrome reads a buffered spot dodge or shield, a tentacle grab could be the way to go.

If the player holds the input, however, Syndrome will continue spinning in midair, falling as he retains an active hitbox, akin to Bayonetta's own N-Air. His multiple rapid hits end up inflicting ever-so-slightly less stun after the fourth one, giving foes some ability to DI away so Syndrome can't as easily kamikaze recovering victims. Beyond that, if the player continues holding A as Syndrome lands, he'll hunch over slightly, emiting a power surging sound as he charges a follow-up attack.

Upon release, he'll pump his fist downward, creating an electrical blast that surrounds him, not dissimilar to Hero's Kazap in terms of hitbox shape albeit with a touch less horizontal reach. Coming out on frame 13, Syndrome's N-Air finisher deals anywhere from 18-25% and diagonal knockback KOing from 95-60%, based on up to a full second of charge time. While powering this hit up, Syndrome gets credit for the length of time the player held A while falling in midair beyond N-Air's initial four hits. In other words, a full second of holding A on the ground will be necessary if Syndrome shorthops the aerial, while he will immediately use his energy surge upon landing if he's left to fall spinning and uninterrupted for a second or longer.


Attempts to fry a foe with N-Air's finishing hit aren't without risk, as Syndrome undergoes 40 frames of end lag re-centering himself after the powerful blast. As such, Syndrome might well face instances where, even if he's managed to fall and build up a decent potential charge, he ought to bow out of his spin to protect himself from a close-ranged opponent, as he's unable to cancel out once he touches down. Boiled down, the player is taking a risk grounding Syndrome from his aerial comfort zone, where he can comfortably zip around using N-Air's tapped variant, in the hopes of achieving a stronger, potentially fatal KO set-up if he's successful. Even without much charge, Syndrome can try whipping out an N-Air surge from a shorthop to punish a get-up option, snag a balloon-toting foe while their movement remains hampered or quickly capitalize on an Omnidroid's knockback. Just don't charge to the extent where his ranged electricity fries his robot in the process!

FORWARD AIR - FIRING HIS LASERS


In a similar fashion to N-Air, Syndrome has alternate F-Air variants, depending on whether the player taps or smashes the input. A tapped F-Air has Syndrome point his wrist gauntlet horizontally forward and fire a single small laser shot. Must've taken pointers from Buzz Lightyear — ZOMG Pixar Theory confirmed!! In any case, this laser is approximately the size of a Pokeball, coming out on frame 12 and traveling two training stage squares outward before dissipating. Foes struck at point-blank range, during the move's first three frames, take 8% and below-average knockback that'll KO offstage around 135%; at any other point in its path, the laser inflicts 5% and a moment of stun.

In terms of in-Smash analogues, Syndrome's F-Air is most immediately comparable to that of Mii Gunner, with its own distinct pros and cons. Given his two aerial jumps, Syndrome can fire off at least two lasers per midair stint, potentially more, if he's willing to expend Up Special rocket boot fuel to keep peppering the air with shots. Doing so enables him to pile on a bit of chip damage at the margins, while his foe is busy dealing with an Omnidroid or disposing of stray balloons. That being said, Syndrome's tapped F-Air becomes rather unsafe once most foes have closed the gap to jam him. Its miniature laser covers only a limited, linear portion of airspace in front of Syndrome, who, unlike Mii Gunner, isn't propeled backward for breathing room upon firing his shot. That, coupled with 24 end lag frames and its status as a reflectable projectile, restricts F-Air's utility for frontal approaches or defense. In those respects, Syndrome's N-Air tends to get the job done better, and even then leaves him with some degree of risk, what with the less-than-stellar range of its immediate hitboxes.

Syndrome's possibilities do, however, expand when smashed F-Air comes into play. Smashing the input has Syndrome enter his usual laser-firing pose over 12 frames but not shoot anything off just yet — instead, he'll momentarily slow his downward momentum as he begins charging up a single stronger laser beam. As with N-Air, Syndrome can charge his ensuing attack for up to one second, upon which the move automatically releases; he'll cancel out over 15 frames upon landing mid-charge. While charging, the player also can guide the control stick to angle Syndrome's laser beyond a strict horizontal trajectory, up to a steep 75 degrees diagonally up or down.

Anyhow, the laser itself ranges from one to two training stage squares long and one to two square grids thick, emerging on frame 12 to deal 14-20% and knockback KOing from 155-120%. Heartier than its tapped counterpart, this laser travels from a half to full Battlefield length at a slightly slower speed than ROB's own beam (and without penetrating victims), leaving its master with 16 frames of end lag.


With its newfound force and versatile angling, F-Air's smashed variant becomes more respectable in terms of blasting away foes, though the startup required to charge and then fire the stronger laser requires Syndrome to be more predictive in his use. In that regard, one bonus property enhances these lasers' utility — their ability to ricochet at a 90-degree angle on impact with the stage. When a laser ricochets, its duration and distance traveled is prolonged by one-third; though Syndrome essentially only gets one bounce on legal stages, that's nothing to sneeze at with the proper angling and spacing.

In practice, Syndrome can leap up and try either aiming his laser right at a target or at a select portion of stage, such that the projectile will bounce upward and cover a linear section of airspace they're apt to use in approaching. A sheer downward shot can result in a laser that ricochets horizontally at an interfering diagonal slope, while a gradually slanting projectile that bounces against the ground or a low platform will careen near-vertically to catch other high-fliers. Just don't dawdle with your fancy aiming, or Syndrome will touch down, losing the opportunity and becoming briefly vulnerable in the process.

Naturally, an aimable, ricocheting laser has no shortage of applications when the rest of Syndrome's kit comes into play. As a refresher, an angled F-Air is one of a few tools Syndrome can use to set up a 50/50 out of F-Throw, in cases where his opponent opts to leap away at low to mid-damage levels. With great aim, he also can bounce a laser off the stage such that it intercepts a midair balloon fired him his Down Special cannon; the resulting orb will swell a good deal before reaching the ground, dealing that much more damage to any foes it impacts. And F-Air is a great mechanism for prompting Omnidroids to toss out boulders for Syndrome to use; if he's sufficiently far away when his laser makes impact, the robot will grant him a single boulder without even turning hostile.

While going on his shooting spree, Syndrome still must avoid getting too cute against characters with reflectors, though given the range from which he'll generally be firing these lasers, he often has more time to bat them back with jab's cape hit, as compared with their tapped F-Air counterparts. Syndrome must wait for one smashed F-Air laser to disappear before he can send out another, with attempts to circumvent this resulting in the tapped variant instead — multi-purpose as the stronger lasers might be, this does not extend to offstage projectile spam.


BACK AIR - ROCKET FIST
Syndrome leans backward, lifting a fist and, with a buck-toothed smirk, hooking it in a downward arc behind him. The blue-flamed wrist thrusters seen in his second jab hit return here, lending actual physical strength to the move, which inflicts a healthy 16% and diagonal knockback KOing around 115% from center stage, and a good deal earlier close to the ledge. With 12 and 28 startup and end lag frames, respectively, Syndrome can't mindlessly leap backward at foes mashing B-Air to safely threaten airspace like your garden variety top-tier. If he tries, he's apt to get shield-grabbed, especially taking his 14 landing frames to mind.

Rather, much like a handful of delayed B-Airs — think K. Rool, Bowser Jr., even Project M Wario for the most immediate analogue — Syndrome is equipped to punish enemy slip-ups, be they careless air dodges in escaping an Omnidroid or excessively laggy moves used to destroy balloons. An easy standby involves leaping up and fast-falling B-Air to make foes regret rolling behind Syndrome — an aerial counterpart to the back-facing defense he can achieve via D-Smash on the ground. So long as Syndrome doesn't commit too hard to B-Air in one direction, he can use his strong aerial movement to throw out a retreating move or two, making foes think twice about following too closely. And, of course, the occasional hard commitment still can pay off, like the aforementioned set-up where Syndrome dash attacks off the ledge through a for or shield before immediately doubling back for an aerial blow.

UP AIR - ELECTRIC BLADE
Syndrome points a flat hand upward, almost appearing to perform a vertical "dab," for a flame-like torrent of blue energy to spurt up from his wrist gauntlet. The energy reaches up about a training stage square, a few grids thick and with a few distinct hitboxes, reminiscent of one of those dreaded swords. The upper third of Syndrome's energy torrent could be considered a tipper hitbox, dealing 15% and vertical knockback KOing around 120% (and earlier, closer to the screentop). The energy's body, meanwhile, deals a lesser 12% and knockback lessened to a 145% KO percentage. These two hitboxes come out between frames 11-12, after which the entirety of Syndrome's beam takes on a sour hitbox, dealing 9% and below-average knockback that won't KO until ridiculous percents, for the balance of its active frames, 14-40.

With its decent reach and oomph, U-Air becomes a helpful tool for Syndrome across a range of circumstances. He's able to leap multiple times up and after a foe he's vertically launched with something like U-Tilt or U-Throw, poking at them to try juggling for a few hits, or else guiding their landing in an Omnidroid's general direction. This empowers a 50/50 he can achieve with U-Throw at very low percentages — a rarity, given the move's launch — in cases where his victim doesn't react fast enough. Syndrome certainly doesn't mind trolling with empty hops that threaten his capacity to land the sweetspot and finish off stocks at KO percent. Closer to earth, shorthopped U-Airs can apply shield-pressure through low platforms, aided by their auto-cancel properties through frame 10 and then again from frames 45-59, representing most of the animation's end lag. These are a boon when Syndrome manages to land U-Air's sourspot out of a shorthop or while fast-falling, as he then can immediately leap back up to true combo into the sweetspot up until higher damage levels.

DOWN AIR - ZERO-POINT STOMP
Syndrome briefly lifts a single rocket boot before stomping downward a short distance, striking a strongman stance akin to a more exaggerated version of DK's own pose. Naturally, being perhaps the farthest thing from a big hairy ape, Syndrome uses technology to bypass his own physical ineptitude. Right on frame 14, his foot takes on an electric 18% sweetspot. Rather than spiking foes, however, Syndrome's stomp paralyzes foes in midair, comparable to ZSS' max-charged Neutral Special.

If you manage to repeat this sweetspot on a paralyzed foe, they'll be spiked more traditionally, with force sufficient to KO off the screentop around 155%. Beyond that, for the balance of D-Air's active frames, 15-24, Syndrome's foot takes on a shoddier hitbox, dealing just 5% and low knockback that virtually never will KO. Though in rare situations Syndrome can capitalize on a sourspotted D-Air — leaping forward to try comboing into N-Air at low damage levels or capitalizing on it sending a foe into prone — the payoffs he can net from the sweetspot mean it's essentially always what he'll be trying to land.

With two midair jumps, Syndrome has some wiggle room in attempts to space the paralyzing hitbox, and if he skillfully lands it with a midair jump or two to spare, he has an easier, albeit not effortless time spacing the follow-up spike against his stationary target. One fun three-move combo up through mid-percents involves Syndrome landing sweetspot D-Air to stun a victim; leaping right back up to catch them in N-Air's multiple hits; and then launching them away with a charged Up Special rocket burst. Just don't get careless with spacing Up Special as a combo finisher, lest Syndrome's opponent exit their stun and attack his boots to send him spiraling away. Yet another option, if Syndrome stomp-paralyzes a foe close enough to solid ground, involves footstooling them out of their stun, guaranteeing they fall into prone for his or his Omnidroid's abuse. And the applications of such a footstool speak for themselves offstage, at the cost of Syndrome opening himself up to be gimped himself in the process.

By stomping a foe within an Omnidroid's pursuit range, Syndrome can prompt his robot to adapt its attack programming, as it registers the target's nonresponsive nature. Of note, he cannot stack stun from D-Air and his bird drone, though his ability to send a parrot up and after a foe after they pop out of paralysis is a great motivator for them to keep on the move. Syndrome's opponent generally won't stay frozen long enough for him to charge F-Smash or U-Smash much at all — and F-Smash's bomb trajectory limits its use for an aerial punish. At KO percents, however, both still can get the job done, especially if Syndrome D-Airs a foe above a drop-through platform and then charges a Smash underneath to complicate their getaway.

Syndrome will find himself eating punishment if he starts throwing out D-Air willy-nilly too close to earth, where he faces a limited auto-cancel window — between frames 1-3 and 42-46, the final four frames before Syndrome regains control. Until the player gets the hang of the move, Syndrome always can dedicate a balloon as a safety net, as the larger ones can detonate from D-Air's sourspot to cover his end lag. Then, with the timing down, Syndrome can slightly prolong his stomp's sweetspot atop a hitlag-friendly balloon. Barring an instant reaction, a foe caught in the ensuing paralysis will get splattered by the potential ensuing balloon blast, too, letting Syndrome really relish in the damage he piles on as a reward.


FINAL SMASH

FINAL SMASH - OMNIDROID ONSLAUGHT


Syndrome spreads both hands, raised to the skies, as he calls excitedly and echoingly out, "It's finally ready!" As he does so, a canonically-sized Omnidroid falls from hammerspace into the background behind him, taking up about as much screen real estate as Petey Piranha — as he appears during Piranha Plant's Final Smash, not his beloved MYM19 incarnation. The giant robot reaches out with super-sized tentacles to snag up to three opponents close enough to its spawn point, before slamming them multiple times back and forth across the stage to deal a cumulative 46% — a real sight to behold when it's slamming multiple characters back and forth in an overlapping fashion. As it's doing so, over the course of three or so seconds, the Omnidroid tromps from side to side, dealing 18% and pitfalling grounded opponents it failed to grab below.

Afterward, the robot forcefully hurls away foes with under 100%, dealing 15% and knockback KOing around 60%; with foes above that damage threshold, the Omnidroid whirs the blades carrying them to eviscerate them on the spot for an instant KO. For bonus humilitation, while his mega-Omnidroid is having its way with its victims, Syndrome will mockingly narrate the proceedings, along the lines of "It's bigger...it's badder!" or "You've got to admit this is -cool-...just like a movie!" All in all, a worthy payoff for Syndrome, given that his regular Omnidroids won't directly target Smash Balls on his behalf, leaving him to take matters into his own hands if he wants to get the goods.

EXTRAS

UP TAUNT - SUPERVILLAIN'S STANDBY
Syndrome gestures forward and chuckles in amusement, "You sly dog! You got me monologuing!"

SIDE TAUNT - FANBOY'S FRUSTRATION
Syndrome strolls around in an angsty circle, proclaiming "Lame, lame, lame, lame, LAME!" while pointing downward to punctuate each word — the perfect taunt to spam when matched up against virtually any of Ultimate's high tiers!

DOWN TAUNT - YOU DENSE [REDACTED]
Mouth agape, Syndrome brings both hands up to frame his face, like so, and blinks twice in an exaggerated fashion.

ENTRANCE - LEAVING ONE'S MARK
Syndrome jets onto the stage with his rocket boots. Upon landing, he quickly lasers a trademark letter 'S' into the stage at his feet and strikes a pose, hands on hips.

VICTORY POSE #1 - STILL GEEKING OUT ABOUT IT


Syndrome soars erratically around in midair, fist pumping before landing with his hands on his hips, declaring in a faux-hillbilly accent, "Ohhh, this is just too good."

VICTORY POSE #2 - SHOOTING FROM THE HIP
Syndrome stands to one side of his Omnidroid, carelessly firing energy lasers in different directions in celebration. After a few shots, Syndrome mistakenly shoots his robot, which raises two pincers, resulting in an "oh sh*t" expression that coincides with his freeze-frame. Afterward, he flees off-screen with a shriek as the Omnidroid gives chase; the robot then continues pursuing Syndrome cartoonishly back and forth as long as you leave the victory screen active.

VICTORY POSE #3 - SAY THE LINE, BA-UDDY!


Syndrome struts into the background, cackling to himself and declaring, "When everyone's super...no one will be," casting a bitter glimpse at the camera as he concludes his iconic line.

VICTORY THEME - INCREDIBLE WIN
Syndrome borrows the intro to the jazzy big-band Incredibles theme, twisted into a minor key to suit his true nature. You're -weak-! And I've outgrown you.

LOSS POSE - SOUR GRAPES
Syndrome applauds with a visible glare, certainly no longer fanboying over a setback of actual consequence.

LINK TO CHANGE LOG (last updated 2/1/2022):
1. Nerfed Omnidroid movement speed while in pursuit of opponents
2. Incorporated brief pause in between individual Omnidroid actions, allowing for more reasonable evasion
3. Nerfed "misfire" Up Special hitbox
4. Slightly buffed grab frame data
5. Nerfed Omnidroid hitbox when thrown from grab
6. Removed excessively snarky U-Air joke about swordies
7. Reduced walk speed nerfs from Down Special balloons, such that roster slowpokes can't end up with negative walk speeds


Last edited:

Slavic

Ask not the sparrow how the eagle soars
Joined
Jun 5, 2013
Messages
757
Location
taco bell, probablyn't
Did you find what I asked for?


Right, the super-important package from the Yakuza, right? I totally forgot about that crap!


Twice...


Besides, I found something of much greater importance. I found this letter rooting through the trash next to some creepy old puppet!


Smash Brothers...
 

Kholdstare

Nightmare Weaver
Joined
Oct 10, 2008
Messages
1,440
"What's dead may never die, huh? If only you knew how true that was. This place... this realm... whatever you want to call it, death is no escape here. No matter how many times you die, even if dissolved in stomach acid or disintegrated or evaporated with a nuclear bomb, you just end up right back on the respawn platform. It used to be I'd just end up back at the campfire, but now something's changed... a lotta new faces. And new Killers. Sometimes I prefer the old way. Still, at least now? Now we have a chance to fight back. The worst part is, despite all the new faces, I still feel the terror in my heart and see her... and that song still drives me insane."


Katapultar

Smash Lord
Joined
Nov 24, 2008
Messages
1,258
Location
Australia
Syndrome has a lot in common with Wolfgeist - a big construct/minion the set focuses on, mixed with creative, unorthodox regular attacks. I appreciate the level of detail you went into describing the Omnidroid, you're very good at that since you did Mysterio. Side Special is a neat move that ties in very well with Neutral and Down Special, and I really adore the creativity behind the grab itself. His Jab is also a neat move that ties in well with his Omnidrones, a fun melee move and pseudo-counter of sorts. Beyond this, Syndrome has brilliant characterisation - how his Omnidroid can turn against him and he can bait it around and manipulate its behaviour, it makes him feel like a massive poser and this conman who fabricates superhero scenarios.

Syndrome feels more or less like a Wolfgeist-tier set for me, but there are two semi-major issues that keep him down from that level for me. Firstly, I think the Omnidroid is very overpowered in the set's current state, if only because the end lag on its attacks feels very low for a minion, more like a regular character. Combined with its high movement speed and various options, the Omnidroid can easily chase and pressure foes while Syndrome has a semi-decent game by himself to exploit this, like his F-air and B-air and F-tilt. There's an easy solution however, just give the drone a good dose of end lag on all its attacks, like at least 1-1.5 seconds. This way the foe at least gets a breather from the droid to fight Syndrome; committing to attacking the droid is pretty risky when Syndrome is around, not to mention the drone's counterattack. It would also give Syndrome a breather from his droid himself.

I am also unsure on various aspects of Syndrome's Down Special. The hitlag extension IS cool, make no mistake, but I wonder if the speed and jump cut are necessary, as they're not mentioned in the set and the drone and Syndrome's options seem powerful enough as is. If anything, the foe probably shouldn't have their midair jump nerfed so they don't get gimped as easily. Above that, 30% on a time bomb-ish hitbox feels very powerful, especially when you can stack two blasts together among other tricks, maybe it should reduced to like 15% (half of the damage the balloon has taken). On the subject of damage, while D-air's spike is hard to hit, needing to land a precise hitbox and have an extra jump available, 18% on each sweetspot feels rather powerful when you get 36% off of one D-air, it should probably be reduced to 12-13%.

Up Special malfunction a bit weird flavour-wise for such a strong move, especially if he's going for it deliberately. Maybe if Syndrome connects with the hitbox, he'll pump his fists and cheer or make some kind of animation that implies his aerial flailing was all a set-up, which would work well with his charactersation. He could even have a different, subtle flailing animation if his boots got attacked by his omnidroid, like he was prepared for the whole thing.

Even with his issues, they are easy enough to fix, and Syndrome is still a very good set. I wasn't expecting him at all from you, but between your Marvel supervillains and old Disney/Pixar villains, he feels like THE modern Kupa character, a marriage of both franchises! While not as compelling as Mysterio, there's something to be said about Syndrome being over 20k, the sheer dedication you put into this character and set over what I assume was a relatively long period of time. Great work here, Kupa!

The Mads are a fun and quirky set that really showcase what I feel is a “gimmicky” style from you, something that was present in Game and Watch character and concept wise. It’s also rather funny; I found the Cholester-do-all hilarious as it tickles MYM’s sense of humour food-wise, and just the idea of Clay abusing and sacrificing Frank to power up his own moves. I like the links to the clips the moves originate from.

Tag team sets were prevalent last contest, and I rather like the idea of one that uses its secondary character as a resource to do your set-ups. The Cholester-do-all is a fun concept in that regard, potentially killing off Frank to give Clay very broken moves for a limited time. That it takes 6 seconds for Frank to get up and detach the generator is a neat touch too, meaning Clay has to commit to potentially losing Frank or go a while without getting access to his buff. The set doesn’t mention regaining meter, so I assume any meter lost is permanent; interesting, as it forces Clay to be careful with what he does during his power-up time, particularly on the lowest meter. But if foes stay away from him, he has a number of set-up tools at his disposal, like U-air and B-air and U-Smash!

(ally projectiles dealing 1.5x more damage with any meter buff might be a bit extreme, only if it applies to the projectile’s knockback: that’s almost as powerful as a buff from the Super Mushroom, and that’s REALLY powerful! Might be better to say that the buff only affects damage and not knockback)


Down Special does feel a bit weak among the Specials - and I wonder whether the Mads can move while the foe is being grabbed? For how committal it is for Frank to research his opponent, that being time you don't you don't get to use the Cholester-do-all or have Frank attack foes for you (Dash Attack from Frank seems rather useful, especially with Up Special). What if Clay could keep the movie playing, even if he misses his grab or the foe escapes? If the movie matches his target's franchise, they'll take damage just from being near the movie (or hearing it? That would make sense), and if they're exposed for like 5 seconds of it they'll get dizzy, once per film. Would be neat for stage control, and gives the foe a decent reason to interrupt Frank before he can finish researching their franchise! On that note, maybe Frank's research should only take 6-7 seconds, given there's no immediate pay-off for it. Afterwards, you could use the franchise film clip strategically, like defending Frank while he's eating or to protect your Up Special device for what it's worth. It would also be fun if Clay's N-air could interact with the movie (and maybe his other constructs) - for instance, using N-air near the movie/seats will pause the movie, but the foe still takes damage due to having to look at the sheer awfulness, and that gives you extra time for them to get stunned.

Side Special gun's blocking function could do with a little elaboration: how much damage can it resist? Does it work like a counter, protecting Clay for a moment but suffering lag if he misses? Can foes grab him out of it?

Up Special’s teleport feels extra cool with Frank/your minion; I could imagine a scenario where Frank is apart from you and you just teleport to save/reunite with him. Feels a bit easy to gimp the Mads though: you need to set up the device first, it’s not hard for the foe to destroy and the Mads don’t have superb jumps. You could either increase the device's HP to something like 50, maybe give Clay a bit of invincibility when he re-appears so foes can't casually knock him away, or give Clay an alternate Up Special where he can teleport/recover without the device. On a different note, the laser aspect of the device is fun, but this part "A second beam is fired from the left screen corner. It has the default power level." and this "A third beam is fired from the right screen corner, with default damage." are a bit confusing: does this just mean the beams come out from behind and above Clay/the device respectively?

U-Smash’s projectile sticking effect is tacky but fun. It should probably be a guaranteed status effect, or at least is guaranteed if you charge it as only the range increases from charging. I’m also unsure about the food sticking around as a trap that sticks foes in place, even if they could attack and shield while stuck. Maybe the trap should just stick food to the foe and you get the projectile sticking effect if it passes over them? I also like D-Smash, a very nutty but simple move that could have really fun melee applications with more melee focus.

N-air deactivating objects seems fine in modern MYM, as it's only temporary and most opponents will have a competent enough melee to pressure/knock Clay out of spamming N-air. This could be hilarious in a Syndrome match-up (two evil genius inventors!), like Clay just spams N-air to shut off Syndrome's Omnidroid endlessly and Syndrome just uses his Side Taunt "Lame, lame, lame, LAME!" in response. There are even (potentially chaotic) opportunities for hard interactions with the Mads' other inventions: what if N-air could temporarily shut off Frank's Dash Attack so you can delay its hitbox for the right time? Or maybe have some kind of weird malfunction effect on the Up Special, like some kind of laser counter where a laser starts up after 1-1.5 seconds if the foe hits the device while it's "deactivated" or fail to destroy it before then? Still, I can understand not wanting to make items dip into each other, given the episodic nature of their source material where a new item is introduced each episode or something among those lines.

B-air’s Frank counter is very weird but cool: it would be fun if, with good positioning, Frank’s counter hit could knock foes into Clay’s strong toothpaste hitbox, which would work well given the input is on a B-air and if Frank is lagging behind Clay. Clever. On that note, how far does toothpaste fall?

U-air is a fun move for how potentially broken it can be at max buff, at the cost of killing Frank, and an ideal move if the foe is staying away from you to stall out until Frank dies. I also found D-air's pseudo-prone state rather interesting, we don't get much of that kind of thing in MYM.

F-throw’s grab state has good balance. Could see B-throw’s food generating effect interacting with B-air. They’re both back inputs to boot!

All and all, the Mads are a good improvement from your MYM23 entries. If anything, the melee could obviously do with improvement (though D-air is a good attempt), but more so acknowledging how the Mads gimmicks and moves work together. Sure, the playstyle mentions they're not supposed to work together, but it's absolutely possible to create a chaotic set where moves can contradict or work against each other, but can work really well if the player plays their cards right. It just about acknowledging the specifics in the set. That would take practice and reading other sets to reach though. In the meantime, I think your approach in making your attacks fun gimmicks and throwing out a relatively ambitious 2-man concept is a good approach to make your early sets interesting reads as opposed to being bland, with a very fun and esoteric character choice to boot. If we're getting more of this kind of thing from you, especially if MSTK3000 becomes you flagship franchise and gets more sets, then I'm all for more of it and creative attacks. Keep up the good work, Torgo!

I and I'm sure others have been interested in sets you have in store since Kira, and The Huntress doesn't disappoint. It's neat to see another set that's inspired by and a love letter to another set, that being Goliso's The Blight which I think was kind of ignored last contest. Huntress makes good use of a bleed effect with her speedy rushdown style set, with tricks like invisibility, rope traps and U-Smash aiming to scare the foe, make them take more damage as they flee from you and ultimate finish them. It works particularly well that Huntress is surprisingly a heavyweight character, not a lightweight female like I'd expect if I saw her picture out-of-context, so she has the power to finish her opponents once she reaches them.

Huntress is a pleasantly short set with neat presentation to add to the set's bleak atmosphere, and you do a good job of conveying information, like with matter-of-fact comparisons to Smash moves. Her melee is solid, but if anything I feel it could be enhanced further by talking about it more and how say, her melee attacks can play off her Specials. For instance, a foe jumping or rolling around a noose could be intercepted with an aerial, the latter more likely if there's a pallet around to catch the foe with a hatchet. It would also be fun if you talked a bit more about the "cave diving" aspect of noosing yourself with Side Special on the Aerials.

Her throws are basic "throw in X direction" for the most part, but I think they could benefit from talking about follow-ups and 50/50s with her other melee attacks. For example, it seems like you could follow up a high base knockback B-throw easy enough with a Dash Attack, which could force a jump from the foe that could lead into her meaty U-air, or even an U-Smash. On that note, maybe Huntress should have the ability to keep hatchets in a foe from any throw, like you hold B to keep them in the foe when throwing. Maybe even a pummel that lets you stick hatchets into the foe. I also think, Huntress being a heavyweight and with her B-throw that gets more powerful with hatchets in the foe, it might be good to throw out KO percentages to really sell the power of her moves. Judging from the black boxes at the bottom of each move, it does seem like you plan to edit and expand upon Huntress' moves playstyle wise, which would be neat.

I also like the little detail on the knockback diagrams that shows if a move would launch on an angle that would force a tech situation, indicated by the enemy stick figure laying prone. Maybe you could bring this up when talking about moves, like using F-Smash as a tech chase or something.

Hatchet-wise, dashing X times to remove a hatchet is a tad weird but I can understand it working into the foe taking more bleed damage by moving. It would be funny if the foe took more damage/got grabbed longer if they dashed into a Side Special snare, like they tripped over it from their momentum? Would be scary with invisibility. If anything, I do wonder whether 20 dashes is a bit much to remove a single hatchet, maybe 10. Pummeling totems to remove them, while taken from Blight to stay true to DBD, does feel very time-consuming and not something I can imagine many foes wanting to do: not when Huntress is speedy enough to catch them, though they can at least shield or dodge out of pummeling the totem. Also, not a complaint, but what if Up Special had a slight cooldown between uses, like subsequent uses don't make you invisible for as long for X seconds, while not using it for a while makes you invisible for longer so you can do trap/U-Smash fun stuff for longer. Maybe having the full hex totem set out could even enhance or speed up the time it takes to gain invisibility time.

Finally, the extras a very fun. Like that detail with how the announcer says her name, and like Mads she has pictured costumes and a stage. Finally, I like the black text box at the start of the set that directly states Huntress' source material and the warning of violent imagery (that's considerate and a good idea for horror sets), must have been inspired by Junahu's google doc work and retrospects.


This is arguably your most ambitious set, Goliso, a trend that seems to continue with your next set. He's also an improvement from your MYM23 sets: in addition to some combos, there's an effort to include Magnus' minions in his gameplan on later moves, and implementation of 50/50s on melee attacks is a welcome addition. I also dig the aesthetics of this set: the presentation is really neat, and I enjoy the writing style, combining your personality with hyping up moves "Strap in, loyalists and heretics alike, because this is absolutely nuts. Forcing your opponent to move and act however you please is just...holy ****, is this nuts. You can force somebody into a firing line of Rubrics or Terminators, you can make them walk into an Infernal Gateway, force them to OHKO one of your Horrors, or if you wanna go full-degenerate, force them to go off-stage." and various references to Warhammer. Magnus also has some neat characterisation, particularly his Jab, and little touches like Dash Attack. It shows an improvement in many areas of setmaking, I'd say.

Magnus gets into some pretty risky territory, something that's enjoyable regardless of execution and always praiseworthy for the attempt. I enjoyed seeing the stronger balance changes to the minions and mind control, though it could do with a little more fine-tuning in my opinion and I'm a bit to blame for not bringing it up beforehand.

I think Neutral Special should have a few seconds of cooldown when a minion is killed before Magnus gets his points back. Maybe 5 seconds, a little more if the foe dealt surplus damage to the minion. It doesn't take that long for Magnus to summon one or a few minions, seems kind of easy for him to replace dead minions. It would also require him to be more conservative with his points, rather than just summon up an army from the get-go. I also wonder whether minion attacks can go through each other, and whether minions can stand next to each other like Ice Climbers or are blocked off like regular characters. If 2 Terminators are standing near each other, could they both use their flamethrower on the same target to stack damage, or would only the one in the front attack? Also, neither Shield Special nor the minion descriptions seem to describe what Magnus' commands do. Seems kind of important, that seems to be what determines the move the Tzaangor uses @ Arcane Bolt VS psychic barrier. Alternatively, maybe you could hold B to have Magnus warp away his minions with some lag to refund his points.

Something I'm aware of but can get overlooked in minion sets is how minions can sponge projectiles for their master. I don't mind this too much on Magnus, he's a big character and would somewhat need the defense, but he can have several minions out: he could flood the stage with like, 10 marines that each have 10HP and can soak up a lot of projectile damage, with Magnus himself having a lot of ranged attacks like Side Special that presumably phase through his minions. To get around this, I would suggest making it so enemy projectiles pierce through all his minions except Chaos Spawns and Chaos Daemons. Or maybe through like, 3-4 minions at most so Magnus gets some projectile defence if he can line up a bunch of minions.

Terminator sword should probably have more end lag, or at least low enough shield damage to punish it on hit. Had this issue with Syndrome’s Omnidroid too, and Magnus is not only fast but he can have multiple minions out with enough set-up time

I like the balance changes to the Tzaangor's platform to prevent stalling. With the Mystic Barrier though, is it just a damage sponge? Feels like it would be a bit too powerful to be anything more like blocking an attack, not when Magnus can move while the barrier is around him. Also, based on the Chaos Daemon's description, it seems like the Tzaangor becomes a Daemon if you keep it alive for 30 seconds. Given the Tzaangor stalls on its platform, you could probably place it high up using your jumps or after being launched so the foe can't reach it, which is a bit powerful given its options are ranged but you do have to invest points in it. Assuming all of Magnus' minions disappear when he loses a stock, this would put the foe on a time limit to kill Magnus before his Tzaangor evolves into a Daemon, which seems pretty fair. Reminds me of Jalter's wyverns from last contest. That the Daemon takes up more points than the Tzaangor is interesting, I assume it won't evolve if you don't have enough points.

With Bolt of Change, perhaps you could make a point of it being punishable end lag wise if Magnus whiffs? You could even make it deal more knockback at close range, which could tie into the neat Jab 50/50. Also, the Up Special mindgame of warping to a nearby lingering warp instead of teleporting is rather neat.

For Down Special, I still wonder whether the 2 second mapping out bit before the forced actions is necessary. Why not just have Magnus control his opponent immediately? This is mostly because I don't know whether Magnus can or can't move while the foe is forced to attack, would obviously be broken if he could even if Down Special has a lot of lag. The mapping sequence could also make it hard to time moving your opponent into a minion attack, as I assume the minions still act and what not while you're mapping the foe's actions. If anything, Down Special as a command grab does seem rather powerful with minions given its range: if the foe so much as attacks or shields something like the warpflames in neutral and the Magnus player has a keen eye, he can just mind control them from afar, and like make them hold their shield and get an easy break from the minion battering it. Actually, if the minion is involved Magnus might not even benefit that much from a shield break, as the minion would probably hit the foe out of their dizzy state before Magnus can throw out a stronger attack. Or he could at least combo from said attack with great skills. Sure is a lot to factor in with minions, huh? Despite this, I would say that Down Special isn't too broken, and the tweaking and asking for suggestions on it paid off. I do wonder if the "off-stage" version of mind control is rewarding enough though: maybe Magnus could teleport the foe onstage and gets to mind control them from there.

Dash Attack’s projectile barrage does seem a bit powerful from the way it’s described, especially given you say he can move past the barrage. I don’t think he should be able to do that, especially when he already has minions; he should just be locked into firing. For the projectile variant, I could see Magnus having to commit to it for a while and being punishable if the foe jumps over the barrage to attack him. For an extra 50/50 between the two variants, I could see the close-up version being unsafe if the foe spot dodges it, but if you use the projectile version the barrage will outlast their spot dodge and punish them!

F-tilt seems rather weak for a move that’s slow and punishable and can be ducked under - Bolt of Change kills earlier! I would have no problem with it killing near the ledge at like 75-80%. That, or it could have some quicker start up. Perhaps you could angle it upwards slightly, and Magnus’ tall height could make it a good anti-air if foes short-hop to avoid his D-tilt?

Magnus' melee attacks do a decent job at remembering that his minions exist. If anything, I wonder whether you could have incorporated his Down Special a bit more into his melee, like how Magnus can threaten foes with its reach and grab hitbox. Taking in the various properties of Magnus' minions and how they could affect his gameplan and melee would be extra potential: like how a foe might react to one of Magnus' minions, and how a Magnus player could use that behaviour to their advantage. If they attack the minion, you could throw out something like Down Special, F-Smash or Side Special, but if they jump you could use a ranged B-air, maybe Up Special or shark them with U-air or get in close for F-air. A Tzaangor's 5 second Arcane Bolt could force a foe to move around, and you could intercept them with something like D-tilt or said aerials depending on how they react and how the minion is positioned. With a Brimstone Horror primed to explode, you could possibly drag the foe back into the blast to get hit by it. Syndrome did a great job of incorporating self-awareness in the implications of a foe attacking his minion, something you could take on when you get to that set for stronger minion sets.

While there is a lot of critique here, minion sets are very ambitious to pull off, good for pandering but expected to have a decent amount of creativity and ideally and lot of detail and knowledge of the smash engine in how the minions work to make them as compelling as possible. For where you are now, Magnus was a pretty good attempt! For now I'd say he's among your best: while I'd say Judgement and Mokou had more compelling concepts in their Neutral Special, I enjoyed Magnus' non-Specials more like his Dash Attack and D-air. With a little tweaking, I'd be confident to say he's your best. Good job here Goliso, and great to see you're getting a start on another beefy set!


It was a bit hard for me to understand the abdominal mechanic, but Naganadel was still an enjoyable set around Daisy tier, with a unique body shape to play around with. It's also our first full-fledged moveset for an Ultra Beast! The hitstun multiplier on Neutral Special, which reminds me of Mr. Sandman all the way back in MYM6 (Warlord called "hitstun stacking" a terrible concept back in the day, but hey this is the modern era and we have balance and combos are cooler), is a neat hook that would have been really fun to integrate into Naganadel's melee. For example, you could have examples that only work if the foe is poisoned, otherwise they can like jump or air dodge to escape it. While I do like their shortness, the launch angles, lag and knockback and shield applications on Naganadel's melee attacks is pretty sparse and could have perhaps done with a bit more description to make full use of the hitstun multiplier, on top of making the set's melee better. It can be a bit hard to tell how moves work together when not explicitly described to do so. One instance of the sparseness is the Down Special projectile: I think a projectile you can fire diagonally downwards would have a decent number of gameplay applications, like the fact that it deals upwards knockback beams it could pop foes up towards Naganadel for a combo. I also didn't catch how far or fast the sludge bomb projectile goes, or how long it lasts while it's out.

Some cool moves in the set were Up Special (reminds me of Sekuna's Up Special), Dash Attack (would be neat if there was a way for Naganadel to effectively position itself for the back hitbox to initiate a drag), B-air and particularly F-air. F-air's boomerang property especially feels like it would benefit from the hitstun boosting poison: I assume the returning hitbox knocks foes towards you, but doesn't deal that much hitstun without poison. Otherwise I could see it comboing into U-air!

Grab game was a bit weak and you didn't seem to enjoy writing it. What if Naganadel had a throw that coated the foe in poison, and they take some hitstun after X seconds if they were poisoned by NSpec? Alternatively, poison puddles or even weak stingers that'd deal no hitstun could stun the foe if they're exposed to them. Just a bit of an idea if you want to edit Naganadel, but I know you have other sets in the works.

Also, wasn't expecting Naganadel to summon an ultra wormhole in his U-throw. That'd be neat to incorporate in another Ultra Beast set as a full-fledged portal, especially with the Faller concept in the Sun and Moon games where a foe thrown through could have ultra wormhole energy on them that makes the UB pursue them.
 
Last edited:

WeirdChillFever

Smash Hero
Joined
Jun 10, 2014
Messages
6,496
Location
Somewhere Out There
5DE7D0E0-3BBD-4FCC-958F-FED55A2E40BD.png

[LOG: MYM 24. DAY 1. SUGGESTION. AVOID. DEAD CONTEST.]

“Hoy small fry, please do excuse me! My name is Rotom Dex, and I cannot imagine a stranger place to have landed! I just got here, and already I’m seeing supervillains, this sure would be a great spot to detect any anomalies in space-time. A particular phenomenon known as UB has never been spotted here, but by being so early I hope I can witness an opening day miracle.

Oh, would you look at that! It‘s already happ— bzzt.“

[PLEASE STAND BY: ERROR CODE; UB-01-WCF-24. FOR MORE INFORMATION, VISIT https://docs.google.com/document/d/1_7qQUNcG055O0oZJvQYvMy8pAwy_nCKoCo4ZqcyZkJU/edit]
 

GolisoPower

Smash Master
Joined
Sep 17, 2017
Messages
4,338
"'Dead'? For one who has attained mastery of the Warp, death is an impossibility. The Warp, the place forged from the souls and minds of all cognizant beings...including those who have delved into this strange realm. This world, where strange machines, Xenos, humans, and those unknown to us do battle in this vast world. Let this mark my return from the Warp! Come forth, my sons...FOR WE WILL CLAIM SMASH AS OURS!"
1614213223544.png
 

UserShadow7989

Smash Journeyman
Joined
Aug 13, 2007
Messages
306
I always thought this planet was so huge. But lookin' at it from space, I realized it's so small. We're just floatin' in the dark. ......kinda makes you feel powerless. On top of that it's got (...) festerin' inside it like a sickness. That's why I say this planet's still a kid. A little kid sick and trembling in the middle of this huge universe. Someone's gotta protect it. Ya follow me? That someone is us.

Looks like we've got a lot of villainous and frightening types already; hopefully this'll help balance it out some. Hope you all are having a good day today! Here's my contribution to opening day: a disgruntled chain smoker with a nasty attitude. So sit yourself down, relax... and maybe have some $%$%#@~! tea as you read it.
 
Last edited:

dilliam

Smash Rookie
Joined
Sep 17, 2019
Messages
24
"The people of the world are builders. But look into their hearts, and you will find they also have the power to destroy. I am that power. I am destruction. And I WILL destroy you."

EDIT LOG
(2/27/2021)
-added extra details and interactions to tilts and aerials, adjusted damage values slightly
-made document colors easier on the eyes
-changed Bio section to be more detailed
-added more images and references
 
Last edited:

Slavic

Ask not the sparrow how the eagle soars
Joined
Jun 5, 2013
Messages
757
Location
taco bell, probablyn't
tony hawk

tony hawk is a character created and designed by vans to sell more vans

stats
identical to falco

neutral special - kickflip
he does a classic kicklfip for some damage

side special - tweet
tony hawk pulls out his phone and delivers a somber tweet to remind us of our bleak existence. 5% damage

up special - hawk wings
tony's arms turn into wings and he flaps upwards, gains 8 midair jumps

down special - car
tony hawk spawns in a car because who cares there's no time

jab - spray paint
tony hawk sprays paint as long as input is held like bowser breath

dash attack - ollie
tony does an ollie

ftilt - board smack
tony hawk swings his board for damage

utilt - bam margera
tony hawk swings bam margera over his head for damage

dtilt - ramp
tony hawk turns the stage he's on into a quarterpipe

fsmash - falcon punch
tony hawk does ganondorf's nspec

usmash - grenade
tony hawk pulls out the neversoft eyeball and throws it above him to turn into a grenade

dsmash - manual
tony does the pogo stick manual trick

nair - kickflip 2
double the kicklfip baby

fair - madonna
on rhe rocks

uair - spine transfer
super effective on spines

bair - car
car is back

dair - stone tony hawk
tony hawk turns into stone kirnby and falls

grab game
tony's hands are too full for grabs because of his board and monster energy

final smash
christ air
duh
 

FrozenRoy

Smash Lord
Joined
Apr 26, 2007
Messages
1,261
Location
Las Vegas, Nevada
Switch FC
SW-1325-2408-7513
Celtic Guardian

(Yes this is a jokeset)

He's a Yu-Gi-Oh card

Stat-wise: He's like Marth and Link put together

Neutral Special: Sword Smash

Celtic Guardian holds the sword he has up high and he smashes it in front of him and it does a lot of damage, but is very slow, extra damage against shields causes them to break instantly so it's like a non-chargable Marth NSpec!

Side Special: Swing Dance

Celtic Guardian performs a four hit automatic attack that sends him forward each time, but he can cancel out mid-attacks with a jump to aggress at the opponent differently. The second hit keeps the foe on the ground, third hit prones the foe, fourth hit launches straight up.

Down Special: Counter

Celtic Guardian is a swordsman and all swordsman are Fire Emblem therefor Down Special is a Counter, stronger than Marth's but weaker than Roy's.

Up Special: Obnoxious Celtic Recovery

Swooshes upwards with his sword as a fast, high recovery that is invincible at the start and so makes opponents who try to gimp you or hit your shield be plagued with keysmashes in anger.

Forward Smash: Smash

Pulls sword back, swings sword forward, smashes opponents for high but risky damage, this can be a read if the foe is proned but you can't get it off SSpec since it's not in the air!

Up Smash: Stab the Sky

Celtic Guardian takes a page out of Giant Soldier of Stone's playbook and stabs his sword upwards as if to stab the moon, complete with an image of the moon at the tip of the sword to really emphasize how much he dislikes Majora's Mask. The tip is a high damage sweetspot.

Down Smash: Breaking Tradition

Celtic Guardian does not perform a sword attack and instead goes more the Fox/Falco route and does the splits, hits to both sides of Celtic Guardian, looks stylish, hits foes upwards and deals medium damage.

Jab: 1-2-3

Celtic Guardian does a quick 1-2-3 jab combo with epic unoriginality as if he was writing this set with a literal 10 or so minute timer to come up with it for a stupid joke challenge.

Forward Tilt: Obnoxious Celtic Slash

Did you know that the retrain of this card can't be destroyed by cards with a certain ATK power? The creator of this moveset does and so uses it as an excuse to cause this step-forward slash to have super armor. Is it tacky? If the attack whiffs, Celtic Guardian stops to ponder if it is tacky and so takes extra ending lag so it's riskier to use in neutral wowies!!

Down Tilt: stab

Crouching down, Celtic Guardian does a little poking stab forward, 30% trip chance but pops opponents up otherwise to start combos that tilt certain people who main King K. Rool.

Up Tilt: Slesh

Celtic Guardian does a forward-to-back slash in front of him, inwards and upwards knockback, a bit high for true combos, at 0% this sends opponents to a sweetspot to be hit by Up Smash sweetspot, to the moon if you will, it's like when the moon hits your big pizza pie like your eye that's amore.

Dash Attack: Gotta Go Fast!

Celtic Guardian glows blue like a blue blur and surfs his sword forward as a multi-hit attack because the moveset's gotta be written fast! The last hit is at a tech angle and deals 6% damage, the attack in total deals 11%, good movement on a slow (?) character.

Grab: Grab

Grab

Pummel: Pummel

Pummel

Forward Throw: Vicious Stab

Celtic Guardian performs an overly dramatic animation that takes too long to be described but is assuredly epic and then stabs the opponent and honestly this is just a spacing throw so you can feel appropriately whelmed every time you use this dumb flashy attack just to do 8% and reset neutral.

Down Throw: THE BOULDER!

Celtic Guardian tosses the opponent up and then rips out THE BOULDER from the Earth, he is an Earth attribute monster after all, which the opponent then painfully falls on for high damage, leaving them in prone on TOP of THE BOULDER for shenanigans especially since THE BOULDER can be hit around with BOULDER physics like a Warlord set with BOULDERS in it. For some reason THE BOULDER looks like the moon.

Up Throw: When The Big Pizza Pie Hits The Moon Like Your Eye

Celtic Guardian spins the foe above him like he's making pizza dough then stabs them with the moon slash for high knockback as a generic KO throw.

Back Throw: Back Throw

Look he foes the throw behind him what do you want from me it doesn't combo but it does a lot of damage movesets are hard that's why this throw isn't useful don't @ me.

Neutral Aerial: Spike

Causes Celtic Guardian to stab in front and below him so his sword looks like a spike, but to subvert expectations like Pixar subverts its villains it doesn't actually spike, ah-ha! The upwards knockback IS good for combos, though.

Forward Aerial: Ha Ha Funni Aerial

A quick sword slash that is great for combo strings and makes people who intentionally avoid combo characters sad that he can string it together like three times off of a Down Tilt. It doesn't deal that much damage at least and has no knockback capability.

Up Aerial: Triple Stab

Celtic Guardian quickly stabs three times above him, the third hit launches with mediocre knockback but solid damage, his primary aerial combo ender that can hit from a variety of combos but not his Forward Aerial for reasons, catches air dodges.

Down Aerial: Spike 2.0

Does a sweeping slash under him but unlike the subverted Neutral Aerial this actually works out if you hit with the middle of the blade and spikes the foe pretty strongly, it does 50/50 off of a Forward Aerial at high percents but it isn't a true combo what do you think Celtic Guardian is an italian??

Back Aerial: Hefty Swing

Heeeeaves the sword in front of him then performs a dramatic swiiiinging slash behind him, this is a huge damage read attack for his aerial launches but slower to come out than Metroid Prime 4 and with ending lag that takes as long to finish as Bayonetta 3.

Final Smash: Bye

Celtic Guardian just turns around and leaves the match. That's it, he's gone, he was just here for a dumb joke anyway and he doesn't have time to be degraded like that any more.
 

Katapultar

Smash Lord
Joined
Nov 24, 2008
Messages
1,258
Location
Australia
HEAVYWEIGHT MALE ANTAGONIST

The evil, gluttonous archenemy of Elefpi, the Lightweight Female Protagonist.

Take the first thing that comes to mind when you think heavyweight male antagonist. That's what he looks like. If you can't imagine that, Google Fist of the North Star villains.

Stats: King Dedede with Ganondorf movement

Side Special: Boulder
HMA tears out a boulder and throws it like Simon's Axe or wherever you want with more lag. It rolls with realistic physics and can be knocked around with attacks, it's a boulder so it automatically makes this jokeset good. It also has a bunch of other details that would make this move as long as a MYM6 moveset.

Neutral Special: Devour
HMA chomps down in front of him. Yum! He likes to eat children, but smashers will work just as well, swallowing them for as long as Dedede and getting bigger and more powerful until they escape. Can also eat boulders for power and spit them out, 10/10 hard interaction.

Up Special: Heavyweight Leap
Performs Dedede's recovery, because that's what all HMAs did in the Brawl era. You can do a quicker leap by tapping B, which is good because you bury crushed enemies and can crush boulders to send their pieces flying for another hard interaction.

Down Special: Warlordian Stomp
A sumo stomp with an earthshaking hitbox, but more importantly this terraforms a 3 grid wide and 2 grid deep section of the stage or knocks down a platform you're standing on. This lets you do really cool things like artificially lower your fat hurtbox.

Jab: A big punch that pressures shields, opens up foes and KOs at higher percents. But that's boring compared to this move's real purpose, which is to punch boulders around the stage despite having other melee moves with the same purpose.

Dash Attack: Curls into a ball and puts that big fat body to use. A keep-going dash attack, enemies are buried for longer the longer you rolled, a bit like Pokemon rollout. Gets stronger when rolling down a slope.

F-tilt: Makes a constipated motion and pulls in stomach like he's going super sayian, thrusting his belly like a true fatty on release. Has counter properties based on how long you hold it and how infrequently you use it, a bit like K. Rool's Belly Armour but it's not original for that reason. Also, if an enemy runs into you, they'll be stopped in their tracks and get stuck in HMA's fat before being bounced away, taking more damage the faster they were moving. A great counter against those pesky speedy female protagonists!

U-tilt: Crouches down before thrusting his head up in anger, a bit like K. Rool's U-Smash which automatically makes this move awesome because Rool is MYM's favourite character. This input would be more fitting on an U-Smash, but Smashes need to make projectiles or traps or be gimmicky to be cool, so that wouldn't work.

D-tilt: Swats the ground with his big fat hand to make a localised quake. Pops up boulders and deals slight upwards knockback, which can read into your devour or even start techs if the foe is popped up out of your Down Special pit.

F-Smash: Slams his fists together angrily before swinging back and throwing a big, clumsy punch that is nonetheless mega powerful because HMA is, after all, a HMA. If he misses, he'll roll forwards hilariously and tumble onto his back into prone, letting those old tacky MYM11-12 sets with no hitboxes on half their moves experience the modern thrill of tech chasing. On a cooler note, each of the punches on the charging animation have a hitbox, and if HMA hits something he'll get more and more cocky and go farther when he punches, something you can use your boulder for or even your DSpec pit by chipping away at the sides of it, letting you form a tunnel that caves itself at the end of the attack.

U-Smash: Jumps up and comes down with a fat, meaty ground pound, dealing damage on the way up and down as a mean one-two punch against anyone idiotic enough to shield really close to him. HMA goes farther the more he charges and catches fire on the way down if he charges for at least half a second, which is really tacky but is okay because the fire stays around as a cool effect that burns nearby opponents. And if you catch a foe when coming down, they'll catch fire as they descend and you'll get more fire. You can eat the fire to spit out fireballs, throw fiery boulders or terraform the fire, which strangely creates a lava pit like the lava on brinstar.

D-Smash: Stomps down and creates two earth pillars on either side of him, which act as weak walls or can be thrown or attached to boulders you dislodge. You can even stomp in a pit to create the spikes on an angle, and knock foes into the spikes to impale them, turning HMA into a genuine combo heavyweight!

N-air: Curls into a ball in a keep-going N-air, because keep-going Dash Attacks aren't good enough, building momentum and rolling faster across the stage the longer you roll. Those idiotic LFPs deserve it for not pressuring the fat man! By cancelling the roll before you land, you can fake out those silly opponents and bait out jumps to catch with your deadly dacus U-Smash.

F-air: Meaty Ganondorf punch that destroys shields and boulders alike. Also makes a shockwave that sends your constructs flying and shakes the very foundation of terraformed earth.

B-air: Impales the foe with spikes on the back of his outfit, like he's Bowser or a Koopaling, a reliable ranged attack for trading with those sword-wielding girlies. Can also impale himself into the ground for a stance where he can punch opponents, or press down to drop on them. He can also impale himself against his boulders to go rolling.

U-air: Swings his hand up greedily with a grab hitbox, but deals its regular damage against bosses. On grabbing a foe, he swings them around himself in a circle before throwing them up, dealing big upwards knockback which he needs because U-air has a grab cooldown. If he's close to the ground, he'll instead slam them into it for a prone situation. He can even slam foes into his boulders to bounce them off on odd angles.

D-air: Does a belly flop with a lingering hitbox, getting more super armour later into the move. Take that, combo characters! He also has an anger mechanic that makes the armour come in earlier the more he was damaged before landing, because HMA's temper is shorter than those ****** female protagonists who dare to oppose him.

Grab: Has Brawl Dedede grab range (which is really good!) and lifts the enemy into the air sadistically like Flame Choke. Can also grab boulders and earth spikes, because of course.

Pummel: Slams the foe into the ground, creating pieces of earth that he can eat and knock around with F-air landing, and he can move around too to scatter chunks across the stage.

F-throw: Slams the foe into the ground so hard he makes a pillar of earth that punches them along, like he's a Fullmetal Alchemist character. The pillar stays around, of course, and HMA can throw it or use it as a slope, even Warlordian Stomp it to send the pieces flying diagonally downwards and pop his enemy up for a meaty heavyweight combo.

B-throw: Folds up earth around the victim to trap them in a ball of compressed mud and rock before hurling them away, which they need to escape from by dealing it damage or they'll go flying off the screen to their death. This is automatically a good move for being creative, but also if the foe destroys the cage while they're on-stage, the pieces will fall and HMA can use them as throwing items or eat them, meaning the foe is encouraged to destroy it when the cage is off-stage to deprive HMA of his goods. Use with lots of ground behind HMA, because this throw is awesome and it kills even earlier than your really good F-throw even near the ledge. Also, if you throw a foe down in a pit they'll get thrown low enough that the rock cage will roll along the stage, even slower than before so the foe pretty much has to destroy it early or give HMA a ton of free time and even catch up to them.

U-throw: Jumps into the air and crashes down with the foe Flying Slam style, dealing lots of damage and letting HMA position himself near a pit or whatnot. Deals more damage the farther he goes up, which is great on Battlefield as HMA can fall through platforms. But who needs Battlefield when you can make your own platforms and pits and flow from F-throw pillar to deal huge 25%, am I right?

D-throw: Throws the foe to the ground and stomps on them brutally several times. This bruises the foe's ego, literally, as they realise their powerlessness against this mighty heavyweight male antagonist and their power drops by 0.8x for it, which lasts for 10 seconds and is great against the various bits of heavy armour on HMA's regular attacks that I would point out if he got a real set. Oh, and it also puts the foe in prone, because that's what all the new kids do with their D-throws.

Final Smash: Summons a swarm of generic evil post-apocalyptic mooks, because Smash Ultimate style finishers are for weak little female protagonists. HMA can move around while his minions cowardly bully the foe, or he can eat his minions to power up or throw them around like boulders using Side Special.
 

Rychu

Thane of Smashville
Joined
Jul 5, 2010
Messages
810
3DS FC
1908-0105-4965
COOKIN UP SOME COMMENTS WITH RYCHU
1614315800322.png

It's that time again folks. Check this handy page-one post for updates on movesets commented in this handy-dandy google doc linked in this adorable image. I should be getting some comments out soon, so consider this the hub for all my thoughts and opinions on your hard work!
  • Syndrome
  • Shigaraki
  • Huntress
  • Dr. Forrester and TV's Frank
  • Naganadel
 
Last edited:

cashregister9

Smash Hero
Joined
Apr 4, 2020
Messages
8,640
I shall change the fate of Smash...

And I will clear it with No Continues!


EX-AID PLAYS THE GAME

Emu Hojo AKA Kamen Rider Ex-aid is the titular protagonist of the series Kamen Rider Ex-aid. Emu is a genius gamer and a doctor and his goal is to rid the world of the deadly Bugster virus, a Virus that takes the form of a monster from a video game. Ex-aid and others with the Game Driver are the only ones who can combat this virus. There are several strains including one themed around Pac-man. Fighting this virus took Ex-aid to the world of Smash Brothers where he will compete.

--Gimmick--
Ex-aid has several forms he can attain by leveling up with Game Cartridges named Gashats Ex-aid can obtain these by either beating opponents up, finding them on the ground. Ex-aid has a few Gashats that he can use.
These forms change Ex-aids appearance and affect certain moves, Ex-aid can only have one transformation at a time

Gekitotsu Robots : Ex-aid's Grabs and throws are more powerful
Shakariki Sports: Ex-aid's Specials throw out a weak Bike wheel projectile
Juju Burger: Ex-aid has increased speed but may occasionally trip
Dragoknight Hunter Z: Ex-aid enters an altered state where he can fly around and shoot fireballs in a fashion similar to Yoshi's old Final Smash, as well as slash with the 2 blades , The downsides are you can't use the rest of Ex-aids Moveset and the form only lasts for a little while.
Mighty Brothers XX: A Second Ex-aid Appears and they now function similarly to Ice Climbers.
Maximum Mighty X: Ex-aid becomes a superheavyweight and grows larger.
Hyper Muteki: All of Ex-aids stats become multiplied by 2 and gains super armor for Smash attacks

A few of these Gashats have some requirements though
To use Dragoknight Hunter Z, you need to collect 4 Dragoknight Hunter Z Gashats
To Use Hyper Muteki, you need to be in Maximum Mighty X Form

The Gashats are easily identifiably as they are floating objects with the game logo underneath it.

--Stats--


Speed: Same as Marth

Weight: Same as Marth

Fall speed: Same as Little Mac

Air Speed: Same as Marth

Initial Dash: Same as Link

Run Speed: Same as Marth


--Basic Attacks--


Jab: A punch with Ex-aids left hand, A kick with is left leg and a hit from the Gashacon Breaker with his right. each hit does about 3% with the final hit doing 5% and has some fixed knockback

Side tilt: A Hit downwards with the Gashacon Breaker

Up tilt: Ex-aid performs an uppercut

Down tilt: A slide kick

Dash Attack: A Slash with the Gashacon Breaker's Blade Form

Get Up: Ex-aid hits around him with the Gashacon Breaker

Ledge Get Up: Ex-aid performs a somersault

Side Smash: Ex-aid charges up an underhanded slash with the Gashacon Breaker Blade

Up Smash: Ex-aid charges a slash upwards with the Gashacon Breaker Blade

Down Smash: Ex-aid spins around with the Gashacon Breaker Blade

Neutral air: Ex-aid spins his right leg in the air

Forward Air: Ex-aid hits downwards with the Gashacon Breaker

Back Air: Ex-aid Kicks backwards

Up Air: Ex-aid performs a flip kick in a fashion similar to Terry

Down Air: Ex-aid performs a Dive-kick, it is a stall and fall


--Specials--


Neutral: Pachi Pachi Eye Beam, Ex-aid turns around and shoots a beam from the face on his back, it works similarly to Byleth's arrows.

Side: Bakusou Critical Strike, Ex-aid mounts his bike Kamen Rider Lazer and charges forward with intense speed, the front deals more damage and it can be turned around but unlike warios it cannot be destroyed or left unattended.

Down: Mighty Critical Strike, Ex-aid Charges up a powerful rider kick and once charged he jumps into the air and swiftly dive kicks downwards, it deals big damage and has a sweet spot on his foot

Up: High Jump, Ex-aid jumps really high off of a High Jump energy item

Final Smash: Maximum Hyper Critical Sparking, Ex-aid instantly becomes Hyper Muteki and slash forwards, if anyone gets hit they are sent into a cutscene where they are hit by several Rider Kicks from not only Ex-aid but from Brave, Snipe, Lazer and Para-DX and the opponents eventually explode.


--Grabs--


Basic grab: Ex-aid grabs the opponent with his left had

Pummel: Ex-aid punches the opponent with his right hand

F-throw: Ex-aid pushes the opponent forwards

B-throw: Ex-aid kicks the opponent backwards

U-throw: Ex-aid throws the opponent upwards

D-throw: Ex-aid dropkicks the opponent


--Animations--


Entrance: Ex-aid starts in Level 1 but quickly levels up to level 2

Up taunt: Ex-aid sticks his fist up in the air, a pose he has been in several times.

Side Taunt: Ex-aid sticks his right hand out in front of him with the palm open and says "I'll clear this with no continues"

Down Taunt: Ex-aid will pull out a handheld game and starts playing it

Victory 1: Ex-aid sticks his fist in the air

Victory 2: Ex-aid becomes mighty brothers XX and matches the faceplates together

Victory 3: Ex-aid holds a gashat and turns away from the camera.

Team Victory: Ex-aid sticks his right hand out


--Alts--


1: Ex-aid's default Level 2 design

2: A color scheme resembling Kamen Rider Brave

3: A color Scheme resembling Kamen Rider Snipe

4: A Color scheme resembling Kamen Rider Lazer Turbo

5: A Color Scheme resembling Kamen Rider Para-DX

6: A Color Scheme Resembling Kamen Rider Cronus

7: Ex-aid's costume changes to resemble that of Kamen Rider Genm

8: Ex-aid's costume changes to resemble that of Dangerous Zombie

--Kirby--
Kirby gains Ex-aids Eyes and Hair as well as the face as seen on the back of ex-aid

--Stage--
CR: The stage starts in the main room with 2 walls and you can only be KO'd from the ceiling, the cameo in the background is Poppy Pipopapo. After a little bit the stage select screen pops up and the layout changes to be reminiscent of Final Destination and the background is one of several Quarry's or Mountains. The cameos change to be a battle between several Bugsters and the main Riders like
Brave, Snipe, Lazer Turbo, Genm, Poppy, Para-DX, Ride Player Nico

--Music--
Victory music: The Game Clear! Notification seen in the series

--Series Icon--
The Kamen Rider symbol

--Boxing Ring Title--
The Gaming Doctor

--Misc--
The second Mighty Brother when Mighty Brothers XX is activated instead of being equipped with the Gashacon Breaker, he is equipped with the Gashacon Key Slasher.

When Ex-aid is KO'd you can hear a narrator say "Game Over"

The higher Ex-aids Percentage is the lower his rider gauge is.

Collecting a Gashat plays the tune that is associated with it.


I'm new to this thread, sorry if I've done something wrong :^)
 
Last edited:

Katapultar

Smash Lord
Joined
Nov 24, 2008
Messages
1,258
Location
Australia
cashregister9 cashregister9 Welcome to Make Your Move! Ex-Aid is definitely an unusual character pick for a new set, we have gotten some Kamen Rider sets in the past but only really from one setmaker. One of those sets is actually for Kamen Rider Cronus, funny enough, which you might be interested in checking out. Also, the image links to Ex-Aid's transformations and moves don't seem to work - might be a good idea to save them on imgur, which I know you know about because your signature image links to it. Wikia images didn't seem to work out.

To start with the basics, a little detail goes a long way: damage is a vital detail, along with knockback and lag. Without such details, it's hard to get a feel for exactly how Ex-Aid plays, especially his throws which simply knock a foe in X direction. For all we know, U-throw could have high base knockback but isn't a kill throw, which B-throw could do like 9% or even 12% and be as good as Incineroar's B-throw for KO'ing! More than anything, I'm very curious about the specifics behind Ex-Aid's item mechanic. How easy it is to knock them out of an opponent? (maybe it works like Kirby losing a copy ability when launched?) Do they spawn randomly? How long do they stay around for? When you say he can pick them off the ground, does that mean they spawn like regular items when items are turned on? Transformation-wise, how much does his grabs get boosted by? (1.2x damage sounds reasonable) When throwing out the wheelie, does he do so immediately upon transforming, and what are the properties of the wheelie?

Make Your Move tends to be pretty detail-orientated, a fact that's really pronounced by the Syndrome moveset at the top of this page. You don't have to go that far, of course, but adding a few basic details to what each move does and how it functions would help give each of them meaning. If you check out some other sets posted in this thread, you'd probably get a good idea of the details that can go into a basic moveset. There's a lot to learn and know about setmaking-wise.

Also, this has nothing to do with Make Your Move, but I do love seeing Ryza and Saber (and Neptune and Miku to some degree) on the "select screen" of your signature - I actually made a Fate (Jeanne Alter) and Atelier set last contest myself. I don't know if you would be interested in making and posting sets for any of them in our thread (or even a non-main character from one of those series you really like!), but I for one would be stoked if you did. I like your taste in games. Also, I looked at the Saber and other spirit boards from your support threads, and I REALLY love them. They would be 10/10 extras in Make Your Move.

It was a bit surprising to hear that Cid was intended to be a simple set; the set’s some 17k length (technically 16k if intro and closing thoughts aren’t counted) from your detailed writing style and talking about melee applications made Cid feel more complex and ambitious for me. Personally, I didn’t think that any of the inputs were too simple, maaaybe aside from his B-throw (if only because its gameplay effect is deceptively simple for its flashy animation). Even the most basic attacks have decent applications that fit Cid well for his powerset.

While not as conceptually or melee compelling as Wriggle imo, Cid is still a great set that’s one of my favourites right now and not too far from the Nightbug in quality. His high start-up Specials in Down Special and Neutral Special are a neat touch. I particularly liked Up Special, B-air, F-throw (feels VERY Final Fantasy like), and D-air, U-Smash and B-air were neat. But D-Smash was especially amazing, easily my favourite move in the set thanks to the timer adjustment effect – could easily be a Special move in its own right and be the focus of a set. Cid’s grumpy animations and the alterations to your writing style to match his personality, pretty @$#%&%g fun stuff.

Neutral Special has a rather unique knockback angle, launching foes 1 grid below where Cid is if I’m not mistaken. If Cid was grounded, I could see this knocking the foe down into his feet for a tech situation, a gameplay aspect I don’t think was brought up in his set. It seems like it would work well in his moveset, particularly with his F-Smash to start a tech chase. On a different note, I could see the radial knockback from Down Special missiles being used to launch your foe horizontally – maybe towards you for a combo.

I do wonder whether the D-Smash dynamite dealing radial knockback is a bit much, as you can throw around the dynamite around and could potentially spike the foe for an early KO based on where you hit them – it’s meant to be a finisher, anyway, would probably be fine dealing knockback on a more conventional angle. Other than that, I have little to no issues with Cid. I do wonder if maaaybe he could have been a bit more concise for writing simple sets in the future, but it’s hard to say as nothing of the set’s details really stuck out as being superfluous.

Great work on this one! It was a neat surprise to see a grumpy male protagonist from you, as unexpected as Kupa posting Syndrome (in spite of knowing you were doing Cid for the FF7 movement) – when I read your Smashboards post linking to Cid, I thought you made a set for a cartoon mobster ala Looney Tunes or something.

Also, we now have 2 movesets for Final Fantasy Cids – the last one was posted all the way back in MYM4, that being Dr. Cid.

Law's Room is a very unique and awesome concept for MYM and one that's well-balanced, you make sure it never gets too out-of-hand in the melee. I"m even okay with the auto-counter, which I was a bit unsure about when I first saw it preview-wise but it has weaknesses and works in well with Law's slower, more committal attacks. Some favourite melee attacks that work with the Room are F-tilt for knocking in enemies towards you, D-tilt to turn the ground ahead of Law (in the Room) into a danger zone, Dash Attack to expand your middle hitbox, D-air to snipe at enemies below you and F-Smash's repositioning and comboing shenanigans. Even outside the Room, the sword buffering mechanic is a genuinely fun and inventive: it's a great way to give Law lag for his Sephiroth-esque range while still turning him into a combo character if he can land a hit. It feels like a better-executed version of Broly's Sayian Rage, and I rather enjoyed the idea behind that mechanic.

I don't have any major issues with Law's set. If anything, I wonder whether Injection Shot could have been incorporated more into his melee game, as it's a powerful finisher that benefits from sword buffering. It might seem awkward that he can't use it outside Room, but it actually works quite well from his combo potential in Room and keeping foes within reasonably close range for the Injection Shot. I could see a ranged Room attack, particularly D-tilt, F-tilt or Dash Attack setting up for a buffered Injection Shot sweetspot if he times it when the Room goes down. You might even want to give the Injection Shot a lot of shield damage and stun to really sell how dangerous it is to block: the would need to spot dodge it, but that can be a 50/50 if Law just runs in with his high dashing speed.

I'm a tad unsure how well F-Smash works outside of the Room, in landing the 2nd or 3rd hit when I can't see them hitting multiple times at higher percents, but it's definitely an ambitious move and I appreciate you using my F-Smash suggestion. The move is particularly awesome in Law's Room, but being able to land the combined damage of all 3 hits on a foe (or at least that's the impression I get) does seem a bit extreme - that's like 50%+ for one hit. Maybe if you hit the foe a 2nd of 3rd time in the same F-Smash, they take a little less damage? You might also want to say whether Law can connect with all 3 hits on a shielding foe outside the Room, and if he can maybe give him a shield damage nerf ala Lucas' D-Smash. Shielding is definitely something to take into consideration with melee and could make the attacks compelling, as I talked about with Injection Shot. Finally, the throws could perhaps be considered a little simple when Law could do fun things power-wise, but they're acceptable and I do like D-throw giving Law his sword buffering to start a combo.

Law is hands-down your best set, and a shockingly huge improvement over Phoenix and Broly in such a short time - both set and presentation-wise. This is particularly commendable because Law goes for a bigger melee focus over more MYM'ian stuff like projectiles and traps (a bit like Phoenix was), the former requires more setmaking experience to make pleasing in my opinion. And the melee in this set IS pretty solid. Great work here, I'd love to see more Once Piece/Shonen Jump sets if you were in the mood. I'd especially be interested in you doing a more MYM'ian style moveset, as Phoenix last contest ended up having decent ideas and I enjoyed him more than Broly.

Shigaraki continues the welcome trend of one MHA character per contest since MYM21, with you and I alternating between a boy and girl. Welp, if no one else or you or I posts a MHA set this contest to break the trend, I'll probably have to make another female MHA character in MYM25. As the more or less main villain of MHA, Shigaraki is definitely a great character choice; this incarnation feels like it's for him early in the series, leaving him open to get a set for one of his future incarnations.

Decay is a mechanic I rather dig. Decaying the foe's feet to extend their jump frames would force them to commit to air approaches, and I like how this works off shield decay as such a foe would be more inclined to take to the air if they can't rely on their shield. These feel like de-buffs you'd see in an FA set, which makes a lot of sense for Tomura given he's an edgelord. Face decay is also interesting in effect and execution: suddenly giving the foe's attacks +4 frames on moves that come out on frame 9 or later is a tad weird, it could be like like +2 frames for every 8-9 frames of start-up their move has. While Tomura doesn't have too many big pay-offs in his own set, it's rather neat that it all comes together for his heavyweight Nomu. For leg decay, I think there's an opportunity to talk about potential synergy with F-Smash: my understanding of that move is that the rubble spray starts out as a low hitbox but gets taller the farther it goes out, which could leave Shigaraki open to attack if the foe sees this and jumps over it. But if you've decayed the foe's legs, they'll have to jump preemptively to avoid this, all the more necessary because of F-Smash's decay extender!

The ability to dislocate your hitbox 4 grids away from you is rather neat. It probably wouldn't be that difficult to input if you press A + B, and while Tomura's attacks are fast they're not disjointed so foes can hit them. While you can do cheese with warp D-air, I like how the warp gate displacement is largely balanced out by Tomura's weak attacks. As far as lingering portals go, I wonder if there's an opportunity there with Dead Hand: for the air version of Side Special, maybe the foe can't escape if the game detects there is ground beneath you, and the longer Shigaraki holds the foe's face the more it gets decayed! And like, maybe just for Side Special, Tomura could extend his chokehold descent artificially by falling through a looping warp gate, maybe once per air trip so he can't loop infinitely.

As far as moves go, I do think F-throw's decay bonus is redundant when D-throw before that already puts foes into prone and you may want F-throw's combo starting potential. I think F-throw's decay bonuses should be moved to D-throw so you get a bigger frame advantage over the foe with the right conditions. For F-throw, or maybe if you hold the input so you get the normal variant too, Shigaraki could thrust his hands into the foe's chest/abdomen to decay it, causing them to take extra damage and/or knockback if you hit them from the front, but the throw isn't good for comboing or killing or anything.

I heard you weren't 100% sold on Nomu's execution (it does feel weird for Shigaraki to ride on the Nomu's back). If anything, I think this part of the set suffers largely from vagueness: Nomu has a lot of moves, and as a minion it's hard to tell which moves it would use in which situations to synergize with Shigaraki's gameplan. It can feel a little disconnected from Shigaraki's set. You could get around this by stating and limiting the Nomu to a select few moves in a certain stance, maybe based on the foe's reactions like Syndrome did. For example, Nomu could use Jab only in defensive mode (and U-tilt from enemies above, giving them counterplay against Nomu as they bait out its slow attack and punish it), and it prioritizes Dash Attack when approaching in offensive move, so foes have a clear way of countering the Nomu. While Nomu does have weaknesses, the tag team of Shigaraki and Nomu feels rather powerful when they both have high dashing speeds (it'd be a bit like if Sheik's Neutral Special summoned an aggressive Special-less Donkey Kong), so elaborating on the Nomu's behaviours and talking about it would improve my opinion on the set. I do like the decay interactions with Nomu though, like with Dash Attack, and talking about regular warp gates more than with Shigaraki given Nomu has the better body type and heavyweight power to make use of them.

All and all, Tomura is a solid set and feels like a 7.5/RV for me right now alongside Law, which is pretty good in his current state and shows a lot of promise if your future works are at least this good. Keep up the great work!

Teridax is a BIG improvement over your MYM23 works, especially his Down Special which has a ton of depth to it by comparison. I tend to get pretty nitpicky with minion balance, but Teridax’s single minion feels fair and he deserves whatever projectile sponging he can get from it given his super heavyweight status. It’s pretty fun how you sell the Fear damage multiplier as being a terrifying prospect for the foe. As I may have mentioned when previewing the set, it would be neat if you could make a Rahkshi use their Power out of their basic attack to potentially combo from it. And given some of the Rahkshi attacks don’t have huge hitboxes other than Fragmentation, I think it would be fair if Teridax could make his minions use them during HIS attacks (but not during his end lag?), but you or others might disagree at this.

A number of Teridax’s non-Specials and Smashes could be considered vanilla, but as FA said melee is something you would develop over time, and I do appreciate you going back and adding to his Standards and Aerials. Neutral Special and Side Special are a tad plain to me, both being chargeable projectiles, but they make sense for his minion-based playstyle and vortex interactions.

I almost wonder whether there are more opportunities for the Neutral Special, like talking about charge canceling like Sephiroth can for mix-ups - or maybe the ball could have a hard interaction with Rahkshi, like temporarily breaking them into pieces that swirl around the ball and deal light damage that sets up foes for the main hit? (“If the button is held for anywhere between 27 and 129 frames, the red sphere will shift into a slightly larger pitch-black orb with various Bionicle pieces swirling around it.”) Maybe you could even have an option to spawn the Gigaflare variant over a Rahkshi/the shell to mix up foes and add to Teridax’s scheming nature? Or spawn any of his variants in front of a Rahkishi; could have fun implications with Vortex or even Teridax’s F-Smash to catch his own NSpec projectile, like if the Rahkshi is facing Teridax because their target ignored them to go after Teridax. Punish the foe for their cowardice!

Some of Teridax’s kill percents feel pretty underpowered for a heavyweight. This I can understand, kill percents can be tricky to grasp and it can be better to stay on the cautious side (and we’re likely assuming kill percents are from the centre of FD). It’s mostly on the Standards and Aerials, which I feel could have their kill percents halved and then some: 500% is VERY late for a Jab heavyweight (assuming it’s meant to kill), I’d say you could get away with making it KO at like, 115% or even 100% given I get the impression the foe can shield to avoid the second hit after being hit by Jab 1 (a nice touch of melee here). F-tilt could kill at maybe 150%, it’s a quick move but Teridax is a heavyweight. Maybe U-air could KO at 200%. While Teridax does have Fear and you may have accounted for this in his kill percents, he honestly deserves such an early kill if he can land the status effect, especially his own. These numbers don’t detract from the set for me though, just a suggestion to help Teridax sell his heavyweight prowess and power.

In any case, good work on this set dill. I’m definitely looking forward to more sets from you, especially from what you’ve previewed with Koshi and Thanos: concept, character and presentation-wise. I could see those two or another set improving further in your setmaking!


Hugo is a fun set and a good improvement presentation and writing-wise, but not on the same level as your MYM23 trio for me. While he has a lot to him for his mechanics and light/medium/heavy attack variants, the majority of his moveset felt a bit vanilla and not that conceptually compelling to me. I did feel your MYM23 sets had room for improvement in their melee department and bringing their attacks together, and on a melee-focused fighter like Hugo that’s important for making him exciting. It’s mostly because the set doesn’t talk about how attacks or different options work together, like 50/50s on attacks, using your heavy moves as threats or talking about the mix-up potential on the Specials, that it’s hard to see feel justified on what a number of moves are supposed to do for his set. It’s pretty early in your career though, and something you’d develop with reading and writing more sets; it’s good that you’re reading this time around. Fighting game sets are also one of the harder genres to tackle imo, needing a good deal of melee knowledge to really sell it.

In all fairness, super heavyweights can be tricky to get right (but very appealing when executed well): Hugo pushes these boundaries in a fun way, being straight-up heavier than Bowser and nearly as tall as standing Ridley - I approve in both areas! It certainly makes for some debatable balance and frame data, his fastest moves coming out on some frame 9, yet he has a lot of attack range and cancels into Specials. It’s not a huge problem for me though, but would be interesting to hear what others think (particularly the heavyweight gurus Smady and Kupa).

On the mechanics, I particularly like the damage scaling mechanic to keep Hugo’s combo damage in check, it’s kind of a surprise we haven’t really seen this mechanic in MYM, let alone from the more prominent SF sets from Smady and Froy. Crush counter is also a fun mechanic; I enjoy moves that get a bonus from interrupting enemy moves, though it could be trickier to pull off with Hugo given his slow frame data.

Some of Hugo’s regular attacks can cancel into Specials: why not talk about these options? For instance, you could add bullet points at the end of the move stating the options and mix-ups Hugo could get from canceling into a Special. For instance, light F-tilt can special cancel: I could see this canceling and possibly confirming into Hugo’s Neutral, Side or Down Special. But if it didn’t confirm, just the threat of Hugo canceling could force the foe to react in a way you can exploit! Like canceling into your Neutral Special grab to stuff out enemies who hold out their shield for too long against Hugo’s F-tilt. Given the start-up lag on his attacks, canceling to Specials would feel pretty beneficial for Hugo.

By the way, you might be interested in reading Smady’s Hugo set from MYM22, which was pretty popular and could give you some pointers on doing melee. Regardless, I think you'd enjoy him for the simple fact that you already did him and really like him as a character.

All and all, Hugo is an interesting character choice and I enjoyed him for his experimental nature. Tackling this style of moveset was also a good exercise for you, I’d say, arguably a bit more “normal” than your MYM23 sets but still out there in his own way. Your casual writing style made for an enjoyable read, like talking about why you made Hugo and not G or Abigail in his Up Special. That, his extras and huge size and weight certainly helped to distinguish him from Smady’s Hugo. Be interesting to see what you do next and whether you have any more SF characters in mind!
 
Last edited:

Torgo the Bear

Smash Lord
Joined
Mar 30, 2019
Messages
1,176
Location
Grinding for Maushold Family of Three
NNID
u2outofcontrol
Switch FC
SW-1209-7008-3905
COMMENTS!

I'm not usually sure what to say on these, but I hope to be able to say something for each set I've read so far. If anything, this can at least let you know which sets I've read.

Anyways, check 'em out over here if you care: -MYM24- Torgo's comments and whatever - Google Docs
 

BKupa666

Barnacled Boss
Moderator
Joined
Aug 12, 2008
Messages
7,788
Location
Toxic Tower
TOMURA SHIGARAKI:
Despite falling into and executing the duo character genre rather nicely, the aspects of Shigaraki I'm highest on are the mechanical quirks he brings incorporating Decay within his own base moveset. I toyed with jump-squat manipulation in passing with skekMal but it feels more centrally integrated here, limiting movement in such a way that navigating crumbling portions of stage and Nomu becomes more treacherous. Debuffs based around enemy attacks' frame counts also is rather novel, seemingly a disproportionate frustration for heavyweights, but then again those are precisely the match-ups where Shigaraki could find himself dying at ludicrously early percentages if not careful. I don't know how incentivized players would be to go for Shigaraki's insta-KO by default when leading into one of Nomu's stronger attacks would seem to get the job done faster, though given his lengthy respawn condition, it's good that he's not overly reliant on his summons and has a distinct KO method beyond just comboing his foe to insane levels.

Far and away my favorite Decay components are its applications on shields as well as on impact with the ground. Turning shield-poking (and to a lesser extent slower shield regeneration) into a conscious tactic as opposed to what often can feel like an afterthought perk in MYM gives Shigaraki the feel of a combo character I'd actually like to play, not overly reliant on pressing an aerial over and over. Meanwhile, a by-no-means comprehensive rundown of cool bits with the stage decay includes forced ledge-trumping (another under-explored mechanic), covering getups as the decay spreads out underneath a prone or rolling victim and Nomu's interactions (with his bonus pitfalls on some moves and D-Throw facial application).

Other aspects worth touching upon — Shigaraki's use of portals as a means for distanced attacking didn't reinvent the wheel, so to speak, but had nice melee relevance from the standpoint of bolstering otherwise close-ranged hitboxes. Their more interesting applications, I think, came from their capacity to move foes and Nomu around the stage, the former into more hairy situations, such as the aforementioned ledge-trumping, and the latter to save what otherwise would be Little Macian early gimps. On the whole, I have no personal issue with Nomu making use of AI; Shigaraki does have the option to take direct control as needed, so it's not as though the entire second moveset is outsourced to a computer. This is more a case of you having the potential to add even more depth by delineating more of what the AI does, if you so choose. As I mentioned in chat, you could note one, two or three approaches, combos, KO preferences, etc. Nomu will attempt in different circumstances (perhaps he'll be likelier to try pitfalling or other moves that play well off of decaying foes, at times when they specifically are decaying?). In any case, others have expressed a continuing preference for Mami as an overall package, and though I agree at this point, Shigaraki really isn't that far off. He portends great things for your future output, and has me even more eager to see what comes next from you than I already was.

THE HUNTRESS:
Off the bat, I really like your incorporation of Steve-esque moveset constructs that transcend the regular inputs themselves with the pallets. From a control standpoint, I'm a little lukewarm on the presence of multiple walls perpetually around the stage. They're not too obstructive, in that characters can vault overtop (in what would be some A+ animations for some) and destroy them if need be, but in terms of obstructing projectiles, knockback trajectories and so on, I think the pallets could factor more into match gameplay than they're given credit for within the set. That being said, I do like their movement-based interactions with Huntress' invisibility and hatchets. With the latter, I do find myself thinking a smaller number of dash-dance inputs would be best for balance. Apart from post-KO trolling, I very rarely have seen players manage to get off more than half a dozen or so dash-dance inputs mid-match, and Huntress requires 20 inputs to dislodge a single damaging hatchet, of which she can stick up to five in one foe (theoretically leaving them to moan horrifically back and forth with 100 dash inputs unless Huntress chooses to throw them first). That, and reducing the pummel damage necessary to get rid of totems, stood out in terms of rather exacting conditions for foes to meet in fighting back, ones a competent Huntress could punish in most instances.

Onto aspects I enjoyed more as-is — Side Special's rope was a quality incorporation of the tether trope, and the idea of swinging down while tethered near the edge is a fun, cartoony flourish with legitimate ledge-guarding applications. The Hex effects on shields weaves in some of that specific frame data I enjoy reading with modern MYM debuffs, and incentivizes Huntress to go for more grabs to boot. Within the melee, I thought grab-game on the whole served as an understated highlight. Huntress brings into play that DK-esque taking-you-with-me grab, relevant in the context of positioning foes in relation to her pallets, and then expounds upon that with the attributes of specific throws. Namely, I've not seen base knockback and knockback growth receive this level of focus in recent memory, but for Huntress, they add great intrigue to what otherwise could be a series of straightforward, albeit brutal animations. That's also coupled with how those properties connect well with the meat of Huntress' kit, as she can enhance what victims experience based on their level of bleeding or where they get kicked, if they've got multiple hatchets embedded. Huntress has some rougher balance edges but for the most part is a quality sum of unique parts, and a great returning set for you after your contest off. Welcome back!

DR. FORRESTER AND TV'S FRANK:
I have fond ancient-MYM memories of sets in the vein of these two, centered on one or more gimmicky humans that fight by doing little else aside from summoning disparate props from their source material. Clay and Frank are the rare duo who can pull this off without delving into forced uniqueness territory, because as you note, invention-of-the-week is their thing. There's also the general throughline of having to manage Frank, whether that's weighing how long to keep him hooked up to the Cholester-do-all or deciding to commit him to research. And the ensuing buffs themselves generally escalate at what I could consider a reasonable rate, enhancing some already-neat concepts like the Stooge gun's hand sweetspot, D-Air's damaging get-up attacks and parts of grab-game healing Clay.

Where the set starts to lose me is in some of the balance, including both the timing commitments for some functions and some functions themselves. There's less room to push the envelope as to how close Frank gets to overeating when it takes a whopping six seconds to unplug the Cholester-do-all. From a conceptual standpoint, I can appreciate the player needing to think ahead as to how much he can eat without being outright killed, but in practice, having Clay's battery power tick up in four-second intervals while the player has to monitor a different six-second timer for Frank's health seems disorienting. Given that Clay's default moveset isn't exactly gimped, I also can understand having Frank be killed off permanently per stock (in that respect, it's like Banjo having a limited number of Wonderwing uses), though I also think there could've been merit in having Frank's health get slowly replenished over time, potentially allowing Clay to access some of his lower-level buffs for use in specific situations.

Beyond the Cholester-do-all, Down Special's experimentation is hilarious, and I commend you for digging up all of those old series clips, though the dizzy stun achieved at 10 seconds is all but irrelevant, given the impossibility of keeping a sentient player from escaping beforehand. F-Smash's endless range is pretty daunting (I struggle to think of an in-Smash projectile with that reach), as is the potential for N-Air to turn off enemy constructs for up to 10 seconds. While U-Smash doesn't appear to grow in strength with charge, a 1.5x movement slowdown (from what I can tell) is quite strong, especially if it stacks. And I generally wish there were fewer instances of required mashing across the set, including to unstick from U-Smash traps' hold of six seconds or more, and F-Throw's tupperware. That being said, I wouldn't consider any of these moves outright unsalvageable, and a lot of these critiques are balance aspects that wouldn't be excessively difficult to iron out either within Clay/Frank or within a successor set. I'd consider these two a valiant step up from your MYM23 output and a hopeful sign for your set-writing's progression in general.

NAGANADEL:
I believe my read-through came after your rewrite(?) of the mechanic section, so I can't speak as to its clarity beforehand, but I still found myself rereading it a few times throughout the set to ensure I had its finer details down, specifically in terms of acid charge vs. syringe charge. In any case, once I had that difference down, I found myself quite enjoying Naganadel as a solid Pokeset, not dissimilar to a Cyclohm or Elekid in terms of some neat frills within an overall breezy package.

There's a healthy level of nuance with acid on the whole, starting with the stepping-down of its poison over time, from damage and a hitstun multiplier to just damage (though could you clarify how fast acid spray inflicts the effect, compared to bursts?). There's also tactical considerations for the player in terms of how much acid they seek to inject into a foe or splat onstage for movement buff and trap functionality vs. keep in their figurative tank reserves. It's a neat variation on the Inkling mechanic, command over which you already exemplified with Cuttlefish last contest. Should the foe ever veer too far in either direction, they have only to extend and imbibe their stinger with the toxic fluids. Speaking of which, talk about a brutal command grab, what with Naganadel's manual, vicious injection of acid into victims, as opposed to landing the input and having the animation play dispassionately out, beyond the player's control.

A few other notes: I like the movement options baked in on a few standards, like D-Tilt and B-Air. The uncontrollable aspect of dash attack adds relevance to sludge puddles but comes off as awkward in regular gameplay, especially in situations where Naganadel gets effectively punished for initiating the move on small drop-through platforms. F-Smash's projectile trajectories and potential honing, plus F-Air's boomeranging, lend themselves to reasonable bullet hell opportunities without them coming to dominate the set, and I also enjoy D-Smash's input scheme as far as differing options for dispensing acid. Comparatively speaking, grab-game comes off as a little rushed, with applications for U-Throw in combination with the melee not getting set real estate earlier on, and D-Throw not seeming to specify how long foes can remain juggled (as is, I take it they won't escape early, and Naganadel automatically drains his acid unless the player presses A again?).

All in all, I think Daisy and Cuttlefish have the edge on Naganadel pre-edits but he still stands strong as his own thing, and a refreshing WCF take on a big-body character to boot.

MAGNUS:
In broad strokes, I really like what Magnus attempts in terms of his niche as a heavyweight minion overlord. Despite his bulk and frankly sizable baggage from not being able to hide under low platforms, Magnus' focus is more on tactical play around his various summons than on single powerful blows. The fun layers of strategy speak for themselves in terms of which minions Magnus sends out, and when, based on desired setups (i.e. the multiple Rubric Marines inflicting hitstun with their rounds, spacing a Terminator's Warpflamer), and how many points he's got left. Compared to a good number of sets, where characters either have to kill off or wait for their minions to be killed off, Magnus sets himself apart nicely with his options for dispelling single minions or all at once, not to mention the neat targeting mechanic. In terms of specific balance, I do worry that Magnus' minions have too little HP for him to get all that much mileage from; my frame of reference here is Pac-Man's hydrant, which takes 13% to launch and often gets smacked by one character or another within seconds of spawning. That's not to say I'd overload the minions with too much more HP than what they've got, given their potential to crowd the stage, but the sort of preservation work needed to keep a 15 HP minion alive for 35 seconds to summon a Daemon Price seems nigh impossible.

Turning to elsewhere within the set, I'm mostly content with the balance workarounds you've come up with to turn mind control from what easily could be an exercise in brain death to an innovative tool for Magnus' kit. You catch the obvious pitfalls in a number of creative ways (i.e. the boundaries, the computer control if they move too far), though I do see the potential need for more tweaks to how Magnus is kept from just self-destructing his victims — the Up B and helplessness workarounds are great, but still seemingly in the cards are options for him to just fastfall most opponents to their deaths in their regular aerial states, or have the Bowsers and Dededes of the world KOed using their special stall-then-falls that don't put them in helpless. Maybe Magnus' horizontal walls can have top and bottom boundaries that lightly launch foes back up when penetrated, too? (This also would keep him from just holding poor Jigglypuff in shield for the entirety of Down Special for an OHKO). Beyond that, the move's functionality feels reasonably solid, with bonkers startup but the reward of a massive and quick-spawning tendril, with most of my personal enjoyment coming from the possible interactions with minions (i.e. ensuring Horrors are killed such that they produce two more).

A few more miscellaneous items — I'm a big fan of a good number of the melee animations, D-Tilt and U-Smash being personal favorites. You put in the work outlining key combos Magnus can use to naturally progress into a Side Special finisher for the sake of summoning Chaos Spawns. Having just the one KO move for getting the Spawns outside the Tzaangor Shamans could come off as flowcharty to some degree, but when those strings are baked in by design, it's less of a concern. I do think Magnus' KO percentages feel a bit undertuned here and there; with the exception of his Daemon Prince blasts, Brimstone Horrors and F-Tilt, all of his attacks appeared to kill upward of 100%, and the latter two are at ledge already. A few more reliable KO options, and specifically a reduction in Side Special's kill percent, given its prominence, would help in that respect. Despite the rough edges here and there (all manageable with edits), I do think Magnus represents the high-water mark in your MYM repertoire to date, and I'm left excited to get on to Lavos and whatever you've got up your sleeves next.

CID HIGHWIND:
He's finally back, and about time, too! Ahem...US' first foray into MYM24 definitely doesn't disappoint. Aero is a great example of what I'll refer to as a movement-based centerpiece — not some overarching mechanic, or a complex central concept that all other attacks can't help but revolve around, but a straightforward enough projectile that still unlocks new offensive and defensive potential for Cid. Jump-canceling is the sort of mechanic that might show up as a byproduct of a regular Ultimate Special without much fanfare, even potentially by accident. But Cid takes that and runs with it in good depth over the course of his other tools. Down Special, in particular, plays off his movement schemes rather well, as he can mix up where his missiles and reticles actually spawn in a far more controlled manner than Pikachu's analogue move.

Midair grab by virtue of Aero also stands out as a perk, though I might've liked to see more applications highlighted — D-Throw's inward drift during end lag stands out as a nice setup for following aerials, though I have to imagine some of the other throws might bring about alternate helpful knockback angles when used off the ground (maybe putting the victim in prone on a platform?). I'm not sure which of Cid's attacks are considered more "signature" in canon, but I also think Cid's Side Special dragon stands out as a less distinct move compared to his D-Smash dynamite. Dragon is a flashier summons and has stamina, to be fair, but when dynamite has controls both for its duration and angle, independent of its interactivity once thrown, I could see it arguably more intuitive to have the inputs flipped. Otherwise, I like the flavor for the animations across the board, with the various spear attacks and -that B-Throw-, not to mention the distinct nature of a ranged fighter who struggles to actually camp. Even though no one would argue Cid is your most ambitious work, I'd say he's nevertheless the sort of fully realized in-Smash, yet creative set I'd be down to see more of in MYM.
 
Last edited:

Almand

Smash Journeyman
Joined
Jan 20, 2018
Messages
216
Hugo Andore
Click the name for the set!

SF3_Hugo.gif

It's nice to be back in MYM! Admittedly, this set is a little complicated, you all know my front-heavy style by now, I'm sure. It's sorta-kinda a rough draft, despite me having worked on it since the tail end of MYM23... But I digress. I'll likely update it in the future if/when provisionary comments roll in, so please criticize me, I'm happy to provide clarification and generally fix things in a reupload later on!

Speaking of comments, I'll actually be posting some this time around! No idea why it took so long, but hey, better late than never, right?
 
Last edited:

Gengar84

Smash Hero
Joined
Dec 9, 2009
Messages
5,500
Here's a moveset I made that I'm really proud of

Sarah Kerrigan
"I am the Swarm. Armies will be shattered. Worlds will burn. Now at last, on this world, vengeance shall be mine. For I am the Queen of Blades."

Sarah Kerrigan (Norse Chowder).jpg

Artist: Norse Chowder


Introduction
Starcraft is a science fiction real time franchise developed by Blizzard Entertainment. While the series is mostly known for being a PC game, the original game did release on the Nintendo 64 as Starcraft 64 in 2000. The franchise received a sequel in 2010 which spawned several expansions. It remains one of the most popular and influential games in its genre to this day.

Who is Sarah Kerrigan?
Prior to her infestation, Sarah Kerrigan began as a psychic terran soldier known as a ghost operative. During a mission, Kerrigan was abandoned by her superior, Arcturus Mengsk, when things began to look bad and was left to die. Instead, Kerrigan became infested by an alien insectoid race known as the Zerg and became one of them. In time, Kerrigan rose to become the leader of the entire Zerg race and swore revenge on the one who betrayed her.

Why Kerrigan would be great for Smash

Kerrigan is an iconic character that would offer a lot to a game like Smash Bros. For one, she is both a female and a villain, two things which Smash is still lacking. I believe Sarah Kerrigan is the best character to represent the RTS genre due to her ability to control the Zerg. RTS games are all about resource management and creating an army of units to crush the opponent's base. This is something I think Kerrigan can utilize in Smash. Starcraft also really meshes well with the Metroid universe and would make for some really cool interactions if there is any kind of story mode in this game.


Potential Moveset:

Special Traits / Other:
Kerrigan would be the first true summoner character in Smash. All of her special attacks other than Psionic Shift summon various Zerg units to aid her in battle. In order to balance this, I decided to incorporate an element of resource management similar to her home series.

Vespian Gas - As the battle goes on, Kerrigan builds up resources that she can spend to use all of her special attacks minus Psionic Shift (which doesn’t cost anything since it is her recovery move). Being a simple attack, Zergling Rush attack uses the least amount of gas while the Hydralisk/Defiler/Mutalisk uses the most. She initially starts with 0 Vespian Gas but builds it up gradually as the battle goes on. The way this works in Starcraft is you have units called Drones (for the Zerg at least) traveling to mining points and bringing back Minerals and Vespian Gas to your base which you use as a currency to construct buildings and units. To simplify things for Smash, I cut it down to just Vespian Gas. I think it would be a nice touch to represent this by have some Drones (pictured below) in the background gathering resources by moving around, similar to Pokemon Trainer. If Kerrigan tries to summon a Zerg without sufficient Vespian Gas, there will a be a disembodied voice of the Overmind stating "We require more Vespian Gas".


Drone (Luke Mancini).jpg


Weak Attacks:
A Combo – Chain Reaction
Kerrigan attacks with a flow of electricity. Like Megaman’s A combo, this is a projectile attack and deals no knockback. In multiplayer, the electricity can flow to other nearby enemies if they are close enough.

Forward Tilt – Kinetic Blast
A small short range explosion from her hand

Up Tilt – Razor Swarm
Kerrigan sends out several mini shockwaves diagonally upwards

Down Tilt
A low claw swipe

Running A
A running double claw swipe


Smash Attacks:
Forward Smash - Ravage
Kerrigan lunges forward and stabs the opponent with her wings.

Up Smash
Kerrigan thrusts her wings upward and stabs above her

Down Smash – Impaling Blades
Kerrigan slams the ground causing spikes to rise from the ground on both sides


Specials:
Neutral B – Hydralisk /Defiler / Mutalisk (pictured from left to right)
Similar to Dedede’s original side B that summoned Waddle Dees, Kerrigan summons one of a variety of Zerg units that wander along the battlefield and attack opponents. The hydralisk is the most basic of these. They travel along the ground and attack any opponent nearby. The defiler doesn’t actively attack but instead inflicts various status effects on anyone that gets too close with a cloud of poisonous gas. Finally, the mutalisk flies through the air and attacks any airborne opponents in its range.

Hydralisk (Luke Mancini).jpg
Defiler (Luke Mancini).jpg
Mutalisk (Luke Mancini).jpg


Forward B (Grounded) – Zergling Rush (pictured on the left)
Kerrigan summons a pair of Zerglings to rise from the ground and charge forward for a bit before diving back into the ground.


Forward B (Aerial) – Scourge (pictured on the right)
If performed in the air, Kerrigan hatches a pair of Scourge who fly forward and explode into any opponent they touch.


Zergling (Luke Mancini).jpg
Scourge (Luke Mancini).jpg


Up B – Psionic Shift
Kerrigan surrounds herself in energy then dashes in the chosen direction, damaging anyone she touches

Down B - Lurker
Similar to Snake’s mine attack, Kerrigan summons a Lurker to burrow in the ground right next to her. Anyone who walks over this location is attacked with a rising spike attack for a short while. Like the Hydralisk, only one Lurker can be summoned at a time.

Lurker (Luke Mancini).jpg


Grabs:
Grab
Kerrigan impales the opponent with her wings

Pummel
Kerrigan grabs the opponent’s face and shocks it with energy

Forward Throw
Kerrigan kicks her opponent forward

Back Throw
A simple toss backward

Up Throw
Kerrigan throws her opponent upwards followed by a quick lightning attack

Down Throw
Kerrigan slams her opponent into the ground


Aerial Attacks:
Neutral A
Kerrigan surrounds herself with electric energy and attacks around her, much like Mewtwo

Forward A
A forward claw swipe

Back A
A backward thrust kick

Up A
A somersault kick

Down A – Quantum Ray
Shoots a beam of energy diagonally downward


Final Smash: Apocalypse
Kerrigan surrounds herself in a radius of energy. Any opponent that comes within range is struck by an explosion which triggers a cinematic cutscene. This scene mimics the final few seconds of the Betrayal on Kerrigan scene. After landing the initial strike, the opponent is transported to a ruined planet where he or she is surrounded by zergs on all sides. As they reach the target, the screen turns to black. It then returns to the normal battle screen and the opponent takes massive damage and knockback.


Apocalypse
 
Last edited:

Katapultar

Smash Lord
Joined
Nov 24, 2008
Messages
1,258
Location
Australia
Heya, welcome to MYM! We had a set for this character a long time ago, back in MYM4. The presentation is nice and the summoning concept sounds promising (we like our summons/minions in MYM), but the set could do with more detail. For instance, her meter! How much meter does she have? How much does it cost to use Specials? And can it be regained during the match? (I'm not familiar with Starcraft's gameplay) For reference, Goliso did something similar with summoning minions with a resource mechanic in Magnus, who feels similar to Kerrigan flavour-wise and could be worth a look. In fact, sets like Shigaraki and Syndrome this contest have also dabbled in minions, there's quite a lot to cover if you're going competitive! You could even measure her Vespian Gas in units, like say she starts with 0, gets 2 per second and maxes out at 50 or something, takes 5 units to use Side Special. Simple, but would flesh out the set a lot and help us readers better envision how she'd play. The moves themselves could also do with more detail: damage, knockback (and KO percents if you like) and lag for starters, there's a lot more to moves but I'll keep it simple for now. While we do have basic attack animations, there's not quite the detail to tell us how the moves works and its applications!

As someone who hasn't played Starcraft, it would be neat to see pictures of the minions (can't tell who's who from Kerrigan's image) for reference, especially there's no reference to their size or attack animations in the Neutral Special. Some questions for this move:
  • Can Kerrigan choose which minion she summons, or is it done at random?
  • Is the move just a basic summon or does it have a hitbox like Dedede's Side Special?
  • How big are the minions?
  • Can they be defeated? (HP/knockback)
  • If so, how much HP do they have?
  • Do they stay out indefinitely?
  • Is there a minion limit?
  • How much damage/knockback do their attacks do? And how much lag and range do they have?
Like-wise, it would be neat to know how far her Side Special and Up Specials go. You can absolutely use Smash Ultimate attacks as reference for stuff like range or lag or what not. This video displays projectile ranges and this one recovery, for instance.

Looking forward to any changes you make, and if you're up for making any new sets after Kerrigan!

Lavos is a return to your source material faithful, cooldown-based sets like Ahri in MYM23. I wouldn’t say I 100% agree with the approach of outright banning Specials in general for X seconds, you could get a bit more liberal with these kinds of sets and say, give him a nerfed version of the Special ala Bowser’s Fire Breath, but the idea behind cooldowns is fun as it justifies making the Specials overpowered. What I immediately like about Lavos more is his Side Special, which lets you reduce the cooldown of your other Specials on hit. And Down Special is a nice way to bring the imbue effects together for a big reward, which would admittedly be super hard to pull off given the cooldown on the Specials. Looking back post-read, it's also good that you mention stuff like Corrosion in Lavos' melee killing moves like his D-air and B-air.

I appreciate the write-up on best solo and dual imbues to use on each Special: otherwise it would be easy for the reader to overlook the potentially interesting possibilities. It reminds me of Smady's Rudy the Clown set in MYM22, which had different Big Reveal clones and he went back and edited in their applications for each melee move. It really does make a difference and helps me like Lavos more than if it were omitted entirely. Just pointing out the best imbue options rather than all of them is pretty smart in a way: it means you're not talking too much, and using a specific imbue combination means it is only really ideal for that Special, not only telegraphing Lavos' intentions but also making it committal since the Imbue doesn't get used up until you've used a Special.

As mentioned in the chat, I'm also fine with Jab/F-tilt/N-air being mirrored Mega Man style, along with his U-tilt and D-tilt being same-y but not really. As for his basic moves, I thought F-air was a neat move for the slide when you land.

Putting aside how balanced some of the Specials are in relation to their cooldown, I don't have much criticism. Given its cooldown, I do wonder whether maybe Side Special could last a little longer: like, after those 3 seconds the probe stays in place but doesn't deal hitstun, just a small consolation prize of reduced cooldown if the foe happens to be in the area. Maybe if you knock the foe through the probe's AoE, you get 1 second of cooldown removed from your Specials? This probe and Down Special also have neat potential with F-Smash to use as constructs to bounce the glaive, well-deserved given their cooldown (ESPECIALLY Down Special), and F-Smash IS specified in a number of the set's combos. Just two things. The move says the glaive bounces off blast lines, which I assume means to say the stage's blast zone, which depending on how fast the projectile travels would give it a lot of life given its infinite travel distance and not having all that much lag. I would personally make it not bounce off blast zones and just have it bounce off stage surfaces and your Special constructs: it seems rather strong, but not that strong as you smartly gave it a low kill percent given Lavos has his imbues. The other, lesser thing: if the glaive is flying towards you and hit a foe, do they get sent flying towards you? Or are they always sent flying away from you ala Sephiroth's Shadow Flare?

All and all, Lavos is a good set that (further) shows an improvement in melee stuff like comboing, some 50/50 details and clarification to go with Magnus, especially when put next to sets like Ahri and Excalibur from last contest. If a bit of Magnus' balance was fixed I'd enjoy him more as he's more ambitious and has more enjoyable concepts, but Lavos is still a good style of set. Nice work Goliso, and congratulations for being the first person to throw out two sets this contest!

Dixie is a surprisingly pick for how “UnKupa’ian” she is, both character-wise (female) and forgoing the usual Kupa-style creativity and MYM approach for what is largely melee. Between this, your personalised intro and the inclusion of a stage and spirits, I get the impression that Dixie is meant to be a more accurate take of what she would be like in Smash and as a DLC inclusion.

That’s not to say Dixie doesn’t have fun stuff, primarily her Down Special with the barrel (which is surprisingly and refreshingly not brought up that much in the set) and Kiddy Kong. The set’s “simplicity” and Kiddy attacking one second after Dixie reminds me a lot of Ernest Amano from last contest, yet another tag team set to go with Shigaraki and everyone from MYM23. The delay mechanic is particularly fun with the Smashes, as Dixie has to invest at least one second of charge into her smash and position herself well if she wants to combo to or from Kiddy’s more powerful variant, plus crossing up Kiddy to make him turn around. Nor does she rely too much on Kiddy either as you say, which was a very good way of handling her while including him to make the set more fun.

I also liked the dual grab where you had the ability to pick which Kong throws by tapping or smashing for Dixie or Kiddy: it felt fair and organic, and on a different set the option of having 1 variants for each throw could lead to some fun mix-ups. For instance, one throw has a quick animation, and if the foe DIs to one side to avoid one variant it would get them punished foe the other variant and vice-versa. I also enjoyed Dash Attack one-two punch with Dixie and Kiddy, and the extreme differences between their F-tilts which can leave Kiddy punished if Dixie uses hers carelessly. While a number of her moves inevitably resemble her boyfriend’s animation-wise, it’s smart that you refrained from calling it out: that could potentially get repetitive, and Dixie feel more like her own character.

Next to skekMal, this is definitely your most melee-orientated set in the modern era, tackling a character(s) with less potential than your usual fare. The set is also devoid of typical MYM “gimmicks”, like tap vs hold variants or mashing A to get an extra effect in an attack. If anything, I wonder whether Kiddy’s KO crying is a bit too punishing, but it’s still decent and you mentioning that it only activates when Kiddy lands makes it a lot more balanced, so no big deal. While I do prefer the concepts of most of your recent sets, Dixie’s fun melee put her up there with them, actually my favourite set of the contest right now until you inevitably edit Syndrome. Excellent work here Kupa, it was neat to see such a different set from you, and will be interesting to see how you handle a more 10kish entry as you said you were interested in doing.

It would be amiss for me not to mention the extras, which were great. It’s rare to have this many pictures for a set, obviously a benefit to being a character lots of people want in Smash.
 
Last edited:

Gengar84

Smash Hero
Joined
Dec 9, 2009
Messages
5,500
Heya, welcome to MYM! We had a set for this character a long time ago, back in MYM4. The presentation is nice and the summoning concept sounds promising (we like our summons/minions in MYM), but the set could do with more detail. For instance, her meter! How much meter does she have? How much does it cost to use Specials? And can it be regained during the match? (I'm not familiar with Starcraft's gameplay) For reference, Goliso did something similar with summoning minions with a resource mechanic in Magnus, who feels similar to Kerrigan flavour-wise and could be worth a look. In fact, sets like Shigaraki and Syndrome this contest have also dabbled in minions, there's quite a lot to cover if you're going competitive! You could even measure her Vespian Gas in units, like say she starts with 0, gets 2 per second and maxes out at 50 or something, takes 5 units to use Side Special. Simple, but would flesh out the set a lot and help us readers better envision how she'd play. The moves themselves could also do with more detail: damage, knockback (and KO percents if you like) and lag for starters, there's a lot more to moves but I'll keep it simple for now. While we do have basic attack animations, there's not quite the detail to tell us how the moves works and its applications!

As someone who hasn't played Starcraft, it would be neat to see pictures of the minions (can't tell who's who from Kerrigan's image) for reference, especially there's no reference to their size or attack animations in the Neutral Special. Some questions for this move:
  • Can Kerrigan choose which minion she summons, or is it done at random?
  • Is the move just a basic summon or does it have a hitbox like Dedede's Side Special?
  • How big are the minions?
  • Can they be defeated? (HP/knockback)
  • If so, how much HP do they have?
  • Do they stay out indefinitely?
  • Is there a minion limit?
  • How much damage/knockback do their attacks do? And how much lag and range do they have?
Like-wise, it would be neat to know how far her Side Special and Up Specials go. You can absolutely use Smash Ultimate attacks as reference for stuff like range or lag or what not. This video displays projectile ranges and this one recovery, for instance.

Looking forward to any changes you make, and if you're up for making any new sets after Kerrigan!
Thanks for the comments. I’ll update the moveset when I can giving some more detail and images for reference. I used to make short gifs for every attack animation that I took directly from their source games. I do have other movesets made that already have these gifs for the attacks and I would be glad to share them. Off the top of my head, I have a Battletoads, Xemnas, Sub-Zero, Tidus, and Predator. Most of these were made with the intention of becoming Brawl PSA mods so I’ll have to rework them a bit.

As far as specifics such as damage and knock back percentages go, I’m not a competitive player at all and would have no idea how to properly balance a character like that. I’ve always been strictly casual so I never really payed much attention to competitive aspects of movesets. I could try but I’m sure they would mostly come out very unbalanced due to my lack of competitive experience. I think I’ll start by just referencing characters with similar moves and using their data as a base.

I will update my Kerrigan post periodically as I come up with new things. For right now, I just got the images of all the units she summons but I will try to remember how to make the gifs of her attack animations as well as put some more thought into the specifics of each attack. For some reason it's not letting me upload the GIFs directly to my post so I'll have to link to Giphy for now until I figure out why.
 
Last edited:

Smady

Smash Master
Joined
Apr 29, 2007
Messages
3,307
Location
K Rool Avenue
5k/10k Word Challenge Returns Once More!


After a long break, this little event is back! It's a simple: write a set that's 5000 words or less (5k) or 10000-5001 words (10k), and you'll get a reward! You may tell us in the set or chat if your set qualifies. Shorter sets are easier to make and read, while still contributing to the set count. And they can be just as good as longer sets!

In the past I've personally written comments for shorters sets, but this was somewhat redundant. I ran a lottery that I've still got to do for sets, even though one of the people who won left the community (uh oh). This time it's much more straightforward: post a 5k/10k word set and a leader will comment that set within a week! Of course more may comment too if they feel like it, but that's a guarantee you can bet your GSP on!

Now lets see some fun shorter submissions!
 

Torgo the Bear

Smash Lord
Joined
Mar 30, 2019
Messages
1,176
Location
Grinding for Maushold Family of Three
NNID
u2outofcontrol
Switch FC
SW-1209-7008-3905
1617261197179.png

Dream
Hes a minecraft youtuber


His moveset is the same as steves but he is better
he has netherrite as the strongest materiel and he runs when placing blocks in teh air because hes speedbriging
also all of his attacks have a 1 in 7.5 trillion chance of being instakills
also his final smash is minecraft manhunt


Happy April Fool's everybody!
 

GolisoPower

Smash Master
Joined
Sep 17, 2017
Messages
4,338
Transmutation, you say? A superstitious process from long ago, in which deranged old men heated stinking substances over fires of dung, thinking they could make gold?

No. To the Orokin, it was a darkly potent, forbidden science. They were not squeamish nor moral, so what profound taboos must this art have violated?

No transmitter was more dreaded than Javi. The Crawling Serpent. The Abhorred. The Filth-Speaker.

The Orokin feared him so greatly that they whispered he might, somehow, survive even the Jade Light, just as a severed snake was once believed to grow a new head. So instead he was imprisoned, that his evil might be contained if not quenched.


His jailer was a brute of a Warframe named Lavos.
1617513273079.png
 
Last edited:

BKupa666

Barnacled Boss
Moderator
Joined
Aug 12, 2008
Messages
7,788
Location
Toxic Tower
"Don't try to argue — if you're going, I'm going with you."


Here's a heroine who needs little to no introduction. Dixie Kong is the long-running tritagonist of the Donkey Kong series, a solid case for the most valuable protagonist of the (banana) bunch and a prominent fixture in what the fanbase largely agrees are the best three of five Country titles to date. Debuting as Diddy's headstrong girlfriend in DKC2, Dixie ventures to the peak of Crocodile Isle to rescue DK after Kaptain K. Rool successfully kidnaps and holds him for ransom. The next year, in DKC3, she steps up as leading lady, rollicking through the Northern Kremisphere and uncovering Baron K. Roolenstein's conspiracy to rule the world as puppeteer for a robot harnessing DK and Diddy as living batteries. Though Dixie largely was relegated to spinoffs and sports titles over the next 18 years, she transcended back into the spotlight with Tropical Freeze. In this latest core title, she undertakes a homecoming journey back to DK Island and wrests control back from the Snowmad army that had evicted the Kongs in the first place.

Dixie represents a moveset-making departure for me personally, beyond her status as (f**king finally) my first set for a female character so far. As the guy who wrote
five of MYM's current nine K. Rool sets and then headed a six-year fan movement to bring the Kremling King back from the figurative dead, I spent my fair share of time during the dregs of Smash 4 discussion downplaying her unique attributes and making the case as to why she ought to be a lesser priority. Though I'm glad I did what I could to help get K. Rool off of Nintendo's quality assurance trash heap — where he would have stayed had the company not been blindsided by his ballot performance — in hindsight I regret not doing more to sing Dixie's praises in the process.

Dixie's prominence in one of Nintendo's oldest and best-selling series, not to mention status as one of very few starring female characters never to have played the damsel, renders her perhaps the most eminently qualified first-party newcomer yet to appear in Smash. Unfortunately, the series' thirst to grab headlines and staged reaction videos with over-the-top third-parties for the past 2.5 years has left her seemingly destined to fall by the wayside once again. There's the off-chance Nintendo could request Dixie's addition to advertise the Nintendo EPD-made Donkey Kong Switch title likely getting announced in a few months, but even that assumes she'll be featured in a prominent playable role, no guarantee after the backseat she took in multiple previous mainline console debuts for her series.

All that being said, though it's somewhat bittersweet, I'm excited to sit down now and (hopefully) convey one standout playstyle Dixie could offer, putting the character's best foot forward regardless of what future lies in store for her this year and beyond.

Click Dixie's render above to access a full DK playlist to accompany her set, as opposed to the single character-relevant track I typically link.

Full credit for the moveset attack illustrations depicted throughout this set goes to
BirthNote/AndrewJCay1. Full credit for the DKC3 and Tropical Freeze GIFs included goes to Arcadenik.

STATISTICS

Jumps n~~ 9 (comparable to Greninja)
Ground Movement n~~ 7 / 1.88 units (26th, between Pichu and Donkey Kong)
Size n~~ 3.5
Weight n~~ 2.5 / 84 units (63rd, between Zelda and Rosalina)
Aerial Movement n~~ 2 / 0.924 units (68th, tied with Link and Diddy Kong)
Fall Speed n~~ 1.5 / 1.27 units (72nd, between Yoshi and Game & Watch)

Much like Diddy and K. Rool before her, Dixie's idle stance modernizes her classic DKC sprite animations in glorious HD, leaving her to blow a small gum bubble or sit down to sip a soft drink if left undisturbed. Size-wise, she's similar to her simian boyfriend, with the lower half of her ponytail not included as part of her hurtbox. Dixie is no slouch movement-wise on the ground, though her horizontal aerial control leaves a bit to be desired, at least in regular circumstances. For better or worse, Dixie has a relatively large gulf between her regular and fast fall speeds, descending airily down at first but able to commit to a fast landing if need be.

That's not to say Dixie doesn't take her air game sky-high in other respects. She supplements a solid initial jump with one of the best midair jumps in the game, just a hair (no pun intended) shorter than Yoshi's flutter kicking, as she twirls her ponytail like a rotor for added oomph. What's more, holding the jump input has Dixie continue rotating her hair to hover, not actually floating in the traditional sense but exerting a degree of control over her descent — an understated gameplay mechanic she gains in Tropical Freeze.


In essence, Dixie can slow her fall speed to be almost minimal for up to two seconds per aerial stint, whether all at once, split after both of her jumps or in multiple fall-stalling bursts after her midair jump. Though not amazing for side-to-side movement, Dixie gains significant leeway to carefully time landings, including to space attacks on- or offstage, dodge enemy attacks from below or snap to the ledge at just the right moment against would-be ledge-guarders.

Unless otherwise stated, KO percentages are on Mario from the middle of Final Destination.


SPECIALS

DOWN SPECIAL - HEAVY LIFTING


With a tapped input, Dixie whips out a steel keg, present in every Donkey Kong Country 3 level, most certainly only full of frothy water and nothing more, and holds it in her ponytail over 18 frames. In this state, she's able to move around holding the keg at her decent regular walk speed, and even perform a single grounded jump sufficient to reach a low Battlefield platform, though she'll drop her cargo at her feet if made to flinch. Pressing shield or air dodge will have Dixie set the keg down of her own volition, dropping it down behind her in midair, though adds 9 frames to both defensive animations' startup, not being a fully commitment-free cancel.

In any case, an additional Down Special input prompts Dixie to sling the keg briefly backward in her hair before tossing it forward, pausing ever so briefly to do so in midair. By default, she'll roll the Kirby-sized keg lazily along the ground at Incineroar's dash speed, upon which it travels the equivalent of Battlefield's length whether onstage or falling. Alternatively, if the player directs the control stick up or down during the toss' 9-frame startup, Dixie will toss the keg in an upward arc or directly at her feet, respectively. The ensuing trajectories will have the keg bounce three times over three seconds before vanishing, either in narrow high arcs that have it rise three training stage squares vertically and travel four squares horizontally, or long low arcs that take it three squares up and nine squares forward. Dixie's kegs have some mechanical similarity to Gordos, including in how foes are able to smack kegs away (thankfully without a hitbox for her to avoid) and how their upward arcs dwindle to virtually nothing upon bouncing onto low platforms.

When it comes to hitboxes, kegs aren't all that strong when traveling at their default easygoing movement speeds — dealing 12% and radial knockback KOing around 185% during the first half of their trajectories, reduced down to 9% and a 200% KO percent for their duration. Kegs rebound from opponents on hit, preventing them from hitting the same target multiple times. That being said, Dixie's respectable 17-frame end lag and movement speed allows her to catch up to her own kegs. If she attacks a keg, she'll send it flying at different trajectories, akin to a clunkier WFT soccer ball, based on the attack in question; a fully-charged F-Smash dealing as much as 18% and knockback KOing around 115%.


Dixie's attacks also take on a short moment of hitlag on impact with kegs before they bounce away. Though nothing crazy, Dixie improves her odds of impacting close-range foes both with her attack and the keg, as the former's hitbox briefly lingers over the latter. Dixie can try capitalizing on this hitlag with a stationary keg she's set down — undisturbed, these remain onstage 10 seconds before vanishing — or, at higher skill levels, by air-dropping a keg down behind her in midair, before spacing her descent so she can smack it into action with an aerial.


Did you forget, I alluded to a smashed Down Special variant at this move's beginning? Never fear! With a longer 24 frames, Dixie grunts as she pulls none other than boisterous baby cousin and DKC3 co-star Kiddy Kong out of hammerspace! Cue all the performative Twitter mewling about how Kiddy is ugly, annoying, an inferior DK replacement and so on...Never mind that Rare didn't want to leave fans pining for a Kiddy-led DKC4, or to have playable DK overshadow Dixie in what was designed as her own adventure. In any case, I've approached Kiddy's inclusion with Dixie's Smash moveset in much the same way. Though he can assist her with fun alternative setups and strategies — more on those in a bit — he's hardly mandatory. In contrast with your typical MYM duo character, Dixie remains more than capable of putting up a fight by her lonesome.


Upon first summoning Kiddy, Dixie holds him on her back, visibly straining to remain upright, as the big galoot looks wondrously around. The player retains the same general control scheme as when Dixie is holding a keg, albeit a far more sluggish variant — notably, Dixie's walk speed and single grounded jump are halved when it's Kiddy she's toting around. Kiddy also functions a bit differently when thrown. When thrown forward, Kiddy rolls at the same speed as a keg, but with a larger hitbox, similar to that of DK's dash attack, and with enough sense to stop at ledges. Thrown down, he'll curl up into a similar ball and bounce the same nine squares as a keg. However, compared to three uniform arcs, Kiddy will bounce twice: once, three squares vertically and again six squares into the air, walling off aerial approaches or landings with an interpretation of his DKC3 water-skipping animation. As an anti-frustration feature, Kiddy automatically cancels his bounce to drop automatically, and harmlessly, to the ground at horizontal points where he otherwise would cross over a bottom blast zone.


And, when thrown upward, Kiddy has his own unique function compared to a keg — after Dixie's startup, he'll pause just six frames, spinning in ball form in midair, before plummeting down four squares directly in front of her. Kiddy's underside takes on a 23% hitbox that will spike midair foes powerfully while launching those on the ground diagonally, with vertical force sufficient to KO around 85%. Comparable to Bowser Bomb, Kiddy's bottom also has a late hitbox, inflicting 12% and lower vertical knockback that won't KO until high percentages. A vertical Kiddy toss is by no means an effortless option to throw out, what with the combined 39-frame startup from summoning him, tossing and waiting for him to fall. That being said, Kiddy's bulk will result in a guaranteed shield-break, as both of his falling hitboxes — the first of which inflicts an added 15% in shield damage — crush down on his hapless victim's bubble. The right reads can position this as a frightening prospect in foes' minds, just so long as Dixie doesn't overextend and throw Kiddy off the ledge to his doom!


How can Dixie work alongside that bratty baboon?
Once Kiddy stops in his trajectory from one of Dixie's Down Special throws, he'll sit onstage, ever so slightly smaller than DK and just as hefty. Left to his own devices, Kiddy will occasionally turn to the screen, raising his eyebrows, or stretch out the toe of his footie pajamas, without throwing out any independent attacks — he's just an oversized infant, after all. Foes can KO Kiddy either by knocking him offstage, past the point where the DK-esque midair jump he'll automatically use can save him, or by depleting his 50 HP.


Those who go the latter route ought to beware, however, as Kiddy isn't about to go quietly into the night. At the point where he exits hitstun from the foe's last, fatal hit, Kiddy will rear back for 25 frames before screaming in childish rage, throwing a brief tantrum in place on the ground or in midair before vanishing. As he hollers, Kiddy emits a spherical soundwave, which immediately manifests around him, reaching out three-quarters the range of a Smart Bomb blast. Opponents who don't evade or shield take 25%, a bonus 10% in shield damage and outward knockback capable of KOing around 80%, and potentially earlier closer to the ledge, on account of the soundwave's above average base knockback.


Every now and then, Dixie can play diabolically and throw Kiddy into harm's way, forcing foes to play around him and potentially setting up his scream to send a victim offstage, where she can work her aerial magic. She never wanted to babysit, anyway! When Kiddy's health reaches 10 HP, he'll start flashing red and emitting steam, as though he were a regular character with high damage. Foes ought to keep track of which attacks they use on Kiddy as they're finishing him off. If the first of several weak multi-hits KOs him, Kiddy only undergoes hitstun from that hit and ignores the others as his tantrum animation begins, leaving that character vulnerable to his ensuing outburst. Of course, the flipside of using single strong hits to spank the ape isn't always optimal, either, as either Kong could find themselves able to capitalize on the likely longer startup or end lag.

Once Kiddy is KOed, Dixie must wait 25 seconds or lose a stock, whichever comes first, before she can summon him again. A barrel icon with blue 'KK' letters appears aside her HUD with an ape noise once its occupant is ready for action again. On the flipside, Kiddy will vanish with a dopey wave if Dixie is KOed first — a distinct possibility, given her lightweight status.


If Dixie comes into contact with Kiddy while he's not in motion from a throw, or if she shields while carrying him to deposit him behind her, he'll start following along, Rare DKC style. While synched up, some of Dixie's animations undergo aesthetic changes — she'll grip Kiddy's back during her midair jump and hover, Tropical Freeze style, and use her hair to pull him along during rolls and into the background for spot dodges. Kiddy will keep tagging along until Dixie either throws him away with a smashed Down Special or enemy attacks knock the two Kongs apart. Once separated, Kiddy will shake his head stupidly before sitting in place; though he'll turn side to side to face Dixie, he won't automatically try to return to her. However, alternating smashes of Down Special will start and stop him making his way back to her side. While in motion, Kiddy ambles along at Dixie's dash speed and leaps with ground and midair jumps similar to DK's. His AI here is comparable to Nana's — persistent, but without any concerted effort to dodge enemy attacks.

In a rather literal instance of "monkey see, monkey do" — if the monkeys in question weren't actually primates — Kiddy will mirror most individual attacks thrown out by Dixie with corresponding attacks of his own, staggered exactly one second after each input. He'll perform his own moves whether he's accompanying Dixie or left to his lonesome, incentivizing her to keep tabs on where precisely he's sitting if she intends to send foes his direction for a timed follow-up. Depending on their timing, a foe can attack Kiddy such that he's in hitstun at this one-second point, and doesn't copy Dixie's move. However, because hitstun alone won't make Kiddy drop a mirror move, attackers ought to handle him carefully to avoid potential counterhits, which Dixie in turn can time to save Kiddy from being casually comboed into oblivion.

Kiddy will skip ahead to mirror Dixie's most current attack if he happens to fall more than one move "behind" her, in circumstances where she's throwing out multiple speedy attacks faster than he can follow suit. Kiddy doesn't hesitate to show exactly how little he knows his own strength on a handful of his attacks, but in a departure from your average hulking summons, several other moves are more oriented toward bolstering Dixie's own attacks, befitting his nature as a support character.

Of note, Kiddy doesn't have his own analogues to most of Dixie's Specials, but Down Special stands out as an exception. One second after Dixie has whipped out a steel keg with a tapped Special input, Kiddy will pull out one of his own, carrying it in front of him like a shield rather than above his head. He'll hold onto the keg as long as Dixie does, before throwing it staggered after her own toss. Though Kiddy matches Dixie's angles, he puts a little added muscle into his tosses. This results in Kiddy's kegs having faster movement speeds, more exaggerated arc trajectories and stronger base damage and knockback properties, all by 1.4x multipliers compared to Dixie's own tossed kegs.

When Dixie and Kiddy are synched up, his kegs often can catch up to and ricochet off of hers, creating a momentarily chaotic airspace and generally coaxing grounded foes to shield. If an opponent knocks Dixie away from Kiddy while she's holding a keg, he'll drop his keg one second from the moment of impact, positioned such that the stationary toddler can send it flying inward with a subsequent attack to cover his partner. Even when both Kongs are launched away, they'll leave behind the literal silver lining of two grounded kegs to use later. And while separated, Dixie and Kiddy can put two kegs on different rolling or bouncing collision courses, potentially sandwiching a target in the middle. Regardless of which creative possibility the two attempt, here's a good chance to note, whether held, stationary or in motion, only two steel kegs can be in play at a time — Dixie will shrug and Kiddy will scratch his head if either tries circumventing this rule.


Miscellaneous tricks with kegs and Kiddy:
Whether Dixie is chasing down a moving keg or Kiddy, she can pick either back up with a Down Special input timed as she comes into contact during their roll or bounce. When this happens, Dixie will more quickly scoop up her cargo, respectively bringing it into her hair or onto her shoulders with half the startup frames she ordinarily would undergo to summon it from hammerspace. A fast throw input after Dixie has leapt up and caught a keg at the apex of a bounce can be great for switching up its trajectory — perhaps by sending it rolling it down from a greater height or hopping across a higher platform. Kiddy's own course can be modified in much the same way, perhaps now to reposition his movement out of harm's way. Certainly, Dixie can approach foes alongside a rolling or bouncing Kiddy to keep them antsy over her option to pick him up for a faster upward toss-and-crush.


Dixie has one more trick up her sleeve in squeezing more mileage out of her two Down Special summons. A directional air dodge onto a keg or Kiddy after they're thrown lets Dixie hop on and start barrel rolling! Dixie's treading instantly speeds her cargo's regular roll speed from Incineroar to Bowser's dash speed, producing a new frontal hitbox that on kegs deals 16% and knockback KOing at 120%, and on Kiddy deals 18% and knockback KOing at 110%. What's more, if Dixie and Kiddy dodge onto a keg together, or if Dixie rolls one over to him, they'll travel even faster, at Fox's dash speed. With the rambunctious rugrat's added heft in tow, the keg now begets a 20% hitbox and knockback KOing at 100%. Depending on which movement speed Dixie's barrel roll ultimately takes on, foes might find themselves hard-pressed to knock her off with a well-timed attack, especially if she suddenly initiates the roll in close quarters.


From a control standpoint, Dixie can change her barrel roll's direction on the fly, taking 20 frames to tread around to face the other way, though she must roll at least one Battlefield platform before she's able to turn. Upon initiating a barrel roll in midair, Dixie will descend atop her keg or Kiddy with gradual horizontal momentum and respective mediocre 5% or 8% hitboxes — her forward movement here is slightly better than that of Yoshi's aerial egg roll but not by much. She's able to exit the roll a few different ways: a shield input prompts her to drop off in place as the keg or Kiddy keeps traveling forward, now at their slower regular pace. A Down Special input has Dixie pick her cargo up from underneath her with the aforementioned halved startup. Perhaps most handily, jumping off has Dixie carry her rolling momentum over into midair, where she automatically reaches her maximum air speed — a perfect directional burst for punishing enemy jumps up and over her keg or Kiddy's continuing hitbox on the ground.

UP SPECIAL - HELICOPTER SPIN


No self-respecting Dixie Kong moveset would be caught dead without this iconic attack, known for saving the bacon of many a young DKC fan over the years, and occasionally some old fogies, too. Here, Dixie begins rotating bodily around while unfurling her ponytail to surround her at close range, enlarged slightly in Smash's hitbox-indicating fashion. In midair, where unsurprisingly this move sees the majority of its use, the player can continue Dixie's spinning as long as they'd like, not even needing to hold the input down to do so. Dixie's helicopter hair slows her fall speed to that of Peach while holding her parasol, as she takes on significant horizontal mobility while descending back to earth.

Coming out on frame six, Dixie's hair has an initial close-ranged launching hitbox that deals 12% and knockback KOing near the blast zone around 105%. Her ponytail also takes on a weaker three-frame hitbox, inflicting 6% and a moment of stun, after each 14-frame interval the player holds her rotation. By comparison, the multiple hits within Spinning Kong, modified versions of which fans tend to slap onto semi-clone Dixie movesets, are spaced out anywhere from six to nine frames. Beyond low percentages, most characters can escape from or clash with Dixie's multiple hair hits if she tries automatically chaining more than a few together like the big hairy ape.


That being said, from both attack and movement standpoints, Dixie's spinning comes bundled with perks DK would kill his own mother to have...err, hang on, 22 years too late. Dixie's horizontal movement speed depends on the point at which she initiates her spin in midair. Used while ascending from a stationary jump, Up Special has Dixie drift marginally less quickly than a parasol-toting Peach, while she'll travel a touch faster if she starts her spin while falling or after reaching maximum air speed — for reference, Peach can drift 15 training stage squares horizontally in the time it takes her to descend five squares. At any point, Dixie is free to cancel Up Special with an air dodge, upon which she drops down in place, or a midair jump or aerial, which lets her retain forward momentum from her spin.

With the right rhythm, Dixie can carry a foe offstage with a few hits from an initial Up Special before stringing together some aerials to push them closer to the blast zone. Should the player buffer Up Special during one of Dixie's aerials, she'll immediately revert from the attack's end lag to her spin, keeping any momentum she previously had carried into her aerial and likely comboing into her hair's stronger initial hit. That strike can serve as a finisher at high enough percentages, or if Dixie's in a more reckless state of mind, her hair's multi-hits can drag a target all the way off the screen's side. Of note, Dixie faces the direction she's spinning during Up Special; as such, moving from side to side enables her to change which way she's facing in midair, a handy perk in cases where she wants to whip out B-Air without landing first.

There's no hard limit on how many times Dixie can initiate Up Special in midair, granting her a recovery that's all but unrivaled horizontally, albeit still imperfect. It's critical that Dixie initiate her spin sufficiently high above the ledge to make it back safely, as her hair grants her absolutely no upward lift whatsoever, and her vertical recovery otherwise is lackluster. Too much canceling in and out of Up Special with aerials offstage, or one badly-timed air dodge, is a surefire way to drop Dixie down past the point of no return. And though Dixie's hair is great at covering her hurtbox from the sides, it does little to defend her from above or below. An opponent that successfully undercuts Dixie offstage can send her lightweight frame flying, perhaps with one of classic MYM's patented U-Air flip kicks, while an especially well-placed spike can be all that's needed to make Dixie to kiss a stock goodbye.

Bouncing to new heights:


When Kiddy or kegs are present onstage, Dixie can spread her figurative wings with more versatility. If the player presses Up Special as she comes in contact with either summons — whether to initiate or during her hair spin — she'll quickly tuck into a ball and bounce off in a linear direction. Dixie bounces about three-quarters as far as Diddy leaps during his Monkey Flip, and about as fast, but with better control: at the moment of impact, the player can direct her bounce in any of the standard eight compass rose directions. Upon reaching the end of her bounce, Dixie automatically will unfurl and transition into regular Up Special at its top air speed, though the player can initiate her hair spin earlier in her linear trajectory with a repeat special input. Impact with Dixie as she's bouncing away inflicts 6% and a moment of hitstun, which, if she's close to transitioning into or initiates her spin, will combo into her hair's stronger initial hit. Post-bounce, kegs are knocked lightly in the opposite direction, while Kiddy keeps bouncing or sitting unimpeded, here not synching back up with his nimble cousin.


Already adept at traversing the skies horizontally with vanilla Up Special, Dixie now unlocks bonus vertical movement and approach options with her bounces off Kiddy or a keg. Following behind either summons as they're bounding forward across the stage, Dixie accesses mix-ups by way of either timing varying bounce angles, letting her evade and punish would-be attackers, or starting and canceling out of Up Special as a feint into something like grab or dash attack. This can prove especially unsettling near the ledge, as offstage foes must predict whether Dixie plans to bounce off at them for a gimp attempt (recover low!) or leave a keg or Kiddy alone to drop or be thrown down at them (recover high!). With a bouncing keg or Kiddy sitting at the ledge, Dixie can prolong the time she spends offstage haranguing a target, using a strategically timed bounce to give herself two out-and-back spinning trips, rather than one. To prevent indefinite midair hovering, Dixie only can bounce off each individual summons once before touching the ground.

If Dixie's directional bounce brings her into contact with a sitting Kiddy, he'll curl into a ball around her and travel along for the duration of her trajectory. This effectively doubles the circular hitbox's size, buffing its damage up to 16% and knockback to KO around 110%. This can turn into a potent KO option closer to the ledge, where the Kongs' teamed-up bounce can KO a fair ways earlier, though if for whatever reason Dixie doesn't want to sync up with Kiddy at that moment, she'll have to angle her bounce such that she avoids him.


Let's talk about Kiddy in midair:
When Dixie and Kiddy are synched up, the banana-brain will tag along behind her as usual. In doing so, Kiddy's fall speed deviates from the DK-esque descent he undergoes while solo, and what one might expect from such a stocky character. Rather, he'll match Dixie's generally floatier falls, even to the point of appearing to hover slightly alongside her. It's a faithful holdover from the classic DKC games that looks a touch odd in 3D but serves as a quality of life measure here, keeping Kiddy from plummeting away from Dixie as he mimics her aerials behind her. If one is of the DK Vine theorycrafting mindset, you could chalk Kiddy's situational floatiness up to something like Big Kong Energy or banana magic.


In any case, Dixie's Up Special changes slightly when Kiddy's right behind her. Rather than immediately starting her hair spin, Dixie will hop onto Kiddy's shoulders, an excitable look on her face. From there, the player can aim the control stick around for up to a second, as Kiddy's fall speed halts briefly before picking back up again. After this time elapses, or the player repeats the input, Kiddy quickly scoops her into one big hand, curled into a ball, and tosses her. Mechanically, Kiddy's tosses allow for souped-up versions of the regular momentum-boosting bounces solo Dixie can perform off of him and her kegs, this time taking her 1.25 times as far as Diddy's Monkey Flip and inflicting 9%, with knockback capable of KOing around 140%. Here, Dixie trades off the chance to combo together her bounce and hair spin for the opportunity to knock foes a short ways away with Kiddy's more forceful toss, after which her maximum distance traveled can give her a better vantage point to twirl around and finish them off.


In terms of recovering offstage, Kiddy grants Dixie a strong multi-directional recovery option (his default toss is vertical), albeit quite possibly at the cost of his own life, as the two Kongs desync after Kiddy's toss. He'll automatically use his midair jump to attempt to follow and reconnect with Dixie, but the attempt will be moot if he's too far from or below the edge to grab it. Because of this Up Special variant's sacrificial nature, Dixie and Kiddy in the air together are better equipped for walling off enemy escape routes with hitbox coverage than they are blitzing offstage targets. To attempt the latter in a pinch, Kiddy can throw Dixie from the relative safety of an onstage shorthop, at the potential risk of his target evading her and returning to smack him without her protection. Of note, Dixie will sweetspot ledges out of Kiddy's toss but falls into prone if hurled down onto a surface, much like a certain fellow Rare bear and bird out of a featherless use of Wonderwing.

Spinning on solid ground:

With both feet planted firmly onstage, Dixie's Up Special has her perform a smaller number of comparatively straightforward spins in place. With a button tap, Dixie will spin just once over 35 frames, bringing out the initial launching hitbox of her aerial Up Special variant in front of her between frames six and nine, and behind her from frames 10-12. Holding the button down, by contrast, has her spin three times over 78 frames, during which she can slowly move one training stage square to either side. As Dixie twirls, she creates weaker hitboxes that inflict 5% and low set knockback in front of and behind her from frames 17-19, 25-28, 33-36 and 42-44.

With both grounded options, the hitboxes in front of and behind Dixie won't combo into each other outside niche circumstances on giant foes. Though her initial spin is safe on shield, on account of a touch of shieldstun, her subsequent twirls are not; at lower damage levels, Dixie's low knockback even opens the door for sufficiently fast foes to punish her on hit. That being said, her ability to pull out a dual-sided, lingering attack is a real benefit for catching out bad rolls or spot dodges. One more added boost — Dixie's hair will reflect enemy projectiles on its first three active frames! Outside the obvious applications, good spin timing allows Dixie to defend Kiddy from getting hosed down from afar. And though kegs don't qualify as projectiles, a single quick spin often is Dixie's best tool for tennis-serving them back at foes who have knocked them her way.

A grounded Up Special while Dixie and Kiddy are synced has her hair spin prompt him to perform a low-to-the-ground hop two training stage squares backward. Nothing too sexy here, but the maneuver automatically desyncs the two Kongs — a quick, handy option for spacing Kiddy to sit a short set distance away, versus taking longer to manually throw him in a more controlled fashion. Kiddy will cross up enemy shields while leaping, opening the door for Dixie to land on a shield with an aerial before buffering Up Special while synced. Pulled off right, she'll whittle the shield down while Kiddy leaps opposite the victim and mirrors her aerial for extra pressure. With Dixie's back to a ledge, grounded Up Special will send Kiddy over the side, but only if there's solid ground, and not a bottom blast zone, underneath. Spaced well on a low platform, Dixie can ward off enemy landings from above, while Kiddy covers her from below — teamwork makes the dream work!


NEUTRAL SPECIAL - BUBBLE GUN


Dixie extracts her state-of-the-art bubble gun, introduced in Tropical Freeze, and points it forward with both hands — a decidedly more defiant parallel to her boyfriend's peanut popgun. With a tap of the input, Dixie will fire a miniature bouncing gumball, slightly smaller than one of Mega Man's pellets and emerging about as quickly. The miniature projectile travels two-thirds of Final Destination, bouncing in three low-to-the-ground skips over 1.5 second before disappearing; foes pelted take 3% and brief stun before undergoing low set knockback. With rapid subsequent button taps, Dixie will fire up to three back-to-back gumballs. While all gumballs are identical damage-wise, all except the last projectile in a duo or trio now impose minimal flinch, with the regular stunning hitbox reserved for the final ball.


If Dixie fires multiple gumballs on the ground, they're likely to pepper foes not quick enough to shield or parry, one after the other. When this happens at close range, Dixie can capitalize with a follow-up hit, though she's taking her chances going for this setup. Opponents with ranged or area-of-influence attacks can cut through the gumballs during Dixie's 25-frame end lag, while sufficiently strong blows will supersede the relatively weak projectiles without clanking. As a helpful workaround, Dixie can fire gumballs while in aerial motion — perhaps falling from a shorthop, or with horizontal momentum approaching or retreating — to increase her likelihood of multiple hits. This is because gumballs fired in midair travel at a modest downward angle, moving at a slightly slower speed until they impact the ground. The result, if Dixie lands mid-stream, often is multiple bouncing gumballs spaced more closely together, harder to leap or dodge away from on hit. Higher in midair, Dixie's gumballs can rain down to frustrate enemies rising up to meet her or waiting to catch her landing, so long as she doesn't over-rely on the tiny projectiles' defensive capabilities from below.

Holding Neutral Special enables Dixie to fire a different type of projectile — a bubble gum bubble! Over the course of up to 120 frames, Dixie's gun shakes and flashes pink with increasing frequency, and unlike Diddy's more reckless counterpart move, she'll simply fire her projectile upon reaching maximum charge, rather than experiencing blowback. By default, Dixie's spherical bubble fills a single training stage square, while a fully-charged bubble encompasses a two-by-two grid of squares. Gum bubbles travel in the same general bouncing trajectory as Dixie's gumballs, albeit at half their speed, reaching two-thirds of Final Destination over three seconds.

Foes experience different effects from these bubbles, depending on their size. If the character in question is small enough to fit into the bubble, it'll engulf and carry them along its bouncing path in their "ball" state (also seen when characters launch themselves out of barrel cannons on the various DK stages). The smallest bubbles won't scoop up any characters not downsized via Poison Mushroom, while Pichu-level characters will start getting picked up around 30 frames of charge, and Bowser-tier big'uns becoming vulnerable after 70 frames. If a character is too big for a given bubble — any bubble, if they're mid-sized or larger and grab a Super Mushroom — it'll simply pop on contact with them, inflicting 9-15% and a period of stun, followed by low set knockback, scaling comparably to ZSS' paralyzer. Victims caught inside bubbles are guaranteed to take this corresponding "pop" damage and stun, whether at the end of the spheres' trajectory, upon mashing out with grab difficulty or an external hitbox bursting their sugary captivity.


Despite functioning as a pseudo-grab projectile, Dixie's gum bubbles are hardly oppressive by their lonesome. Any flinch-inflicting attack will pop a bubble, regardless of its size, without damaging the character in question. The pink spheres have hitgrab properties comparable to Isabelle's fishing rod, not absorbing opponents through shields but popping on contact for their corresponding shield damage and an added touch of shieldstun for Dixie's efforts. However a foe decides to dispose of a bubble, they're best-suited doing so with quick offensive or defensive actions so Dixie can't punish their reaction. More nimble foes might opt to evade gum bubbles rather than face them head-on, though getting around them doesn't necessarily mean getting out of the woods, as Dixie can try knocking such opponents backwards into her trap. Compared to the chip damage Dixie can net through her faster gumballs, gum bubbles often serve her well as a more committal stage control tool, capable of temporarily locking off platforms or enemy air space.

Depending on Dixie's positioning, she can also harness them to bolster damage racking. Attacking an empty bubble will pop it, triggering its stunning hitbox for two frames. This blast only catches foes at point-blank range, but serves as a brief, helpful add-on for Dixie's attack, potentially snagging those carelessly rushing in to pop the bubble in question. Alternatively, Dixie can pop bubbles with foes in tow to exert control over where they experience its stun. If the move she uses strikes both the bubble and its victim, they'll take its damage but the gum pop's stun will override its knockback — this leaves Dixie more easily able to connect with a single attack's multi-hits, or to fade back and smack the gobsmacked foe with something else.

Of particular interest, Dixie can perform an Up Special bounce off of a gum bubble, popping it to stun a foe inside, before twirling back for an aerial string. In terms of counterplay, with smart button-mashing, bubble-encased foes can mix up how fast they escape to try throwing off Dixie's attempted combos, especially if she locks into one option based on where she believes they'll be stunned. Ultimate's re-grab timer kicks in during a bubble-encased character's stun as well as one second after they exit it, inhibiting bubble infinites or unfun repeat absorptions.

A gum bubble can prove a hit or a miss when fired in amid one or more steel kegs Dixie has onstage. Timed right, the two summons can create an unorthodox sort of bullet hell for foes to navigate, though, because bubbles of all sizes are capable of absorbing kegs, throwing too much at the figurative wall can ultimately just mess up Dixie's simpler setups. That being said, encasing a keg in gum isn't without occasional merit — the keg's onstage duration is paused as long as it's in the bubble, and it'll retain its previous bouncing or rolling trajectory upon getting relinquished. This can prove quite handy for repositioning purposes, though if Dixie wants to preserve a certain keg trajectory, she must take care not to pop that bubble with something that sends the steel summons flying differently. Kegs won't get drawn into character-carrying bubbles but rather will pop them with their regular hitboxes.

Kiddy is a bit of a unique case when it comes to gum bubble interactions. Despite his size, he'll tuck into a tight ball to get drawn into Dixie's bubbles a good ways earlier than others in his weight class, with around 45 frames of charge — must be a circus trick the two Kongs practiced. What happens next lends credence to that head-canon: Kiddy alone has the ability to attack while inside a gum bubble, staggered as usual with his babysitter, at which point he'll burst himself harmlessly out at that point in the sphere's trajectory.

If one of Kiddy's attacks — including the grounded moves he now can perform in midair — pops the bubble on a foe at point-blank range, he'll likely be ideally situated below them for a strong follow-up on their stun. If Kiddy protectionism is Dixie's focus, however, she ought not to cast him off inside too many bubbles; foes can attack him through the spheres (though he thankfully does not experience the burst hitbox), and bouncing bubbles too close to the ledge can result in accidental self-destructs. Manually handling Kiddy is almost always preferable to gum bubbles for positioning him, though in a pinch, Dixie can capture and float him back a set distance if she'd rather he be spaced farther away for the time being.


SIDE SPECIAL - HAIR LASH


Dixie swings her head to the side, appearing to concentrate as she whips her ponytail horizontally three training stage squares. On contact with a foe, Dixie will giggle triumphantly as she reels her victim in and holds them tightly in her hair, spinning three times rapidly in a blur before hurling them vertically for 9%. Compared to your typical command grab, the whirlwind effect from Dixie's ponytail here inflicts set knockback, sending her opponent spiraling up four squares regardless of their percentage. The result is, while Dixie won't be KOing from her throw itself, she can confirm from a successful Side Special with most of her aerials — with varying frame windows for doing so — as well as Up Special's initial hit out of a full-hop for a KO setup at sufficiently high percents.

Even if Dixie isn't quick enough to secure such a combo, she can aim to capitalize on her victim's less-than-ideal midair positioning above her. Throwing out a move with decent hitbox coverage could block the enemy's escape, while empty hopping can bait out their midair jump, making them more susceptible to an aerial follow-up. In addition, the momentary hitstun Dixie's foe undergoes gives her a brief moment to run slightly to either side of them before attacking, quickly mixing up their knockback trajectory and which direction the foe must DI. There's a great deal of damage racking and KO utility here, so long as Dixie doesn't start spamming Side Special as baby's first combo starter tool. That's because she's momentarily vulnerable on whiff, with 33 end lag frames, and her hair only constitutes a grab hitbox for three frames. Foes who read Dixie's Side Special attempt can spot dodge her hair without fear of it snagging her as their intangibility ends. Of course, if she herself predicts this punish attempt, Dixie can just wait to initiate her ponytail lash until said foe exits their spot dodge...hooray, counterplay!

During Dixie's 17-frame startup, the player can angle her hair diagonally upward on the ground, and diagonally downward at the edge of a platform or in midair. Should she grab a victim in midair, Dixie will pause briefly in midair as she performs her throw animation — not ideal for gimping purposes, as she tosses her foe skyward, but still capable of turning the tables offstage. Speaking of which, Dixie is able to lash her ponytail out to tether to the ledge, upon which she'll dangle momentarily with her hair, akin to her hook-hanging animation in DKC2. This is a definite help in terms of snapping to the ledge when Dixie has spun close enough with Up Special in recovering, though compared to other tethers, Dixie's ponytail-casting animation gives her no vertical boost.

While onstage, the player can guide the control stick side to side during Dixie's 40-frame spinning animation to have her twirl in that direction at her walking speed, victim in tow, before tossing them. The more discerning DKC2 players might recognize the animation as a nod to the game's delightfully bizarre Cat-O-9-Tails enemies. Dixie's throw properties differ more forcefully when she's moved prior to throwing — for 14% and diagonal knockback capable of KOing around 120%. Here, she'll essentially be trading her stationary Side Special's combo-happy properties for a potential KO throw, though a moving Side Special toss still can see use for its spacing properties at lower damage levels. Mechanics-wise, Dixie will not move off the end of platforms while spinning, and boasts an external hitbox that inflicts 5% and below-average set knockback to foes in FFAs. And Special-wide, Dixie's Side Special is subject to Ultimate's one-second re-grab timer.


If Dixie lashes either a keg or Kiddy, she'll draw her target in and hold them as if summoned via Down Special — compared to a repeat pick-up from an additional Down Special, Dixie doesn't get any frame bonus here, but gains the option to pull either summons to her from afar or a platform. Dixie's got one more flashy Side Special trick at her disposal, if the player double-taps the input at the moment her hair lashes her keg or cousin. Rather than casually picking her summons up, Dixie will whoop in girlish excitement, pulling her target in and performing a flip, at a shorthop's height if initiated onstage or in place if started in midair. Dixie holds out her keg or balled-up Kiddy in her ponytail as she flips, after which she slams her target powerfully to the ground in front of her, almost appearing to perform a cartoonier version of an Aether move.

This is what could be considered a going-for-broke finisher move; while flipping over 40 frames, Dixie and her summons have great circular hitbox coverage, about three-quarters the size of a Smart Bomb blast. Here, flipping with a keg deals 13% and radial knockback KOing around 115%, while Kiddy ups those figures to 16% and 105%, respectively. Then, Dixie's slam covers three training stage squares in front of her, walloping grounded foes to deal 21% and knockback KOing around 80% with a keg, and a whopping 28% and knockback KOing at 55% with Kiddy. This represents the strongest finisher in Dixie's arsenal, and comes with 10% in bonus shield damage to boot; if a grounded foe shields both hits from her flip and slam, they'll lose almost all of their bubble with a keg, and see a guaranteed shield-break from Kiddy. If Dixie lands either slam variant, the game camera will zoom briefly in as the background turns blue, in one of those rare signifiers of a show-stopping attack hit.


Despite this setup's potency, Dixie almost certainly will find herself on the business end of enemy punishment on whiff, as she undergoes an unpleasant 66 frames of end lag on landing. In midair, Dixie also won't stop slamming down until she reaches solid ground, for an assured self-destruct if offstage. Her keg or cousin's underside does, however, carry a 7% hitbox while descending, comparable to Aether or Incineroar's Cross Chop, so she can take foes down with her. Effectively, with these risky Side Special options, Dixie will take herself out of her midair comfort zone to a vulnerable grounded end point in exchange for the chance to really take a bite out of her opponent's stock, if not eradicate it outright. Situationally, she can time her slam onstage at the ledge to spike a high-recovering foe, or else station a keg or Kiddy at the ledge so, from offstage, she can rain down atop a low-recovering target for a suicide KO. And though it takes positioning — maybe by pursuing a keg falling offstage or performing a reversed Side Special on a de-synched Kiddy as he's leaping offstage to reunite — Dixie can use this finisher when she has a stock lead to seal the deal on a match in as bombastic a fashion as she can muster.

AERIALS

NEUTRAL AIR - FAN FARE


Dixie faces the screen and begins spinning her ponytail around her body in a circular fashion, creating the appearance of a fan blade behind her. Coming out on frame 6, Dixie's hair surrounds her over 23 frames, during which time foes will take four rapid stunning hits of 2%. The following fifth hit inflicts 4% and radial knockback that won't KO from onstage until around 180%, but can eke out earlier offstage KOs closer to the blast zone.

Though not quite as expansive a move as Ridley's N-Air, Dixie's counterpart similarly provides hitbox coverage around her body, reaching out a decent ways to pull in foes at her ponytail's periphery. With 15 end lag frames, Dixie can use multiple N-Airs from shorthops to extend combos, or auto-cancel on landing past frame 32 to lead into a grab or jab-lock combo — especially if a low-to-the-ground N-Air sent a foe into prone. Worth noting, while Dixie's aerial prowess often empowers her to pursue foes skyward, there's always the chance she could wind up regretting choosing to burn her excellent double-jump to micro-target a lower opponent with N-Air, or most of her other aerials for that matter.

From a mechanical standpoint, when Kiddy is desynced from Dixie on the ground, he'll perform a shorthop in leaping up to mirror her aerials if she initiated her corresponding move at the height of her shorthop or lower — whether from an actual shorthop or descending to the stage with an attack. If Dixie starts an aerial at the height of her full hop or higher, Kiddy respectively will full hop his aerial, too. Sometimes, if Dixie is high enough to use multiple aerials before falling below full hop height, Kiddy will land before mirroring all of those attacks, in which case he may perform a falling aerial before leaping back up to resume.

If Kiddy is bouncing along inside a gum bubble, he'll leap out to break free before performing his aerial, situationally letting him use it from higher up than he otherwise could. And, if Kiddy is falling in midair at the point where he otherwise would mirror one of Dixie's grounded attacks, he'll perform the matching directional aerial — F-Air, to match her F-Tilt, for instance — before switching to the correct mirror move at his first chance.

As a blessing and a curse, Kiddy still will mirror Dixie's aerials while leaping back onto the stage solo, even if it inhibits him from making it to the ledge. Though this gives Kiddy options for carrying out sacrificial KOs, his fate also could be sealed if Dixie just mindlessly presses buttons after a foe has send Kiddy offstage. In a roundabout way, sending Kiddy offstage can temporarily render Dixie more vulnerable, too, as she's temporarily deterred from using her bread-and-butter aerials if she doesn't want to lose her partner.

With N-Air specifically, Kiddy simply tucks into a ball and performs a single flip in place, inflicting 12% and knockback KOing around 125% at the ledge. Coming out between frames 9-15, it's a straightforward enough single launching hit with 16 end lag frames. Synched up against a foe with no to low damage, the two Kongs can rack up some early damage if Dixie leaps inward at them after successfully landing an initial N-Air. Pulled off, her hair won't send them far enough away to evade Kiddy's flip, which in turn can launch that victim into a second Dixie N-Air or a different attack — even a Smash, if she's higher up on a platform.


While separated, Dixie can try spinning a foe in Kiddy's direction with N-Air for him to knock back at her in a miniature soccer game; even if misspaced such that the victim air dodges before Kiddy can get his flip out, Dixie sometimes can salvage the setup by landing and rushing in to punish. And sitting by his lonesome, Kiddy's flip can net him some breathing room against would-be attackers if Dixie times her preceding N-Air right.

FORWARD AIR - KONG KICKS


Dixie performs two kicks in quick succession, first with her left foot, then her right, ending on what could pass for a karate flykick pose. Coming out between frames 6-17, her two kicks chain together, dealing 4% and 6%, respectively, with the latter dealing knockback capable of KOing around 145% at the ledge. With a paltry 15 end lag frames, and relatively minor landing lag, F-Air could be considered a bread-and-butter aerial for Dixie. She's able to harness her kicks both to start combos, perhaps out of a full-hop following Side Special, or extend them, and also is relatively free to throw it out into thin air while advancing on or retreating from a foe.

On opponents with sufficiently low percents, or heavyweights, Dixie generally can land one F-Air from a shorthop before landing and leaping back up to pursue with an additional F-Air or two. Momentum from Up Special is a big help for her in chaining multiple F-Airs together at mid- to high percentages. Just don't let up pressing your advantage; the range on Dixie's feet isn't too spectacular, so melee combatants can put the squeeze back on her if she lets up. On a more situational note, when breaking gum bubbles with F-Air or other such lighter multi-hit moves, it's generally worth Dixie's while to fade back before impact. That way, a later, weaker multi-hit — here, Dixie's second kick — won't hit her victim out of the bubble's stun, letting her instead punish with something a touch meatier.

Kiddy's F-Air equivalent has him perform a surprisingly agile bicycle kick maneuver, backflipping to kick opponents in front of him for 14% and near-vertical knockback KOing off the screentop around 115%. Not the fastest aerial, Kiddy's kick becomes active from frames 12-15, with 29 end lag frames. When together, foes hit by Dixie's F-Air can quickly air dodge away to avoid getting kicked by Kiddy too — and her kicks send foes past low damage out of his stumpy legs' reach anyway — though external help from a slow-bouncing keg or gum bubble can ensure his follow-up connects.


The frame discrepancy between the two Kongs' F-Airs means that, when desynched, Kiddy can't perform as many F-Airs in one midair sitting as Dixie can. Even so, with good timing, players can turn this to their advantage by determining whether solo Kiddy is performing rising or falling F-Airs, influencing his knockback's trajectory accordingly. The young Kong is all too happy both to kick foes up, soccer-like, at Dixie for an aerial string, or else wait on a high platform to convert her hit into a screentop KO. And even if foes should prove evasive, there's nothing stopping him from venting his frustration on a steel keg...

BACK AIR - SWISH AND FLICK


Dixie chuckles sweetly, sweeping a hand through her ponytail to forcefully swish it in an arc a little more than one training stage square behind her. Foes whipped take 8% and knockback that sends them at a slight downward trajectory, capable of KOing at the ledge around 135%. Active from frames 8-10, Dixie has little difficulty throwing out B-Air out of a shorthop to punish rolls, though, with 24 end lag frames, it's generally best suited for individual blows, versus F-Air's potential for chained hits.

If Dixie manages to coax a foe offstage with B-Air, her hair's low knockback trajectory can land an opponent underneath her as she's twirling around with Up Special. Forging this momentary vantage point lets her react to her target's attempted recovery, ideally without getting overzealous with a follow-up aerial and losing the ability to recover herself. Onstage, Dixie can lash foes down onto prone onstage. If they miss their tech, she can land and true combo into dash attack before their getup, or else spray down gumballs so they can't help but rise up into the projectiles.

Upon successfully landing Side Special, Dixie also has a 50/50 setup at her disposal, through which B-Air lets her smack foes who opt not to leap away from her command grab's set knockback (with U-Air at her disposal for those latter scenarios). And, spaced properly, Dixie can B-Air a keg she's dropped down behind her in midair to potentially hit foes twice, first with her hitlag-prolonged hair and then again with the keg as it hurtles off around her launched victim.

Without so much as looking backward, Kiddy lifts one arm to briefly scratch his armpit in ape-like fashion with his other hand, before slamming the arm down behind himself. His fist hits with great force, dealing 19% and knockback capable of KOing around 90%, or 145% from a stage bounce off the screentop. Up there in terms of the laggiest aerials in the game, with a 20-frame startup — for reference, Dedede's D-Air comes out on frame 22 — this is not a move Kiddy will be chaining together with Dixie in any kind of meaningful capacity, unless an opponent makes the grave mistake of dodging inward at the Kongs after the heroine's hair swish.


Optimally stationed, however, Kiddy can bounce a foe down for Dixie to get in her own licks as they're ricocheting untechably off the stage. She also can swish a foe down at Kiddy with her own B-Air's distinct knockback, potentially even for an onstage spike if he's positioned on a low platform close enough to the ledge. Sometimes, however, this will require Dixie to monitor which side of Kiddy she's on — you might recall, he'll always face her direction, so if she crosses behind him before his own B-Air can come up, the setup won't proceed as planned. She already ought to be prepared to rush to his defense if an opponent decides Kiddy's 26-frame end lag is their window to make him cry.

UP AIR - SIMIAN CYCLONE


Dixie spreads her arms, stretching out in a free-fall pose as she whips and twists her hair above her in a more feral, tornado-esque fashion than usual. Her hair reaches up about one-and-a-third training stage squares, dealing six rapid multi-hits between frames 10-33. The first five hits deal 1.5% and stun, while the last deals 5% and vertical knockback KOing around 125%. Another staple aerial, Dixie can juggle most foes at least twice at low to mid- damage levels, and often more.

It's an efficient enough juggle tool that the threat of U-Air can be potent for baiting hasty movements from landing enemies if Dixie performs empty hops. Side Special into U-Air is a reliable combo for building damage, and can become a kill confirm later on if Dixie doesn't stale the latter too excessively. U-Air's duration can be a blessing and a curse, catching out poor air dodges with relative ease but giving foes who dodge through a window to punish Dixie from below. She'll also undergo a not-insignificant 16 frames of landing lag unless she autocancels U-Air within the back half of its 22 end lag frames.

Kiddy sweeps a big meaty arm in an arc a decent distance above his head, in a manner almost reminiscent of DK's old Smash 64 U-Air. Coming out between frames 14-23, the first half of his sweep inflicts 12% and vertical knockback KOing around 110%, while during the back half, this diminishes to 8% and vertical knockback KOing at 135%. If Dixie is spaced right leaping up after performing her own U-Air, Kiddy's will connect, too, if he's synched up. Kiddy's added damage and knockback potential effectively renders Dixie's 50/50 setups, such as B-Air's aforementioned one with Side Special, that much more worrisome.


Kiddy's slower sweep itself won't often juggle responsive foes, though — both synched and by himself — its weaker hitbox can come in handy from a shorthop. Pulled off, Kiddy will lightly swat his victim, autocancel during the last 7 of his 24 end lag frames, and have a moment to pursue with a follow-up aerial. A challenging setup involves positioning Dixie and Kiddy side by side, albeit not synched, and staggering U-Airs, short and full hops so Kiddy sweeps foes into Dixie's hair. That way, its lesser knockback can cancel out his stronger launch a few times repeatedly, piling on a healthy heaping of damage with optimal execution.

DOWN AIR - SLIDING SCALE
Dixie extends a single foot diagonally downward, pausing momentarily in midair before using her hair to propel herself at that trajectory. The nature of Dixie's stall and fall hinges on her momentum at the time of the aerial's inception. Used while she's at her regular air speed, Dixie will pause for 13 frames before sliding down six training stage squares diagonally. While at enhanced momentum from Up Special, however, Dixie sheds five startup frames and descends a diagonal 10 squares before regaining control. With enough air space beneath her, Dixie travels both full distances over 65 frames, with her sped-up version having a hair more speed to its name. Foes kicked during the first three frames of Dixie's descent, at point blank range, take 13% and are spiked with above average force. Those impacted any later take 7% and light vertical knockback that won't KO but can position them for a follow-up aerial.

Dixie certainly doesn't mind this, as she bounces off her target on hit, up to her double jump height, depending on control stick holding. This bounce won't refresh her actual double jump in midair, but gives her a means for surviving a successful hit offstage, or — for the more daring players — some height to play with, in falling down far enough to land another aerial, potentially F-Air for an offstage KO, but not so far that she can't live to tell the tale. Throwing D-Air out mindlessly offstage obviously is a recipe for disaster, giving Dixie's dearth of vertical recovery options. Situationally, however, D-Air lets her clap back at an aggressive foe trying to smack her from below, or if they're too far offstage for the luxury of an air dodge to avoid her descent.

Onstage, Dixie can bounce off shields for a little breathing room while landing, though a skillful spot dodge can turn this against her, as she undergoes 28 frames of landing lag. Steel kegs, standalone Kiddy and gum bubbles also make for great springboards, as though Dixie's aerial movement weren't already freeform enough. Compared to an Up Special bounce, Dixie's foot here lets her rebound from a bit further away, at the possible cost of bringing about her landing lag. On a foe-carrying bubble, Dixie will bounce off, after which she can zip back down with a second D-Air to strike her victim out of the pop's stun. D-Air as a method for springing off Kiddy also reunites him with Dixie, occasionally letting her extract him from a hairy situation.

With 17 startup frames, Kiddy stretches out, pauses ever so slightly and performs a belly flop, descending at high speeds until he reaches solid ground — technically up to 75 frames, with a ton of air space beneath him. His underside deals 18%, with a powerful spike hitbox during the first five frames of his descent, and diagonal knockback for its duration that KOs at 110%. Onstage, Kiddy also will inflict 10% in bonus shield damage, and produce close-ranged 4% dust hitboxes to either side, nicking foes who drop shield too soon upon his landing. Unique among Dixie's aerials, D-Air will automatically desync Kiddy from her, as he picks himself up onstage over 30 frames before attempting to reunite with her.


With an onstage D-Air, followed by a smashed Down Special, Dixie can deposit Kiddy at the location of her choosing before continuing on to greater heights, perhaps a higher platform to double up the two Kongs' coverage. Though punishable, solo Kiddy can occasionally get off stupid hits in more casual settings by leaping up and repeatedly falling down in place with D-Air. Offstage, he'll almost invariably fall to his death; if the player knows they've buffered D-Air right before getting launched, they'll want to make a beeline for the stage before Kiddy's one-second move-mirroring delay expires. Dixie generally will need good positioning to land Kiddy's brief spike hitbox, though if she's got a sufficient stock lead, she can doom her dratted cousin for guaranteed damage on some recovering foes, not unlike what Steve can do with his anvil. Sometimes, sacrifices must be made. . .

GRAB-GAME

GRAB - KONG KLUTCH
By her lonesome, Dixie swipes a hand forward a short distance to snag a victim. If she's successful, she'll grip them with both hands and a determined look on her face, reminiscent of her barrel-carrying animation from Tropical Freeze. On whiff, she'll stumble over her feet with an annoyed expression, undergoing 28 end lag frames.

Coming out on frame 7, Dixie's grab is comparable to Diddy's in terms of its so-so range, as she gets hands-on in lieu of using her hair again. Generally speaking, Dixie will find herself rushing in on a vulnerable foe to punish with a grab, or dropping suddenly from Up Special to catch a foe by surprise, rather than grabbing from a standstill.

By contrast, solo Kiddy has grab range more comparable to the leader of the bunch himself, with only marginally slower startup than Dixie to boot at eight frames, and the same end lag on whiff. The tyke swipes both big arms in front of him in a hug-esque animation, embracing victims against his chest in what likely is intended as a non-violent gesture, nonetheless still uncomfortable. From an input standpoint, control effectively switches over to Kiddy after he's caught a foe; the player is free to use his own grab-game before resuming control of Dixie after he's thrown his victim or they escape.

During Kiddy's grab, Dixie pauses to hop in place, cheering him on — no rushing over to charge Smash attacks mid-grab. If Kiddy landed grab while she's in midair, Dixie will fall regularly in place, retaining any momentum she had previously, and become stationary upon landing. If Dixie has no solid ground beneath her, the player ought not dawdle in throwing Kiddy's victim, lest Dixie find herself up schitt's creek without a paddle.

Despite Dixie's inertia during Kiddy's grab itself, she's able to prove her mettle both immediately before and afterward. With tight timing, Dixie can move, leap or twirl overtop Kiddy immediately before his grab comes out, prompting him to turn and rival DK for some of the best pivot grab range in the game. More simply, if Dixie knows Kiddy's grab is about to come out, it's often in her best interest to move in his general direction, so she can follow up on his victim right after they're thrown. It ought to go without saying, but Ultimate's re-grab timer kicks in for both Kongs, regardless of which of Dixie or Kiddy has triggered it.

When Dixie and Kiddy are paired up, the latter will grip the former from behind in one hand, before thrusting her forward slightly as she proceeds with her own grab. This ups the grab's startup a decent amount, to frame 12, but extends its range significantly, up to 2.5 training stage squares. In essence, the Kongs together have the laggiest but farthest reaching grab, compared to either of their solo variants.

The 28-frame end lag on whiff from both solo Kong grabs carries over here, too, though it's most risky here, as Kiddy keeps Dixie's hurtbox held out for the first half of this cooldown before yanking her back in. The tradeoff, if the duo lands grab, is the player's flexibility to choose which Kong ultimately throws the victim, signified by Kiddy placing one hand ominously on the foe's shoulder as Dixie frontally clutches them. Her more combo-suited throws are triggered with directional control stick taps, while Kiddy's more forceful counterparts are achieved through smashed inputs.


PUMMEL - KONG KRUNCH


Dixie holds her victim in place as she sinks a knee into their gut or gut equivalent, dealing 1% at a rapid rate. Kiddy instead squeezes his opponent against his chest, dealing 1.6% at a somewhat slower rate. With both Kongs together, Dixie will continue kneeing the victim, while Kiddy performs a more traditional shoulder chop with his free hand, with the same damage and speed as his standalone hug. They'll effectively perform both of their pummels at the same time, though the damage adds up gradually, rather than all at once, given the slight speed difference between Dixie and Kiddy's respective attacks.

One bonus here is, both Kongs will refresh their stale moves simultaneously, as opposed to refreshing just their own attacks with their standalone pummels. For additional damage-dealing via grab-game, Dixie and/or Kiddy can try landing grab in the path of a steel keg, which will bounce off their victim without knocking them free, akin to one of Dedede's Gordos. Gum bubbles, too, can assist in this respect, though they'll only inflict their damage — no stun or encasement — upon impacting a foe mid-grab or throw animation.

FORWARD THROW - KONG KATAPULT


In one fluid motion, Dixie tosses her victim backward into her ponytail before shifting forward into a handstand, reversing their momentum to fling them. The toss inflicts 9% and decent horizontal knockback capable of KOing at the ledge around 120%. Dixie's trajectory is able to put larger foes or those with low damage in a tech chase situation about a platform's distance in front of her. Later in the percentage game, characters are flung far enough that they also could opt to leap out of their knockback instead of landing.

In that respect, Dixie can try conditioning one of those two options, by respectively leaping after her target or sending out a keg or gum bubble, before eventually punishing the ingrained behavior with the opposite reaction. Of note, because Dixie's startup has her briefly position her victim behind her, in her ponytail, she situationally can tack on bonus damage, without interrupting the animation, by initiating F-Throw right in front of a damaging construct.

Upon initiating F-Throw, Kiddy lifts his victim into the air in one hand, before slamming them to the ground, as if smashing a bug, putting his whole body into the animation. He inflicts a respectable 10% and healthy base knockback that sends his victim a decent ways up diagonally, but does not scale especially quickly, not KOing until rather high percentages.


In contrast with Ultimate's similar-looking throws, there's not a ton of immediate combo potential when both Kongs are united, outside sending the victim into a well-aimed keg or a hard read with a buffered Up Special toss of Dixie. That being said, when separated, Kiddy's knockback can send his victim right into Dixie's air space, if she's far enough in front of Kiddy to leap up and intercept the foe, potentially hovering down to micro-space an aerial with relation to their air dodge.

BACK THROW - BUBBLE GUN BLAST


A multi-part animation, Dixie turns around and hoists her victim up in the air behind her, dealing an initial 3%. Before they can react, she whips out her bubble gun and grins mischievously as she presses the trigger; as compared to Neutral Special, here, a gum bubble can be seen inflating at the weapon's muzzle. Dixie's victim lands on the bubble, popping it under their weight for an additional 9% and outward knockback that can KO at the ledge around 105%. As a slight easter egg, the bubble gum burst produces a sound effect not unlike when a Kong's extra-life balloon pops in DKC — all the more fitting, given the move's status as Dixie's strongest KO throw.


Outside of a B-Air or inward Up Special strong hit at low damage levels, Dixie has better combo tools at her disposal within grab-game. Even still, that she can polish off stocks with some degree of efficiency both with F-Throw and B-Throw means Dixie can credibly threaten opponents climbing up from the ledge, regardless of which direction she grabs them from. With the startup timing down, partnered Kiddy's extra range can be a boon for landing these ledge-adjacent grabs, while, by herself, Dixie's fast ground movement can help her counteract her grab's mediocre range. And given Up Special's nature as an edgeguarding staple, suddenly landing from her twirl to grab at the ledge can make for a potent, potentially lethal mix-up for Dixie.

Kiddy apes Smash's staple "so long, gay eh Bowser" throw animation for his B-Throw, spinning his victim around twice before hurling them behind him for 9% and knockback KOing at 95% with his back to the ledge. Upon release, he takes a moment to wave innocently in his victim's general direction — happy trails! The young Kong's spinning has him rotate two training stage squares backward over 58 frames, stopping at ledges but potentially bringing him closer to the blast zone before releasing his victim. Dixie will travel backward along with Kiddy when the two Kongs are paired up, whereas, while solo, B-Throw can serve double-duty as a means for repositioning Kiddy.


As with Dixie's F-Throw, Kiddy can swing his victim into a bouncing keg or gum bubble for bonus damage without breaking his grip, here to either side. That being said, this can be comparatively harder to time, as Kiddy's mid-throw movement could just as easily have him travel underneath and miss some constructs. As a KO option, Kiddy's B-Throw will finish off ledge-adjacent opponents a touch earlier than Dixie's counterpart — only fair, given that he must land grab with his back facing the ledge to capitalize, without much knockback behind his own F-Throw.

DOWN THROW - DIXIE DRILL
Dixie drops her victim to the ground, where they lie helplessly on their back, belly or equivalent, before leaping over them and flipping upside down. She then drops down, ponytail extended underneath her in a point, and pivots around rapidly, using her hair to drill her opponent with five rapid hits adding up to 7%. The final hit inflicts low downward knockback, certain to send Dixie's victim into prone about a platform width in front of her, barring a timed tech. Given that Dixie's combo potential here largely stems from managing her foe's get-up, D-Throw generally is one she'll want to use on a main stage platform.

There, she'll have more room to play around with potential reads, not to mention space for locking off a directional roll, with a preemptive move for Kiddy to mirror or a bouncing construct. Dixie's upcoming D-Smash, in particular, makes for a valuable tool on foes put in prone via D-Throw. Her fast first actionable frame after drilling her victim lets her run up and use a well-spaced D-Smash to cover three of their four possible get-up options (collapse in place, tech in place or inward tech roll). Outward tech rolls can provide foes an escape route, though Dixie can lock this off, too, if she initiates D-Throw sufficiently close to the ledge. Alternatively, Dixie can move in with jab for a jab lock combo, which can run out her victim's regrab timer such that she can then step back for a turnaround Side Special to catch their get-up, in lieu of a launching third hit.

Kiddy's D-Throw has him leap up a short distance, fists above his head, before stomping down atop his victim, evocative of his render on DKC3's "bash the baddies" bonus room screens. His bulk inflicts a solid 15% and sends his victim at a diagonal trajectory behind him, with mediocre knockback that won't KO until steep percentages. The launch angle here isn't conducive for combos, either. Given how Kiddy automatically faces Dixie's direction, in most cases he'll be sending his foe away from her, and Kiddy himself doesn't have all that much he can follow up with, outside of a hard read with his sluggish B-Air. Outside of niche spacing instances around Dixie's constructs, Kiddy's D-Throw is most valuable for guaranteed damage — the most among any of the two Kongs' throws — if she missed her chance to get in position for a potentially more rewarding string out of a different throw.


UP THROW - SIMIAN SPRING


In a display of acrobatic prowess, Dixie grips her victim with both hands as her ponytail compresses underneath her like a spring, holding both characters a touch off the ground. She then uses her hair's potential energy to leap with her foe in a short arc, carrying them four training stage squares upward and one square forward, before slamming down upon them on landing. U-Throw takes Dixie and her foe high enough to land on low platforms, though the animation will stop slightly short at edges. The throw's impact inflicts 6% and bounces both Dixie and her victim skyward. The foe isn't launched all that far, only getting KOed around 190% on high platforms, while Dixie travels up a set three squares (deviating from the horizontal trajectory in the final illustrated section below).


Dixie's aerial positioning close to her thrown victim, not to mention a three-frame reaction advantage, sets U-Throw up as a differently flavored combo starter. Compared to her grounded, more reaction-based D-Throw, Dixie can true-combo U-Throw into N-Air, F-Air or Up Special at lower percentages. Past that point, foes can air dodge, but it's a sufficiently tight window that Dixie still can find herself landing those follow-ups anyhow. At mid-damage levels, Dixie can set up a 50/50, hitting her victim with an aforementioned aerial attack if they don't react, or fastfalling down to use a grounded attack (a charged Smash, for instance) if they dodge downward. And higher into the percent game, U-Throw launches characters far enough to leap away, though they still ought to ready themselves for Dixie to spin in pursuit with Up Special if she goes the aggressive route.

Already wrapping his arms tightly around his victim, Kiddy locks them in a veritable straightjacket of a hug, turning back and forth in a cutesy manner, oblivious to their obvious discomfort. The brief animation inflicts 12% across three crunchy hits, after which the victim pops up from between Kiddy's arms like soap from a fist. They undergo vertical knockback capable of KOing from high platforms as low as 90% — a payoff Kiddy sure will be sticking his neck out to earn sitting on such a platform, where foes can whittle down his HP as he struggles to land. Past low damages, Kiddy will squeeze his victim up too high for Dixie to leap up after while synced up. Even so, if she's the one on a platform above him, U-Throw can deposit a victim in prone there for Dixie to abuse, or close enough to the screentop that her U-Air can close out the stock.


SMASHES

FORWARD SMASH - SIMIAN SPIRAL
While charging, Dixie leans inward, curling her ponytail back to one side with a look of grim focus. Upon release, she spins thrice rapidly, whipping her hair at a slightly downward angle with each twirl, before rearing back and slamming it powerfully down in front of her. The animation brings four hitboxes into play — between frames 9 and 26, Dixie's hair whips, each chaining into the next and dealing 2-4%, while her slam, from frames 36-39, deals 11-14% and knockback KOing from 120-85%.

The range on Dixie's ponytail increases a touch over the course of her Smash, from one training stage square during her whips to 1.5 square during her slam. Before Dixie slams, the player also can use the control stick to direct her slowly forward or backward, up to two training stage squares over the course of her spin (though not back and forth or off platforms). She's able to press in on or retreat from an opponent mid-Smash, approach a keg or gum bubble for a potential on-hit interaction, or even just sync up with a nearby Kiddy before the attack ends.

With relatively fast startup and 21 end lag frames, Dixie's F-Smash isn't an especially sluggish option. Its blessing and curse, depending on where you're standing, stems from her animation's 60-frame duration from start to finish. Used well, Dixie can easily catch out spot dodges at close range, cover grounded ledge get-ups or whittle down shields — a scary prospect, if Kiddy either already has taken a chunk out of the foe's bubble or is about to as Dixie initiates F-Smash. The longevity of its hitboxes also means it's a decent option for Dixie to throw out on a higher platform to try intercepting a victim Kiddy has launched her way.

That being said, if a foe reads and avoids Dixie's F-Smash, they've got a prime opportunity for punishment; without outside intervention, she also won't make enough of a dent in full shields to avoid getting shield-grabbed. Though no slouch on the ground, F-Smash is a solid manifestation of Dixie's general need to be strategic with her landings from midair, using her great jumps and hover to drop down for F-Smash at an opportune moment. One especially frightening moment, when Dixie has adequately cornered a foe near Kiddy as he's about to undergo his death animation tantrum, involves dropping down to use F-Smash (or any Smash, for that matter) in front of or behind him. Used immediately before or after her cousin's tantrum, this can increase the odds of at least one powerful hitbox connecting and, if the foe isn't careful shielding Kiddy's sound wave, will guarantee a shield break if all of Dixie's F-Smash hits connect.

Let's talk about Kiddy's mechanics in terms of Smash attacks. Whether together with or apart from Dixie, Kiddy's one-second buffer period for his mirrored moves still applies here — both for the Smashes themselves and their charge periods. In other words, if Dixie charges her Smash for one second or less, Kiddy will perform an uncharged version of his own Smash; he'll start charging his own Smash if Dixie does so for any longer than one second, releasing his move the equivalent time frame after she does. This means, for Kiddy to achieve full charge, Dixie must first charge her own Smash for two seconds, twice the amount of time she herself needs to reach max power. It's a design scheme that kills two birds with one stone, preventing the alternative of Dixie being stuck immobile while Kiddy is mid-charge, while also making it that much harder to just station him and have him spam Smashes mindlessly from a distance.

With F-Smash, Kiddy keeps things simple, facing the screen and leaping a slight distance off the ground while kicking a single foot to the side. Extending a bit less than a full training stage square, his foot inflicts 21-27% and knockback KOing from 100-75% — not especially impressive, compared to most of Kiddy's heavyweight compatriots. Where Kiddy's F-Smash can become more oppressive is in tandem with Dixie. His kick's 19-frame startup prevents it from being a true combo from Dixie's own F-Smash. That being said, Kiddy's added hitbox at the very least will cover Dixie's end lag, necessitating more conscious thought when punishing her spin-and-slam's duration.


And, if a foe cowers in their shield, or otherwise isn't fast enough to leap away, Dixie and Kiddy can go to town. At low to mid-percentages, Dixie can time her own F-Smash to intercept victims out of Kiddy's kick; with skill, the two Kongs can rack damage on a single victim at a k. razy pace, using multiple F-Smashes to carry them across the stage — like the Ice Climbers but not competitively viable because of unintended exploits. This is far from an easy setup to pull off, however, as if Dixie mistimes her F-Smash, the foe can throw out a fast attack to separate the Kongs. Kiddy's kick also comes bundled with 28 frames of end lag, upping the risk factor for him in throwing it out solo outside of hard reads — say, if Dixie can spook a foe into a gum bubble for Kiddy to kick from the opposite side.

Kiddy also can enhance the movement properties of Dixie's F-Smash, together or solo, if his kick overlaps with her spinning animation. When this happens, the player can direct the control stick side to side to double the regular distance Dixie can move while whipping, from two to four training stage squares. Unlike with standalone F-Smash, Dixie only is able to spin forward with this setup, though with her new speed boost, she becomes able to cross up shields with the right spacing — potentially to avoid wannabe shield-grabbers and punish with a shorthopped B-Air. If Dixie times an F-Smash such that she spins into Kiddy right as he's using his kick, she can suddenly veer back in the opposite direction for her slam, syncing up with her young charge in the process. And should a foe leap or roll away from a chain of F-Smashes from the two Kongs, Dixie can always let herself be kicked forward, aborting the setup and desyncing but possibly salvaging a final hit.


DOWN SMASH - PONYTAIL POUND


Dixie turns to face the screen, hunching over slightly, before rapidly pounding her ponytail twice to the ground, first in front of her and immediately again behind her — this is her hand slap equivalent from Tropical Freeze. She produces two hitboxes with D-Smash: one on her hair itself, which reaches out a training stage square to either side, dealing 12-16%, and a grounded shockwave hitbox that extends half a square beyond that, inflicting 2-4% and light flinch. When it comes to KO power, Dixie's D-Smash is extremely wanting; foes have to be pushing 200% for her pound's vertical knockback to KO off the screentop, even when D-Smash is fully charged.

That being said, her hair pound boasts exemplary end-to-end speed, even by Smash standards. Not only does Dixie's slam hitbox come out on frame 5, covering both sides through frame 19, but she also has a surprisingly low 15 frames of end lag. On the ground, Dixie can aggressively throw out an uncharged D-Smash to pop low-damage foes up such that they land in prone next to her if they miss their tech, or, at mid-damage, are teed up just the right distance for her to start a midair string. More defensively, she also can slam to interrupt enemy combos, as well as snag rolling foes with her backward hit.

D-Smash also stands out as a good option for quickly launching approaching kegs at a helpful outward angle, or popping nearby gum bubbles with victims inside. The move is sufficiently fast that, if the player buffers multiple D-Smashes, Dixie effectively can pound the ground continuously to threaten space, just like in her source material. Just take care not to instinctively throw it out at close range or, like with Nayru's Love from a bad WiFi Zelda, Dixie's opponent could bait her into doing so before retaliating mid-animation.

With D-Smash, Kiddy seeks to show up all the detractors who bemoan that DK should have starred in DKC3 instead by virtue of having a hand slap. Rather than slapping one hand at a time, Kiddy steadily lifts both hands into the air before bringing both palms powerfully down onto the stage at the same time. Coming out on frame 23, Kiddy's slap produces a grounded shockwave that extends outward 1.5 times as far as DK's Down Special, albeit only in front of him. The inward half of this shockwave constitutes a sweetspot, inflicting 24-31% and vertical knockback KOing from 95-60%, whereas the latter deals 14-18% and diagonal knockback KOing nearer to 115-90%. Kiddy undergoes a not-great 36 frames of end lag, holding his hands to the ground momentarily in such a way that underscores his slap's sheer force.


Against foes with no damage, Kiddy's D-Smash will combo from Dixie's if a foe misses their tech after her hair pound pops them up. This can net the two Kongs a reliable set amount of damage to start off a stock, though more masterful players might find they can earn even more rewarding damage on that foe by having solo Dixie kick off a jab lock combo instead. Otherwise, Kiddy's laggy Smash can be a gamble to casually throw out against practiced foes who'll see it as their chance to separate him from his begrudging babysitter and lower his HP. A situational workaround can involve having Kiddy initiate D-Smash from inside a gum bubble, where his hitbox will pop the bubble as it comes into being, dropping him in midair to cancel his cooldown.

More potent, however, is the threat of Kiddy's hand slap, which can come in handy as a tool for steering enemy movement when both Kongs are synced. Because Dixie completes her hair pound with nearly half a second to spare before Kiddy initiates his own D-Smash, she can turn back and forth to switch which way her cousin faces and ultimately will slap. This can terrify aerial foes, unsure which side of the Kongs will end up safe for their landing, and maybe provoke a punishable air dodge for their troubles.

Beyond that, a fun defensive strategy involves Dixie standing within the hand slap shockwave of a desynced Kiddy for coverage on her grounded attacks. She can keep Kiddy at the right distance behind her — likely by stopping and starting his return movements, or twirling him back to desync with grounded Up Special — before splicing quick D-Smashes in with her attacks to continue manifesting his staggered shockwaves. Though somewhat predictable, this can boost Dixie's pressure game by a good margin, earning her bonus damage and knockback if she can hold a foe within the shockwave's range or, heaven forbid, her victim opts to roll inward into Kiddy's sweetspot.


UP SMASH - BLADES OF BLONDE
Dixie crouches while peering upward, before unfurling her ponytail and spinning it in a circular blade-esque fashion above her head. With 9 frames of startup, her hair inflicts five rapid hits over 26 frames, the first four of which deal 1-3% and stun, with the final launcher dealing 10-13% and vertical knockback KOing from 125-90%. Despite its so-so power, Dixie's hair reaches out a training stage square to either side.

Dixie will pull characters who make contact into her remaining multi-hits, without risk of them falling out, as can be the case with some comparable in-game Smashes, though the shortest characters are able to duck under her ponytail. With 30 end lag frames, U-Smash features the slowest first actionable frame among Dixie's Smashes, often being unsafe at the lowest damage levels. Even still, her ponytail blade can prove valuable for extending Dixie's combos — after one or two U-Tilts or from a falling N-Air or U-Air. U-Smash also can catalyze a kill confirm on high-damage foes stuck in gum bubbles, as Dixie's first multi-hit pops their bubble so the remaining ones can finish them off from their stun.

Kiddy twists forcefully inward before spinning in a stationary whirling dervish, fists out, akin to DK's upright Spinning Kong animation from the first three Smash games. The start of his inward twist boasts a launching hitbox between frames 3-5, dealing 9-12% and KOing from 135-100%. Beyond that, the bulk of Kiddy's pugilistic cyclone takes place between frames 19-56, inflicting three chaining hits of 6-7%, followed by a stronger hit dealing 9-12% and diagonal knockback KOing from 110-75%.


Kiddy's initial strong hit comes out unusually fast for a Smash, not being all that effective for KOs outside ledge reads but — like DK's Melee Up Special — working excellently in scenarios where he needs to quickly throw foes off to get some room to breathe. He shares Dixie's 30-frame end lag, though, because his animation is a touch longer, he's more punishable on whiff. Otherwise, Kiddy's fists reach out marginally less far horizontally than Dixie's hair but lack their slight low-to-the-ground blindspot, beyond the obvious power boost.

During the first 10 frames of Kiddy's U-Smash startup, the player can smash A and the control stick for his spin to propel Dixie either straight or diagonally upward while performing her own U-Smash, as though she were one of those sky dancer ballerina toys. It's a movement option Dixie can achieve whether she's synced with Kiddy or falling down on him from above, taking her up three training stage squares or in a sideway arc two squares vertically and three horizontally. Dixie's momentum has her complete her U-Smash animation in midair before beginning to descend. She's even able to cancel her final five end lag frames into another buffered option, be it an attack, jump or dodge; with Up Special, in particular, she'll start her spinning at her top air speed, as though she bounded off a construct with the move itself.

The two Kongs can effectively double their hitbox coverage, occupying space both on the ground and in midair, at the cost of desyncing and Kiddy becoming potentially vulnerable as he mirrors a second U-Smash in place. Oftentimes, Dixie may choose to board low platforms this way, as she can poke through at foes while retaining the option to drop back through and reconnect with Kiddy. She'll want to mix this approach up with rising aerials, however, lest her target be ready to greet her ascent with a charged Smash.


STANDARDS

JAB - PONYTAIL POLE VAULT
Dixie's first two jab hits have her slap once, then twice with alternating hands, balancing on the opposite hand for each strike. Both slaps deal 2% and a touch of stun, typical of most lightweight jabs. Her first slap comes out on frame 3 and transitions into her second as early as frame 6, with the two slaps having respective first actionable frames on frames 19 and 20.

This represents an identical animation and frame data to Diddy's first two jab hits, and similarly to her boyfriend, it's a rare day that Dixie won't want to proceed to her rapid jab or finisher. Even so, if Dixie observes she's about to get shield-grabbed, a near-instant reaction (or a slow reaction from her foe) lets her double back to try an alternate form of pressure, like a turnaround Side Special grab. In any case, her slaps are fast enough to be great go-to options for jab lock combos when she's landed a foe in prone with something like shorthop N-Air, B-Air, D-Throw or low-damage D-Smash.


Dixie starts distinguishing herself on her rapid jab, as she transitions from balanced slaps to kicks. Out of slap numero dos, as soon as frame 6, Dixie leans backward, bending her ponytail underneath herself for support as she kicks rapidly forward with alternating feet. She performs one 0.4% kick every three frames, able to tack on helpful bonus damage in all the usual scenarios — running up and jabbing to punish stationary techs or poking at a shield, to name a few.


Dixie's jab finisher has her stretch her ponytail out and brace on her hands to kick more forcefully with both feet, dealing 5% and knockback KOing at the ledge around 190%. Her hair lends her finisher more range than your typical finisher, reaching out about one-and-a-third training stage squares, comparable to a number of tilts. This range can work for or against Dixie, depending on her spacing.


Skipping her rapid kicks to proceed right into her finisher can catch foes off-guard as they're getting too close for comfort. That being said, with 29 end lag frames, Dixie isn't fully safe on shield unless she initiates her long kick from its maximum range (the distance her rapid kicks will push her victim back with enough time). The fastest foes can make Dixie regret her brief forward hurtbox extension, though she, in turn, can kick outward as pseudo-bait before pulling herself in and making hay of overly laggy punish attempts.

When it comes to mirror moves, Kiddy will perform one jab in response to any individual combination of Dixie's jab hits, solo or together. He sticks both arms to the side, almost as if t-posing, before performing a single spin in place. Kiddy's fists extend about as far as Ganondorf's jab to either side, between frames 7-9, inflicting 11% and knockback capable of KOing at the ledge around 130%. It's a lariat-esque maneuver he appears to have borrowed from his older brother Chunky Kong before his untimely demise. The animation itself lasts 28 frames, not great by jab standards, though as a helpful perk, Kiddy's upper half is intangible between frames 6-15. Talk about a Strong Kong!


When the Kongs are together, Dixie has time to get off a few rapid jabs before Kiddy lands his spin on the stunned opponent. Compared to her regular finisher, Kiddy will inflict greater knockback at the expense of an easier chance for a grounded follow-up, or the ability to hold a victim in multiple kicks as a keg or gum bubble approaches. A happy medium can come while the Kongs are desynced but flanking a foe to either side, as Dixie uses her extended kick to send her victim into Kiddy's spin, which in turn sends them back in her direction for an aerial pursuit.

By himself, Kiddy can throw off encroaching attackers with the occasional fast jab spin. Oftentimes, his doing so will be less a function of how great of a reward he gets off of jab, but rather how easily Dixie can throw out a single jab hit to instill apprehension in an opponent she sees making a beeline for her cousin. Given that Kiddy lacks a shield while stationed solo, well-timed jabs, and their intangibility windows, can help prolong his life, though spamming his jab exclusively for this outcome is a quick recipe for shortening it. For lower-stakes shenanigans compared to spinning through enemy hitboxes, try having Kiddy bat a foe into one of Dixie's bouncing kegs, or vice versa.


DASH ATTACK - PONYTAIL PIROUETTE


Dixie whoops girlishly, holding her beret to her head with one hand as she pirouettes forward four training stage squares over 34 frames — the Smash incarnation of her roll attack from Tropical Freeze. She carries a strong initial hitbox from frames 8-11, dealing 9% and diagonal knockback KOing around 170%, and a weaker lingering hitbox from frames 12-23, dealing 5% and low knockback that won't KO until obscene percentages.

A relatively quick burst option, Dixie players can get a kick, albeit questionable competitive benefit, out of performing repeat dash attacks to traverse the stage. Dixie will cross up shields if she makes contact during the first half of her pirouette, able to poke from behind with a subsequent aerial, but otherwise will stop short, vulnerable to a shield-grab. The attack itself comes in handy as a true combo on foes knocked into prone at close range with a shorthopped F-Air or B-Air, or if Dixie suddenly drops down as a feint from Up Special.

Of note, if the player holds the dash attack input, rather than tapping it, Dixie will pirouette off the ends of platforms instead of stopping short. Doing nothing has her begin fast-falling after her attack animation, whereas a jump input will cancel her out of it, carrying her momentum forward at her top air speed. Beyond being a faithful nod to source material, this "roll jump" can grant Dixie quick added height in chasing a victim offstage. She can also cross up a shielding foe at the ledge before leaping back in their direction with B-Air, or, in a casual setting, more easily traverse platforms on a hellscape like 75m or Palutena's Temple.

Bringing his own DKC roll equivalent to the table, Kiddy performs a single somersault, producing a creaky barrel-esque sound effect as he goes. He travels the same distance as Dixie, at the same speed and with identical shield cross-up properties. His beefier roll inflicts 12% and diagonal knockback KOing around 160% from frames 9-12, and 9% and below-average knockback from frames 13-24. When stationary solo, Kiddy will perform the equivalent of a standstill dash attack, beneficial for bursting into foes and potential onstage repositioning when Dixie is too far away to grab and throw him.


Kiddy either will stop at platform edges or roll off them, depending on which version of Dixie's dash attack he's pantomiming. The held version can be great for moving him off low platforms, and anything but great when he's stationed at the ledge, barring sacrificial KO setups against low-recovering foes. Kiddy will reunite with Dixie if he comes into contact with her at any point during his roll; sometimes, he'll pass through her for some frontal defense, before doubling back after his attack ends. With her cousin in tow, Dixie's dash attack transforms as a distinct duo of staggered hits. The two hitboxes won't combo into each other, unless the Kongs both roll through a gum bubble-entrapped target, but nonetheless are useful across a range of pressure scenarios.

If Dixie crosses up a shield, Kiddy's following roll can eat another chunk out of that foe's bubble, or else foil their attempt to shorthop B-Air her in retaliation. Dixie's opponent still can shield-grab her, but unless they do so at her pirouette's furthest extent, they'll render themselves vulnerable to Kiddy barreling in behind her. Counterplay often will involve jumping or dodging out of the two Kongs' way, though foes must be quick and decisive in doing so, lest Dixie have time to leap behind them for aerial coverage while Kiddy rolls in on the ground. Other mix-ups at Dixie's disposal involve moving inward after pirouetting, so Kiddy rolls past her to hit from that side, or air dodging onto Kiddy mid-somersault to start rolling on top of him, as an alternate means for initiating this stance beyond air dodging after a Neutral Special toss.


FORWARD TILT - PONYTAIL PROPELLER


Dixie sticks her ponytail over her shoulder and drills it in a point in front of her, giggling to herself as she does so. A twisting particle effect appears over Dixie's hair as she does so, driving home the throwback to her propeller swimming ability from Tropical Freeze. A decently fast tilt, Dixie's hair inflicts four rapid multi-hits between frames 8-15, the first three of which deal 1% and stun, followed by a fourth dealing 5% and horizontal knockback KOing at the ledge around 175%. Her ponytail reaches nearly a full training stage square, capable of being angled diagonally up or down to catch aerial approaches or score two-frames, respectively.

With a 34-frame duration end to end, F-Tilt serves as an effective poking tool within Dixie's kit. She's able to walk forward, throwing it out once or twice in succession to catch foes too slow to punish at close range, putting them in a tech chase situation at low damage levels or pushing them across the stage. To the extent it has downsides, though Dixie's ponytail is safe on shield at max range, it doesn't reach as far here as in most of her other attacks, taking comparatively less advantage of its disjointed nature. Opponents with superior range, not to mention those with tough guy or super armor capable of tanking Dixie's weaker initial hits, all can outclass her before the move wraps up.

Returning to the Chunky attack well, Kiddy rears back on one foot, pulling a fist back nearly to the ground behind him before lunging forward to perform one hell heck of a primate punch. He staggers the punch for 30 whole frames, doubling Link's 15-frame startup for the slowest F-Tilt in the game, though he fortunately takes on super armor during the back half of this wind-up. Afterward, Kiddy punches forward 1.2 training stage squares to deal 22%, plus 20% in bonus shield damage, and robust knockback KOing around 65%. With 34 end lag frames, this is up there as far as a go-for-broke option among Kiddy's standalone attacks.


To some degree, the speed of Dixie's counterpart tilt is a blessing and a curse for her cousin. She'll have to take care not to just mash F-Tilt, Joker-esque, lest she gift wrap opportunities for her opponent to spot dodge and kill off Kiddy. That being said, though jab or short-hopped F-Airs generally are preferable for Kiddy in self-defense, there's little better way to put the fear of god in opponents than having Kiddy's super armor eat up their puny hitboxes before he powers through to send them flying. With range and power comparable to a Smash, Kiddy's punch also stands out as a solid reward if either Kong manages to inflict enough gum bubble stun on a foe. When the Kongs are paired up, Kiddy's F-Tilt isn't fast enough to combo into Dixie's own tilt. Even still, it's as strong an incentive as any to keep a foe from sitting in shield in front of her, and will lock off inward rolls if her F-Tilt sends them into prone near the ledge, freeing her up to follow with something different.

DOWN TILT - PONYTAIL PIVOT
From her standard ducking crouch, Dixie spins once 360 degrees, swiping her ponytail at her feet to slip up victims in front of her. As Dixie's fastest tilt, her hair here takes on its frontal hitbox on frame 6, reaching out a training stage square horizontally, albeit not all that far vertically. Her ponytail inflicts a light 5%, popping foes lightly upward with force insufficient to KO until nutty percentages. Grounded foes struck also have a 33% chance of tripping, primed for an additional D-Tilt from Dixie, given the move's minimal 16-frame cooldown, or any number of alternate follow-ups. Despite Dixie's preference for the air, as the cool kids say, D-Tilt lends itself to the case study as to why she also can hold her own plenty well on the ground, too, what with its status as an optimal combo starter.

At lower percentages, her ponytail swipe sets up a 50/50, letting Dixie either leap up and punish with F-Air if her foe doesn't react or, if they air dodge, stay on the ground and use another fast attack or grab. She's also to sweep her hair over the ledge to two-frame victims, upon which a buffered Up Special strong hit or F-Air can take stocks at higher damage levels. And every now and then, if a steel keg is bouncing her way, perhaps thrown by Kiddy, Dixie can air dodge backward to land on top and steamroll her foe as they fall down. Naturally, if Dixie manages to trip her victim, she's able to go to town with a dash attack or grab as faster options; if her foe doesn't react quickly enough, Side Special, an inflated gum bubble shot or even a Smash become plausible. The big chore on Dixie's part is not button-mashing D-Tilt follow-ups, lest she blow a chance to punish her foe's launch or trip when the opposite occurs.

Kiddy lifts a single fist above his head for 15 frames before pounding it to the ground a short distance in front of him. His fist itself reaches a training stage square forward, inflicting 14% and knockback KOing around 95%. The force of Kiddy's pound also produces a half-square-long shockwave, which ripples four squares forward — or until it reaches the platform's edge — over a second and a half, inflicting 3% and a bit of flinch to those it impacts. Though not always enough to save Kiddy from getting punished during D-Tilt's 28 end lag frames, the shockwave generally will require foes to shield just a touch longer to avoid getting nicked at close range. And as with D-Smash, Kiddy foregoes his end lag if he uses D-Tilt to break out of a gum bubble, though his midair tilt variant doesn't produce a shockwave.


Kiddy's D-Tilt complements Dixie's options — both D-Tilt and otherwise — in several ways. Most directly, his fist covers foes' possible "downward air dodge" reaction to her aforementioned 50/50, all but ensuring Dixie can proceed with the aerial follow-up of her choice. Together with or separate from her cousin, Dixie also can run overtop Kiddy's shockwave, which amplifies her already strong 2.09-unit initial dash to 2.45 units, tied with Mythra for best in the game. Beyond dash-dancing along the shockwave for mix-ups, this understated perk lets Dixie more easily lunge forward to grab foes she's tripped via D-Tilt, likely holding them in the path of Kiddy's shockwave for bonus damage to boot. And the shockwave launches stationary or thrown kegs it touches at a strong upward diagonal angle, making it a fun tool for badgering aerial foes from below.

UP TILT - PONYTAIL PROP-UP


Dixie uses her ponytail to perform the equivalent of a handstand, balancing herself as she kicks upward with both feet. Her extended torso kicks up high enough to poke slightly through low platforms, dealing 7% and vertical knockback capable of KOing around 165%. With 7 startup and 19 end lag frames, U-Tilt is fast enough for Dixie to use a few times in quick succession to irritate foes who make the mistake of shielding on a platform above her. It's a serviceable launching tool, sending grounded foes up just the right distance for Dixie to juggle once or twice at lower damage levels, before pursuing with her bread-and-butter aerials. Her primary limitation here is U-Tilt's limited horizontal range — though her kick will scoop up foes at her side at point-blank range, it'll miss those any further out, freeing them up to retaliate.

Kiddy brings his leathery ape hands together a short distance above his head to perform a single strong clap. Compared to DK's clap variants, Kiddy keeps his arms closer in toward his body, not dissimilar to your garden-variety cymbal monkey. At point-blank range, for a single frame right where his hands come together, Kiddy's clap inflicts 18% and vertical knockback capable of KOing at 85%. A training stage above that, between frames 10-16, his clap also produces a mild arc-shaped shockwave, dealing 3% and blowing foes upward with a modest wind effect. Kiddy undergoes a Smash-like 36 frames of end lag, waving a limp hand comically as though to rub it in for all the right people that he's not DK.

Similar to several other moves in Kiddy's arsenal, the threat of him bringing U-Tilt out sometimes is more potent than the move itself. With Dixie and Kiddy together, his clap is a great deterrent against foes trying to fastfall an N-Air down onto Dixie after she kicks them with her own U-Tilt. Even if they try, and Kiddy's sweetspot misses, his wind hitbox often will puff all but the most ranged aerials upward such that they end in a whiff, positioning Dixie to assume advantage over their end lag.

Of note, if Dixie touches Kiddy's wind hitbox while performing a regular attack, she'll be boosted 3.5 training stage squares skyward mid-animation — vertically by default, and able to be steered slightly diagonally to either side. Dixie achieves this boost with aerials either by falling down on Kiddy's clap or shorthopping into it, whereas grounded attacks require her to sit above Kiddy on a low platform. What's more, Dixie's first jump height increases from above-average to tied with Falco for best in the game if she initiates it right above Kiddy during his U-Tilt. It's a situational, albeit versatile movement option that allows Dixie not just to perform single grounded atttacks in midair, but to mobilize offensively or defensively immediately afterward, having achieved top air speed with Kiddy's help.

By himself, Kiddy's piddling non-sweetspot U-Tilt range gives him a real defensive blindspot against foes attacking from above, outside well-timed shorthopped U-Airs. That said, his clap's sweetspot reaches just high enough to impact foes through low platforms, inflicting 20% in bonus shield damage and healthy shieldstun to boot. Navigating such a platform while Kiddy is underneath is enough to set unprepared foes' teeth on edge. Though those foes will find themselves safe to one side, rolling or teching to the opposite side can land them right where Kiddy can clap them into oblivion. And naturally, Dixie is all too happy for the chance to cover those opponents' remaining ground, or else poke at them further if they're caught in shield.


FINAL SMASH

FINAL SMASH - BIG BUDDY BASH
Dixie lashes her ponytail forward an elongated six training stage squares to initiate her Final Smash, which varies depending on whether she initiates the super move with or without Kiddy onstage.


By her lonesome, Dixie knocks foes into a cutscene, within which she appears to have called on the calavry. Up to three victims rise up in a deep jungle setting to see a stampede of DKC's Animal Buddies — specifically the ones appearing in DKC2 and DKC3 — charging at them. Dixie can be seen riding Rambi the rhino at the head of the throng, where the animals can be seen bearing down on the victims in their own distinct way. Ellie the elephant sprints; Rattly the rattlesnake bounds along on his coiled tail; and Clapper the seal flops dopily along, just happy to be included. Squitter the spider swings from a stand of webbing in midair, alongside aerial beelines by Squawks the parrot, Quawks the purple parrot and Parry the parallel bird. Even Enguarde the swordfish and Glimmer the anglerfish get in on the fun, bounding in and out of a stream running parallel to their landbound counterparts. Anyhow, the animals all appear to collide with their targets en masse, inflicting one solid blow of 48% and knockback KOing around 50%.


With Kiddy onstage, at her side or otherwise, a different cutscene takes place. Dixie's victims reawaken in a mystic cloudy realm. A stone wall emblazoned with a circle of hieroglyphics lowers in front of them as they get up, revealing the Banana Bird Queen from off of DKC3. A barrage of the game's 15 regular collectible Banana Birds dive-bomb the victims in quick succession, each inflicting 3% in a manner reminiscent of Banjo's Jinjos, leaving them falling from the skies into a lake below. The camera then cuts to the victims' point of view, showing the Banana Bird Queen — Dixie and Kiddy astride her back — dumping a single massive egg down at them. The camera blacks out back to the main stage as the egg makes impact, dealing an additional 20% and knockback KOing around 100%.


In essence, similarly to Mythra and Pyra's super moves, players will earn stronger knockback using their Final Smash with solo Dixie, with a tradeoff for greater damage with Kiddy onstage, too.

EXTRAS

UP TAUNT - AIR GUITAR
Dixie appears to briefly lose herself in her own musical world, strumming along in midair and humming to hersef, before eventually rotating an arm and jumping up with a cheer. If onstage, Kiddy will mirror her taunt by adorably beating his chest a few times, producing bongo-esque sounds as he does so.

SIDE TAUNT - KONG CHEER
Dixie giggles to herself, clasping her hands together and wiggling back and forth in place — her reaction to collecting all K-O-N-G letters or puzzle pieces in Tropical Freeze. Kiddy simply sits up and channels Maggie Simpson by sucking his binky audibly a few times.

DOWN TAUNT - SIMIAN SHOWDOWN
Dixie cries out with enthusiasm, spinning several times rapidly in place before brushing her hair aside with a determined look. Kiddy doesn't seem to appreciate the same urgency, letting out a massive monkey yawn in place — still perfect for facing characters attempting the same button-mashy strings time and time again!

ENTRANCE - BUDDY BARREL
Dixie bursts out of a red DK barrel, emerging a bit higher in midair than her two playable Kong compatriots. She uses her ponytail to descend gracefully onto the stage, landing on one foot with a grin before entering her idle pose.

VICTORY POSE #1 - ACTUAL GUITAR


Dixie breaks out her blue electric guitar and jams along to her victory theme, with her freeze frame taking place as she leaps up into the air to finish her tune. If Kiddy was present onstage as the match ended, he'll appear alongside his cousin during her victory poses, here clapping happily along to her rhythm.

VICTORY POSE #2 - FLAGPOLE FINISH
Dixie is seen clinging to the rope of a wooden flagpole, which she pulls down to raise a pink flag to full staff. If present, Kiddy will appear on the flagpole underneath Dixie to assist in pulling it down. If he personally landed the final blow to win the match, he'll appear above Dixie on the rope, with the Kongs hoisting a blue flag in place of the typical pink one.

VICTORY POSE #3 - GYMNASTIC ROUTINE
The camera follows Dixie as she weaves back and forth down from above with her helicopter spin, before her freeze frame occurs, as she lands with a laugh in a perfect splits pose. Kiddy will await her on the ground and, after her closeup, attempt to mirror her splits, only to faceplant stupidly before he can do so. Kiddy picks himself up and shakes his head back and forth unperturbed; keep the victory screen on and, every so often, he'll look sneakily side to side before trying the stance again, with the same sad outcome.

VICTORY THEME - GUITAR GAZUMP
A snazzy electric guitar remix of Dixie's DKC2 level clear jingle rings out in celebration of her Smash successes.

LOSS POSE - SORROWFUL SIMIAN
Dixie applauds at a regular pace with a somewhat exasperated expression, clearly not at peace over coming up short against her banana-brained opponent.

STAGE

STAGE - GRASSLAND GROOVE


Keeping in the spirit of presenting Dixie as the optimal choice for a new DLC newcomer, here's an example stage that could be included as part of her fighter's pass. Most folks seem to gravitate toward Frozen Donkey Kong Island as their go-to Tropical Freeze stage, but my preference is to deviate and introduce Smash's first DKC stage -not- set on DK Island with none other than the game's breathtaking introduction to the Bright Savannah — heralded by a good number in the fandom as the series' best individual level, bar none. Set in the middle of a Lion King on Broadway-esque celebration, characters fight on the main ostrich-faced float, enjoying a spectacular vista of the sun setting over the rippling grasslands, dancing baobab trees and a snaggle-toothed rock adorned with a banana crown. Point it out on Twitter, and Retro will insist it wasn't an homage to King K. Rool!


The ostrich float is comparable in length to Smashville's main platform and, at regular intervals, a second animal float will travel in the background from one side of the blast zone to the other. The additional float serves as a drop-through platform, a bit larger than one of Town & City's, bobbing lazily up and down from the height of a low Battlefield platform to a high one. These alternatively can save characters recovering offstage or give their opponents a means for oppressing them further with grounded attacks initated further from the main stage, to say nothing of pitfalling or jab-locking a foe on top. The drop-through floats alternate which side they originate from, rotating through four different animals — hyena, wild dog, water buffalo and elephant — so players better know what to expect from both directions.


With hazards turned on, every third drop-through platform is followed by a vertically-oriented giraffe or zebra puppet, the pole of which characters are able to scale and attack from as though it were a ladder. And every two minutes, Lord Fredrik's deep laugh will echo in the background as a massive, albeit visual ice dragon sweeps across the screen. For the next 20 seconds, the stage's surfaces are coated in ice, with the accompanying traction reduction and increased likelihood of tripping seen on The Summit. The savannah's backdrop takes on a cold blue hue, as the animal platforms take on comically dismayed cold faces until the sun appears again to melt the frozen buildup.

Grassland Groove sports all of the DK series' existing music tracks, as well as the following new ones, which also now retroactively play on the current DK stages:

SPIRITS
SPIRIT - KROW


Fighter: Falco (black)
Reinforcements: Falco, Yoshi, Wario
Stage: Pirate Ship
Music: Crocodile Cacophony
Class: Novice
Conditions:
  • The enemy is invisible (Falco #2, Yoshi, Wario)
  • The enemy favors Up Special (Yoshi)
  • The enemy favors Side Special (Wario)
  • Reinforcements will appear after the enemy is KOed (Falco -> Falco #2)
SPIRIT - OK BOOMER BEAR


Fighter: Banjo-Kazooie
Assist Trophy: Bomberman
Stage: Jungle Japes
Music: Bonus Time
Class: Novice
Conditions:
  • Hostile Assist Trophies will appear
  • The enemy favors Down Special
  • Bob-ombs will rain from the sky
SPIRIT - TAWKS


Fighter: Duck Hunt (brown and red)
Stage: Kongo Jungle
Music: Mangrove Cove
Class: Novice
Conditions:
  • Certain items will appear in large numbers (barrels, back shields, Super Stars)
  • The enemy is easily distracted by items
SPIRIT - KLUBBA


Fighter: Donkey Kong (green)
Unaffiliated: King K. Rool
Stage: Pirate Ship
Music: Lockjaw's Saga
Class: Advanced
Conditions:
  • The enemy starts the battle with an Ore Club (Donkey Kong)
  • The enemy deals damage when falling (Donkey Kong)
SPIRIT - BARON K. ROOLENSTEIN


Fighter: King K. Rool (white)
Reinforcements: R.O.B. (olive green)
Stage: Find Mii
Music: Big Boss Blues
Class: Ace
Conditions:
  • Stamina battle (150 HP per character)
  • The enemy's Up Special has increased power (King K. Rool)
  • The enemy is giant (R.O.B.)
  • Gravity is reduced
SPIRIT - BANANA BIRD QUEEN


Fighter: Yoshi (yellow)
Reinforcements: Dixie Kong
Stage: Skyworld
Music: Stilt Village / Stilt Village GBA
Class: Ace
Conditions:
  • The enemy is giant (Yoshi)
  • The enemy favors Neutral Special (Yoshi)
  • The enemy will suddenly have a Final Smash (Dixie Kong)
  • The enemy's FS meter charges quickly (Dixie Kong)
SPIRIT - BRASH BEAR


Fighter: Banjo-Kazooie
Ally: Dixie Kong
Stage: Kongo Falls
Music: Rockface Rumble
Class: Legend
Conditions:
  • The enemy is very fast and can't stop quickly
  • The enemy can deal damage by dashing into you
  • The enemy gets a major stat boost when badly damaged (past 100%)
  • Periodic earthquakes will shake the stage after a little while (past 100%)
LINK TO CHANGE LOG (last updated 1/24/2022):
1. Clarified startup for Kiddy Kong tantrums, his properties close to or immediately after getting KOed via HP reduction
2. Added missing startup for Kiddy Back Air
 
Last edited:

DeniroSerafim

Smash Apprentice
Joined
Sep 23, 2018
Messages
172
"Don't try to argue — if you're going, I'm going with you."


Here's a heroine who needs little to no introduction. Dixie Kong is the long-running tritagonist of the Donkey Kong series, a solid case for the most valuable protagonist of the (banana) bunch and a prominent fixture in what the fanbase largely agrees are the best three of five Country titles to date. Debuting as Diddy's headstrong girlfriend in DKC2, Dixie ventures to the peak of Crocodile Isle to rescue DK after Kaptain K. Rool successfully kidnaps and holds him for ransom. The next year, in DKC3, she steps up as leading lady, rollicking through the Northern Kremisphere and uncovering Baron K. Roolenstein's conspiracy to rule the world as puppeteer for a robot harnessing DK and Diddy as living batteries. Though Dixie largely was relegated to spinoffs and sports titles over the next 18 years, she transcended back into the spotlight with Tropical Freeze. In this latest core title, she undertakes a homecoming journey back to DK Island and wrests control back from the Snowmad army that had evicted the Kongs in the first place.

Dixie represents a moveset-making departure for me personally, beyond her status as (f**king finally) my first set for a female character so far. As the guy who wrote
five of MYM's current nine K. Rool sets and then headed a six-year fan movement to bring the Kremling King back from the figurative dead, I spent my fair share of time during the dregs of Smash 4 discussion downplaying her unique attributes and making the case as to why she ought to be a lesser priority. Though I'm glad I did what I could to help get K. Rool off of Nintendo's quality assurance trash heap — where he would have stayed had the company not been blindsided by his ballot performance — in hindsight I regret not doing more to sing Dixie's praises in the process.

Dixie's prominence in one of Nintendo's oldest and best-selling series, not to mention status as one of very few starring female characters never to have played the damsel, renders her perhaps the most eminently qualified first-party newcomer yet to appear in Smash. Unfortunately, the series' thirst to grab headlines and staged reaction videos with over-the-top third-parties for the past 2.5 years has left her seemingly destined to fall by the wayside once again. There's the off-chance Nintendo could request Dixie's addition to advertise the Nintendo EPD-made Donkey Kong Switch title likely getting announced in a few months, but even that assumes she'll be featured in a prominent playable role, no guarantee after the backseat she took in multiple previous mainline console debuts for her series.

All that being said, though it's somewhat bittersweet, I'm excited to sit down now and (hopefully) convey one standout playstyle Dixie could offer, putting the character's best foot forward regardless of what future lies in store for her this year and beyond.

Click Dixie's render above to access a full DK playlist to accompany her set, as opposed to the single character-relevant track I typically link.

Full credit for the moveset attack illustrations depicted throughout this set goes to
BirthNote/AndrewJCay1. Full credit for the DKC3 and Tropical Freeze GIFs included goes to Arcadenik.

STATISTICS

Jumps n~~ 9 (comparable to Greninja)
Ground Movement n~~ 7 / 1.88 units (26th, between Pichu and Donkey Kong)
Size n~~ 3.5
Weight n~~ 2.5 / 84 units (63rd, between Zelda and Rosalina)
Aerial Movement n~~ 2 / 0.924 units (68th, tied with Link and Diddy Kong)
Fall Speed n~~ 1.5 / 1.27 units (72nd, between Yoshi and Game & Watch)

Much like Diddy and K. Rool before her, Dixie's idle stance modernizes her classic DKC sprite animations in glorious HD, leaving her to blow a small gum bubble or sit down to sip a soft drink if left undisturbed. Size-wise, she's similar to her simian boyfriend, with the lower half of her ponytail not included as part of her hurtbox. Dixie is no slouch movement-wise on the ground, though her horizontal aerial control leaves a bit to be desired, at least in regular circumstances. For better or worse, Dixie has a relatively large gulf between her regular and fast fall speeds, descending airily down at first but able to commit to a fast landing if need be.

That's not to say Dixie doesn't take her air game sky-high in other respects. She supplements a solid initial jump with one of the best midair jumps in the game, just a hair (no pun intended) shorter than Yoshi's flutter kicking, as she twirls her ponytail like a rotor for added oomph. What's more, holding the jump input has Dixie continue rotating her hair to hover, not actually floating in the traditional sense but exerting a degree of control over her descent — an understated gameplay mechanic she gains in Tropical Freeze.


In essence, Dixie can slow her fall speed to be almost minimal for up to two seconds per aerial stint, whether all at once, split after both of her jumps or in multiple fall-stalling bursts after her midair jump. Though not amazing for side-to-side movement, Dixie gains significant leeway to carefully time landings, including to space attacks on- or offstage, dodge enemy attacks from below or snap to the ledge at just the right moment against would-be ledge-guarders.

Unless otherwise stated, KO percentages are on Mario from the middle of Final Destination.


SPECIALS

DOWN SPECIAL - HEAVY LIFTING


With a tapped input, Dixie whips out a steel keg, present in every Donkey Kong Country 3 level, most certainly only full of frothy water and nothing more, and holds it in her ponytail over 18 frames. In this state, she's able to move around holding the keg at her decent regular walk speed, and even perform a single grounded jump sufficient to reach a low Battlefield platform, though she'll drop her cargo at her feet if made to flinch. Pressing shield or air dodge will have Dixie set the keg down of her own volition, dropping it down behind her in midair, though adds 9 frames to both defensive animations' startup, not being a fully commitment-free cancel.

In any case, an additional Down Special input prompts Dixie to sling the keg briefly backward in her hair before tossing it forward, pausing ever so briefly to do so in midair. By default, she'll roll the Kirby-sized keg lazily along the ground at Incineroar's dash speed, upon which it travels the equivalent of Battlefield's length whether onstage or falling. Alternatively, if the player directs the control stick up or down during the toss' 9-frame startup, Dixie will toss the keg in an upward arc or directly at her feet, respectively. The ensuing trajectories will have the keg bounce three times over three seconds before vanishing, either in narrow high arcs that have it rise three training stage squares vertically and travel four squares horizontally, or long low arcs that take it three squares up and nine squares forward. Dixie's kegs have some mechanical similarity to Gordos, including in how foes are able to smack kegs away (thankfully without a hitbox for her to avoid) and how their upward arcs dwindle to virtually nothing upon bouncing onto low platforms.

When it comes to hitboxes, kegs aren't all that strong when traveling at their default easygoing movement speeds — dealing 12% and radial knockback KOing around 185% during the first half of their trajectories, reduced down to 9% and a 200% KO percent for their duration. Kegs rebound from opponents on hit, preventing them from hitting the same target multiple times. That being said, Dixie's respectable 17-frame end lag and movement speed allows her to catch up to her own kegs. If she attacks a keg, she'll send it flying at different trajectories, akin to a clunkier WFT soccer ball, based on the attack in question; a fully-charged F-Smash dealing as much as 18% and knockback KOing around 115%.


Dixie's attacks also take on a short moment of hitlag on impact with kegs before they bounce away. Though nothing crazy, Dixie improves her odds of impacting close-range foes both with her attack and the keg, as the former's hitbox briefly lingers over the latter. Dixie can try capitalizing on this hitlag with a stationary keg she's set down — undisturbed, these remain onstage 10 seconds before vanishing — or, at higher skill levels, by air-dropping a keg down behind her in midair, before spacing her descent so she can smack it into action with an aerial.


Did you forget, I alluded to a smashed Down Special variant at this move's beginning? Never fear! With a longer 24 frames, Dixie grunts as she pulls none other than boisterous baby cousin and DKC3 co-star Kiddy Kong out of hammerspace! Cue all the performative Twitter mewling about how Kiddy is ugly, annoying, an inferior DK replacement and so on...Never mind that Rare didn't want to leave fans pining for a Kiddy-led DKC4, or to have playable DK overshadow Dixie in what was designed as her own adventure. In any case, I've approached Kiddy's inclusion with Dixie's Smash moveset in much the same way. Though he can assist her with fun alternative setups and strategies — more on those in a bit — he's hardly mandatory. In contrast with your typical MYM duo character, Dixie remains more than capable of putting up a fight by her lonesome.


Upon first summoning Kiddy, Dixie holds him on her back, visibly straining to remain upright, as the big galoot looks wondrously around. The player retains the same general control scheme as when Dixie is holding a keg, albeit a far more sluggish variant — notably, Dixie's walk speed and single grounded jump are halved when it's Kiddy she's toting around. Kiddy also functions a bit differently when thrown. When thrown forward, Kiddy rolls at the same speed as a keg, but with a larger hitbox, similar to that of DK's dash attack, and with enough sense to stop at ledges. Thrown down, he'll curl up into a similar ball and bounce the same nine squares as a keg. However, compared to three uniform arcs, Kiddy will bounce twice: once, three squares vertically and again six squares into the air, walling off aerial approaches or landings with an interpretation of his DKC3 water-skipping animation. As an anti-frustration feature, Kiddy automatically cancels his bounce to drop automatically, and harmlessly, to the ground at horizontal points where he otherwise would cross over a bottom blast zone.


And, when thrown upward, Kiddy has his own unique function compared to a keg — after Dixie's startup, he'll pause just six frames, spinning in ball form in midair, before plummeting down four squares directly in front of her. Kiddy's underside takes on a 23% hitbox that will spike midair foes powerfully while launching those on the ground diagonally, with vertical force sufficient to KO around 85%. Comparable to Bowser Bomb, Kiddy's bottom also has a late hitbox, inflicting 12% and lower vertical knockback that won't KO until high percentages. A vertical Kiddy toss is by no means an effortless option to throw out, what with the combined 39-frame startup from summoning him, tossing and waiting for him to fall. That being said, Kiddy's bulk will result in a guaranteed shield-break, as both of his falling hitboxes — the first of which inflicts an added 15% in shield damage — crush down on his hapless victim's bubble. The right reads can position this as a frightening prospect in foes' minds, just so long as Dixie doesn't overextend and throw Kiddy off the ledge to his doom!


How can Dixie work alongside that bratty baboon?
Once Kiddy stops in his trajectory from one of Dixie's Down Special throws, he'll sit onstage, ever so slightly smaller than DK and just as hefty. Left to his own devices, Kiddy will occasionally turn to the screen, raising his eyebrows, or stretch out the toe of his footie pajamas, without throwing out any independent attacks — he's just an oversized infant, after all. Foes can KO Kiddy either by knocking him offstage, past the point where the DK-esque midair jump he'll automatically use can save him, or by depleting his 50 HP.


Those who go the latter route ought to beware, however, as Kiddy isn't about to go quietly into the night. At the point where he exits hitstun from the foe's last, fatal hit, Kiddy will rear back for 25 frames before screaming in childish rage, throwing a brief tantrum in place on the ground or in midair before vanishing. As he hollers, Kiddy emits a spherical soundwave, which immediately manifests around him, reaching out three-quarters the range of a Smart Bomb blast. Opponents who don't evade or shield take 25%, a bonus 10% in shield damage and outward knockback capable of KOing around 80%, and potentially earlier closer to the ledge, on account of the soundwave's above average base knockback.


Every now and then, Dixie can play diabolically and throw Kiddy into harm's way, forcing foes to play around him and potentially setting up his scream to send a victim offstage, where she can work her aerial magic. She never wanted to babysit, anyway! When Kiddy's health reaches 10 HP, he'll start flashing red and emitting steam, as though he were a regular character with high damage. Foes ought to keep track of which attacks they use on Kiddy as they're finishing him off. If the first of several weak multi-hits KOs him, Kiddy only undergoes hitstun from that hit and ignores the others as his tantrum animation begins, leaving that character vulnerable to his ensuing outburst. Of course, the flipside of using single strong hits to spank the ape isn't always optimal, either, as either Kong could find themselves able to capitalize on the likely longer startup or end lag.

Once Kiddy is KOed, Dixie must wait 25 seconds or lose a stock, whichever comes first, before she can summon him again. A barrel icon with blue 'KK' letters appears aside her HUD with an ape noise once its occupant is ready for action again. On the flipside, Kiddy will vanish with a dopey wave if Dixie is KOed first — a distinct possibility, given her lightweight status.


If Dixie comes into contact with Kiddy while he's not in motion from a throw, or if she shields while carrying him to deposit him behind her, he'll start following along, Rare DKC style. While synched up, some of Dixie's animations undergo aesthetic changes — she'll grip Kiddy's back during her midair jump and hover, Tropical Freeze style, and use her hair to pull him along during rolls and into the background for spot dodges. Kiddy will keep tagging along until Dixie either throws him away with a smashed Down Special or enemy attacks knock the two Kongs apart. Once separated, Kiddy will shake his head stupidly before sitting in place; though he'll turn side to side to face Dixie, he won't automatically try to return to her. However, alternating smashes of Down Special will start and stop him making his way back to her side. While in motion, Kiddy ambles along at Dixie's dash speed and leaps with ground and midair jumps similar to DK's. His AI here is comparable to Nana's — persistent, but without any concerted effort to dodge enemy attacks.

In a rather literal instance of "monkey see, monkey do" — if the monkeys in question weren't actually primates — Kiddy will mirror most individual attacks thrown out by Dixie with corresponding attacks of his own, staggered exactly one second after each input. He'll perform his own moves whether he's accompanying Dixie or left to his lonesome, incentivizing her to keep tabs on where precisely he's sitting if she intends to send foes his direction for a timed follow-up. Depending on their timing, a foe can attack Kiddy such that he's in hitstun at this one-second point, and doesn't copy Dixie's move. However, because hitstun alone won't make Kiddy drop a mirror move, attackers ought to handle him carefully to avoid potential counterhits, which Dixie in turn can time to save Kiddy from being casually comboed into oblivion.

Kiddy will skip ahead to mirror Dixie's most current attack if he happens to fall more than one move "behind" her, in circumstances where she's throwing out multiple speedy attacks faster than he can follow suit. Kiddy doesn't hesitate to show exactly how little he knows his own strength on a handful of his attacks, but in a departure from your average hulking summons, several other moves are more oriented toward bolstering Dixie's own attacks, befitting his nature as a support character.

Of note, Kiddy doesn't have his own analogues to most of Dixie's Specials, but Down Special stands out as an exception. One second after Dixie has whipped out a steel keg with a tapped Special input, Kiddy will pull out one of his own, carrying it in front of him like a shield rather than above his head. He'll hold onto the keg as long as Dixie does, before throwing it staggered after her own toss. Though Kiddy matches Dixie's angles, he puts a little added muscle into his tosses. This results in Kiddy's kegs having faster movement speeds, more exaggerated arc trajectories and stronger base damage and knockback properties, all by 1.4x multipliers compared to Dixie's own tossed kegs.

When Dixie and Kiddy are synched up, his kegs often can catch up to and ricochet off of hers, creating a momentarily chaotic airspace and generally coaxing grounded foes to shield. If an opponent knocks Dixie away from Kiddy while she's holding a keg, he'll drop his keg one second from the moment of impact, positioned such that the stationary toddler can send it flying inward with a subsequent attack to cover his partner. Even when both Kongs are launched away, they'll leave behind the literal silver lining of two grounded kegs to use later. And while separated, Dixie and Kiddy can put two kegs on different rolling or bouncing collision courses, potentially sandwiching a target in the middle. Regardless of which creative possibility the two attempt, here's a good chance to note, whether held, stationary or in motion, only two steel kegs can be in play at a time — Dixie will shrug and Kiddy will scratch his head if either tries circumventing this rule.


Miscellaneous tricks with kegs and Kiddy:
Whether Dixie is chasing down a moving keg or Kiddy, she can pick either back up with a Down Special input timed as she comes into contact during their roll or bounce. When this happens, Dixie will more quickly scoop up her cargo, respectively bringing it into her hair or onto her shoulders with half the startup frames she ordinarily would undergo to summon it from hammerspace. A fast throw input after Dixie has leapt up and caught a keg at the apex of a bounce can be great for switching up its trajectory — perhaps by sending it rolling it down from a greater height or hopping across a higher platform. Kiddy's own course can be modified in much the same way, perhaps now to reposition his movement out of harm's way. Certainly, Dixie can approach foes alongside a rolling or bouncing Kiddy to keep them antsy over her option to pick him up for a faster upward toss-and-crush.


Dixie has one more trick up her sleeve in squeezing more mileage out of her two Down Special summons. A directional air dodge onto a keg or Kiddy after they're thrown lets Dixie hop on and start barrel rolling! Dixie's treading instantly speeds her cargo's regular roll speed from Incineroar to Bowser's dash speed, producing a new frontal hitbox that on kegs deals 16% and knockback KOing at 120%, and on Kiddy deals 18% and knockback KOing at 110%. What's more, if Dixie and Kiddy dodge onto a keg together, or if Dixie rolls one over to him, they'll travel even faster, at Fox's dash speed. With the rambunctious rugrat's added heft in tow, the keg now begets a 20% hitbox and knockback KOing at 100%. Depending on which movement speed Dixie's barrel roll ultimately takes on, foes might find themselves hard-pressed to knock her off with a well-timed attack, especially if she suddenly initiates the roll in close quarters.


From a control standpoint, Dixie can change her barrel roll's direction on the fly, taking 20 frames to tread around to face the other way, though she must roll at least one Battlefield platform before she's able to turn. Upon initiating a barrel roll in midair, Dixie will descend atop her keg or Kiddy with gradual horizontal momentum and respective mediocre 5% or 8% hitboxes — her forward movement here is slightly better than that of Yoshi's aerial egg roll but not by much. She's able to exit the roll a few different ways: a shield input prompts her to drop off in place as the keg or Kiddy keeps traveling forward, now at their slower regular pace. A Down Special input has Dixie pick her cargo up from underneath her with the aforementioned halved startup. Perhaps most handily, jumping off has Dixie carry her rolling momentum over into midair, where she automatically reaches her maximum air speed — a perfect directional burst for punishing enemy jumps up and over her keg or Kiddy's continuing hitbox on the ground.

UP SPECIAL - HELICOPTER SPIN


No self-respecting Dixie Kong moveset would be caught dead without this iconic attack, known for saving the bacon of many a young DKC fan over the years, and occasionally some old fogies, too. Here, Dixie begins rotating bodily around while unfurling her ponytail to surround her at close range, enlarged slightly in Smash's hitbox-indicating fashion. In midair, where unsurprisingly this move sees the majority of its use, the player can continue Dixie's spinning as long as they'd like, not even needing to hold the input down to do so. Dixie's helicopter hair slows her fall speed to that of Peach while holding her parasol, as she takes on significant horizontal mobility while descending back to earth.

Coming out on frame six, Dixie's hair has an initial close-ranged launching hitbox that deals 12% and knockback KOing near the blast zone around 105%. Her ponytail also takes on a weaker three-frame hitbox, inflicting 6% and a moment of stun, after each 14-frame interval the player holds her rotation. By comparison, the multiple hits within Spinning Kong, modified versions of which fans tend to slap onto semi-clone Dixie movesets, are spaced out anywhere from six to nine frames. Beyond low percentages, most characters can escape from or clash with Dixie's multiple hair hits if she tries automatically chaining more than a few together like the big hairy ape.


That being said, from both attack and movement standpoints, Dixie's spinning comes bundled with perks DK would kill his own mother to have...err, hang on, 22 years too late. Dixie's horizontal movement speed depends on the point at which she initiates her spin in midair. Used while ascending from a stationary jump, Up Special has Dixie drift marginally less quickly than a parasol-toting Peach, while she'll travel a touch faster if she starts her spin while falling or after reaching maximum air speed — for reference, Peach can drift 15 training stage squares horizontally in the time it takes her to descend five squares. At any point, Dixie is free to cancel Up Special with an air dodge, upon which she drops down in place, or a midair jump or aerial, which lets her retain forward momentum from her spin.

With the right rhythm, Dixie can carry a foe offstage with a few hits from an initial Up Special before stringing together some aerials to push them closer to the blast zone. Should the player buffer Up Special during one of Dixie's aerials, she'll immediately revert from the attack's end lag to her spin, keeping any momentum she previously had carried into her aerial and likely comboing into her hair's stronger initial hit. That strike can serve as a finisher at high enough percentages, or if Dixie's in a more reckless state of mind, her hair's multi-hits can drag a target all the way off the screen's side. Of note, Dixie faces the direction she's spinning during Up Special; as such, moving from side to side enables her to change which way she's facing in midair, a handy perk in cases where she wants to whip out B-Air without landing first.

There's no hard limit on how many times Dixie can initiate Up Special in midair, granting her a recovery that's all but unrivaled horizontally, albeit still imperfect. It's critical that Dixie initiate her spin sufficiently high above the ledge to make it back safely, as her hair grants her absolutely no upward lift whatsoever, and her vertical recovery otherwise is lackluster. Too much canceling in and out of Up Special with aerials offstage, or one badly-timed air dodge, is a surefire way to drop Dixie down past the point of no return. And though Dixie's hair is great at covering her hurtbox from the sides, it does little to defend her from above or below. An opponent that successfully undercuts Dixie offstage can send her lightweight frame flying, perhaps with one of classic MYM's patented U-Air flip kicks, while an especially well-placed spike can be all that's needed to make Dixie to kiss a stock goodbye.

Bouncing to new heights:


When Kiddy or kegs are present onstage, Dixie can spread her figurative wings with more versatility. If the player presses Up Special as she comes in contact with either summons — whether to initiate or during her hair spin — she'll quickly tuck into a ball and bounce off in a linear direction. Dixie bounces about three-quarters as far as Diddy leaps during his Monkey Flip, and about as fast, but with better control: at the moment of impact, the player can direct her bounce in any of the standard eight compass rose directions. Upon reaching the end of her bounce, Dixie automatically will unfurl and transition into regular Up Special at its top air speed, though the player can initiate her hair spin earlier in her linear trajectory with a repeat special input. Impact with Dixie as she's bouncing away inflicts 6% and a moment of hitstun, which, if she's close to transitioning into or initiates her spin, will combo into her hair's stronger initial hit. Post-bounce, kegs are knocked lightly in the opposite direction, while Kiddy keeps bouncing or sitting unimpeded, here not synching back up with his nimble cousin.


Already adept at traversing the skies horizontally with vanilla Up Special, Dixie now unlocks bonus vertical movement and approach options with her bounces off Kiddy or a keg. Following behind either summons as they're bounding forward across the stage, Dixie accesses mix-ups by way of either timing varying bounce angles, letting her evade and punish would-be attackers, or starting and canceling out of Up Special as a feint into something like grab or dash attack. This can prove especially unsettling near the ledge, as offstage foes must predict whether Dixie plans to bounce off at them for a gimp attempt (recover low!) or leave a keg or Kiddy alone to drop or be thrown down at them (recover high!). With a bouncing keg or Kiddy sitting at the ledge, Dixie can prolong the time she spends offstage haranguing a target, using a strategically timed bounce to give herself two out-and-back spinning trips, rather than one. To prevent indefinite midair hovering, Dixie only can bounce off each individual summons once before touching the ground.

If Dixie's directional bounce brings her into contact with a sitting Kiddy, he'll curl into a ball around her and travel along for the duration of her trajectory. This effectively doubles the circular hitbox's size, buffing its damage up to 16% and knockback to KO around 110%. This can turn into a potent KO option closer to the ledge, where the Kongs' teamed-up bounce can KO a fair ways earlier, though if for whatever reason Dixie doesn't want to sync up with Kiddy at that moment, she'll have to angle her bounce such that she avoids him.


Let's talk about Kiddy in midair:
When Dixie and Kiddy are synched up, the banana-brain will tag along behind her as usual. In doing so, Kiddy's fall speed deviates from the DK-esque descent he undergoes while solo, and what one might expect from such a stocky character. Rather, he'll match Dixie's generally floatier falls, even to the point of appearing to hover slightly alongside her. It's a faithful holdover from the classic DKC games that looks a touch odd in 3D but serves as a quality of life measure here, keeping Kiddy from plummeting away from Dixie as he mimics her aerials behind her. If one is of the DK Vine theorycrafting mindset, you could chalk Kiddy's situational floatiness up to something like Big Kong Energy or banana magic.


In any case, Dixie's Up Special changes slightly when Kiddy's right behind her. Rather than immediately starting her hair spin, Dixie will hop onto Kiddy's shoulders, an excitable look on her face. From there, the player can aim the control stick around for up to a second, as Kiddy's fall speed halts briefly before picking back up again. After this time elapses, or the player repeats the input, Kiddy quickly scoops her into one big hand, curled into a ball, and tosses her. Mechanically, Kiddy's tosses allow for souped-up versions of the regular momentum-boosting bounces solo Dixie can perform off of him and her kegs, this time taking her 1.25 times as far as Diddy's Monkey Flip and inflicting 9%, with knockback capable of KOing around 140%. Here, Dixie trades off the chance to combo together her bounce and hair spin for the opportunity to knock foes a short ways away with Kiddy's more forceful toss, after which her maximum distance traveled can give her a better vantage point to twirl around and finish them off.


In terms of recovering offstage, Kiddy grants Dixie a strong multi-directional recovery option (his default toss is vertical), albeit quite possibly at the cost of his own life, as the two Kongs desync after Kiddy's toss. He'll automatically use his midair jump to attempt to follow and reconnect with Dixie, but the attempt will be moot if he's too far from or below the edge to grab it. Because of this Up Special variant's sacrificial nature, Dixie and Kiddy in the air together are better equipped for walling off enemy escape routes with hitbox coverage than they are blitzing offstage targets. To attempt the latter in a pinch, Kiddy can throw Dixie from the relative safety of an onstage shorthop, at the potential risk of his target evading her and returning to smack him without her protection. Of note, Dixie will sweetspot ledges out of Kiddy's toss but falls into prone if hurled down onto a surface, much like a certain fellow Rare bear and bird out of a featherless use of Wonderwing.

Spinning on solid ground:

With both feet planted firmly onstage, Dixie's Up Special has her perform a smaller number of comparatively straightforward spins in place. With a button tap, Dixie will spin just once over 35 frames, bringing out the initial launching hitbox of her aerial Up Special variant in front of her between frames six and nine, and behind her from frames 10-12. Holding the button down, by contrast, has her spin three times over 78 frames, during which she can slowly move one training stage square to either side. As Dixie twirls, she creates weaker hitboxes that inflict 5% and low set knockback in front of and behind her from frames 17-19, 25-28, 33-36 and 42-44.

With both grounded options, the hitboxes in front of and behind Dixie won't combo into each other outside niche circumstances on giant foes. Though her initial spin is safe on shield, on account of a touch of shieldstun, her subsequent twirls are not; at lower damage levels, Dixie's low knockback even opens the door for sufficiently fast foes to punish her on hit. That being said, her ability to pull out a dual-sided, lingering attack is a real benefit for catching out bad rolls or spot dodges. One more added boost — Dixie's hair will reflect enemy projectiles on its first three active frames! Outside the obvious applications, good spin timing allows Dixie to defend Kiddy from getting hosed down from afar. And though kegs don't qualify as projectiles, a single quick spin often is Dixie's best tool for tennis-serving them back at foes who have knocked them her way.

A grounded Up Special while Dixie and Kiddy are synced has her hair spin prompt him to perform a low-to-the-ground hop two training stage squares backward. Nothing too sexy here, but the maneuver automatically desyncs the two Kongs — a quick, handy option for spacing Kiddy to sit a short set distance away, versus taking longer to manually throw him in a more controlled fashion. Kiddy will cross up enemy shields while leaping, opening the door for Dixie to land on a shield with an aerial before buffering Up Special while synced. Pulled off right, she'll whittle the shield down while Kiddy leaps opposite the victim and mirrors her aerial for extra pressure. With Dixie's back to a ledge, grounded Up Special will send Kiddy over the side, but only if there's solid ground, and not a bottom blast zone, underneath. Spaced well on a low platform, Dixie can ward off enemy landings from above, while Kiddy covers her from below — teamwork makes the dream work!


NEUTRAL SPECIAL - BUBBLE GUN


Dixie extracts her state-of-the-art bubble gun, introduced in Tropical Freeze, and points it forward with both hands — a decidedly more defiant parallel to her boyfriend's peanut popgun. With a tap of the input, Dixie will fire a miniature bouncing gumball, slightly smaller than one of Mega Man's pellets and emerging about as quickly. The miniature projectile travels two-thirds of Final Destination, bouncing in three low-to-the-ground skips over 1.5 second before disappearing; foes pelted take 3% and brief stun before undergoing low set knockback. With rapid subsequent button taps, Dixie will fire up to three back-to-back gumballs. While all gumballs are identical damage-wise, all except the last projectile in a duo or trio now impose minimal flinch, with the regular stunning hitbox reserved for the final ball.


If Dixie fires multiple gumballs on the ground, they're likely to pepper foes not quick enough to shield or parry, one after the other. When this happens at close range, Dixie can capitalize with a follow-up hit, though she's taking her chances going for this setup. Opponents with ranged or area-of-influence attacks can cut through the gumballs during Dixie's 25-frame end lag, while sufficiently strong blows will supersede the relatively weak projectiles without clanking. As a helpful workaround, Dixie can fire gumballs while in aerial motion — perhaps falling from a shorthop, or with horizontal momentum approaching or retreating — to increase her likelihood of multiple hits. This is because gumballs fired in midair travel at a modest downward angle, moving at a slightly slower speed until they impact the ground. The result, if Dixie lands mid-stream, often is multiple bouncing gumballs spaced more closely together, harder to leap or dodge away from on hit. Higher in midair, Dixie's gumballs can rain down to frustrate enemies rising up to meet her or waiting to catch her landing, so long as she doesn't over-rely on the tiny projectiles' defensive capabilities from below.

Holding Neutral Special enables Dixie to fire a different type of projectile — a bubble gum bubble! Over the course of up to 120 frames, Dixie's gun shakes and flashes pink with increasing frequency, and unlike Diddy's more reckless counterpart move, she'll simply fire her projectile upon reaching maximum charge, rather than experiencing blowback. By default, Dixie's spherical bubble fills a single training stage square, while a fully-charged bubble encompasses a two-by-two grid of squares. Gum bubbles travel in the same general bouncing trajectory as Dixie's gumballs, albeit at half their speed, reaching two-thirds of Final Destination over three seconds.

Foes experience different effects from these bubbles, depending on their size. If the character in question is small enough to fit into the bubble, it'll engulf and carry them along its bouncing path in their "ball" state (also seen when characters launch themselves out of barrel cannons on the various DK stages). The smallest bubbles won't scoop up any characters not downsized via Poison Mushroom, while Pichu-level characters will start getting picked up around 30 frames of charge, and Bowser-tier big'uns becoming vulnerable after 70 frames. If a character is too big for a given bubble — any bubble, if they're mid-sized or larger and grab a Super Mushroom — it'll simply pop on contact with them, inflicting 9-15% and a period of stun, followed by low set knockback, scaling comparably to ZSS' paralyzer. Victims caught inside bubbles are guaranteed to take this corresponding "pop" damage and stun, whether at the end of the spheres' trajectory, upon mashing out with grab difficulty or an external hitbox bursting their sugary captivity.


Despite functioning as a pseudo-grab projectile, Dixie's gum bubbles are hardly oppressive by their lonesome. Any flinch-inflicting attack will pop a bubble, regardless of its size, without damaging the character in question. The pink spheres have hitgrab properties comparable to Isabelle's fishing rod, not absorbing opponents through shields but popping on contact for their corresponding shield damage and an added touch of shieldstun for Dixie's efforts. However a foe decides to dispose of a bubble, they're best-suited doing so with quick offensive or defensive actions so Dixie can't punish their reaction. More nimble foes might opt to evade gum bubbles rather than face them head-on, though getting around them doesn't necessarily mean getting out of the woods, as Dixie can try knocking such opponents backwards into her trap. Compared to the chip damage Dixie can net through her faster gumballs, gum bubbles often serve her well as a more committal stage control tool, capable of temporarily locking off platforms or enemy air space.

Depending on Dixie's positioning, she can also harness them to bolster damage racking. Attacking an empty bubble will pop it, triggering its stunning hitbox for two frames. This blast only catches foes at point-blank range, but serves as a brief, helpful add-on for Dixie's attack, potentially snagging those carelessly rushing in to pop the bubble in question. Alternatively, Dixie can pop bubbles with foes in tow to exert control over where they experience its stun. If the move she uses strikes both the bubble and its victim, they'll take its damage but the gum pop's stun will override its knockback — this leaves Dixie more easily able to connect with a single attack's multi-hits, or to fade back and smack the gobsmacked foe with something else.

Of particular interest, Dixie can perform an Up Special bounce off of a gum bubble, popping it to stun a foe inside, before twirling back for an aerial string. In terms of counterplay, with smart button-mashing, bubble-encased foes can mix up how fast they escape to try throwing off Dixie's attempted combos, especially if she locks into one option based on where she believes they'll be stunned. Ultimate's re-grab timer kicks in during a bubble-encased character's stun as well as one second after they exit it, inhibiting bubble infinites or unfun repeat absorptions.

A gum bubble can prove a hit or a miss when fired in amid one or more steel kegs Dixie has onstage. Timed right, the two summons can create an unorthodox sort of bullet hell for foes to navigate, though, because bubbles of all sizes are capable of absorbing kegs, throwing too much at the figurative wall can ultimately just mess up Dixie's simpler setups. That being said, encasing a keg in gum isn't without occasional merit — the keg's onstage duration is paused as long as it's in the bubble, and it'll retain its previous bouncing or rolling trajectory upon getting relinquished. This can prove quite handy for repositioning purposes, though if Dixie wants to preserve a certain keg trajectory, she must take care not to pop that bubble with something that sends the steel summons flying differently. Kegs won't get drawn into character-carrying bubbles but rather will pop them with their regular hitboxes.

Kiddy is a bit of a unique case when it comes to gum bubble interactions. Despite his size, he'll tuck into a tight ball to get drawn into Dixie's bubbles a good ways earlier than others in his weight class, with around 45 frames of charge — must be a circus trick the two Kongs practiced. What happens next lends credence to that head-canon: Kiddy alone has the ability to attack while inside a gum bubble, staggered as usual with his babysitter, at which point he'll burst himself harmlessly out at that point in the sphere's trajectory.

If one of Kiddy's attacks — including the grounded moves he now can perform in midair — pops the bubble on a foe at point-blank range, he'll likely be ideally situated below them for a strong follow-up on their stun. If Kiddy protectionism is Dixie's focus, however, she ought not to cast him off inside too many bubbles; foes can attack him through the spheres (though he thankfully does not experience the burst hitbox), and bouncing bubbles too close to the ledge can result in accidental self-destructs. Manually handling Kiddy is almost always preferable to gum bubbles for positioning him, though in a pinch, Dixie can capture and float him back a set distance if she'd rather he be spaced farther away for the time being.


SIDE SPECIAL - HAIR LASH


Dixie swings her head to the side, appearing to concentrate as she whips her ponytail horizontally three training stage squares. On contact with a foe, Dixie will giggle triumphantly as she reels her victim in and holds them tightly in her hair, spinning three times rapidly in a blur before hurling them vertically for 9%. Compared to your typical command grab, the whirlwind effect from Dixie's ponytail here inflicts set knockback, sending her opponent spiraling up four squares regardless of their percentage. The result is, while Dixie won't be KOing from her throw itself, she can confirm from a successful Side Special with most of her aerials — with varying frame windows for doing so — as well as Up Special's initial hit out of a full-hop for a KO setup at sufficiently high percents.

Even if Dixie isn't quick enough to secure such a combo, she can aim to capitalize on her victim's less-than-ideal midair positioning above her. Throwing out a move with decent hitbox coverage could block the enemy's escape, while empty hopping can bait out their midair jump, making them more susceptible to an aerial follow-up. In addition, the momentary hitstun Dixie's foe undergoes gives her a brief moment to run slightly to either side of them before attacking, quickly mixing up their knockback trajectory and which direction the foe must DI. There's a great deal of damage racking and KO utility here, so long as Dixie doesn't start spamming Side Special as baby's first combo starter tool. That's because she's momentarily vulnerable on whiff, with 33 end lag frames, and her hair only constitutes a grab hitbox for three frames. Foes who read Dixie's Side Special attempt can spot dodge her hair without fear of it snagging her as their intangibility ends. Of course, if she herself predicts this punish attempt, Dixie can just wait to initiate her ponytail lash until said foe exits their spot dodge...hooray, counterplay!

During Dixie's 17-frame startup, the player can angle her hair diagonally upward on the ground, and diagonally downward at the edge of a platform or in midair. Should she grab a victim in midair, Dixie will pause briefly in midair as she performs her throw animation — not ideal for gimping purposes, as she tosses her foe skyward, but still capable of turning the tables offstage. Speaking of which, Dixie is able to lash her ponytail out to tether to the ledge, upon which she'll dangle momentarily with her hair, akin to her hook-hanging animation in DKC2. This is a definite help in terms of snapping to the ledge when Dixie has spun close enough with Up Special in recovering, though compared to other tethers, Dixie's ponytail-casting animation gives her no vertical boost.

While onstage, the player can guide the control stick side to side during Dixie's 40-frame spinning animation to have her twirl in that direction at her walking speed, victim in tow, before tossing them. The more discerning DKC2 players might recognize the animation as a nod to the game's delightfully bizarre Cat-O-9-Tails enemies. Dixie's throw properties differ more forcefully when she's moved prior to throwing — for 14% and diagonal knockback capable of KOing around 120%. Here, she'll essentially be trading her stationary Side Special's combo-happy properties for a potential KO throw, though a moving Side Special toss still can see use for its spacing properties at lower damage levels. Mechanics-wise, Dixie will not move off the end of platforms while spinning, and boasts an external hitbox that inflicts 5% and below-average set knockback to foes in FFAs. And Special-wide, Dixie's Side Special is subject to Ultimate's one-second re-grab timer.


If Dixie lashes either a keg or Kiddy, she'll draw her target in and hold them as if summoned via Down Special — compared to a repeat pick-up from an additional Down Special, Dixie doesn't get any frame bonus here, but gains the option to pull either summons to her from afar or a platform. Dixie's got one more flashy Side Special trick at her disposal, if the player double-taps the input at the moment her hair lashes her keg or cousin. Rather than casually picking her summons up, Dixie will whoop in girlish excitement, pulling her target in and performing a flip, at a shorthop's height if initiated onstage or in place if started in midair. Dixie holds out her keg or balled-up Kiddy in her ponytail as she flips, after which she slams her target powerfully to the ground in front of her, almost appearing to perform a cartoonier version of an Aether move.

This is what could be considered a going-for-broke finisher move; while flipping over 40 frames, Dixie and her summons have great circular hitbox coverage, about three-quarters the size of a Smart Bomb blast. Here, flipping with a keg deals 13% and radial knockback KOing around 115%, while Kiddy ups those figures to 16% and 105%, respectively. Then, Dixie's slam covers three training stage squares in front of her, walloping grounded foes to deal 21% and knockback KOing around 80% with a keg, and a whopping 28% and knockback KOing at 55% with Kiddy. This represents the strongest finisher in Dixie's arsenal, and comes with 10% in bonus shield damage to boot; if a grounded foe shields both hits from her flip and slam, they'll lose almost all of their bubble with a keg, and see a guaranteed shield-break from Kiddy. If Dixie lands either slam variant, the game camera will zoom briefly in as the background turns blue, in one of those rare signifiers of a show-stopping attack hit.


Despite this setup's potency, Dixie almost certainly will find herself on the business end of enemy punishment on whiff, as she undergoes an unpleasant 66 frames of end lag on landing. In midair, Dixie also won't stop slamming down until she reaches solid ground, for an assured self-destruct if offstage. Her keg or cousin's underside does, however, carry a 7% hitbox while descending, comparable to Aether or Incineroar's Cross Chop, so she can take foes down with her. Effectively, with these risky Side Special options, Dixie will take herself out of her midair comfort zone to a vulnerable grounded end point in exchange for the chance to really take a bite out of her opponent's stock, if not eradicate it outright. Situationally, she can time her slam onstage at the ledge to spike a high-recovering foe, or else station a keg or Kiddy at the ledge so, from offstage, she can rain down atop a low-recovering target for a suicide KO. And though it takes positioning — maybe by pursuing a keg falling offstage or performing a reversed Side Special on a de-synched Kiddy as he's leaping offstage to reunite — Dixie can use this finisher when she has a stock lead to seal the deal on a match in as bombastic a fashion as she can muster.

AERIALS

NEUTRAL AIR - FAN FARE


Dixie faces the screen and begins spinning her ponytail around her body in a circular fashion, creating the appearance of a fan blade behind her. Coming out on frame 6, Dixie's hair surrounds her over 23 frames, during which time foes will take four rapid stunning hits of 2%. The following fifth hit inflicts 4% and radial knockback that won't KO from onstage until around 180%, but can eke out earlier offstage KOs closer to the blast zone.

Though not quite as expansive a move as Ridley's N-Air, Dixie's counterpart similarly provides hitbox coverage around her body, reaching out a decent ways to pull in foes at her ponytail's periphery. With 15 end lag frames, Dixie can use multiple N-Airs from shorthops to extend combos, or auto-cancel on landing past frame 32 to lead into a grab or jab-lock combo — especially if a low-to-the-ground N-Air sent a foe into prone. Worth noting, while Dixie's aerial prowess often empowers her to pursue foes skyward, there's always the chance she could wind up regretting choosing to burn her excellent double-jump to micro-target a lower opponent with N-Air, or most of her other aerials for that matter.

From a mechanical standpoint, when Kiddy is desynced from Dixie on the ground, he'll perform a shorthop in leaping up to mirror her aerials if she initiated her corresponding move at the height of her shorthop or lower — whether from an actual shorthop or descending to the stage with an attack. If Dixie starts an aerial at the height of her full hop or higher, Kiddy respectively will full hop his aerial, too. Sometimes, if Dixie is high enough to use multiple aerials before falling below full hop height, Kiddy will land before mirroring all of those attacks, in which case he may perform a falling aerial before leaping back up to resume.

If Kiddy is bouncing along inside a gum bubble, he'll leap out to break free before performing his aerial, situationally letting him use it from higher up than he otherwise could. And, if Kiddy is falling in midair at the point where he otherwise would mirror one of Dixie's grounded attacks, he'll perform the matching directional aerial — F-Air, to match her F-Tilt, for instance — before switching to the correct mirror move at his first chance.

As a blessing and a curse, Kiddy still will mirror Dixie's aerials while leaping back onto the stage solo, even if it inhibits him from making it to the ledge. Though this gives Kiddy options for carrying out sacrificial KOs, his fate also could be sealed if Dixie just mindlessly presses buttons after a foe has send Kiddy offstage. In a roundabout way, sending Kiddy offstage can temporarily render Dixie more vulnerable, too, as she's temporarily deterred from using her bread-and-butter aerials if she doesn't want to lose her partner.

With N-Air specifically, Kiddy simply tucks into a ball and performs a single flip in place, inflicting 12% and knockback KOing around 125% at the ledge. Coming out between frames 9-15, it's a straightforward enough single launching hit with 16 end lag frames. Synched up against a foe with no to low damage, the two Kongs can rack up some early damage if Dixie leaps inward at them after successfully landing an initial N-Air. Pulled off, her hair won't send them far enough away to evade Kiddy's flip, which in turn can launch that victim into a second Dixie N-Air or a different attack — even a Smash, if she's higher up on a platform.


While separated, Dixie can try spinning a foe in Kiddy's direction with N-Air for him to knock back at her in a miniature soccer game; even if misspaced such that the victim air dodges before Kiddy can get his flip out, Dixie sometimes can salvage the setup by landing and rushing in to punish. And sitting by his lonesome, Kiddy's flip can net him some breathing room against would-be attackers if Dixie times her preceding N-Air right.

FORWARD AIR - KONG KICKS


Dixie performs two kicks in quick succession, first with her left foot, then her right, ending on what could pass for a karate flykick pose. Coming out between frames 6-17, her two kicks chain together, dealing 4% and 6%, respectively, with the latter dealing knockback capable of KOing around 145% at the ledge. With a paltry 15 end lag frames, and relatively minor landing lag, F-Air could be considered a bread-and-butter aerial for Dixie. She's able to harness her kicks both to start combos, perhaps out of a full-hop following Side Special, or extend them, and also is relatively free to throw it out into thin air while advancing on or retreating from a foe.

On opponents with sufficiently low percents, or heavyweights, Dixie generally can land one F-Air from a shorthop before landing and leaping back up to pursue with an additional F-Air or two. Momentum from Up Special is a big help for her in chaining multiple F-Airs together at mid- to high percentages. Just don't let up pressing your advantage; the range on Dixie's feet isn't too spectacular, so melee combatants can put the squeeze back on her if she lets up. On a more situational note, when breaking gum bubbles with F-Air or other such lighter multi-hit moves, it's generally worth Dixie's while to fade back before impact. That way, a later, weaker multi-hit — here, Dixie's second kick — won't hit her victim out of the bubble's stun, letting her instead punish with something a touch meatier.

Kiddy's F-Air equivalent has him perform a surprisingly agile bicycle kick maneuver, backflipping to kick opponents in front of him for 14% and near-vertical knockback KOing off the screentop around 115%. Not the fastest aerial, Kiddy's kick becomes active from frames 12-15, with 29 end lag frames. When together, foes hit by Dixie's F-Air can quickly air dodge away to avoid getting kicked by Kiddy too — and her kicks send foes past low damage out of his stumpy legs' reach anyway — though external help from a slow-bouncing keg or gum bubble can ensure his follow-up connects.


The frame discrepancy between the two Kongs' F-Airs means that, when desynched, Kiddy can't perform as many F-Airs in one midair sitting as Dixie can. Even so, with good timing, players can turn this to their advantage by determining whether solo Kiddy is performing rising or falling F-Airs, influencing his knockback's trajectory accordingly. The young Kong is all too happy both to kick foes up, soccer-like, at Dixie for an aerial string, or else wait on a high platform to convert her hit into a screentop KO. And even if foes should prove evasive, there's nothing stopping him from venting his frustration on a steel keg...

BACK AIR - SWISH AND FLICK


Dixie chuckles sweetly, sweeping a hand through her ponytail to forcefully swish it in an arc a little more than one training stage square behind her. Foes whipped take 8% and knockback that sends them at a slight downward trajectory, capable of KOing at the ledge around 135%. Active from frames 8-10, Dixie has little difficulty throwing out B-Air out of a shorthop to punish rolls, though, with 24 end lag frames, it's generally best suited for individual blows, versus F-Air's potential for chained hits.

If Dixie manages to coax a foe offstage with B-Air, her hair's low knockback trajectory can land an opponent underneath her as she's twirling around with Up Special. Forging this momentary vantage point lets her react to her target's attempted recovery, ideally without getting overzealous with a follow-up aerial and losing the ability to recover herself. Onstage, Dixie can lash foes down onto prone onstage. If they miss their tech, she can land and true combo into dash attack before their getup, or else spray down gumballs so they can't help but rise up into the projectiles.

Upon successfully landing Side Special, Dixie also has a 50/50 setup at her disposal, through which B-Air lets her smack foes who opt not to leap away from her command grab's set knockback (with U-Air at her disposal for those latter scenarios). And, spaced properly, Dixie can B-Air a keg she's dropped down behind her in midair to potentially hit foes twice, first with her hitlag-prolonged hair and then again with the keg as it hurtles off around her launched victim.

Without so much as looking backward, Kiddy lifts one arm to briefly scratch his armpit in ape-like fashion with his other hand, before slamming the arm down behind himself. His fist hits with great force, dealing 19% and knockback capable of KOing around 90%, or 145% from a stage bounce off the screentop. Up there in terms of the laggiest aerials in the game — for reference, Dedede's D-Air comes out on frame 22 — this is not a move Kiddy will be chaining together with Dixie in any kind of meaningful capacity, unless an opponent makes the grave mistake of dodging inward at the Kongs after the heroine's hair swish.


Optimally stationed, however, Kiddy can bounce a foe down for Dixie to get in her own licks as they're ricocheting untechably off the stage. She also can swish a foe down at Kiddy with her own B-Air's distinct knockback, potentially even for an onstage spike if he's positioned on a low platform close enough to the ledge. Sometimes, however, this will require Dixie to monitor which side of Kiddy she's on — you might recall, he'll always face her direction, so if she crosses behind him before his own B-Air can come up, the setup won't proceed as planned. She already ought to be prepared to rush to his defense if an opponent decides Kiddy's 26-frame end lag is their window to make him cry.

UP AIR - SIMIAN CYCLONE


Dixie spreads her arms, stretching out in a free-fall pose as she whips and twists her hair above her in a more feral, tornado-esque fashion than usual. Her hair reaches up about one-and-a-third training stage squares, dealing six rapid multi-hits between frames 10-33. The first five hits deal 1.5% and stun, while the last deals 5% and vertical knockback KOing around 125%. Another staple aerial, Dixie can juggle most foes at least twice at low to mid- damage levels, and often more.

It's an efficient enough juggle tool that the threat of U-Air can be potent for baiting hasty movements from landing enemies if Dixie performs empty hops. Side Special into U-Air is a reliable combo for building damage, and can become a kill confirm later on if Dixie doesn't stale the latter too excessively. U-Air's duration can be a blessing and a curse, catching out poor air dodges with relative ease but giving foes who dodge through a window to punish Dixie from below. She'll also undergo a not-insignificant 16 frames of landing lag unless she autocancels U-Air within the back half of its 22 end lag frames.

Kiddy sweeps a big meaty arm in an arc a decent distance above his head, in a manner almost reminiscent of DK's old Smash 64 U-Air. Coming out between frames 14-23, the first half of his sweep inflicts 12% and vertical knockback KOing around 110%, while during the back half, this diminishes to 8% and vertical knockback KOing at 135%. If Dixie is spaced right leaping up after performing her own U-Air, Kiddy's will connect, too, if he's synched up. Kiddy's added damage and knockback potential effectively renders Dixie's 50/50 setups, such as B-Air's aforementioned one with Side Special, that much more worrisome.


Kiddy's slower sweep itself won't often juggle responsive foes, though — both synched and by himself — its weaker hitbox can come in handy from a shorthop. Pulled off, Kiddy will lightly swat his victim, autocancel during the last 7 of his 24 end lag frames, and have a moment to pursue with a follow-up aerial. A challenging setup involves positioning Dixie and Kiddy side by side, albeit not synched, and staggering U-Airs, short and full hops so Kiddy sweeps foes into Dixie's hair. That way, its lesser knockback can cancel out his stronger launch a few times repeatedly, piling on a healthy heaping of damage with optimal execution.

DOWN AIR - SLIDING SCALE
Dixie extends a single foot diagonally downward, pausing momentarily in midair before using her hair to propel herself at that trajectory. The nature of Dixie's stall and fall hinges on her momentum at the time of the aerial's inception. Used while she's at her regular air speed, Dixie will pause for 13 frames before sliding down six training stage squares diagonally. While at enhanced momentum from Up Special, however, Dixie sheds five startup frames and descends a diagonal 10 squares before regaining control. With enough air space beneath her, Dixie travels both full distances over 65 frames, with her sped-up version having a hair more speed to its name. Foes kicked during the first three frames of Dixie's descent, at point blank range, take 13% and are spiked with above average force. Those impacted any later take 7% and light vertical knockback that won't KO but can position them for a follow-up aerial.

Dixie certainly doesn't mind this, as she bounces off her target on hit, up to her double jump height, depending on control stick holding. This bounce won't refresh her actual double jump in midair, but gives her a means for surviving a successful hit offstage, or — for the more daring players — some height to play with, in falling down far enough to land another aerial, potentially F-Air for an offstage KO, but not so far that she can't live to tell the tale. Throwing D-Air out mindlessly offstage obviously is a recipe for disaster, giving Dixie's dearth of vertical recovery options. Situationally, however, D-Air lets her clap back at an aggressive foe trying to smack her from below, or if they're too far offstage for the luxury of an air dodge to avoid her descent.

Onstage, Dixie can bounce off shields for a little breathing room while landing, though a skillful spot dodge can turn this against her, as she undergoes 28 frames of landing lag. Steel kegs, standalone Kiddy and gum bubbles also make for great springboards, as though Dixie's aerial movement weren't already freeform enough. Compared to an Up Special bounce, Dixie's foot here lets her rebound from a bit further away, at the possible cost of bringing about her landing lag. On a foe-carrying bubble, Dixie will bounce off, after which she can zip back down with a second D-Air to strike her victim out of the pop's stun. D-Air as a method for springing off Kiddy also reunites him with Dixie, occasionally letting her extract him from a hairy situation.

With 17 startup frames, Kiddy stretches out, pauses ever so slightly and performs a belly flop, descending at high speeds until he reaches solid ground — technically up to 75 frames, with a ton of air space beneath him. His underside deals 18%, with a powerful spike hitbox during the first five frames of his descent, and diagonal knockback for its duration that KOs at 110%. Onstage, Kiddy also will inflict 10% in bonus shield damage, and produce close-ranged 4% dust hitboxes to either side, nicking foes who drop shield too soon upon his landing. Unique among Dixie's aerials, D-Air will automatically desync Kiddy from her, as he picks himself up onstage over 30 frames before attempting to reunite with her.


With an onstage D-Air, followed by a smashed Down Special, Dixie can deposit Kiddy at the location of her choosing before continuing on to greater heights, perhaps a higher platform to double up the two Kongs' coverage. Though punishable, solo Kiddy can occasionally get off stupid hits in more casual settings by leaping up and repeatedly falling down in place with D-Air. Offstage, he'll almost invariably fall to his death; if the player knows they've buffered D-Air right before getting launched, they'll want to make a beeline for the stage before Kiddy's one-second move-mirroring delay expires. Dixie generally will need good positioning to land Kiddy's brief spike hitbox, though if she's got a sufficient stock lead, she can doom her dratted cousin for guaranteed damage on some recovering foes, not unlike what Steve can do with his anvil. Sometimes, sacrifices must be made. . .

GRAB-GAME

GRAB - KONG KLUTCH
By her lonesome, Dixie swipes a hand forward a short distance to snag a victim. If she's successful, she'll grip them with both hands and a determined look on her face, reminiscent of her barrel-carrying animation from Tropical Freeze. On whiff, she'll stumble over her feet with an annoyed expression, undergoing 28 end lag frames.

Coming out on frame 7, Dixie's grab is comparable to Diddy's in terms of its so-so range, as she gets hands-on in lieu of using her hair again. Generally speaking, Dixie will find herself rushing in on a vulnerable foe to punish with a grab, or dropping suddenly from Up Special to catch a foe by surprise, rather than grabbing from a standstill.

By contrast, solo Kiddy has grab range more comparable to the leader of the bunch himself, with only marginally slower startup than Dixie to boot at eight frames, and the same end lag on whiff. The tyke swipes both big arms in front of him in a hug-esque animation, embracing victims against his chest in what likely is intended as a non-violent gesture, nonetheless still uncomfortable. From an input standpoint, control effectively switches over to Kiddy after he's caught a foe; the player is free to use his own grab-game before resuming control of Dixie after he's thrown his victim or they escape.

During Kiddy's grab, Dixie pauses to hop in place, cheering him on — no rushing over to charge Smash attacks mid-grab. If Kiddy landed grab while she's in midair, Dixie will fall regularly in place, retaining any momentum she had previously, and become stationary upon landing. If Dixie has no solid ground beneath her, the player ought not dawdle in throwing Kiddy's victim, lest Dixie find herself up schitt's creek without a paddle.

Despite Dixie's inertia during Kiddy's grab itself, she's able to prove her mettle both immediately before and afterward. With tight timing, Dixie can move, leap or twirl overtop Kiddy immediately before his grab comes out, prompting him to turn and rival DK for some of the best pivot grab range in the game. More simply, if Dixie knows Kiddy's grab is about to come out, it's often in her best interest to move in his general direction, so she can follow up on his victim right after they're thrown. It ought to go without saying, but Ultimate's re-grab timer kicks in for both Kongs, regardless of which of Dixie or Kiddy has triggered it.

When Dixie and Kiddy are paired up, the latter will grip the former from behind in one hand, before thrusting her forward slightly as she proceeds with her own grab. This ups the grab's startup a decent amount, to frame 12, but extends its range significantly, up to 2.5 training stage squares. In essence, the Kongs together have the laggiest but farthest reaching grab, compared to either of their solo variants.

The 28-frame end lag on whiff from both solo Kong grabs carries over here, too, though it's most risky here, as Kiddy keeps Dixie's hurtbox held out for the first half of this cooldown before yanking her back in. The tradeoff, if the duo lands grab, is the player's flexibility to choose which Kong ultimately throws the victim, signified by Kiddy placing one hand ominously on the foe's shoulder as Dixie frontally clutches them. Her more combo-suited throws are triggered with directional control stick taps, while Kiddy's more forceful counterparts are achieved through smashed inputs.


PUMMEL - KONG KRUNCH


Dixie holds her victim in place as she sinks a knee into their gut or gut equivalent, dealing 1% at a rapid rate. Kiddy instead squeezes his opponent against his chest, dealing 1.6% at a somewhat slower rate. With both Kongs together, Dixie will continue kneeing the victim, while Kiddy performs a more traditional shoulder chop with his free hand, with the same damage and speed as his standalone hug. They'll effectively perform both of their pummels at the same time, though the damage adds up gradually, rather than all at once, given the slight speed difference between Dixie and Kiddy's respective attacks.

One bonus here is, both Kongs will refresh their stale moves simultaneously, as opposed to refreshing just their own attacks with their standalone pummels. For additional damage-dealing via grab-game, Dixie and/or Kiddy can try landing grab in the path of a steel keg, which will bounce off their victim without knocking them free, akin to one of Dedede's Gordos. Gum bubbles, too, can assist in this respect, though they'll only inflict their damage — no stun or encasement — upon impacting a foe mid-grab or throw animation.

FORWARD THROW - KONG KATAPULT


In one fluid motion, Dixie tosses her victim backward into her ponytail before shifting forward into a handstand, reversing their momentum to fling them. The toss inflicts 9% and decent horizontal knockback capable of KOing at the ledge around 120%. Dixie's trajectory is able to put larger foes or those with low damage in a tech chase situation about a platform's distance in front of her. Later in the percentage game, characters are flung far enough that they also could opt to leap out of their knockback instead of landing.

In that respect, Dixie can try conditioning one of those two options, by respectively leaping after her target or sending out a keg or gum bubble, before eventually punishing the ingrained behavior with the opposite reaction. Of note, because Dixie's startup has her briefly position her victim behind her, in her ponytail, she situationally can tack on bonus damage, without interrupting the animation, by initiating F-Throw right in front of a damaging construct.

Upon initiating F-Throw, Kiddy lifts his victim into the air in one hand, before slamming them to the ground, as if smashing a bug, putting his whole body into the animation. He inflicts a respectable 10% and healthy base knockback that sends his victim a decent ways up diagonally, but does not scale especially quickly, not KOing until rather high percentages.


In contrast with Ultimate's similar-looking throws, there's not a ton of immediate combo potential when both Kongs are united, outside sending the victim into a well-aimed keg or a hard read with a buffered Up Special toss of Dixie. That being said, when separated, Kiddy's knockback can send his victim right into Dixie's air space, if she's far enough in front of Kiddy to leap up and intercept the foe, potentially hovering down to micro-space an aerial with relation to their air dodge.

BACK THROW - BUBBLE GUN BLAST


A multi-part animation, Dixie turns around and hoists her victim up in the air behind her, dealing an initial 3%. Before they can react, she whips out her bubble gun and grins mischievously as she presses the trigger; as compared to Neutral Special, here, a gum bubble can be seen inflating at the weapon's muzzle. Dixie's victim lands on the bubble, popping it under their weight for an additional 9% and outward knockback that can KO at the ledge around 105%. As a slight easter egg, the bubble gum burst produces a sound effect not unlike when a Kong's extra-life balloon pops in DKC — all the more fitting, given the move's status as Dixie's strongest KO throw.


Outside of a B-Air or inward Up Special strong hit at low damage levels, Dixie has better combo tools at her disposal within grab-game. Even still, that she can polish off stocks with some degree of efficiency both with F-Throw and B-Throw means Dixie can credibly threaten opponents climbing up from the ledge, regardless of which direction she grabs them from. With the startup timing down, partnered Kiddy's extra range can be a boon for landing these ledge-adjacent grabs, while, by herself, Dixie's fast ground movement can help her counteract her grab's mediocre range. And given Up Special's nature as an edgeguarding staple, suddenly landing from her twirl to grab at the ledge can make for a potent, potentially lethal mix-up for Dixie.

Kiddy apes Smash's staple "so long, gay eh Bowser" throw animation for his B-Throw, spinning his victim around twice before hurling them behind him for 9% and knockback KOing at 95% with his back to the ledge. Upon release, he takes a moment to wave innocently in his victim's general direction — happy trails! The young Kong's spinning has him rotate two training stage squares backward over 58 frames, stopping at ledges but potentially bringing him closer to the blast zone before releasing his victim. Dixie will travel backward along with Kiddy when the two Kongs are paired up, whereas, while solo, B-Throw can serve double-duty as a means for repositioning Kiddy.


As with Dixie's F-Throw, Kiddy can swing his victim into a bouncing keg or gum bubble for bonus damage without breaking his grip, here to either side. That being said, this can be comparatively harder to time, as Kiddy's mid-throw movement could just as easily have him travel underneath and miss some constructs. As a KO option, Kiddy's B-Throw will finish off ledge-adjacent opponents a touch earlier than Dixie's counterpart — only fair, given that he must land grab with his back facing the ledge to capitalize, without much knockback behind his own F-Throw.

DOWN THROW - DIXIE DRILL
Dixie drops her victim to the ground, where they lie helplessly on their back, belly or equivalent, before leaping over them and flipping upside down. She then drops down, ponytail extended underneath her in a point, and pivots around rapidly, using her hair to drill her opponent with five rapid hits adding up to 7%. The final hit inflicts low downward knockback, certain to send Dixie's victim into prone about a platform width in front of her, barring a timed tech. Given that Dixie's combo potential here largely stems from managing her foe's get-up, D-Throw generally is one she'll want to use on a main stage platform.

There, she'll have more room to play around with potential reads, not to mention space for locking off a directional roll, with a preemptive move for Kiddy to mirror or a bouncing construct. Dixie's upcoming D-Smash, in particular, makes for a valuable tool on foes put in prone via D-Throw. Her fast first actionable frame after drilling her victim lets her run up and use a well-spaced D-Smash to cover three of their four possible get-up options (collapse in place, tech in place or inward tech roll). Outward tech rolls can provide foes an escape route, though Dixie can lock this off, too, if she initiates D-Throw sufficiently close to the ledge. Alternatively, Dixie can move in with jab for a jab lock combo, which can run out her victim's regrab timer such that she can then step back for a turnaround Side Special to catch their get-up, in lieu of a launching third hit.

Kiddy's D-Throw has him leap up a short distance, fists above his head, before stomping down atop his victim, evocative of his render on DKC3's "bash the baddies" bonus room screens. His bulk inflicts a solid 15% and sends his victim at a diagonal trajectory behind him, with mediocre knockback that won't KO until steep percentages. The launch angle here isn't conducive for combos, either. Given how Kiddy automatically faces Dixie's direction, in most cases he'll be sending his foe away from her, and Kiddy himself doesn't have all that much he can follow up with, outside of a hard read with his sluggish B-Air. Outside of niche spacing instances around Dixie's constructs, Kiddy's D-Throw is most valuable for guaranteed damage — the most among any of the two Kongs' throws — if she missed her chance to get in position for a potentially more rewarding string out of a different throw.


UP THROW - SIMIAN SPRING


In a display of acrobatic prowess, Dixie grips her victim with both hands as her ponytail compresses underneath her like a spring, holding both characters a touch off the ground. She then uses her hair's potential energy to leap with her foe in a short arc, carrying them four training stage squares upward and one square forward, before slamming down upon them on landing. U-Throw takes Dixie and her foe high enough to land on low platforms, though the animation will stop slightly short at edges. The throw's impact inflicts 6% and bounces both Dixie and her victim skyward. The foe isn't launched all that far, only getting KOed around 190% on high platforms, while Dixie travels up a set three squares (deviating from the horizontal trajectory in the final illustrated section below).


Dixie's aerial positioning close to her thrown victim, not to mention a three-frame reaction advantage, sets U-Throw up as a differently flavored combo starter. Compared to her grounded, more reaction-based D-Throw, Dixie can true-combo U-Throw into N-Air, F-Air or Up Special at lower percentages. Past that point, foes can air dodge, but it's a sufficiently tight window that Dixie still can find herself landing those follow-ups anyhow. At mid-damage levels, Dixie can set up a 50/50, hitting her victim with an aforementioned aerial attack if they don't react, or fastfalling down to use a grounded attack (a charged Smash, for instance) if they dodge downward. And higher into the percent game, U-Throw launches characters far enough to leap away, though they still ought to ready themselves for Dixie to spin in pursuit with Up Special if she goes the aggressive route.

Already wrapping his arms tightly around his victim, Kiddy locks them in a veritable straightjacket of a hug, turning back and forth in a cutesy manner, oblivious to their obvious discomfort. The brief animation inflicts 12% across three crunchy hits, after which the victim pops up from between Kiddy's arms like soap from a fist. They undergo vertical knockback capable of KOing from high platforms as low as 90% — a payoff Kiddy sure will be sticking his neck out to earn sitting on such a platform, where foes can whittle down his HP as he struggles to land. Past low damages, Kiddy will squeeze his victim up too high for Dixie to leap up after while synced up. Even so, if she's the one on a platform above him, U-Throw can deposit a victim in prone there for Dixie to abuse, or close enough to the screentop that her U-Air can close out the stock.


SMASHES

FORWARD SMASH - SIMIAN SPIRAL
While charging, Dixie leans inward, curling her ponytail back to one side with a look of grim focus. Upon release, she spins thrice rapidly, whipping her hair at a slightly downward angle with each twirl, before rearing back and slamming it powerfully down in front of her. The animation brings four hitboxes into play — between frames 9 and 26, Dixie's hair whips, each chaining into the next and dealing 2-4%, while her slam, from frames 36-39, deals 11-14% and knockback KOing from 120-85%.

The range on Dixie's ponytail increases a touch over the course of her Smash, from one training stage square during her whips to 1.5 square during her slam. Before Dixie slams, the player also can use the control stick to direct her slowly forward or backward, up to two training stage squares over the course of her spin (though not back and forth or off platforms). She's able to press in on or retreat from an opponent mid-Smash, approach a keg or gum bubble for a potential on-hit interaction, or even just sync up with a nearby Kiddy before the attack ends.

With relatively fast startup and 21 end lag frames, Dixie's F-Smash isn't an especially sluggish option. Its blessing and curse, depending on where you're standing, stems from her animation's 60-frame duration from start to finish. Used well, Dixie can easily catch out spot dodges at close range, cover grounded ledge get-ups or whittle down shields — a scary prospect, if Kiddy either already has taken a chunk out of the foe's bubble or is about to as Dixie initiates F-Smash. The longevity of its hitboxes also means it's a decent option for Dixie to throw out on a higher platform to try intercepting a victim Kiddy has launched her way.

That being said, if a foe reads and avoids Dixie's F-Smash, they've got a prime opportunity for punishment; without outside intervention, she also won't make enough of a dent in full shields to avoid getting shield-grabbed. Though no slouch on the ground, F-Smash is a solid manifestation of Dixie's general need to be strategic with her landings from midair, using her great jumps and hover to drop down for F-Smash at an opportune moment. One especially frightening moment, when Dixie has adequately cornered a foe near Kiddy as he's about to undergo his death animation tantrum, involves dropping down to use F-Smash (or any Smash, for that matter) in front of or behind him. Used immediately before or after her cousin's tantrum, this can increase the odds of at least one powerful hitbox connecting and, if the foe isn't careful shielding Kiddy's sound wave, will guarantee a shield break if all of Dixie's F-Smash hits connect.

Let's talk about Kiddy's mechanics in terms of Smash attacks. Whether together with or apart from Dixie, Kiddy's one-second buffer period for his mirrored moves still applies here — both for the Smashes themselves and their charge periods. In other words, if Dixie charges her Smash for one second or less, Kiddy will perform an uncharged version of his own Smash; he'll start charging his own Smash if Dixie does so for any longer than one second, releasing his move the equivalent time frame after she does. This means, for Kiddy to achieve full charge, Dixie must first charge her own Smash for two seconds, twice the amount of time she herself needs to reach max power. It's a design scheme that kills two birds with one stone, preventing the alternative of Dixie being stuck immobile while Kiddy is mid-charge, while also making it that much harder to just station him and have him spam Smashes mindlessly from a distance.

With F-Smash, Kiddy keeps things simple, facing the screen and leaping a slight distance off the ground while kicking a single foot to the side. Extending a bit less than a full training stage square, his foot inflicts 21-27% and knockback KOing from 100-75% — not especially impressive, compared to most of Kiddy's heavyweight compatriots. Where Kiddy's F-Smash can become more oppressive is in tandem with Dixie. His kick's 19-frame startup prevents it from being a true combo from Dixie's own F-Smash. That being said, Kiddy's added hitbox at the very least will cover Dixie's end lag, necessitating more conscious thought when punishing her spin-and-slam's duration.


And, if a foe cowers in their shield, or otherwise isn't fast enough to leap away, Dixie and Kiddy can go to town. At low to mid-percentages, Dixie can time her own F-Smash to intercept victims out of Kiddy's kick; with skill, the two Kongs can rack damage on a single victim at a k. razy pace, using multiple F-Smashes to carry them across the stage — like the Ice Climbers but not competitively viable because of unintended exploits. This is far from an easy setup to pull off, however, as if Dixie mistimes her F-Smash, the foe can throw out a fast attack to separate the Kongs. Kiddy's kick also comes bundled with 28 frames of end lag, upping the risk factor for him in throwing it out solo outside of hard reads — say, if Dixie can spook a foe into a gum bubble for Kiddy to kick from the opposite side.

Kiddy also can enhance the movement properties of Dixie's F-Smash, together or solo, if his kick overlaps with her spinning animation. When this happens, the player can direct the control stick side to side to double the regular distance Dixie can move while whipping, from two to four training stage squares. Unlike with standalone F-Smash, Dixie only is able to spin forward with this setup, though with her new speed boost, she becomes able to cross up shields with the right spacing — potentially to avoid wannabe shield-grabbers and punish with a shorthopped B-Air. If Dixie times an F-Smash such that she spins into Kiddy right as he's using his kick, she can suddenly veer back in the opposite direction for her slam, syncing up with her young charge in the process. And should a foe leap or roll away from a chain of F-Smashes from the two Kongs, Dixie can always let herself be kicked forward, aborting the setup and desyncing but possibly salvaging a final hit.


DOWN SMASH - PONYTAIL POUND


Dixie turns to face the screen, hunching over slightly, before rapidly pounding her ponytail twice to the ground, first in front of her and immediately again behind her — this is her hand slap equivalent from Tropical Freeze. She produces two hitboxes with D-Smash: one on her hair itself, which reaches out a training stage square to either side, dealing 12-16%, and a grounded shockwave hitbox that extends half a square beyond that, inflicting 2-4% and light flinch. When it comes to KO power, Dixie's D-Smash is extremely wanting; foes have to be pushing 200% for her pound's vertical knockback to KO off the screentop, even when D-Smash is fully charged.

That being said, her hair pound boasts exemplary end-to-end speed, even by Smash standards. Not only does Dixie's slam hitbox come out on frame 5, covering both sides through frame 19, but she also has a surprisingly low 15 frames of end lag. On the ground, Dixie can aggressively throw out an uncharged D-Smash to pop low-damage foes up such that they land in prone next to her if they miss their tech, or, at mid-damage, are teed up just the right distance for her to start a midair string. More defensively, she also can slam to interrupt enemy combos, as well as snag rolling foes with her backward hit.

D-Smash also stands out as a good option for quickly launching approaching kegs at a helpful outward angle, or popping nearby gum bubbles with victims inside. The move is sufficiently fast that, if the player buffers multiple D-Smashes, Dixie effectively can pound the ground continuously to threaten space, just like in her source material. Just take care not to instinctively throw it out at close range or, like with Nayru's Love from a bad WiFi Zelda, Dixie's opponent could bait her into doing so before retaliating mid-animation.

With D-Smash, Kiddy seeks to show up all the detractors who bemoan that DK should have starred in DKC3 instead by virtue of having a hand slap. Rather than slapping one hand at a time, Kiddy steadily lifts both hands into the air before bringing both palms powerfully down onto the stage at the same time. Coming out on frame 23, Kiddy's slap produces a grounded shockwave that extends outward 1.5 times as far as DK's Down Special, albeit only in front of him. The inward half of this shockwave constitutes a sweetspot, inflicting 24-31% and vertical knockback KOing from 95-60%, whereas the latter deals 14-18% and diagonal knockback KOing nearer to 115-90%. Kiddy undergoes a not-great 36 frames of end lag, holding his hands to the ground momentarily in such a way that underscores his slap's sheer force.


Against foes with no damage, Kiddy's D-Smash will combo from Dixie's if a foe misses their tech after her hair pound pops them up. This can net the two Kongs a reliable set amount of damage to start off a stock, though more masterful players might find they can earn even more rewarding damage on that foe by having solo Dixie kick off a jab lock combo instead. Otherwise, Kiddy's laggy Smash can be a gamble to casually throw out against practiced foes who'll see it as their chance to separate him from his begrudging babysitter and lower his HP. A situational workaround can involve having Kiddy initiate D-Smash from inside a gum bubble, where his hitbox will pop the bubble as it comes into being, dropping him in midair to cancel his cooldown.

More potent, however, is the threat of Kiddy's hand slap, which can come in handy as a tool for steering enemy movement when both Kongs are synced. Because Dixie completes her hair pound with nearly half a second to spare before Kiddy initiates his own D-Smash, she can turn back and forth to switch which way her cousin faces and ultimately will slap. This can terrify aerial foes, unsure which side of the Kongs will end up safe for their landing, and maybe provoke a punishable air dodge for their troubles.

Beyond that, a fun defensive strategy involves Dixie standing within the hand slap shockwave of a desynced Kiddy for coverage on her grounded attacks. She can keep Kiddy at the right distance behind her — likely by stopping and starting his return movements, or twirling him back to desync with grounded Up Special — before splicing quick D-Smashes in with her attacks to continue manifesting his staggered shockwaves. Though somewhat predictable, this can boost Dixie's pressure game by a good margin, earning her bonus damage and knockback if she can hold a foe within the shockwave's range or, heaven forbid, her victim opts to roll inward into Kiddy's sweetspot.


UP SMASH - BLADES OF BLONDE
Dixie crouches while peering upward, before unfurling her ponytail and spinning it in a circular blade-esque fashion above her head. With 9 frames of startup, her hair inflicts five rapid hits over 26 frames, the first four of which deal 1-3% and stun, with the final launcher dealing 10-13% and vertical knockback KOing from 125-90%. Despite its so-so power, Dixie's hair reaches out a training stage square to either side.

Dixie will pull characters who make contact into her remaining multi-hits, without risk of them falling out, as can be the case with some comparable in-game Smashes, though the shortest characters are able to duck under her ponytail. With 30 end lag frames, U-Smash features the slowest first actionable frame among Dixie's Smashes, often being unsafe at the lowest damage levels. Even still, her ponytail blade can prove valuable for extending Dixie's combos — after one or two U-Tilts or from a falling N-Air or U-Air. U-Smash also can catalyze a kill confirm on high-damage foes stuck in gum bubbles, as Dixie's first multi-hit pops their bubble so the remaining ones can finish them off from their stun.

Kiddy twists forcefully inward before spinning in a stationary whirling dervish, fists out, akin to DK's upright Spinning Kong animation from the first three Smash games. The start of his inward twist boasts a launching hitbox between frames 3-5, dealing 9-12% and KOing from 135-100%. Beyond that, the bulk of Kiddy's pugilistic cyclone takes place between frames 19-56, inflicting three chaining hits of 6-7%, followed by a stronger hit dealing 9-12% and diagonal knockback KOing from 110-75%.


Kiddy's initial strong hit comes out unusually fast for a Smash, not being all that effective for KOs outside ledge reads but — like DK's Melee Up Special — working excellently in scenarios where he needs to quickly throw foes off to get some room to breathe. He shares Dixie's 30-frame end lag, though, because his animation is a touch longer, he's more punishable on whiff. Otherwise, Kiddy's fists reach out marginally less far horizontally than Dixie's hair but lack their slight low-to-the-ground blindspot, beyond the obvious power boost.

During the first 10 frames of Kiddy's U-Smash startup, the player can smash A and the control stick for his spin to propel Dixie either straight or diagonally upward while performing her own U-Smash, as though she were one of those sky dancer ballerina toys. It's a movement option Dixie can achieve whether she's synced with Kiddy or falling down on him from above, taking her up three training stage squares or in a sideway arc two squares vertically and three horizontally. Dixie's momentum has her complete her U-Smash animation in midair before beginning to descend. She's even able to cancel her final five end lag frames into another buffered option, be it an attack, jump or dodge; with Up Special, in particular, she'll start her spinning at her top air speed, as though she bounded off a construct with the move itself.

The two Kongs can effectively double their hitbox coverage, occupying space both on the ground and in midair, at the cost of desyncing and Kiddy becoming potentially vulnerable as he mirrors a second U-Smash in place. Oftentimes, Dixie may choose to board low platforms this way, as she can poke through at foes while retaining the option to drop back through and reconnect with Kiddy. She'll want to mix this approach up with rising aerials, however, lest her target be ready to greet her ascent with a charged Smash.


STANDARDS

JAB - PONYTAIL POLE VAULT
Dixie's first two jab hits have her slap once, then twice with alternating hands, balancing on the opposite hand for each strike. Both slaps deal 2% and a touch of stun, typical of most lightweight jabs. Her first slap comes out on frame 3 and transitions into her second as early as frame 6, with the two slaps having respective first actionable frames on frames 19 and 20.

This represents an identical animation and frame data to Diddy's first two jab hits, and similarly to her boyfriend, it's a rare day that Dixie won't want to proceed to her rapid jab or finisher. Even so, if Dixie observes she's about to get shield-grabbed, a near-instant reaction (or a slow reaction from her foe) lets her double back to try an alternate form of pressure, like a turnaround Side Special grab. In any case, her slaps are fast enough to be great go-to options for jab lock combos when she's landed a foe in prone with something like shorthop N-Air, B-Air, D-Throw or low-damage D-Smash.


Dixie starts distinguishing herself on her rapid jab, as she transitions from balanced slaps to kicks. Out of slap numero dos, as soon as frame 6, Dixie leans backward, bending her ponytail underneath herself for support as she kicks rapidly forward with alternating feet. She performs one 0.4% kick every three frames, able to tack on helpful bonus damage in all the usual scenarios — running up and jabbing to punish stationary techs or poking at a shield, to name a few.


Dixie's jab finisher has her stretch her ponytail out and brace on her hands to kick more forcefully with both feet, dealing 5% and knockback KOing at the ledge around 190%. Her hair lends her finisher more range than your typical finisher, reaching out about one-and-a-third training stage squares, comparable to a number of tilts. This range can work for or against Dixie, depending on her spacing.


Skipping her rapid kicks to proceed right into her finisher can catch foes off-guard as they're getting too close for comfort. That being said, with 29 end lag frames, Dixie isn't fully safe on shield unless she initiates her long kick from its maximum range (the distance her rapid kicks will push her victim back with enough time). The fastest foes can make Dixie regret her brief forward hurtbox extension, though she, in turn, can kick outward as pseudo-bait before pulling herself in and making hay of overly laggy punish attempts.

When it comes to mirror moves, Kiddy will perform one jab in response to any individual combination of Dixie's jab hits, solo or together. He sticks both arms to the side, almost as if t-posing, before performing a single spin in place. Kiddy's fists extend about as far as Ganondorf's jab to either side, between frames 7-9, inflicting 11% and knockback capable of KOing at the ledge around 130%. It's a lariat-esque maneuver he appears to have borrowed from his older brother Chunky Kong before his untimely demise. The animation itself lasts 28 frames, not great by jab standards, though as a helpful perk, Kiddy's upper half is intangible between frames 6-15. Talk about a Strong Kong!


When the Kongs are together, Dixie has time to get off a few rapid jabs before Kiddy lands his spin on the stunned opponent. Compared to her regular finisher, Kiddy will inflict greater knockback at the expense of an easier chance for a grounded follow-up, or the ability to hold a victim in multiple kicks as a keg or gum bubble approaches. A happy medium can come while the Kongs are desynced but flanking a foe to either side, as Dixie uses her extended kick to send her victim into Kiddy's spin, which in turn sends them back in her direction for an aerial pursuit.

By himself, Kiddy can throw off encroaching attackers with the occasional fast jab spin. Oftentimes, his doing so will be less a function of how great of a reward he gets off of jab, but rather how easily Dixie can throw out a single jab hit to instill apprehension in an opponent she sees making a beeline for her cousin. Given that Kiddy lacks a shield while stationed solo, well-timed jabs, and their intangibility windows, can help prolong his life, though spamming his jab exclusively for this outcome is a quick recipe for shortening it. For lower-stakes shenanigans compared to spinning through enemy hitboxes, try having Kiddy bat a foe into one of Dixie's bouncing kegs, or vice versa.


DASH ATTACK - PONYTAIL PIROUETTE


Dixie whoops girlishly, holding her beret to her head with one hand as she pirouettes forward four training stage squares over 34 frames — the Smash incarnation of her roll attack from Tropical Freeze. She carries a strong initial hitbox from frames 8-11, dealing 9% and diagonal knockback KOing around 170%, and a weaker lingering hitbox from frames 12-23, dealing 5% and low knockback that won't KO until obscene percentages.

A relatively quick burst option, Dixie players can get a kick, albeit questionable competitive benefit, out of performing repeat dash attacks to traverse the stage. Dixie will cross up shields if she makes contact during the first half of her pirouette, able to poke from behind with a subsequent aerial, but otherwise will stop short, vulnerable to a shield-grab. The attack itself comes in handy as a true combo on foes knocked into prone at close range with a shorthopped F-Air or B-Air, or if Dixie suddenly drops down as a feint from Up Special.

Of note, if the player holds the dash attack input, rather than tapping it, Dixie will pirouette off the ends of platforms instead of stopping short. Doing nothing has her begin fast-falling after her attack animation, whereas a jump input will cancel her out of it, carrying her momentum forward at her top air speed. Beyond being a faithful nod to source material, this "roll jump" can grant Dixie quick added height in chasing a victim offstage. She can also cross up a shielding foe at the ledge before leaping back in their direction with B-Air, or, in a casual setting, more easily traverse platforms on a hellscape like 75m or Palutena's Temple.

Bringing his own DKC roll equivalent to the table, Kiddy performs a single somersault, producing a creaky barrel-esque sound effect as he goes. He travels the same distance as Dixie, at the same speed and with identical shield cross-up properties. His beefier roll inflicts 12% and diagonal knockback KOing around 160% from frames 9-12, and 9% and below-average knockback from frames 13-24. When stationary solo, Kiddy will perform the equivalent of a standstill dash attack, beneficial for bursting into foes and potential onstage repositioning when Dixie is too far away to grab and throw him.


Kiddy either will stop at platform edges or roll off them, depending on which version of Dixie's dash attack he's pantomiming. The held version can be great for moving him off low platforms, and anything but great when he's stationed at the ledge, barring sacrificial KO setups against low-recovering foes. Kiddy will reunite with Dixie if he comes into contact with her at any point during his roll; sometimes, he'll pass through her for some frontal defense, before doubling back after his attack ends. With her cousin in tow, Dixie's dash attack transforms as a distinct duo of staggered hits. The two hitboxes won't combo into each other, unless the Kongs both roll through a gum bubble-entrapped target, but nonetheless are useful across a range of pressure scenarios.

If Dixie crosses up a shield, Kiddy's following roll can eat another chunk out of that foe's bubble, or else foil their attempt to shorthop B-Air her in retaliation. Dixie's opponent still can shield-grab her, but unless they do so at her pirouette's furthest extent, they'll render themselves vulnerable to Kiddy barreling in behind her. Counterplay often will involve jumping or dodging out of the two Kongs' way, though foes must be quick and decisive in doing so, lest Dixie have time to leap behind them for aerial coverage while Kiddy rolls in on the ground. Other mix-ups at Dixie's disposal involve moving inward after pirouetting, so Kiddy rolls past her to hit from that side, or air dodging onto Kiddy mid-somersault to start rolling on top of him, as an alternate means for initiating this stance beyond air dodging after a Neutral Special toss.


FORWARD TILT - PONYTAIL PROPELLER


Dixie sticks her ponytail over her shoulder and drills it in a point in front of her, giggling to herself as she does so. A twisting particle effect appears over Dixie's hair as she does so, driving home the throwback to her propeller swimming ability from Tropical Freeze. A decently fast tilt, Dixie's hair inflicts four rapid multi-hits between frames 8-15, the first three of which deal 1% and stun, followed by a fourth dealing 5% and horizontal knockback KOing at the ledge around 175%. Her ponytail reaches nearly a full training stage square, capable of being angled diagonally up or down to catch aerial approaches or score two-frames, respectively.

With a 34-frame duration end to end, F-Tilt serves as an effective poking tool within Dixie's kit. She's able to walk forward, throwing it out once or twice in succession to catch foes too slow to punish at close range, putting them in a tech chase situation at low damage levels or pushing them across the stage. To the extent it has downsides, though Dixie's ponytail is safe on shield at max range, it doesn't reach as far here as in most of her other attacks, taking comparatively less advantage of its disjointed nature. Opponents with superior range, not to mention those with tough guy or super armor capable of tanking Dixie's weaker initial hits, all can outclass her before the move wraps up.

Returning to the Chunky attack well, Kiddy rears back on one foot, pulling a fist back nearly to the ground behind him before lunging forward to perform one hell heck of a primate punch. He staggers the punch for 30 whole frames, doubling Link's 15-frame startup for the slowest F-Tilt in the game, though he fortunately takes on super armor during the back half of this wind-up. Afterward, Kiddy punches forward 1.2 training stage squares to deal 22%, plus 20% in bonus shield damage, and robust knockback KOing around 65%. With 34 end lag frames, this is up there as far as a go-for-broke option among Kiddy's standalone attacks.


To some degree, the speed of Dixie's counterpart tilt is a blessing and a curse for her cousin. She'll have to take care not to just mash F-Tilt, Joker-esque, lest she gift wrap opportunities for her opponent to spot dodge and kill off Kiddy. That being said, though jab or short-hopped F-Airs generally are preferable for Kiddy in self-defense, there's little better way to put the fear of god in opponents than having Kiddy's super armor eat up their puny hitboxes before he powers through to send them flying. With range and power comparable to a Smash, Kiddy's punch also stands out as a solid reward if either Kong manages to inflict enough gum bubble stun on a foe. When the Kongs are paired up, Kiddy's F-Tilt isn't fast enough to combo into Dixie's own tilt. Even still, it's as strong an incentive as any to keep a foe from sitting in shield in front of her, and will lock off inward rolls if her F-Tilt sends them into prone near the ledge, freeing her up to follow with something different.

DOWN TILT - PONYTAIL PIVOT
From her standard ducking crouch, Dixie spins once 360 degrees, swiping her ponytail at her feet to slip up victims in front of her. As Dixie's fastest tilt, her hair here takes on its frontal hitbox on frame 6, reaching out a training stage square horizontally, albeit not all that far vertically. Her ponytail inflicts a light 5%, popping foes lightly upward with force insufficient to KO until nutty percentages. Grounded foes struck also have a 33% chance of tripping, primed for an additional D-Tilt from Dixie, given the move's minimal 16-frame cooldown, or any number of alternate follow-ups. Despite Dixie's preference for the air, as the cool kids say, D-Tilt lends itself to the case study as to why she also can hold her own plenty well on the ground, too, what with its status as an optimal combo starter.

At lower percentages, her ponytail swipe sets up a 50/50, letting Dixie either leap up and punish with F-Air if her foe doesn't react or, if they air dodge, stay on the ground and use another fast attack or grab. She's also to sweep her hair over the ledge to two-frame victims, upon which a buffered Up Special strong hit or F-Air can take stocks at higher damage levels. And every now and then, if a steel keg is bouncing her way, perhaps thrown by Kiddy, Dixie can air dodge backward to land on top and steamroll her foe as they fall down. Naturally, if Dixie manages to trip her victim, she's able to go to town with a dash attack or grab as faster options; if her foe doesn't react quickly enough, Side Special, an inflated gum bubble shot or even a Smash become plausible. The big chore on Dixie's part is not button-mashing D-Tilt follow-ups, lest she blow a chance to punish her foe's launch or trip when the opposite occurs.

Kiddy lifts a single fist above his head for 15 frames before pounding it to the ground a short distance in front of him. His fist itself reaches a training stage square forward, inflicting 14% and knockback KOing around 95%. The force of Kiddy's pound also produces a half-square-long shockwave, which ripples four squares forward — or until it reaches the platform's edge — over a second and a half, inflicting 3% and a bit of flinch to those it impacts. Though not always enough to save Kiddy from getting punished during D-Tilt's 28 end lag frames, the shockwave generally will require foes to shield just a touch longer to avoid getting nicked at close range. And as with D-Smash, Kiddy foregoes his end lag if he uses D-Tilt to break out of a gum bubble, though his midair tilt variant doesn't produce a shockwave.


Kiddy's D-Tilt complements Dixie's options — both D-Tilt and otherwise — in several ways. Most directly, his fist covers foes' possible "downward air dodge" reaction to her aforementioned 50/50, all but ensuring Dixie can proceed with the aerial follow-up of her choice. Together with or separate from her cousin, Dixie also can run overtop Kiddy's shockwave, which amplifies her already strong 2.09-unit initial dash to 2.45 units, tied with Mythra for best in the game. Beyond dash-dancing along the shockwave for mix-ups, this understated perk lets Dixie more easily lunge forward to grab foes she's tripped via D-Tilt, likely holding them in the path of Kiddy's shockwave for bonus damage to boot. And the shockwave launches stationary or thrown kegs it touches at a strong upward diagonal angle, making it a fun tool for badgering aerial foes from below.

UP TILT - PONYTAIL PROP-UP


Dixie uses her ponytail to perform the equivalent of a handstand, balancing herself as she kicks upward with both feet. Her extended torso kicks up high enough to poke slightly through low platforms, dealing 7% and vertical knockback capable of KOing around 165%. With 7 startup and 19 end lag frames, U-Tilt is fast enough for Dixie to use a few times in quick succession to irritate foes who make the mistake of shielding on a platform above her. It's a serviceable launching tool, sending grounded foes up just the right distance for Dixie to juggle once or twice at lower damage levels, before pursuing with her bread-and-butter aerials. Her primary limitation here is U-Tilt's limited horizontal range — though her kick will scoop up foes at her side at point-blank range, it'll miss those any further out, freeing them up to retaliate.

Kiddy brings his leathery ape hands together a short distance above his head to perform a single strong clap. Compared to DK's clap variants, Kiddy keeps his arms closer in toward his body, not dissimilar to your garden-variety cymbal monkey. At point-blank range, for a single frame right where his hands come together, Kiddy's clap inflicts 18% and vertical knockback capable of KOing at 85%. A training stage above that, between frames 10-16, his clap also produces a mild arc-shaped shockwave, dealing 3% and blowing foes upward with a modest wind effect. Kiddy undergoes a Smash-like 36 frames of end lag, waving a limp hand comically as though to rub it in for all the right people that he's not DK.

Similar to several other moves in Kiddy's arsenal, the threat of him bringing U-Tilt out sometimes is more potent than the move itself. With Dixie and Kiddy together, his clap is a great deterrent against foes trying to fastfall an N-Air down onto Dixie after she kicks them with her own U-Tilt. Even if they try, and Kiddy's sweetspot misses, his wind hitbox often will puff all but the most ranged aerials upward such that they end in a whiff, positioning Dixie to assume advantage over their end lag.

Of note, if Dixie touches Kiddy's wind hitbox while performing a regular attack, she'll be boosted 3.5 training stage squares skyward mid-animation — vertically by default, and able to be steered slightly diagonally to either side. Dixie achieves this boost with aerials either by falling down on Kiddy's clap or shorthopping into it, whereas grounded attacks require her to sit above Kiddy on a low platform. What's more, Dixie's first jump height increases from above-average to tied with Falco for best in the game if she initiates it right above Kiddy during his U-Tilt. It's a situational, albeit versatile movement option that allows Dixie not just to perform single grounded atttacks in midair, but to mobilize offensively or defensively immediately afterward, having achieved top air speed with Kiddy's help.

By himself, Kiddy's piddling non-sweetspot U-Tilt range gives him a real defensive blindspot against foes attacking from above, outside well-timed shorthopped U-Airs. That said, his clap's sweetspot reaches just high enough to impact foes through low platforms, inflicting 20% in bonus shield damage and healthy shieldstun to boot. Navigating such a platform while Kiddy is underneath is enough to set unprepared foes' teeth on edge. Though those foes will find themselves safe to one side, rolling or teching to the opposite side can land them right where Kiddy can clap them into oblivion. And naturally, Dixie is all too happy for the chance to cover those opponents' remaining ground, or else poke at them further if they're caught in shield.


FINAL SMASH

FINAL SMASH - BIG BUDDY BASH
Dixie lashes her ponytail forward an elongated six training stage squares to initiate her Final Smash, which varies depending on whether she initiates the super move with or without Kiddy onstage.


By her lonesome, Dixie knocks foes into a cutscene, within which she appears to have called on the calavry. Up to three victims rise up in a deep jungle setting to see a stampede of DKC's Animal Buddies — specifically the ones appearing in DKC2 and DKC3 — charging at them. Dixie can be seen riding Rambi the rhino at the head of the throng, where the animals can be seen bearing down on the victims in their own distinct way. Ellie the elephant sprints; Rattly the rattlesnake bounds along on his coiled tail; and Clapper the seal flops dopily along, just happy to be included. Squitter the spider swings from a stand of webbing in midair, alongside aerial beelines by Squawks the parrot, Quawks the purple parrot and Parry the parallel bird. Even Enguarde the swordfish and Glimmer the anglerfish get in on the fun, bounding in and out of a stream running parallel to their landbound counterparts. Anyhow, the animals all appear to collide with their targets en masse, inflicting one solid blow of 48% and knockback KOing around 50%.


With Kiddy onstage, at her side or otherwise, a different cutscene takes place. Dixie's victims reawaken in a mystic cloudy realm. A stone wall emblazoned with a circle of hieroglyphics lowers in front of them as they get up, revealing the Banana Bird Queen from off of DKC3. A barrage of the game's 15 regular collectible Banana Birds dive-bomb the victims in quick succession, each inflicting 3% in a manner reminiscent of Banjo's Jinjos, leaving them falling from the skies into a lake below. The camera then cuts to the victims' point of view, showing the Banana Bird Queen — Dixie and Kiddy astride her back — dumping a single massive egg down at them. The camera blacks out back to the main stage as the egg makes impact, dealing an additional 20% and knockback KOing around 100%.


In essence, similarly to Mythra and Pyra's super moves, players will earn stronger knockback using their Final Smash with solo Dixie, with a tradeoff for greater damage with Kiddy onstage, too.

EXTRAS

UP TAUNT - AIR GUITAR
Dixie appears to briefly lose herself in her own musical world, strumming along in midair and humming to hersef, before eventually rotating an arm and jumping up with a cheer. If onstage, Kiddy will mirror her taunt by adorably beating his chest a few times, producing bongo-esque sounds as he does so.

SIDE TAUNT - KONG CHEER
Dixie giggles to herself, clasping her hands together and wiggling back and forth in place — her reaction to collecting all K-O-N-G letters or puzzle pieces in Tropical Freeze. Kiddy simply sits up and channels Maggie Simpson by sucking his binky audibly a few times.

DOWN TAUNT - SIMIAN SHOWDOWN
Dixie cries out with enthusiasm, spinning several times rapidly in place before brushing her hair aside with a determined look. Kiddy doesn't seem to appreciate the same urgency, letting out a massive monkey yawn in place — still perfect for facing characters attempting the same button-mashy strings time and time again!

ENTRANCE - BUDDY BARREL
Dixie bursts out of a red DK barrel, emerging a bit higher in midair than her two playable Kong compatriots. She uses her ponytail to descend gracefully onto the stage, landing on one foot with a grin before entering her idle pose.

VICTORY POSE #1 - ACTUAL GUITAR


Dixie breaks out her blue electric guitar and jams along to her victory theme, with her freeze frame taking place as she leaps up into the air to finish her tune. If Kiddy was present onstage as the match ended, he'll appear alongside his cousin during her victory poses, here clapping happily along to her rhythm.

VICTORY POSE #2 - FLAGPOLE FINISH
Dixie is seen clinging to the rope of a wooden flagpole, which she pulls down to raise a pink flag to full staff. If present, Kiddy will appear on the flagpole underneath Dixie to assist in pulling it down. If he personally landed the final blow to win the match, he'll appear above Dixie on the rope, with the Kongs hoisting a blue flag in place of the typical pink one.

VICTORY POSE #3 - GYMNASTIC ROUTINE
The camera follows Dixie as she weaves back and forth down from above with her helicopter spin, before her freeze frame occurs, as she lands with a laugh in a perfect splits pose. Kiddy will await her on the ground and, after her closeup, attempt to mirror her splits, only to faceplant stupidly before he can do so. Kiddy picks himself up and shakes his head back and forth unperturbed; keep the victory screen on and, every so often, he'll look sneakily side to side before trying the stance again, with the same sad outcome.

VICTORY THEME - GUITAR GAZUMP
A snazzy electric guitar remix of Dixie's DKC2 level clear jingle rings out in celebration of her Smash successes.

LOSS POSE - SORROWFUL SIMIAN
Dixie applauds at a regular pace with a somewhat exasperated expression, clearly not at peace over coming up short against her banana-brained opponent.

STAGE

STAGE - GRASSLAND GROOVE


Keeping in the spirit of presenting Dixie as the optimal choice for a new DLC newcomer, here's an example stage that could be included as part of her fighter's pass. Most folks seem to gravitate toward Frozen Donkey Kong Island as their go-to Tropical Freeze stage, but my preference is to deviate and introduce Smash's first DKC stage -not- set on DK Island with none other than the game's breathtaking introduction to the Bright Savannah — heralded by a good number in the fandom as the series' best individual level, bar none. Set in the middle of a Lion King on Broadway-esque celebration, characters fight on the main ostrich-faced float, enjoying a spectacular vista of the sun setting over the rippling grasslands, dancing baobab trees and a snaggle-toothed rock adorned with a banana crown. Point it out on Twitter, and Retro will insist it wasn't an homage to King K. Rool!


The ostrich float is comparable in length to Smashville's main platform and, at regular intervals, a second animal float will travel in the background from one side of the blast zone to the other. The additional float serves as a drop-through platform, a bit larger than one of Town & City's, bobbing lazily up and down from the height of a low Battlefield platform to a high one. These alternatively can save characters recovering offstage or give their opponents a means for oppressing them further with grounded attacks initated further from the main stage, to say nothing of pitfalling or jab-locking a foe on top. The drop-through floats alternate which side they originate from, rotating through four different animals — hyena, wild dog, water buffalo and elephant — so players better know what to expect from both directions.


With hazards turned on, every third drop-through platform is followed by a vertically-oriented giraffe or zebra puppet, the pole of which characters are able to scale and attack from as though it were a ladder. And every two minutes, Lord Fredrik's deep laugh will echo in the background as a massive, albeit visual ice dragon sweeps across the screen. For the next 20 seconds, the stage's surfaces are coated in ice, with the accompanying traction reduction and increased likelihood of tripping seen on The Summit. The savannah's backdrop takes on a cold blue hue, as the animal platforms take on comically dismayed cold faces until the sun appears again to melt the frozen buildup.

Grassland Groove sports all of the DK series' existing music tracks, as well as the following new ones, which also now retroactively play on the current DK stages:

SPIRITS
SPIRIT - KROW


Fighter: Falco (black)
Reinforcements: Falco, Yoshi, Wario
Stage: Pirate Ship
Music: Crocodile Cacophony
Class: Novice
Conditions:
  • The enemy is invisible (Falco #2, Yoshi, Wario)
  • The enemy favors Up Special (Yoshi)
  • The enemy favors Side Special (Wario)
  • Reinforcements will appear after the enemy is KOed (Falco -> Falco #2)
SPIRIT - OK BOOMER BEAR


Fighter: Banjo-Kazooie
Assist Trophy: Bomberman
Stage: Jungle Japes
Music: Bonus Time
Class: Novice
Conditions:
  • Hostile Assist Trophies will appear
  • The enemy favors Down Special
  • Bob-ombs will rain from the sky
SPIRIT - TAWKS


Fighter: Duck Hunt (brown and red)
Stage: Kongo Jungle
Music: Mangrove Cove
Class: Novice
Conditions:
  • Certain items will appear in large numbers (barrels, back shields, Super Stars)
  • The enemy is easily distracted by items
SPIRIT - KLUBBA


Fighter: Donkey Kong (green)
Unaffiliated: King K. Rool
Stage: Pirate Ship
Music: Lockjaw's Saga
Class: Advanced
Conditions:
  • The enemy starts the battle with an Ore Club (Donkey Kong)
  • The enemy deals damage when falling (Donkey Kong)
SPIRIT - BARON K. ROOLENSTEIN


Fighter: King K. Rool (white)
Reinforcements: R.O.B. (olive green)
Stage: Find Mii
Music: Big Boss Blues
Class: Ace
Conditions:
  • Stamina battle (150 HP per character)
  • The enemy's Up Special has increased power (King K. Rool)
  • The enemy is giant (R.O.B.)
  • Gravity is reduced
SPIRIT - BANANA BIRD QUEEN


Fighter: Yoshi (yellow)
Reinforcements: Dixie Kong
Stage: Skyworld
Music: Stilt Village / Stilt Village GBA
Class: Ace
Conditions:
  • The enemy is giant (Yoshi)
  • The enemy favors Neutral Special (Yoshi)
  • The enemy will suddenly have a Final Smash (Dixie Kong)
  • The enemy's FS meter charges quickly (Dixie Kong)
SPIRIT - BRASH BEAR


Fighter: Banjo-Kazooie
Ally: Dixie Kong
Stage: Kongo Falls
Music: Rockface Rumble
Class: Legend
Conditions:
  • The enemy is very fast and can't stop quickly
  • The enemy can deal damage by dashing into you
  • The enemy gets a major stat boost when badly damaged (past 100%)
  • Periodic earthquakes will shake the stage after a little while (past 100%)
LINK TO CHANGE LOG (last updated 4/18/2021):
1. Clarified startup for Kiddy Kong tantrums, his properties close to or immediately after getting KOed via HP reduction
This was extremely well done, makes me really want Dixie sooner rather than later, hopefully we get lucky with this second fighter pass!
Dixie definitely deserves more love and attention, and I think for those who believe she doesn't deserve to get in; or question her ability to have a unique move set, this post could go a long way in swaying that opinion.
 

FrozenRoy

Smash Lord
Joined
Apr 26, 2007
Messages
1,261
Location
Las Vegas, Nevada
Switch FC
SW-1325-2408-7513
The Lazy Pokemon

No. 289
Slaking

Slaking, the Lazy Pokemon
Type: Normal
Weight: 287.7 lbs
Height: 6' 07"
Ability: Truant

The world's laziest Pokémon. When it is lounging, it is actually saving energy for striking back. Wherever Slaking lives, rings of over a yard in diameter appear in grassy fields. They are made by the Pokémon as it eats all the grass within reach while lying prone on the ground. If it eats all the grass it can reach, this Pokémon reluctantly moves to another spot. Hordes of Slaking gather around trees when fruits come into season. They wait around patiently for ripened fruits to fall out of the trees.


Stat

Slaking is quite similar in size to Donkey Kong as well as stance, being about 80% as large as Donkey Kong. While in the superheavyweight class, his 123 weight puts him between Donkey Kong/King Dedede (127) and Ganondorf (118). 1.93 Dash Speed puts him fairly high in dash speed, a midpoint between Bowser's 1.971 and Donkey Kong's 1.873, but his walk speed is a very slow stroll that blatantly doesn't want to move at 0.78. His crouch doesn't move him down far at all, as he sits on his side just like his spritework and image in a Dedede-esque manner, even periodcally scratching himself while crouching as an idle animation!

Aerially, Slaking is a fastfaller (Incineroar speed) who moves at a decently fast Air Speed too (Joker/Pyra speed). Both of his jumps are in the upper height (First Jump: Donkey Kong/Ridley/Duck Hunt, Second Jump: Diddy Kong) and that's all there really is to say on stats.


Truant

Slaking's Special Ability, Truant, is very easy to understand. Slaking can be in one of two states: Truant is Off, which we will call Active, and Truant is On, which we will call Lazy. Slaking begins the match Active and swaps between Active and Lazy after completing an attack, although he won't swap if he is hit out of the starting lag or duration. Some of Slaking's moves change depending on if he is Active or Lazy, others stay the same but deal modifier damage. While Slaking is Lazy, any attack that doesn't change deals 0.8x damage and knockback but the same hitstun, usually making it better for combos. While Slaking is Active, any attack that doesn't change deals 1.5x damage, but the knockback is only as if it dealt 1.2x damage. Attacks that do change just use the damage value listed in the set. While there is no HUD tracking of Slaking's Truant, his animations for movement, idling and so on change between the two, fittingly looking more active and ready when Active and lazing around when Lazy. His crouch animation stays the same, though. And none of his actual stats change, of course, it's just animations.

Spec

Down Special: Slack Off

The basis of Slaking's Down Special, healing, is the same no matter if Slaking is Active or Lazy, but how it works mechanically depends on that. If Slaking is Active, then he will let out a loud yawn and flop on his back like a lazy oaf. This not only causes Slaking to reject humanity and return to Lazy, but heals him for half the damage Slaking has dealt in the last 5 seconds. After a hearty day's work of comboing away the opponent, resting for a heal is a great option, although it gives up any chance to pursue the foe and really lets them take their turn back. Also, since this move takes a while from start to finish, it is pretty punishable if the foe isn't sent far away. You also could run away from the foe and go for this, giving up a chance to deal more damage in order for a chance at healing. Enemies trying to escape a combo or whatnot can very easily be going for an option that doesn't allow a punishment of Slack Off, leading to some free healing.

The opposite is true of Slaking when he is Lazy, as using Down Special causes Slaking to rise up and pound its chest fiercely to intimidate the opponent! Looks like the slack...is off! This heals Slaking for half of the damage he has TAKEN in the past 5 seconds, making it a risky way to help counter the inevitable comboing of Slaking's fatness enemies will do. It's faster than the other Slack Off, but still far from free to use if the opponent is close. This encourages opponents going super aggressive against Slaking while he is Lazy to keep him from healing off damage, which is fine for Slaking. Let the opponent come to him! Slaking can also use this for some healing when jettisoned offstage if he doesn't mind dropping further down (which will almost certainly lock him into recovering low) or letting opponents get a free shot at gimping him.

The final thing to note is this swaps Slaking's state and locks it for 10 seconds. So using Slack Off while Active will put Slaking into Lazy for 10 seconds, even when Slaking would normally swap out, and vice-versa when used while Lazy. This will occur even if you don't have any damage to heal, so you could just use this to lock Slaking in place, but give nthe lag this is very niche to use.


Side Special: Giga Impact

Like all 3 of Slaking's other Specials, this move changes depending on if Slaking is Active or Lazy. If Slaking is Active, then he takes a lumber forward while sweeping his arms like he wants to give enemies a very deadly bear hug. If an opponent gets snagged, then he'll lift them up, throw them down and bury them in the ground! Fans of the Bear and the Croc will be quite familiar with this type of move, but this command grab instead buries opponents for 1.1x the duration of K. Rool's Down Tilt. It also deals TREMENDOUS damage, crushing opponents for 20% as they get smashed in. Slaking will DEFINITELY get a follow-up off this, so that's a lot! Of course, this move is appropriately quite laggy to come out and punishable if missed, so it is a hard read. The fact it's a command grab helps, especially since the natural reaction to seeing an opponent attack is often to shield.

Being a Special, Slaking can also use this in the air, which leads to some attack differences if you hit with this. Slaking now deals 5% damage when gripping the foe and throws them downwards at a diagonal-forward angle with some good punch, which means this can be a rather effective spike. If the opponent impacts the ground, they get buried for 1.3x-0.7x K. Rool's Down Tilt duration based on how long they fell before impact. The less time before impact, the stronger the bury, although since Slaking needs to land (and this doesn't autocancel) it isn't necessarily as big of a frame advantage as it looks. The opponent also takes 18%-5% damage, scaling the same as the pitfall, so you'll get slightly more damage than normal if you shorthopped and threw an opponent into the ground. Since it can be used in the air, this can be used to snag a shielding opponent on platforms, which will most of the time result in them being buried on the platform. Moving platforms or platforms with a very specific slant might cause them to be thrown off instead.

Burying is usually great for kill confirms, but Slaking's Truant limits him since it'll get him feeling Lazy after. There's a few ways around this. First off, you can just use it to combo confirm instead as a damage racker, which is the most common use of the move. Once opponents get to hit percents, Slaking can use his lightning fast Jab to get right back to Active and use a faster kill option as a kill confirm. Finally, locking yourself into Active completely alleviates the need for any of this and allows Slaking to potentially get some monstrous kill confirms. One of the strongest is to use this on an opponent on a platform from below, burying for 1.3x while landing, which can lead into Up Smash kills at 50-60% unless the foe is a mashing god, and at around 75% even if they are.

While Lazy, Slaking's Side Special is significantly simpler, but still very deadly! Slaking simply gets up on two feet, raising both of his arms above his head, and crashes down in front of him. It almost looks like Slaking kinda flops forward, without any semblance of form, truly a height of laziness. Despite this, having a nearly 300 pound PokeApe just crash its weight on you is INCREDIBLY damaging, and this is one of Slaking's strongest: 30% damage and killing at 72%, this supremely strong technique is hampered by plenty of lag, which is also why it isn't viable to just Side Special pitfall into this to get your Lazy kill confirm, the starting lag is just too laggy unless an opponent has given up on life and doesn't bother mashing or is at such high percents you could use many other moves. Interestingly, almost all of this move's lag is concentrated in the starting lag and so Slaking Actively recovers pretty quickly. This move also deals extremely high shield damage, and will likely break a shield that has taken only a little prior damage.

Oh, and this is a monstrously powerful spike in the air, easily on par with a Ganondorf DAir or stronger. Unlike the Active Side Special, which takes some time to really "kill" an opponent, this will kill a lot of the cast at 0% if you can manage to land it. Being so laggy, you risk getting counter-gimped, which is VERY bad because Slaking's Lazy recover has almost no vertical height so you'll probably die. Even compared to most laggy spikes, this is some serious risk/reward.


Neutral Special: Hyper Beam / Retaliate

Who doesn't love a monkey with a laser? Godzilla, eat your heart out. Opening his mouth like a mighty yawn, energy charges inside of it before Slaking unleashes it as a large beam on par with ROB's fully charged Neutral Special! This laser begins in front of Slaking, diagonally in front of him as he blasts it out of his mouth, before he moves his mouth upwards to sweep it across 1.5 Battlefield Platforms in front of him and then about the height of the cone of Palutena's Autoreticle. The beam explodes on contact with anything that can be damaged such as opponents, crates, destructible stage elements or so on for 21% damage that kills at 95%, which is very good given it has a pretty mighty range and that it doesn't stop sweeping from hitting something although it can only activate on or damage an object/foe/etc once. The starting lag on this isn't as long as you might expect, but it is still fairly long, and the ending lag is pretty atrocious as Slaking falls over as the Hyper Beam dissipates, actually entering prone in addition to taking massive ending lag before he can choose a prone option, evidently having used a lot of energy and feeling too Lazy to get up right now.

While too laggy to be any kind of "counter-camping" option, the large range does allow Slaking to control a lot of space and mess with enemies trying to purely react to him. It's also a truly potent ledgetrapping option and in particular can force opponents to commit to recovering low because Hyper Beam covers almost every high option. It should be noted that since Hyper Beam is such a commitment, you can't punish foes who go low if you use it, but the fact it covers every high option means Slaking can scare enemies into going low without using it, especially if he sees someone going high and can casually punish with this. The laser won't go over ledges if it meets the ledge on the ground portion of its travel but instead just stay hitting the ledge, which can actually be VERY useful by covering a lot of ledge options if they DID grab it, and depending on the range / duration force opponents to try to time their way around it due to hitting just hanging on ledge. Slaking can then take advantage of foes going low with, for example, his Side Special options, with his Active Side Special being another option against high recoveries as well.

That was Slaking's Active Neutral Special, but what if you're feeling Lazy? Well, it's going to look very underwhelming at first, as Slaking simply does a lacksadasical half-uppercut with his fist that deals 7% damage and very weak knockback. It's enough to get a combo started with some of Slaking's other fast moves, but it isn't all that impressive given it is kinda laggy at the start (low ending lag tho). It's safe on shield, but all things considered is a very mediocre move. And left to his own devices, Slaking's Lazy Neutral Special will remain unimpressive.

But if Slaking's been hit in the last 5 seconds, akin to his Slack Off? Well, Slaking's P I S S E D now! Comical anger marks appear on his head when using Neutral Special, you'd think Anger Point had been activated but no Slaking is just upset his loafing around has been interrupted, and his punch has half starting lag as he punches with more gusto, followed up by a forward striking downwards slam of his other fist for 7% damage, and then finally jumping up for a double fist slam for 14% damage that'll kill at 120%! This totals 28% damage, and while it doesn't kill as early as Slaking's other options it comes out MUCH faster. Slaking moves forward with each hit and drags enemies with him, which CAN be a good thing (you can drag opponents towards a blast zone in midair for some real early kills!) but DOES mean it is useless with the Side Special bury. Shields will be carried along and while this won't break them or anything, the attack is still safe on shield. Situational, sure, but it's something for enemies to keep in mind after smacking Slaking around.


Up Special: Leap & Spin

Slaking's Up Special while Active has him leap quite high into the air, slightly under King Dedede's Up Special in height, dealing 4% damage and knockback that allows him to be safe as he does. Moving into a belly flop, Slaking then descends at VERY high speeds! Anyone directly in Slaking's path as he falls is dealt 15% damage and a moderate spike, while a landing hitbox of 25% that kills with upwards knockback at 110% dissuades challenges on the ground. A brief groundshaking hitbox of 6% that lightly knocks opponents up provides familiar safety, although no advantage given the long landing lag. while similar to King Dedede's Up Special in many ways, it is closer to Incineroar and Pyra's Up Specials in that there is no cancelling out of it once started! Slaking doesn't feel like getting out of that belly flop, even if it would send him right to the blast zone. This gets a bit less horizontal distance than King Dedede's Up Special too, but it's still solid. This has no utility out of shield.

By comparison, Slaking's Lazy Up Special takes inspiration from another simian, with Slaking spinning in a less...determined and somewhat more lazy way than Donkey Kong, but actually managing a somewhat longer horizontal distance in exchange for, somehow, slightly less vertical movement. This recovery can save Slaking at horizontal distances his Active Up Special can't reach, but is a death sentence beneath the stage unless Slaking has time to use an aerial. This attack's damage in the air is 13% without any real knockback. On the ground, this move gains a few frames of super armor at the start and is effective as an out of shield option, racking up 8% damage un multihits followed by 5% in a somewhat weak launching hitbox. It can even be used as an awkward approaching option to power through some weak hits, but be aware that thanks to some long ending lag on the ground this is a punishable tactic if repeated.


Smash

Forward Smash: Hammer Arm

While very similar looking, Slaking's Forward Smash is technically a variation move! While Active, this move has Slaking very quickly raising up his arm up and slamming it in front of him! This isn't a very powerful Smash at all, dealing 12%-16.8% damage, nor is the knockback especially strong, but it is at a very nice angle that basically always forces the opponent to tech or enter prone. The ending lag makes the attack very safe, too. A lot of Slaking's Active attacks are going to be more for killing or combo ending given how it works on non-changing moves, so Slaking appreciates this kind of fast utility move, and how it allows him to keep up the aggression. Dash Attack, Retaliate and Lazy Up Special are some of Slaking's best options for tech chasing a foe, but if he's locked into an Active state then Hyper Beam requires some very tight timing to avoid if he uses it right after landing this.

Lazy Forward Smash is the opposite, as Slaking holds his fist up for an uncomfortably long time, body trembling as if building up power, before bringing it down in a nonchalant yet oddly powerful way. Bang the Gavin-I mean the gavel! This is your pretty standard laggy-yet-powerful smash attack, rounding out the limited kill options Lazy Slaking has for the most part, and being the least conditional of the bunch in exchange for a bit more even power level of 20%-28% that kills at 97%-67%. It's a bit heavier starting lag than a Donkey Kong Forward Smash with a bit less ending lag, as a comparison point. It isn't Slaking's most powerful confirm from an Active Giga Impact, but it requires no prior setup and so serves as a very safe kill confirm from it at somewhere after 100% depending on mash.


Up Smash: Clapback

This is the first move that's the same no matter what part of Truant you're in, so as a quick reminder: These moves give a base damage, knockback etc, which then gets modified by being Lazy (0.8x damage, affecting knockback) or Active (1.5x damage, knockback as if 1.2x damage).

Slaking's Up Smash is a pretty simple attack to understand, as Slaking draws his hands down before bringing them both above his head and giving his foes the C L A P! This hits a decent bit above Slaking and has base 19%-26.6% damage that kills at 91%-58%, making it do some pretty damn massive damage and knockback when you're Active! Because of that, this is THE kill confirm for if Slaking can land an Active Giga Impact if he's Slacked Off, not to mention quite a powerful hard read against landing opponents that forces them to respect landing against the lug, although it should be noted Slaking's Up Tilt is kind of awkward as an anti-air. Slaking also rather enjoys being under platforms for this reason, as this along with his Giga Impact and other aerials are particularly good at sharking opponents. Well, at least when Active: This move really gains no benefit from bein' Lazy since it still won't combo or anything, so you lose some real threat on landing opponents until you get Active again.


Down Smash: Earthquake

Leaping into the air, Slaking comes crashing down shoulder first for a real chunky landing! That's right, just like K. Rool and Ridley, we've got ourselves a "leap and slam" Down Smash, although Slaking turning it into a downwards shoulder slam means that his hurtbox doesn't shift quite as much. It's a pretty powerful strike, though, dealing 18%-25.2% and killing at 100%-70%, making it a true KO move when Slaking is feeling more Active. The hitbox is also a bit smaller than the Ridley/K. Rool attacks, so it requires a bit more spacing. The lag's starting and ending lag is roughly comparable to King K. Rool's Down Smash, but with slightly shorter starting lag.

When Slaking lands from his attack, he strikes with enough force to shake the earth itself! This is the part that DOES change with Active/Lazy, as Slaking puts different levels of force into the landing with somewhat altered animations. When Active, the earthshaking is a single hitbox of moderate power that deals 10%-14% damage and pops opponents up with enough force to kill at 175%-140%. This hitbox is very brief, but it leaves Slaking totally safe if it hits and can even snag some kinda late kills. It's a lot easier to dodge, though, and it DOESN'T poke shields so it leaves Slaking open against shields still.

When Lazy, the lesser power means the earthshaking deals a mere 1% damage and a trip, but it does last for most of the move's ending lag instead, which makes it a lot more safe. Opponents might be able to hit Slaking with a getup attack even if tripped, but that isn't THAT bad, and the long duration means that an opponent who holds shield the entire time doesn't really get to punish Slaking even if they won't get shieldpoked. It also can make this a bit more intimidating as an already strong ledge option, since it'll cover that area for so much longer.


Standard

Jab: One-Two Punch

Probably Slaking's simplest attack, Slaking executes a quick swinging punch and then a second swinging punch from his other fist, a quick 1-2 Jab that leaves Slaking looking like Donkey Kong after his Spinning Kong by the end of it. The first jab hit comes out VERY fast and has very little ending lag if Slaking doesn't go into the second hit. Not only does this give him the kind of fast defensive tool a lot of heavies would drool over, but it ALSO means that Slaking can use it as a quick way to swap between Lazy and Active, albeit not one that is totally unable to be abused, especially if Slaking overutilizes it. The hitstun is so small that if the opponent just mashes A after shielding it, they'll probably grab you unless you go into the 2nd hit. It also only deals a mere 2% damage and doesn't offer frame advantage without the 2nd hit.

The 2nd hit deals 6% damage and mediocre knockback, with the main purpose of the move really depending on Slaking's Truant. When Lazy, this is a solid combo starter that'll lead into attacks such as Neutral Aerial or Up Tilt until mid percents (when combos become less true and more read-based off it), while when Active this is a pretty straightforward get off me tool. Something worth noting is that since it is a 2-hit where you need to input each hit, it'll swap your Truant both times and leave you back where you started. So if you began Active, it'll be Active -> Jab 1 to Lazy -> Jab 2 back to Active after it. Jab 2 isn't safe on shield, so if you hit a shield your only salvation is jab timing mixups. Such is the life of jabs.


Forward Tilt: Dropkick

From a standing position, Slaking makes a leap while kicking out to take one from the King of Kongs and dropkick the opponent! This attack has actually somewhat low starting lag to it and will smack opponents for 11% damage, killing at around 160% or so and making it a fairly solid killing tool, with the killing power being somewhat more concentrated in scaling than base knockback. When Active, this attack becomes a pretty dang nice alternative killing tool that'll kill around 120%, but most commonly you'll be seeing it as a grounded combo ender or combo ender by landing on platforms rather than a randie killing tool. It's also fairly punishable in ending lag and since Slaking is moving forward can't really be spaced to be safe, making it a commitment.

Interestingly, this can actually be used as a situational early percent combo starter if Lazy! This attack has less ending lag when Lazy and the knockback reduction is enough that Slaking can potentially get a Neutral Aerial or Forward Aerial from this against the right opponent (usually a fellow big body). Opponents who DI away will always avoid this, but since the only time you'd ever want to DI away from this attack is specifically when it is at low percents with a Lazy Slaking it's pretty easy for muscle memory to mess with replying to it if you even see it coming. Aside from that, this is a lower powered but still solid combo ender attack and actually can be situationally safe on shield thanks to the lower ending lag, but most of the time it still isn't.


Down Tilt: Dream Land

This attack returns to having different attacks based on Lazy or Active from Slaking's supreme loafing position. When Active, Slaking performs an acrofatic roll that would make Dream Land's King proud, with two seperate hitboxes on it. The start of the hitbox is a powerful sweetspot that deals 12.5% damage. It won't kill until 180% normally, but the knockback (which has a bit of an upwards focus to it) is still rather strong. It allows Slaking to score a few surprise early kills on high platforms. It has some notable shield push, but it still won't be safe on shield, even if you cross up usually. The sourspot at the end of the roll deals 7% damage and low angled knockback. At low and low-mid percents this forces a tech situation, but aside from that it can be a decent way to knock opponents offstage if you want them to be in an awkward spot to recover. This attack also gives Slaking some fast burst movement on an attack without much starting lag, so it can help punish far away foes, and the sourspot is particularly good at nipping opponents playing too cutesy with Slaking's range. The ending lag isn't the greatest though, and the sourspot is also unsafe on shield so shields will end up beating this.

The Lazy Down Tilt, however, is one of the stronger attacks for Slaking when he doesn't really FEEL like attacking, y'know? Slaking stretches his arms and legs out wide, even yawning a little, before throwing both of them forward with a ferocious attack! It looks similar to one of Slaking's physical attacking animations in the Gamecube games. While this attack has a long starting lag, it's also pretty much the perfect combination: High damage at 14% on the hit, but low knockback that knocks opponents upwards and leads into most of Slaking's aerial game, with a particularly deadly option being to go for a risky Active Giga Impact. This is far from true, but if an opponent air dodges you can get a good hit, or if they just plain don't expect it and so don't appropriately react / be trying to combo break out of something else. The ending lag is fairly short, but if this attack is safe on shield is a bit dependant on the opponent since it actually doesn't have a ton of shield push. It can be safe if the opponent only has short or slow out of shield options, but someone with fast options will probably still beat out Slaking, and as mentioned it is rather laggy for a Down Tilt.

It should be noted that neither of Slaking's Down Tilts are good tools to just kinda poke the enemy's shield to test for reactions, since even in the niche matchups Lazy Down Tilt is safe it is still a laggy move. One reason Slaking's shield-threatening Specials are important is he doesn't have a ton of attacks that are all that safe on shield, so that constant threat the opponent has against their shield has to make up for it.


Up Tilt: Leaping Splash

Slaking's Up Tilt is a bit of a funky attack, always starting with Slaking flopping up into the air without even much of an "attacking" animation, flopping up straight and lazy. In a weird way, it's like a sloppier looking K. Rool Up Smash, which gives it some pretty awkward coverage against overhead attackers. It has some extra horizontal coverage which can make it interesting for sharking, though. The attack itself deals 8% damage and mediocre upwards knockback, nothing much worth talking about frankly. The starting lag is pretty dang average. The attack itself is affected by the Lazy/Active split, but how the attack ends also changes based on said split.

If Slaking is Active, then he'll crash back down to earth with a spicy extra attack that deals 13% damage and kills at 155%! It's actually pretty safe on shield thanks to some high shield push, so it gives Slaking a pretty weird niche where he can both anti-air and stay safe on a shield. It also has the potential to catch out opponents who air dodge down to avoid the anti-air strike, so opponents will need to air dodge left/right to avoid the attack which can be more awkward. The ending lag on this is a touch long.

When Lazy, Slaking doesn't even bother doing anything aftet the move ends! This gives it low ending lag and leaves Slaking in the air, essentially functioning as an anti-air attack and a jump of about a short hop's length. It allows Slaking to lead into Up Aerial true combos out of hitting the Up Tilt, requiring a 2nd jump past low percents, but it can also allow Slaking to do a little dodging of low profile attacks, and if sharking the opponent allows Slaking to go right into another attack: 2nd jump Giga Impact must be reacted to quickly to avoid it, which is a very deadly option, or Slaking can go for more safe shield pressure or the like with most of his aerials. This makes it a lot more of an anti-platform move han an anti-air, really. The complete lack of a 2nd attack means shielding should be able to beat it quickly, but Slaking going into the air CAN cause some funkiness for how the foe should reply.


Dash Attack: Return / Double-Edge

When Slaking is feeling Lazy, so is this attack! It's a simple, overhead swing of Slaking's arm from his running position, quick to come out and dealing 9% damage with mediocre knockback. At low percents Slaking can potentially get something off this, however most commonly Slaking will be going to chase the opponent down and just keep getting aggressive at them without any true combos. It's also a pretty fast attack, making it safe on whiff a lot of the time, although on shield you'll probably get shield grabbed. It's a quick move to bully opponents with when you're approaching at the cost of lower rewards, basically.

When Slaking is feeling Active, though, this becomes an automatic two hit attack! Slaking leads with a potent straight punch, then spins into a leaping uppercut to send opponents flying into the sky! The straight punch deals 5% damage and will always true combo into the 2nd hit, which deals 9% damage and sends enemies flying straight up at enough power to kill at 135% or so. While this move is also fast to start up, the wild swing and clumsy landing (guess Slaking didn't feel like trying to be graceful...) leave Slaking open for punishment! At around 30%-50% depending on the character (floaty = earlier), this will hit opponents to the top platform of Battlefield and similar stages where they must tech or enter prone. While the long ending lag and distance mean this isn't as effective as Slaking's other options, it DOES allow him to start some sharking with Up Aerials and has good movement coverage. It also does a lot of damage for landing punishes (a common use for dash attacks), and can be a secondary kill move when swinging wildly is getting him nowhere.


Aerial

Neutral Aerial: Body Splash

Flinging his arms and legs to the side, Slaking decides to do the minimum investment possible and just crush the foe with his body with a fierce body splash! A sex kick-style move, this attack deals 8% damage at the start with knockback that has decent weight behind it and decays to a mere 3% and weak away knockback at the end. This isn't a bad thing, though, particularly if Slaking lands with it, as it allows for a combo right after with ease! This move even comes out quickly, so you'll be seeing a steady diet of Neutral Aerials and Jabs against opponents trying to speedball all over the poor monkey. It's also Slaking's fastest out of shield option: Lazy Up Special is usually better, but when Active it is the de facto default.

Exactly how this move is best used depends on if Slaking is Active or Lazy. This move's "get off me" properties are enhanced and it's even better for getting foes away from Slaking, not to mention buffing the damage to a more-than-respectable 12%. But the knockback increase on the latter hit tends to make combos that little bit more difficult and can force Slaking to use less damaging stuff (like just Jab 1 -> Jab 2) or even cost him the combo entirely if the foe DIs away. By comparison, this move isn't as good for getting opponents off Slaking during Lazy and at low percents the first hit might not even be totally safe, but the combo ability is enhanced by keeping opponents even closer! In particular, Slaking can get off a grab during Lazy but will essentially never be able to when he is Active, which opens a much wider range of options. So while this move can do a lot, what you can do in a specific situation can be limited/gimped or expanded depending. This is also important to keep in mind when it comes to Slaking's combo strings, as going Active into a Lazy Neutral Aerial will allow Slaking to continue a combo, while if you hit with a Lazy combo starter and don't have other ways to extend Active Forward Aerial is a better option.


Forward Aerial: Clapforward

Slaking leans back his hands, before delivering a fierce clap in front of him! This move's lag and range give it a feel similar to K. Rool's Forward Tilt, but with aerial drift as an aerial that can also drop on opponent's heads. This attack deals 12% damage and KOs at 120%, making it a solid aerial option for Slaking to get those kills, and when Active turns into a pretty early killer for Slaking! This move's got pretty bad landing lag when Active, it should be noted, so while it is a good killer it is more for pure anti-air or for some very risky shorthop moves.

This move loses a lot of its power when Lazy, you won't really be getting any kills off of this, but it gains benefit in having a generous autocancel window after the clap, with Slaking feeling much ready to go and Active! While you don't get a lot of reward this move IS safe on shield when autocancelled, making it one of Slaking's few safe aerials. Lazy Forward Aerial -> Active Grab is one threatening option Slaking has against shields. This move's starting lag does leave it pretty easily stuffed if the opponent just anti-airs you, though.


Up Aerial: Headbutt

An attack that changes depending on Active or Lazy, although the core principle of "headbutt" remains. While Slaking is Active, this is a very fast upwards headbutt with a promise towards a combo move more than anything, dealing a mere 6% with weak upwards knockback and serving as Active's one combo-y aerial. It also allows it to mix up with the sluggish Giga Impact, giving opponents a fit on what timing to dodge against, especially since Giga Impact is a hard punish againstb eing too timid and holding up shield. The ending lag on this move ain't bad either, so it is a pretty staple of the simian diet.

By contrast, the Lazy attack is a lumbering and sluggish headbutt, adding a great deal of power to it in addition to hefty starting lag. At 15% damage and killing at 97%, this is a pretty monstrously powerful tool to kill opponents with and in turn serves as the one Lazy power option in the air. This is actually Slaking's most consistent combo option from an Active Up Aerial, but the move getting staled from the Up Aerial right before really blunts the potential kill power and makes this more of a tool to damage + set up a landing situation. If you really wanna risk it for the biscuit, then you can go for an Active Up Special right after this! It won't hit most of the time, but anyone who air dodges it without going horizontal or reacts too slow to attack you out of it can get hit with a reeeal strong attack. The long starting lag can catch out people who instinctively air dodge, especially since the Active Up Aerial can condition opponents, and it is of course plenty powerful to hit raw. The ending lag on this is also on the long end, so keep that in mind.


Back Aerial: Backrest

While Active, Slaking's Back Aerial is a mighty swing of his arms behind him, with enough force to cause his entire body to spin! The back hit of Back Aerial is your standard power BAir, dealing 14% damage and killing at 105% or so, but the spin also gives Slaking a weak front hit for coverage that deals 6% damage and lightly knocks opponents away. This leads into absolutely nothing, but the safety is useful. As to be expected from a power BAir it is also laggy, although that lag is largely concentrated in the end lag of the move rather than the only slightly laggy start-up. A RAR can allow Slaking to sometimes combo an Active Back Aerial where he could use Active Forward Aerial, but since Slaking's Active Forward Aerial deals more damage and kills earlier this would only be recommended if your Forward Aerial has staled due to using it in Lazy neutral.

When Lazy, this attack is...weirder. Slaking puts both of his hands behind his head, yawns, and leans back. Looks like he's tired of fighting and wants a little rest! Slaking falls like a plank backwards as a very long lasting but slow hitbox, which deals 11% damage the entire way with knockback that kills at 165%. The impressive horizontal coverage is the main benefit here, as it is extremely difficult to air dodge through thanks to that + the long duration and can cover a LOT of ledge options such as both ledge jump at the start + ledge getup/attack at the end, and in general being a move to space out foes and be like "no, no, no" to their approaches! It is a bit laggy at the start and while the ending lag as Slaking snaps to attention in surprise is short, the looooong duration means this is punishable, and poor landing lag means shorthopping it is dumb.


Down Aerial: The Singleton Stomp

Looking down with a look of either fierceness or longing to get back to solid ground for a nap, Slaking lifts up his foot and thrusts it down for a solid stomp! This is exactly rhe kind of spike you would expect, dealing with 14% and having moderate power. This means that when it is put under an Active buff, it not only becomes a potent killing spike but deals a pretty obscene 21%! While Hyper Beam keeps opponents from wanting to recover high, Down Aerial is your reward for scaring opponents into recovering low if you get the right read and send them to the grave! This move is pretty laggy on both ends, though, so don't think this is just "force foe to recover low and win": Not only can they dodge around it or hit you, but being put into Lazy means you can't go too low if you want to recover, although you can potentially do something like double jump UAir to get your Active Up Special to let you recover. But this is linear and sets you up to be counterspiked by a foe who dodged it in the first place or otherwise get gimped. But you can get heeella kills off this, so!

Despite having the same lag, the Lazy version of this stomp is far weaker, and so you won't be going offstage to gimp with this any time soon. While this might seem to make Lazy Down Aerial useless, adept Slaking players will realize this turns the move into a "combo spike" on stage! Looks like the landing lag on it isn't too bad (this is also true for the Active variant, but much less useful). At low percents, the standard combo is with an Active Up Aerial, which can potentially go into Lazy Up Aerial or another attack. But the real scare damage ranges are at around 60%~ on most characters and around 80%~ on most!

At around 60%~, in a specific character dependant damage range (floaty = earlier), this true combos into Active Up Smash, potentially working as a kill confirm (especially if the opponent DI'd up, which can escape this sometimes, but didn't actually get out) at a dangerously early percent. And at around 80%, this combos into an Active Up Aerial and then into a Lazy Up Aerial, which can also work as a kill confirm although staling can be an issue. Even if you don't get the full kill confirm, both of these combos will do quite a lot of damage to brutalize the opponent! While the Active Up Aerial will still combo off of this move after around 95%, it'll require a double jump so you can't do the double Up Aerial for a kill confirm, although the option to do stuff like double jump Forward Aerial as a kill confirm becomes a sometimes option. Depending on the stage and DI, Slaking either needs to aerial drift a certain direction or won't be able to reach the foe before they can air dodge to make it a 50/50.


Throw

Grab: Monkey Business

Slaking's grab has very simple Active/Lazy differences. The Active grab is fast as Slaking grabs in front of him in a quick arm motion, but it doesn't have all that much range. When Lazy, the grab is slow as Slaking leans forward for a very lumbering and sluggish grab, which has very good range but is slow to come out. Interestingly, it also has a long active duration which can allow it to catch out some things most grabs can't, but it leaves Slaking even a little more vulnerable.

As an additional note while whiffing will cause Slaking's Truant state to change as normal, hitting it will cause Slaking to only change his Truant state after either throwing the foe or them escaping, so an Active grab leads to him being Active for throws.


Pummel: Lazy Slap

Equally lazily in both stages of Truant, Slaking just leans his hand back and slaps the opponent in a way that looks really casual. This is very slow and deals 3.5% damage and will NOT swap Slaking's Truant, so you can't just invalidate if you're Active or Lazy when grabbing the foe with a pummel.

Down Throw: Slam

A VERY swift throw, Slaking grips the opponent and slams them down in front of him! This deals 4.5% damage and causes the opponent to bounce forward, being a particularly ideal Lazy throw as it becomes a potent combo starter into attacks such as Forward Tilt, Forward Aerial, Dash Attack, Down Tilt, you get the idea. This is gonna be Slaking's main combo throw whenever he gets the chance and lands basically whatever he wants off it. There really isn't much else to say about it.

If Slaking is Active when grabbing the opponent, he probably shouldn't use this attack except at very low percents where it can lead into a Lazy Neutral Aerial for a combo extension. But past around 15% this attack loses all combo potential unless they DI in, which given this move is so fast you CAN DI mixup foes some, so you just get a weak neutral reset.


Back Throw: Sleepy Suplex

A throw that differs based on Truant, when Active Slaking puts the opponent into a sloppy-if-quick suplex position and, well, drops backwards to suplex them! This is Slaking's main kill throw, dealing 13% damage and KOing at 115%~ or so at the ledge and 145%~ or so from center stage. It also turns Slaking around as he gets up from the suplex, although judging from his face he'd REALLY rather stay down and sleep. Since Slaking's Active grab is very fast, this means that sitting on shield at ledge to read getups or what have you is a fairly risky proposition vs. Slaking. Even when this throw doesn't kill, the high knockback makes it great for putting opponents offstage and starting Slaking's fairly strong gimping and ledge-trapping game.

While Slaking starts to suplex the foe when Back Throwing, he ends up kind of standing the opponent above him and then just...stops giving a crap, falling backwards with the foe above him and letting both slam into the stage. This deals 8% damage with knockbackthat pretty much puts the opponent in a tech situation, with Slaking getting up a bit faster than when he lands during the Active B-Throw. This is the main option for these kinda chases when Slaking's in his Lazy state, and being able to flip to Active means Slaking can instantly go into Hyper Beam! An opponent who hits their tech won't have much of a problem dodging it, but if they miss it then it requires a really tight getup to avoid getting hit and sent flying, making it a reasonably powerful tactic. Active Dash Attack with its two hits or even trying to blender the opponent with another grab are also some potential choices for ya.


Up Throw: Shoulder Backbreaker

Lifting into the air with an incredible leap, Slaking soars into the sky in a manner not unlike K. Rool, Kirby and the like. While Slaking ascends with the foe held above him, when he comes back down he's instead got them below him with his shoulder on their back, which slams them into the ground for a vicious looking attack! You can even see the position shift if Slaking is stuck under Temple's bottom ceiling or whatnot. Anyway, the landing deals a pretty good 12% damage when Slaking lands, and knockback that'll kill off the top at 190%. That might not sound too impressive, but when Active that damage gets bumped up to 18% and the kill percent to 160%, so as an auxiliary killing throw it is actually quite potent! And if you can't get a combo or anything, then it is your highest damage no-drawbacks/conditions option. If you get up to a top platform of a stage like Battlefield, Active will start to kill at 130% and is thus a better option than a center stage Back Throw.

Lazy probably won't ever want to use this throw. It actually can lead into some limited combos very early, like Up Aerial or Neutral Aerial, but you'll get more damage and longer combos from a Lazy Down Throw the vast majority of the time anyway. Pass.


Forward Throw: Hyper Blast / Punishment

When Active, Slaking grips the opponent very firmly in front of him while opening his mouth, before letting out a point-blank Hyper Beam blast that explodes right in front of him! This deals the same 21% damage as Hyper Beam but nerfed kill power, killing at 95% only at ledge and at around 140% center stage. This means it IS more powerful at the ledge, but it does come with a notable downside as the explosion damages Slaking for 21% as well! This doesn't send Slaking flying with knockback but does cause him to tumble back 1 Battlefield Platform, not sending him flying off ledges but letting him slip off non-ledge platforms.

This is, obviously, a notable downside, but if Slaking wants this damage DOES count towards Slack Off when he's feeling Lazy, and with the tremendous knockback (that has more base than Back Throw or Up Throw) this will pretty much always let Slaking get a Slack Off. Because of this it is, paradoxically, a good throw to fish for if you took a bunch of damage from a combo, as you'll get to dish a lot out and heal off both half of the 21% but also half of the combo damage pretty safely. Slaking can also go for a heal after a KO, but this can sometimes be riskier because respawning and running to Slaking can be faster than recovering from far away or what have you. This gets kills faster than your other KO throws too, but even if you heal it is 10.5% self-damage so keep that in mind.

Lazy Slaking starts off by simply headbutting the foe for 7% damage, a mediocre spacing throw and rarely worth using. But do NOT touch Slaking's shield! If Slaking shielded an attack before grabbing the opponent, even if they held shield for a long time (resets when shield is dropped or broken), then he'll get a familiar angry yell as he grips the opponent hard and SLAMS them in front of him for 5%, then behind him for another 5%, then brings the opponent back in front of him for a skull cracking headbutt that deals 11% and sends enemies away! They even have a little comical mark in the shape of Slaking's nose imprinted on them for a second or two, which does nothing except be an amusing visual. The knockback only resets neutral, but 21% total damage and some frame advantage makes this a pretty potent throw and makes opponents even more wary of trying to pick at Slaking's shield than just Up Special and Neutral Aerial made them! Not really too much else to this one.


Final Smash: Lazy Punch

Empowered with the might of the Smash Ball, Slaking takes his fist and just. Kinda lurches forward with a single strong punch. There's no cinematic, no flashiness, nothing: He just does a kind of clumsy punch forward with a lot of power behind it, dealing 40% damage and KOing at 60%. Looks like Slaking was too lazy to put more effort into his ultimate attack! The fact it is so fast makes it really easy to land and the attack being so non-special is rather comical.
 
Last edited:

ninjahmos

Smash Ace
Joined
Aug 12, 2018
Messages
767
Location
Noneya Business
Switch FC
SW-8579-4123-9016
"I've covered wars, ya know."

Frank West
7EFE0B16-4073-4D5E-B75D-AC34DC3D65E7.png
Frank West is a freelance photojournalist and a protagonist of the Capcom open world action-adventure survival horror beat 'em up series, Dead Rising. He's covered wars, ya know. Frank made his first appearance in the first Dead Rising game, which first came out on August 8, 2006. He goes to the Willamette Parkview Mall in the town of Willamette, Colorado to get a scoop of the situation by taking pictures with his camera and getting enough information in three days. On the way there, he finds that nearly the entire town had been infested of zombies. While he's inside the mall, he uses a whole variety of things he can find to fight off against the zombies, such as a baseball bat. His moveset would be a mix between his Dead Rising and VS Capcom counterparts. But mostly his Dead Rising counterpart.

Stats

Height: 5'10" (177 cm)

Weight: 220 lbs (100 kg)


Unique Mechanics

Just like in Dead Rising and Ultimate Marvel VS. Capcom 3, he has his own level system. Frank will level up over time by attacking and taking damage. The more you level up as Frank, the more efficiently powerful he becomes. The maximum level is 5.

Standard Attacks

Jab: Frank starts with a quick punch if you press A one time. If you press A two times, it’s a quick one-two punch. If you press A three times, it’s a one-two punch and a straight kick. The two punches inflict 2% damage, and the kick inflicts 4% damage. At Level 3, the punches deal 4% damage, and the kick deals 8% damage. At Level 5, it’s 6% damage from both punches, and 12% damage from the kick.

Dash Attack: If you press A while running as Frank, with his burly physique, he can use his Football Tackle on you. It inflicts 5% damage. It has medium knockback. There’s some slight lag after the attack ends. At level 3, it deals 10% damage. At Level 5, it deals 15% damage.

Forward Tilt: By tilting the control stick forward and pressing A, Frank uses his powerful Roundhouse Kick to send his opponent flying, due to high knockback. It inflicts 6% damage. At Level 3, it deals 12% damage.

Down Tilt: By tilting down on the control stick and pressing A, Frank will use his Slide Attack from Ultimate Marvel VS. Capcom 3. It inflicts 6% damage. At Level 3, it deals 12% damage.

Up Tilt: By tilting up on the control stick and pressing A, Frank will use a random object to attack his opponent. At Level 1, he uses a plunger, which inflicts 3% damage. At Level 3, he uses a broom, which inflicts 6% damage. It deals 9% damage at Level 5.

Smash Attacks

Forward Smash: Frank swings a baseball bat at his opponent, which inflicts 10% damage. It deals decently fast and has high knockback, but it has some slight lag after the attack is done. At Level 3, it becomes a spiked bat, which inflicts 20% damage.

Down Smash: Frank uses a katana and swings it back and forth at his opponents. Both hits inflict 11% damage. At Level 3, it inflicts 22% damage.

Up Smash: Frank uses a boat paddle with two chainsaws strapped to each end. It inflicts damage with multiple hits. Each hit deals 12% damage, and the final hit deals 24% damage. It has some slight lag after the attack ends. At Level 5, each hit deals 15% damage and the final hit deals 30% damage.

Aerial

Neutral Aerial: If you press A while airborne, Frank will perform a Double Lariat, a special move that originated from the 1989 arcade game Final Fight from Mike Haggar, that was then used as one of Zangief's special moves in the Street Fighter series. It inflicts 8% damage.

Forward Aerial: If you tilt forward and press A while airborne, Frank will use his Jump Kick. It inflicts 6% damage.

Back Aerial: If you tilt back on the control stick and press A while in mid-air, Frank will use his broom, which inflicts 4% damage.

Down Aerial: If you tilt down and press A while in the air, Frank will use his Knee Drop attack. Its movement speed is similar to that of Young Link's D-Air attack, but slightly slower. Frank's Knee Drop can hit his opponent two times. In the air, it inflicts 5% damage, and when he lands on the ground it inflicts 10% damage.

Up Aerial: If you tilt up and press A in mid-air, Frank will use his Somersault Kick. It’s similar to his Jump Kick attack, but he adds a backflip to it. It inflicts 6% damage.

Grab

Grab: Frank will reach out his hand to his opponent, like some characters do.

Pummel: By pressing A, Frank will slam his knee against his opponent’s chest. It inflicts 2% damage.

Forward Throw: Frank will use his Judo Throw to toss his opponent over his shoulder to send them flying. It inflicts 6% damage.

Back Throw: Frank will use his Suplex attack to send his opponent flying backwards. It inflicts 6% damage.

Down Throw: Frank will use his Face Crusher attack by smashing his opponent’s face into the ground. It inflicts 8% damage.

Up Throw: Frank will lift up his opponent and be able to move around while carrying them, like Donkey Kong. He can tilt the control stick left, right, or up, and press A to toss them. It inflicts 6% damage.

Specials

B: Frank will take a Snapshot of his opponent with his camera. It stuns them and inflicts 4% damage. If it lands, he'll say "Fantastic!" This is the fastest way for Frank to level up. You’ll have to use it multiple times. But don’t spam it.

Side B: Frank will charge at his opponent with a shopping cart, and it uses multiple hits. Each hit inflicts 4% damage, and the final hit deals 6% damage.

Down B: Frank will drink a mixed drink. It will heal Frank himself, but it has a cooldown for 5 seconds. If Frank drinks during the cooldown, it’ll inflict 10% damage. There’s also different ways it works. For example, it could buff all of Frank's moves, but his knockback would be reduced, so getting KOs won’t be as easy, but he’ll be able to make combos easier.

Up B: Frank will climb on top of a randomly appearing zombie and jump up in the air. It works like Sonic's Spring Jump. If it lands on the stage it will stay out a little and attack Frank's opponents. But it’ll mostly go for Frank, because it’s probably mad at him for jumping on it. This special may backfire if you’re not careful with your landing as Frank.

Final Smash

Frank starts off by charging with a shopping cart at his opponents. If it lands, it plays a cutscene of him attacking his opponents using a barrage of different weapons, then a horde of zombies will charge after them and attack them. It ends with Frank taking a Snapshot of the scene. It inflicts 40% damage. It KOs his opponents at 100% damage.

Home Stage

Frank's Home Stage would obviously be inside the Willamette Parkview Mall. In the background, there’s an army of zombies causing mayhem everywhere.

Edit: And I’d say that’s about finished. Although, I might consider adding more later. I’m kinda new at this MYM thing. I did my best. I hope you guys like it so far. Thanks to BKupa666 BKupa666 and Katapultar Katapultar for advice and suggestions.
 
Last edited:

Ruler of Subspace

Smash Apprentice
Joined
Apr 11, 2021
Messages
159
Bouldergeist


Bouldergeist is a boss from the Super Mario series, specifically the Galaxy duology. Many people consider him the best boss in the first game and one of the best in the second, and since he is unique enough, he has been added to the beautiful roster of the Super Smash Bros. series.


What Makes It so Special?
To start things off, Bouldergeist is a floaty heavyweight. This means it is difficult to launch, but can stay in the air longer than most fighters. This is because of what Bouldergeist obviously is: a poltergeist with boulders attached to itself and with the ability to control stone.

Moving on to the unique mechanics... Bouldergeist has durability. As seen in gameplay of both Galaxy games, you can explode its body with Bomb Boos, making the boulders on its body bust. In Smash, this is put into the fighter's playstyle. As Bouldergeist takes damage, it will slowly be reduced the blach spirit it is inside. Along with this, it gains agility and loses attack damage and weight. This is good for combos and getting away from the opponent. With this also comes with the risk of revealing its sweet spot, the red bubble. If this gets hit by a strong attack, Bouldergeist will launched farther than usual. This puts it at a great disadvantage against heavy fighters. Once it reaches its lowest point, all stone-based attacks will be reduced to tiny stones or turn into pebbles. Bomb Boos can be used and will be slightly buffed. These attacks will be used for a brief period of time as Bouldergeist will need to regenerate in order to keep the character balanced.

Stats
Movement - Floats
Size - A bit taller than Ridley starting out, then gets to be slightly taller than Luigi
Weight - 130 units (between DK and K. Rool); lowest is 76 (between G&W/Squirtle and Fox/Mewtwo)
Unique Mechanics - Deterioration; floaty heavyweight

Specials
N Special - Boulder Launcher

This attack is what Bouldergeist is first seen doing in battle - throwing rocks at Mario. This simple attack is basically Wolf's gun but slower and does a bit more damage. Only 3 can be thrown at a time and has a relatively short cooldown. Depending on Bouldergeist's durability, the cooldown may increase.

S Special - Bomb Boo


For this attack, Bouldergeist swings a Bomb Boo around itself. The longer you hold it, the farther and faster it'll fly to either the left or right. The Boo will explode upon impact or how long it's been out.

D Special - Stalagmite Trio

In this move, Bouldergeist summons three stone spikes from the ground in the direction it is facing. This will send fighters upward. If the opponent(s) is at a low percent, the can land on the spikes and be sent back up. This attack will decrease in size and power depending on the durability. When in the air, smaller stalagmites will form from the boulders on it.

U Special A - Stone Tether

It throws as many boulders and stones as it can from its body. The tether size depends on how much damage its taken.

U Special B - Tri-Boo Explosion

Bouldergeist summons a few Bomb Boos to explode beneath it. This damages anyone in the area, including Bouldergeist. This is only available when no boulders are left.

Final Smash
Meteor Shower - PK Starstorm meets Sudden Death. Large meteors fall from the sky all throughout the top blastzone.

Smash Attacks
U Smash - Bouldergeist has a horn-shaped stone spike appear on both sides. These spikes will rise slightly above it and will do a total of three hits of done right. This attack will decrease in size and power depending on the durability.

S Smash - It will throw a large fist at the opponent, dealing a good amount of damage and knockback. When it is at its lowest point, this attack will be turned into some pebbles that make the opponent flinch.

D Smash - It'll send its stone hands smashing into the ground on both sides. This can ground opponents when durability is at and near its highest. At its lowest, it will be reduced to nothing.

Tilt Attacks
U Tilt - It spits an array of pebbles above it. Isn't affected by durability.

S Tilt - A large bone will be pulled from the ground and slung forwards.

D Tilt - Similar to DK's D Special, several pebbles will spawn and bounce on the ground causing opponents to trip. This can be spammed. The amount will decrease depending on durability.

Dash Atack - It sends two fists flying forward. Affected by durability.

Jab and Ledge Attack
Jab - Taking creative liberty and associating Bouldergeist with Boos, it whips out its tongue and starts swinging it everywhere. When it stops, a stone spike forms from the ground and the opponent will be launched forward in a diagonal way. This can be slightly angled along with the tongue.

Ledge Attack - While it's hanging from the ledge by a hand, it throws its body onto the floor. Damage and knockback depend on its size/durability.

Aerial Attacks
N Air - Pebbles circle Bouldergeist.

F Air - Several Boo Buddies fly forwards.

D Air - A Bomb Boo is launched downwards.

U Air - This is a U Tilt but slightly weaker.

B Air - A powerful spike forms behind it from the boulders on him, leaving it vulnerable to more damage. This attack is somewhat slow.

Throws
Pummel - Small rocks hit the opponent from any side and angle.

U Throw - Bouldergeist creates a stalagmite to send the opponent in the air. It will be smaller according to durability.

F Throw - It slaps the opponent forward like Master Hand. Distance and damage depends on durability.

B Throw - It spins the opponent just like Mario.

D Throw - This is just like Steve's anvil, but with a boulder.

Taunts
Side - It slightly reveals its true form by moving the boulders on its body outwards.

Down - It pops into the ground, causing his boulders to fall in reference to Dry Bones.

Up - A star appears above it and spins. It can be a green star, grey star, yellow star, or rarely a red star or grand star.

Costumes
-Basic Bouldergeist
-Black, referencing true form
-White with black eyes, referencing Boo
-White with blue eyes and dark outlines around the boulders, referencing Dry Bones again
-Yellow body with white horns, referencing Bowser
-Green, referencing Green Stars
-Purple, referencing Purple Coins
-Red, referencing Daredevil Runs

Miscellaneous
Home Stage - Galaxy Reactor


Music - Several Galaxy tracks, including Speedy Comet, Toy Time Galaxy, Bouldergeist's theme, Bowser's Galaxy Reactor, and Bowser's Galaxy Generator; Ghost House tracks, such as Twisted Mansion, Super Mario World's, a Harsh Possessor medley, and a few Luigi's Mansion 3 tracks
 
Last edited:

Katapultar

Smash Lord
Joined
Nov 24, 2008
Messages
1,258
Location
Australia
Slaking is quite good for a one day Pokeset, elevated by the Froy melee we've come to know and love. Of course, Truant is a fun melee mechanic as Slaking has to switch between "good" and "bad" moves on top of being a heavyweight monkey. Recalling your Alex set, I could see you or someone else doing a different take on this mechanic, like only switching when you perform certain attacks or only when you land an attack (which would be neat for encouraging offensives). The mechanic could even alter the fighter's movement instead of their attacks: like one form is slow and heavy while the other is fast and light. Maybe the longer you stay in one form, the more extreme the stat changes are to the other form? Honestly, there's room for interpretation here with the right character.

Slaking is most fun when the Active and Lazy moves are working together, particularly Lazy moves comboing into Active moves like ground D-air to U-Smash. In a way, it reminds me of a mini Aki with the two-in-one set deal where you have to mingle the attacks together to get the best out of the set. And the there's Slack Off, which heals (in a neat way for a heavy) and locks Slaking into one mode. I was a bit neutral about this at first, but it's actually interesting as it denies Slaking his Active > Lazy > Active stuff, worsens his combo potential if he just stays Active. Oh, and having to commit to either a vertically good but horizontally bad recovery and vice-versa.

As a one day set, I don't have much or anything to complain about! As you hoped, the set was everything it set out to be. Nice work Froy, it's admirable you were able to pop out something like this so fast and will bode well for MYM24's set count if the trend continues.

Hey, welcome! For starters, it would be neat to give Frank some stats (weight, ground speed, jump, air speed, fall speed, height), even if you just compared them to existing Smash characters would be good. As for the level system, I'd like to know how Frank levels up! Does he level up over time, or does he needed to inflict a certain amount of damage, hit with certain moves or hit a certain number of times? I'm assuming it works identically to Ultimate Marvel VS Capcom 3, but I don't know how that works there. I did read that his Neutral Special can be used to level up, but it's a bit vague how that works and implies that he has other methods of leveling up.

There's plenty of ways a setmaker could go into detail about their attacks, but I'll throw out some basics. Lag, knockback (strength and launch trajectory: like upwards, horizontal and downwards for spikes, but you don't have to mention this if the knockback is diagonal as that's what I assume it would be if knockback trajectory isn't mentioned on a move) are some good details to add where needed to better understand how the hypothetical moves would work. For instance, you could say that his F-Smash comes out decently fast and deals high knockback, but has high end lag that makes it punishable on miss. On the subject of Smashes, Frank's don't seem to deal much damage! Smash attacks tend to deal at least 10-14% based on charge as a minimum. It's okay, damage percents aren't always easy to grasp, especially when you have stuff like 1.2x damage multipliers in 1v1 matches. Different setmakers have different ideas on how much damage certain attacks should deal. Depending on how easy it is for Frank to level up, you could definitely get away with giving his Smashes high damage like 20-25%, maybe even 30% if it's particularly laggy at Lv5.

Also, you don't have to mention how the player inputs certain moves like on the standard and aerial attacks, heh, as that's common sense to all of us! And feel free to compare attacks to existing Smash moves (with your own twist on them if you can). We do this plenty for non-Specials in MYM, can make moves easier to understand.

Down Special randomly healing or damaging Frank seems unreliable (MYM isn't a huge fan of RNG) and potentially powerful: even Hero's healing spell has a good chunk of cooldown to prevent it from being busted. What if Frank just healed himself, but had a cooldown to it? Maybe damaging himself if he drinks during the cooldown. You could also spice the move up in different ways: like applying a buff to Frank's moves, maybe even reducing his knockback when he drinks so he can't KO as well but combo easier. And while it would probably be contradictory to his franchise, maybe drinking or drinking in excess could level him down? And as for Up Special, perhaps it could work a bit like Sonic's Spring where the zombie stays out a little if it lands on the stage: it will attack nearby opponents, but mostly goes after Frank (it's probably pissed at him for jumping in it) and can backfire on him if he's not careful with his landing. That would actually be pretty cool!

Well, anyway, those are just some suggestions. Good luck with your future endeavors, and if you need any help feel free to call upon any of us! (or glance at a set or two if you like, for an idea of how others make their sets)

We haven't had a set for Bouldergeist since MYM12! Deterioration is a sweet mechanic right off the bat, but as I talked about for Frank West it could do with a bit of clarification. As an example, you could say that Bouldergeist deteriorates at a rate of 1 weight unit for every 1.5% it takes: the difference between 130 and 76 is 54, so with that number it would take 81% for it to reach the lowest point. You also mention Bouldergeist getting faster: I would suggest detailing its movement in the stats section, even if you just said its movement was comparable to Ganondorf at the start (minus Bouldergeist being floaty) but being comparable to Mythra on the opposite spectrum.

Further details would be neat if you could: damage output, knockback and lag to name some basics. And range, in the case of moves like F-tilt. As far as its moves go, many of them seem to get nerfed with less boulders, like the Up Special going a shorter distance or the F-Smash just stunning the foe (it should probably deal at least some knockback given F-Smashes are designed to KO). If moves have their damage and/or range nerfed by deterioration, it'd be best to make them faster as is the case with faster fighters. And for Bouldergeist's nerfed recovery, it would be easy to get around that by having his midair jump improve the lighter he is. That would also make him better at comboing. On that note, you could make a slight mention at moves like U-air being better at comboing in the context of a better jump. At the risk of sounding redundant, you could make a quick mention in every move to say whether it's stronger or weaker/whatever changes based on durability. To be fair though, it's the quite the mechanic to take on for your first set as you have higher expectations and have to factor it in for the entire moveset.

Also, I'd be interested in seeing a picture for Boo Bombs since I haven't played Super Mario Galaxy.

Despite that, Bouldergeist's mechanic is a promising start to your movesetting! It just needs more detail to be particularly intriguing, but hey that's something we've all had to learn and go through in our movesetting careers. If you were interested in going further, as I mentioned to ninjahmos we would be happy to offer suggestions.
 

Ruler of Subspace

Smash Apprentice
Joined
Apr 11, 2021
Messages
159
Slaking is quite good for a one day Pokeset, elevated by the Froy melee we've come to know and love. Of course, Truant is a fun melee mechanic as Slaking has to switch between "good" and "bad" moves on top of being a heavyweight monkey. Recalling your Alex set, I could see you or someone else doing a different take on this mechanic, like only switching when you perform certain attacks or only when you land an attack (which would be neat for encouraging offensives). The mechanic could even alter the fighter's movement instead of their attacks: like one form is slow and heavy while the other is fast and light. Maybe the longer you stay in one form, the more extreme the stat changes are to the other form? Honestly, there's room for interpretation here with the right character.

Slaking is most fun when the Active and Lazy moves are working together, particularly Lazy moves comboing into Active moves like ground D-air to U-Smash. In a way, it reminds me of a mini Aki with the two-in-one set deal where you have to mingle the attacks together to get the best out of the set. And the there's Slack Off, which heals (in a neat way for a heavy) and locks Slaking into one mode. I was a bit neutral about this at first, but it's actually interesting as it denies Slaking his Active > Lazy > Active stuff, worsens his combo potential if he just stays Active. Oh, and having to commit to either a vertically good but horizontally bad recovery and vice-versa.

As a one day set, I don't have much or anything to complain about! As you hoped, the set was everything it set out to be. Nice work Froy, it's admirable you were able to pop out something like this so fast and will bode well for MYM24's set count if the trend continues.

Hey, welcome! For starters, it would be neat to give Frank some stats (weight, ground speed, jump, air speed, fall speed, height), even if you just compared them to existing Smash characters would be good. As for the level system, I'd like to know how Frank levels up! Does he level up over time, or does he needed to inflict a certain amount of damage, hit with certain moves or hit a certain number of times? I'm assuming it works identically to Ultimate Marvel VS Capcom 3, but I don't know how that works there. I did read that his Neutral Special can be used to level up, but it's a bit vague how that works and implies that he has other methods of leveling up.

There's plenty of ways a setmaker could go into detail about their attacks, but I'll throw out some basics. Lag, knockback (strength and launch trajectory: like upwards, horizontal and downwards for spikes, but you don't have to mention this if the knockback is diagonal as that's what I assume it would be if knockback trajectory isn't mentioned on a move) are some good details to add where needed to better understand how the hypothetical moves would work. For instance, you could say that his F-Smash comes out decently fast and deals high knockback, but has high end lag that makes it punishable on miss. On the subject of Smashes, Frank's don't seem to deal much damage! Smash attacks tend to deal at least 10-14% based on charge as a minimum. It's okay, damage percents aren't always easy to grasp, especially when you have stuff like 1.2x damage multipliers in 1v1 matches. Different setmakers have different ideas on how much damage certain attacks should deal. Depending on how easy it is for Frank to level up, you could definitely get away with giving his Smashes high damage like 20-25%, maybe even 30% if it's particularly laggy at Lv5.

Also, you don't have to mention how the player inputs certain moves like on the standard and aerial attacks, heh, as that's common sense to all of us! And feel free to compare attacks to existing Smash moves (with your own twist on them if you can). We do this plenty for non-Specials in MYM, can make moves easier to understand.

Down Special randomly healing or damaging Frank seems unreliable (MYM isn't a huge fan of RNG) and potentially powerful: even Hero's healing spell has a good chunk of cooldown to prevent it from being busted. What if Frank just healed himself, but had a cooldown to it? Maybe damaging himself if he drinks during the cooldown. You could also spice the move up in different ways: like applying a buff to Frank's moves, maybe even reducing his knockback when he drinks so he can't KO as well but combo easier. And while it would probably be contradictory to his franchise, maybe drinking or drinking in excess could level him down? And as for Up Special, perhaps it could work a bit like Sonic's Spring where the zombie stays out a little if it lands on the stage: it will attack nearby opponents, but mostly goes after Frank (it's probably pissed at him for jumping in it) and can backfire on him if he's not careful with his landing. That would actually be pretty cool!

Well, anyway, those are just some suggestions. Good luck with your future endeavors, and if you need any help feel free to call upon any of us! (or glance at a set or two if you like, for an idea of how others make their sets)

We haven't had a set for Bouldergeist since MYM12! Deterioration is a sweet mechanic right off the bat, but as I talked about for Frank West it could do with a bit of clarification. As an example, you could say that Bouldergeist deteriorates at a rate of 1 weight unit for every 1.5% it takes: the difference between 130 and 76 is 54, so with that number it would take 81% for it to reach the lowest point. You also mention Bouldergeist getting faster: I would suggest detailing its movement in the stats section, even if you just said its movement was comparable to Ganondorf at the start (minus Bouldergeist being floaty) but being comparable to Mythra on the opposite spectrum.

Further details would be neat if you could: damage output, knockback and lag to name some basics. And range, in the case of moves like F-tilt. As far as its moves go, many of them seem to get nerfed with less boulders, like the Up Special going a shorter distance or the F-Smash just stunning the foe (it should probably deal at least some knockback given F-Smashes are designed to KO). If moves have their damage and/or range nerfed by deterioration, it'd be best to make them faster as is the case with faster fighters. And for Bouldergeist's nerfed recovery, it would be easy to get around that by having his midair jump improve the lighter he is. That would also make him better at comboing. On that note, you could make a slight mention at moves like U-air being better at comboing in the context of a better jump. At the risk of sounding redundant, you could make a quick mention in every move to say whether it's stronger or weaker/whatever changes based on durability. To be fair though, it's the quite the mechanic to take on for your first set as you have higher expectations and have to factor it in for the entire moveset.

Also, I'd be interested in seeing a picture for Boo Bombs since I haven't played Super Mario Galaxy.

Despite that, Bouldergeist's mechanic is a promising start to your movesetting! It just needs more detail to be particularly intriguing, but hey that's something we've all had to learn and go through in our movesetting careers. If you were interested in going further, as I mentioned to ninjahmos we would be happy to offer suggestions.
Thanks for the tips, I'll look over the moveset at least once again to put down some specifics.

This actually wasn't the first time I've made a moveset, only the first one where I've put in a unique mechanic. I've made a few over the past few years and actually made this one several months ago and posted it somewhere else, but it got no attention. I touched up several things and added stuff when I posted this.

Anyways, I updated the post with an image of a Bomb Boo, and I'll continue to update for specifics. :)
 
Last edited:

GolisoPower

Smash Master
Joined
Sep 17, 2017
Messages
4,338


COPERNICO, LUA
Time: 1834 Hours
Date: 04/24/2XXX

The sound of footsteps and wings ringed throughout the halls of the once-great center of the Orokin Empire. The former passengers of the Satellite of Love were being guided by a hulking figure of metal and serpent and a young girl with a large box on her back. Despite it being the Moon of all places, ancient technology from the empire made it possible to breathe as though they were on Earth.

“So...ya mind tellin’ me why the hell we’re on the goddamn moon of all places,” asked Cid Highwind, his spear primed and ready to strike anyone that would attack.

“Yeah, being on what’s considered space ruins wasn’t exactly on my agenda,” Calliope Mori mused. She was looking around and taking in the gilded hallways, enamored by the organic, gilded design. “This could be some inspiration for my next cover, though…”

“These ‘space ruins’, as you called them, were once the Capital city of a once-powerful empire,” the snake-man, the transmuter Lavos explained. Despite having no mouth, a deep voice rang like the strings of a cello piercing the fabric of reality. “Ordis and I believe that we will find master-crafted weapons from long ago that may aid us in the coming battle against this new League of Villains.”

Naganadel warily looked around, all the while taking in all the gold-plated sights, equal parts awed and nervous of the environment.

“Well, tell me then...if you believe this place to have the weapons we so desperately need, then why the %*&$ have we been walking for the past 5 hours,” yelled Cid, motioning to the large, seemingly endless sprawl of moondust outside. “We’re walking on a massive moon, through a gold-covered maze of &^!%-all, in case you haven’t noticed!”

A digitized sigh escaped from Lavos as the two snakes looked at the Rocket Town Dreamer with as much an annoyed look as they could muster.

“Highwind, I have performed more missions on Lua than you’ve used obscenities throughout your entire lifespan,” the Elemental Craftsman said. “I made sure to land the Orbiter near the most likely location for our objective, so if anyone knows their way around this place, it will be me. Now be silent, puff your tobacco some more, and follow my lead.”

Cid sighed as smoke escaped from his lips, grumbling about snakes and robots and the like.

“Um...he...does have a point,” chimes in Lucille. “We...might have to hurry up if we want to find them...the League of Villains is still doing...well, something...”

“I am aware of this,” responded Lavos, his voice gaining a gentle twinge. “However, landing on a Mission Point does not always grant the layout we desire. I understand wanting your sense of urgency, but we must endure and press onwards.”

Lucille let out a sigh in disappointment, but couldn’t help but smile at her senpai’s reassuring words. She looked around for a moment before something caught her eye.

“Oh! Senpai! This has to be it, right,” squeaked Lucille, as she pointed at a hallway leading to a strange dark blue doorway. It stood as tall as the wall and had a pixelated look, ocean-blue energies seeping from it. The group turned towards it and stopped their movement before slowly walking up to it.

“Strange,” Lavos said. “I don’t believe that was here on Lua before...Ordis, do we have any records of this?”

“Not at all, Operator,” responded the Cephalon. “It almost seems like it just appeared out of thin air! It certainly-STICKS OUT LIKE A SORE THUMB-looks very different from the Orokin architecture found everywhere else.”

“Well, if you were looking for ‘master-crafted weapons’, then I think we found the place where we’ll find them,” said Calli as she loosened the grip on her scythe. “Or at least, I’m hoping this is the case.”

“Well, if it is, we’ll just walk in, snatch and grab anything that’ll help us and walk back out, simple as that,” yelled Cid enthusiastically, elated that he didn’t have to stay on Lua for long.

Cid hopped in before Lavos would object, and with a simple curse, the Warframe jumped into the doorway with him, followed by the others.

The room was large, yet simplistic, as opposed to the extravagant gilded aesthetic of the Orokin buildings from before. Large ceramic boxes scattered the place, except for a large, round, elaborate sigil on the floor, illuminated by a large blue light from above.

“Well...that’s not ominous at all,” said Calli as she looked down. “This one of your experiments, big man?”

“I don’t believe so. This is certainly not something I recognize,” mused Lavos before he kneeled and began a discussion with his master-turned-snake Javi, analyzing and documenting the sigil with near-unbreakable focus.

Lucille, meanwhile, was walking around the summoning circle hoping she could use this for some sort of healing ritual. She was staring down at it with wonder as child-like as her appearance and jotting notes intensely.

“Well, let’s look around these crates,” said Cid as he pried open a crate with the Venus Gospel. “There’s gotta be somethin’ that oughta...huh!? It’s empty!”

Calliope and Naganadel kept opening up more crates, each time discovering that they too were broken. This continued for a good few moments before Calli opened a crate and found three stellated octahedrons glowing with rainbow energy. She turned away from the crate to sit down against it, slumped against the side as she became enticed by these gems’ colors.

Naganadel turned to see Calli with the gems and leaned down to eye level.

“Woah...what are those things,” asked Calli as Naganadel hunched over and took a closer look.

“No clue,” said Cid gruffly. “Though I gotta admit, they do look nice...you think they might be ammo for something?”

“Um...I think they might be…” said Lucille, who had overheard the exchange and writing down notes. “But on the other hand, they look too fragile...maybe they...”

“Master Javi and I believe they have to do with this sigil on the floor,” said Lavos as he stood up, finished with his analysis. “If my analysis of it has led me to anything concrete, it would be that the gems Mori possesses may serve as a conduit for some sort of ritual. As to the purpose of said ritual, we do not currently know, but based on the design and glyphs scribbled upon it, I can theorize that it is most likely to summon something.”

Lucille, brightly realizing what to do now, placed the gems right in the center of the sigil, in which they shattered, causing it to glow with power. The room lit up like a Christmas tree as glowing blue energy slithered like serpents into Lucille’s left hand, forming an elaborate red sigil in the shape of a flower. The sigil on the floor then erupted with the force of a pound of C4, a pillar of energy visible from orbit before dying out moments later.

“Wh-what the hell was that,” Cid yelled as he pushed himself off the wall and regained his balance.

He looked to see Naganadel crawling up to Calli, seeking to help her up as she thankfully smiled at the Ultra Beast. Calli then looked around to see if everyone was okay, which was almost immediately affirmed. Lavos, who had held his ground against the force of the blast, turned to see Lucille and noticed the red sigil on her hand.

“Lucille...what did you just summon,” warily asked Lavos before turning towards the ritual, where a cloud of dust was dispersing.

“I-I don’t know, Lavos-senpai! I’m so sorry for acting without planning ahead,” yelled Lucille, eyes threatening to flood with tears.

“Guys,” said Calli. “...who the hell is that?”

The group turned towards the summoning sigil, where a new figure was standing.


She was a voluptuous, youthful-looking girl with long purple hair nearly touching the floor, and fuchsia eyes adorning her meek and adorable face. Barely containing her massive, bountiful chest was a black catsuit held in place by twin belts. Upon her legs were a pink-and-black striped blouse, dark brown stockings, and black-and-pink high-heeled boots. But most noticeable of all was the titanic, monstrous-looking brass-plated claws that look as though they could easily crush a semi-truck like a soda can in well under a second.

The purple-haired girl looked around and saw the former Satellite of Love crew before she opened her mouth and spoke, a timid, high-pitched voice escaping her lips.

“I’m the Alter Ego of Love and Hate...my name is Passionlip. Um...if I hurt any of you...I’m sorry…”
 
Last edited:

BKupa666

Barnacled Boss
Moderator
Joined
Aug 12, 2008
Messages
7,788
Location
Toxic Tower
TERIDAX:
I'll echo what others have said so far and say Teridax represents an awesome step up within your set library. In a fittingly character interpretation, Teridax gets to be strategic with his placement and that of his Rahkshi, based on how easily he's able to have a Kraata move from point A to point B at any given moment. He can all too easily spawn the Rahkshi next to him and have the Kraata just crawl over to produce a weak minion, but he'll get the reward of a stronger summons if he can get away with having one crawl more than four seconds. And whereas that might be his preferred playstyle if he's looking to supplement his regular attacks with a superior minion, Teridax can always take the easy path if he's just looking to absorb his Rahkshi and use enhanced versions of their attacks anyway.

The minion control scheme between Down Special and Shield Special also is pretty efficiently handled. And between the defined six different minion attacks and D-Smash/U-Smash time bomb manipulations, Teridax has plenty of versatility to play around his summons without having the sense of unique effects tacked on for the sake of it. My largest concern with the set honestly has to do with something less intrinsic, in the KO percentages. A significant number of Teridax's moves KO anywhere from 200-800%, leaving him with what appears to be a glaring dearth of KO moves — especially for a heavyweight — outside of his Smashes. And I'm a little iffy on a seemingly indefinite teleport to the Rahkshi with grounded Up Special, but given the commitment of positioning the casing and the startup, it's not a massive deal. I applaud your work on this and, pending an extremely competitive contest to come, look forward to Teridax planting a flag on my vote list to come.
 

FrozenRoy

Smash Lord
Joined
Apr 26, 2007
Messages
1,261
Location
Las Vegas, Nevada
Switch FC
SW-1325-2408-7513
“My only wish is to see Lady Edelgard fulfill her ambitions. All other matters pale in comparison.”

Hubert von Vestra

Loyal to a fault, Hubert is the second in command of the Black Eagles under the direct supervision of Edelgard. He has been the stalwart servant of Edelgard since the tender age of six, when Edelgard was captured by her uncle Lord Arundel with the complict help of Hubert's own father who delivered her to him personally: This would lead to the horrifying events of Edelgard's own backstory. Hubert's extreme loyalty makes him one of only two units which cannot be recruited by any other house, the other being Dimitri's retainer Dedue (Hilda, Claude's Hubert/Dedue counterpart, cannot be recruited in Black Eagles but can in Blue Lions).

Hubert's appearance is instantly striking and intimidating and he is quite known for his dark smile and vile laugh, something which he is well aware of. He is hardly bothered by the fact it makes others see him as a consummate villain and even enjoys using that to mess with others on ocassion. He is completely devoted to Edelgard and the Empire along with their best interests and is willing to use underhanded tactics and ghoulish, gruesome methods if it means achieving them, something that puts him at odds with Ferdinand in their support. Despite this, Hubert loathes Those Who Slither in the Dark and has an entire paralogue dedicated to studying them so that he might eliminate them, finding their sadism cruel and pointless rather than a vile act in service of a greater cause.

This can also put him at odds with both Edelgard and those actively helping him, although Edelgard is able to rein him in frequently and fairly easily. In keeping with his steadfast allegiance to the Empire, people's perception of him and his uncaringness on changing that, Hubert is unable to Support with any students outside of his house, although he can support with Hanneman and Shamir. With those he is closer to, Hubert is harsh yet attempts to be accomadating if it would help further their ends and is shown to be more humorous than he lets on. He is perfectly willing to completely stop smiling and laughing around Bernadetta when his over-the-time edgelord nature sends her into a fit, and then has a little fun giving off the most evil laugh he can when she tells him to start up again so she can get used to it.


Hubert's unrecruitability means he is an assured ally on the Crimson Flower route and a deadly enemy in all others. He condemns his father and is hardly displeased by the man's death, calling it "unfortunate" in a rather pleased, sinister tone when discussing his death from the purging of the nobility who have performed vile deads. This reduces House Vestra to a mere County, but given Edelgard's anti-noble sentiment and plans after the war it is hardly of concern to him, and he rises to the rank of a Minister in the war efforts regardless. He is frequently one of the brains of the operation, serving alongside Edelgard and Byleth in order to formulate plans to win the war. While he largely remains the same as ever, he does lighten up at least a little in some of the post-war supports, such as his A SUpport with Byleth.

In combat, Hubert is a battle-focused mage with essentially no support tools but an extremely potent array of fierce, offensive magic. He is one of only three units who can learn Dark Magic naturally, alongside Edelgard and Lysithea, and his Mire spell is completely unique to him regardless (and without DLC to introduce Hapi, Banshee is unique to him as well). He might not be the walking nuke that is Lysithea, but he nonetheless hits quite hard while having solid speed. In addition, his Mire and Banshee spells give him excellent utility: Mire lowers the enemy's defense and allows other units to pick off the weakened foe, while Banshee reduces the foe's movement and is especially potent as a Dark Knight where Hubert can scurry away after. He has a Budding Talent in Lances, which will grant him the Combat Art Frozen Lance, and gives him an extremely ideal class path down the Monk/Dark Mage path. Fittingly, he will be primarily utilizing dark magic in this set but he will be willing to bring out his lance when he needs some melee help.

His Personal Skill, Officer Duty, grants his Gambits +5 Might, so despite below average Charm growth his Gambits with Battalions hit like a truck. He does not have a Crest and so has no benefits from anything Crest related. He would perhaps consider that a relief in some ways, given Edelgard's distate for them.


Vile Statistics


Statistically, Hubert is quite a poor fit for Smash Brothers. He is a mountain of a man, in Three Houses he stands at 6' 3", which in-game translates to him being slightly smaller than Ganondorf with a similar build. Despite his large size, Hubert is a lightweight whose 85 weight ties with Zelda for a fairly easy target to send flying. On top of that Hubert is a very slow character, with his 1.43 run speed giving him the 8th lowest run speed in the game, tied with Byleth and Zelda. He has high traction.

Aerially, Hubert is a floaty character whose fall speed ties with Ness just outside the 10 floatiest characters in the game (Ness is the 11th floatiest). His 1.0 air speed ties with Palutena at an average to slightly below average level, so he is comparitively better in the air than the ground. Hubert's jumps are very strong, with his 40 first jump tying with Rosalina for 6th highest and his 44 2nd jump putting him just baaarely 8th for second jumps (Lucas is 7th with 44.13, ZSS is 6th with 44.2).

Overall, Hubert isn't a character whose statistics paint a pretty picture. He's easy to hit, easy to kill off the side despite his high jumps and he doesn't play a speed game. Instead, Hubert has to make up for his lacking statistics with his brain and his moves...


Scheming Specials

"Most who spend time around me seem to become bored and depressed. Heh. Can't imagine why."


Neutral Special - Dark Spikes Τ

Hubert raises his hand to the sky with a flippant wave, manifesting a spike of dark magic above his head. By default, the spike is aimed forward and slightly down at an angle that will strike grounded foes if it was fired. Hubert can hold down B and move the control stick to aim the dark spike in ANY direction, even little differences between diagonals and the like. Either way, Hubert cannot interact with the Dark Spike once it has been set, so make sure you have it where you want it before letting go. Setting up a Dark Spike is actually a fairly fast process, with low starting and ending lag, so as long as you know what direction you want to set it is NOT hard to get up.

Once the Dark Spike is set up, a single press of B will have Hubert snap his fingers, and a half second after that the Dark Spike will fire off in its chosen direction! The finger snap is VERY fast, it only takes a few frames to happen with essentially no starting or ending lag. This allows Hubert to slip it into the middle of various combos, fire it off before approaching for coverage, and many more uses. The Dark Spike is not a hitbox until it is fired off, able to be moved through safely. Its hitbox is not very tall but has a decent horizontal range and it travels at a fairly fast pace.

Hitting an opponent deals 8% damage and VERY high hitstun when it impacts an opponent, with the knockback being light and in the direction of the Dark Spike's firing after the hitstun. The very high hitstun gives the Dark Spike serious applications as a combo extender and combo starter, in some cases you can even use it to interrupt a combo ender and turn it into a long combo! Hubert is not, traditionally, a "combo character" in the vein of a Sheik or what have you, but it doesn't mean he can't put out serious damage output when he sets the battlefield to his advantage. Dark Spikes can travel from one end of Battlefield to the other, so their range is quite strong.

Since there is a delay in the Dark Spike's firing timing, Hubert needs to either plan out the combo to end and hit the opponent towards where the Dark Spike will go or, if he already has the foe in position, delay them for its firing. Some examples of this would be performing his jab combo at a slower speed to keep opponents in place longer, going into a grab or grab mixup instead of a combo that would knock opponent away, or even giving up a true combo to force the opponent into a 50/50 where they either eat the Dark Spike or a stronger attack.

Overall, Dark Spikes T is a potent tool at the noxious strategist's disposal. As an approaching tool, it leads to Hubert's most damaging options if it lands and while the shieldstun is small it can potentially lead into a grab or Down Tilt shield poke, although given Hubert's slow speed he only gets to maximize approaching damage if he is already somewhat close. It extends combos, it allows Hubert to get additional damage off of his traps, the key thing Hubert should be aware of is that the Dark Spikes' position is set after use, so he needs to fire it off and wait for it to leave the screen or hit before he gets to set another one. Hubert can absolutely be left in an awkward spot if, say, he sets up the combo for an upwards extender or downwards approach enabler and then gets forced into a situation where that is useless.


Side Special - Miasma Δ

Hubert raises his hand in a grasping motion with a dark chuckle as purple, vile arcane energy flows into his hands, collecting into an oozing mass of dark, poisonous gas which Hubert shoots forward with a palm thrust. This attack has fairly moderate starting lag, with the projectile it shoots off being roughly the size of Robin's Arcthunder projectile. The projectile itself travels rather slowly, allowing Hubert to mix up projectile timings with his Dark Spike, although neither are going to be seeing use often as traditional projectiles. Upon impact with the foe, two effects occur. The first is that the foe takes 5% damage while being poisoned for 5 seconds, which causes 1% non-flinching damage per second in 0.2% damage chunks per 12 frames. Shielding does not prevent this poisonous damage. The launch the opponent takes from this is fairly low, although it also does not provide much hitstun and so lacks the follow-up potential inherent in Dark Spikes. It has fairly moderate ending lag as well, this move isn't fast in any regard but you won't get super punished on whiff or if you get caught in the starting lag either.

The second effect also occurs if the projectile reaches its natural distance before expiring, which is half of Battlefield: The ball bursting into a fine poisonous mist! This mist isn't HUGE but covers a pretty large area, with a kind of jagged cloud-like shape that is more wide at the ends and tall in the middle while being smaller on the diagonals. You can think of it as shaped in a similar way to this cloud.

The cloud lasts for quite a long time, 12 seconds, so it is a stage hazard opponents have to deal with long term. If an opponent enters the cloud without being poisoned, they will be poisoned for 3 seconds as described above. Opponents who ARE poisoned have their poison timer not only paused while in the cloud, but added to while they are in it! So, if you are in the cloud for half a second, then not only does your poison timer not tick down during that half second, but it has a half second ADDED to it! This makes keeping foes inside of a poison cloud quite rewarding.

Hubert himself is immune to the poison from his own clouds, although he CAN be affected by other Hubert's clouds (which are tinted with their own unique color). Did you think Hubert would lack a contingency plan for if he had to fight himself? Tsk, tsk, poor form. If Hubert so desires, he can slink into the cloud in order to perform his setup and force opponents to either utilize projectiles or take the poison to get him out of it. This can lead to an odd scenario where the opponent wants to space HUBERT out from getting to his cloud while Hubert wants to push them in. Of course, Hubert can also decide to set up his Dark Spike, Down Special or other moves to instead make it more difficult to escape the cloud. Even if Hubert isn't able to get his stronger confirms off of his traps, a delicious sampling of poison can make up for deficiencies in his damage diet.

Hubert can only have one Miasma Cloud out at a time. If he fires this projectile while a cloud is out, then the projectile will come out like normal but simply pop without making a cloud on contact with a foe or expiration of its distance.


Down Special - Mire B / Banshee Θ

Hubert's Down Special has two seperate versions depending on if Hubert decides to tap or smash the control stick, with tapping getting Mire B and smashing getting Banshee Θ. This move also has different animations depending on if Hubert uses it on the ground or in the air. On the ground, Hubert will crouch down and swipe his hand along the ground, causing a pool of dark energy to form in front of him. The pool is about half a Battlefield Platform wide and oozes dark energy. Mire will have it periodically bubbling and brewing like toxic waste, while Banshee will have wisps and spirits periodically flying around the top of it. This makes distingushing the traps from each other easy by animation alone. Hubert can have one of each type of trap on the field at once, attempting to create a new one while one is out will cause the old one to disappear.

In the air, Hubert will thrust his arm out and cause a mass of dark energy to form in front of it, which coalesces into a mass of dark energy roughly 2x the size of Robin's Arcthunder projectile. The same phenomena of bubblling or spirits indicates what type of trap it is and the number of traps is shared between the ground and air (IE only 1 Mire and 1 Banshee trap no matter where it is). Be it in the air or on the ground, the trap takes roughly as long as Isabelle's Lloid Trap to set and lasts for 12.5 seconds (Lloid Trap lasts for 10 as a comparison).

If the opponent enters range of the Mire trap, then it will explode in spheres of sloppy, sludgy dark magical energy that deals 8% damage and upwards knockback that allows Hubert to follow-up if he is at close range until medium percents. If placed high enough in the air or at a high enough percent, this can be used as a "kill extender" by knocking the foe into it for it to explode and get that last bit of upwards knockback. While this is all well and good, that is not the main draw of Mire. Much like in the game, Mire debuffs the opponent's defense in multiple ways! Affected opponents can even see the raw, sludgy dark energy slopping off of them during the 10 seconds they are affected. If you hit an opponent with another Mire, then it gets 10 seconds of added duration.

The defense destroying debuff has three effects. First off, all poison damage the opponent takes is doubled! This means 2% per second and 0.4% every 12 frames. If the foe is poisoned the entire time, this essentially adds a flat 10% damage to Mire, and it will likely lead opponents to be particularly wary of Hubert's poisoning powers when they under its spell. Secondly, the next dark magic attack that Hubert performs gains 1.5x damage, although the knockback is "only" increased as if it was 1.25x. All of Hubert's Specials and Smashes are Dark Magic, as well as a few of his other attacks: It should be obvious which ones are, but I'll point it out in cases I find it ambiguous. This is particularly potent with his Forward Smash, which becomes a brutal kill move if you can combine it with Mire's debuff.

Finally, the foe's shield regenerates at half of its normal speed while under the effect of Mire. Hubert doesn't have particularly strong shield break setups or the like, but shielding is a good way to remove his traps or Dark Spikes or what have you, so it does allow him to land solid chip damage into niche breaks or more commonly shield pokes.

Banshee, on the other hand, buffets foes with multiple hits from dark, spirit-like wisps that keep the foe in place, dealing a total of 12% damage over 5 1% hits and a final 2% hit. Being a multi-hit will lock opponents in place for a bit, so Hubert is free to hit the opponent during this time if he is close enough! The last hit has almost no knockback but the hitstun is also pretty low, so you do need to be reasonably close to actually do anything of value. Like with Mire, this move applies a debuff to the opponent for 8 seconds that is as important as the move itself, although in Banshee's case the debuff is instead movement-based!

In addition to a 10% reduction in ground speed, opponents suffer from 4 extra frames of jumpsquat when going for a jump, and 4 extra frames when starting their dash or pivot dash (the equivalent of Corrin/Sheik taking as long as Falco). This tends to make movement less crisp than normal and reduces the power of dashdancing, foxtrots and lots of shorthops, much to Hubert's preference for easier reading. The addition of jumpsquat frames also hurts the opponent's aerial out of shield options, often causing opponents to rely on riskier Up Specials or be unable to punish some options. Opponents also have their air acceleration reduced by 0.01 in additional acceleration, note that the highest aerial acceleration in the game is 0.013 so this is a much bigger debuff than it seems. Opponents can see they are debuffed thanks to an ominous dark aura and 1-2 wisps floating around them.

While Banshee does not offer the direct damage output of Mire, its effects are nonetheless critically applicable to Hubert's playstyle and help compensate for his highly slow movement. If Hubert is feeling especially frisky, the Mire and Banshee traps CAN overlap, sacrificing stage control in exchange for what is essentially a super trap that applies both debuffs. The Banshee's multi-hit will keep foes in place and override the Mire knockback, so you can also tack on 8% damage to any Banshee combo you get. The Banshee's hits will not trigger the Mire debuff. This is highly risky since stage control is key for Hubert, but it does lead to a scenario where the opponent both has their speed debuffed and an on-hit trigger for more damage.


Up Special - Psychotic Crush

Hubert encases himself in dark energy and rushes himself into the air, spinning as he does so in a mad rush! This sends Hubert a pretty good distance into the air, so in terms of pure distance it is a fairly strong recovery. Hubert is also a pretty strong hitbox on the way up, dealing 15% damage to anyone who strikes him and killing at 150%: Given you will frequently be hitting people higher in the air, this will realistically kill earlier if you hit it. This also makes it a pretty strong out of shield option, as the hitbox surrounds Hubert on all sides. It is also a fairly strong combo ender since Hubert travels upwards fairly fast and it is strong, but do be aware there's some start-up to this attack even if Hubert's actual movement is quite fast.

While this is all well and good, the only trajectories Hubert can travel are straight up, and slightly left/right with angling. This can make recovering low a pretty big nightmare for him, as he is very vulnerable to spikes, disjointed edgeguarding moves such as Byleth's FAir/BAir or even trading with it. Hubert's strong jumps allow him to go high well, but the fact his recovery is pretty lacking in horizontal movement is a real bother for him in that regard. And his light weight makes it easier for him to be launched off stage and so makes it easier for him to be put in edgeguarding situations. Hubert's fast movement, hitbox and even his little bit of angling means he is no Chrom, but he is still one of the more vulnerable characters offstage.


Gruesome Smashes

"We will burn together!"


Forward Smash - Death Γ

Hubert thrusts both of his arms out to the side, fingers making a gripping motion as they surge with dark magic and cause a towering explosion of darkness to surge upwards in front of him! Glowing eyes can be seen at the apex of the spell's height, just like when the spell is used in game. This is a fairly fast attack, the starting lag and animation is mostly Hubert throwing out his arms after all, and the ending lag is fairly average as well. The damage, fittingly, is mediocre: 12%-16.8% damage and it won't kill until 140%-110%! While this isn't THAT hard to hit with, the reward is simply low for Hubert, although the hitbox has a pretty good size and since it is kinda rectangular-shaped it even has some coverage vertically in front of him. And it is low commitment.

This move is frightening when the opponent is under any of Hubert's debuffs. In Three Houses, Death is a spell with a particularly high crit rate and in Smash this has been translated as a conditional crit. If Death Γ hits an opponent suffering from any of Hubert's debuffs, and it includes poison, then the explosion will flair stronger than normal as the eyes glow brightly like a demonic face! Hubert even spins in the same way as the spellcaster crit animation in Three Houses, performing the very same pre-timeskip "Mwahahahahahahahahahahaha!" crit noise. Damage of this attack is doubled to 24%-33.6% and it now kills at an extremely early 70%-30% despite keeping the same speed! This is THE biggest reason for opponents to fear Hubert when his plans come into fruition, as Hubert can score ridiculously early kills and not be extremely punishable in the process. The Banshee debuff can make running away from Hubert and his frightening attack more difficult, while Mire's on-hit booster causes this move to deal ludicrous damage and kill at 40% if it goes off, even uncharged!

While this IS all very strong, the ending lag IS still punishable by fast attacks if you just spam it. And the critical effect does NOT trigger when hitting a shield, which this attack always loses to. This attack can never shield poke, which further reduces options Hubert can use to get around it. An opponent under Mire's defensive stopping debuff might chip their shield down low enough to be afraid of using it, giving Hubert more of an opening to use it. Hubert can also simply abuse opponents who are TOO scared of this move by creeping setup closer to them, boxing them in more and more and utilizing more grabs. Finally do remember that while this move is frightening if the opponent is tagged with a debuff, it is mediocre outside of that, a modest combo ender and late kill move. It can be dificult for Hubert to find kills if opponents deftly avoid his machinations.


Up Smash: Resonant Lightning

Resonant Lightning is not a spell in Three Houses, but rather the Gambit of a Battalion, to be specific Hubert's personal Battalion, the House Vestra Engineers. Given Hubert's own magical prowess and that they work for him, it is of little surprise that he should master their technique before entering into the world of Smash.

Hubert, quite dramatically, flourishes his open palm to the sky as electrical energy seeped and tinted with a wicked black glow crackles around it, before releasing it into the sky in a burst of lightning! A single bolt shoots up into the air, by default straight upwards by Hubert can angle it left/right to some degree via control stick tilting. This bolt is reasonably strong, dealing 15%-21% damage overall and killing at aroud 115%-85%, but it isn't all that impressive in the grand scheme of things (Byleth, for example, kills at 97% and deals more damage). But it has the plus side of some VERY good range, able to hit the top Battlefield Platform from the main platform with room to spare. Hubert can get in earlier kills by getting this off after a Mire, for example, and it makes landing against Hubert a big pain. Especially if he has decided to place some aerial traps or aim his Dark Spike upwards!

This move's starting lag is a bit on the long side, while the ending lag is a bit on the short side. The short ending lag helps with the next part of the attack, as it is Resonant Lightning after all! At the apex of the lightning's height, it will make a brilliant burst before shooting out. If Hubert has nothing on stage, this is merely a difficult to hit sweetspot that deals 18%-25.2% damage and kills at 96%-77%. Not easy to hit, but it can be rather rewarding. Oh, and if the dark outline all over this move making it look jagged and evil didn't clue you in this counts as one of Hubert's dark magic attacks.

However, IF Hubert has any traps on stage, the burst will send out a blast of lightning aimed directly at them! Your Dark Spike, Miasma Cloud, Mire and Banshee traps all count for this. The lightning bolt is about 3/4ths the size of Pikachu's Thunder (the main bolt itself is full sized) and travels in a straight line towards the trap, fizzling out if it runs into a solid wall or what have you on the way there. The extraneous bolt deals 12% damage regardless of charge and moderate knockback in the direction the bolt travels. Won't usually score a kill, but if the bolt sent an opponent downwards offstage through some bizarre setup it could work as a spike. Note that the bolt is aimed specifically for the center of the trap, important for the large Miasma Cloud.

Before going into more, this is simply an amazing stage control move. If you've got your traps out, you're getting a lot of bang for your bolt in sending out a lot of projectile to avoid. On top of that, though, the fact that the bolt sends opponents towards the trap in question means it is highly probable they will be stuck in it! Opponents blown by the bolt into a Mire or Banshee will likely trigger it, a bolt towards a poison cloud means they'll likely be poisoned due to being thrown inside it and depending on how the Dark Spike is situated they may find themselves having it thrust at them after being blown in that direction or even intercepted!

On top of THAT, though, Resonant Lightning gives special effects if the trap in question is hit by it. When a Miasma Cloud is hit, the electricity will ripple through the entire cloud AGAIN as a very brief hitbox, dealing 6% damage, moderate hitstun and dragging anyone hit inside closer to the center. Mire and Banshee traps which are struck will crackle with electricity for the next 3 seconds. If opponents get within 1/4th of a Battlefield Platform to either side of the trap, it will shoot out in that direction, dealing 5% damage and dragging the opponent closer to the trap! This likely triggers it, increasing the threat range of Hubert's Mire and Banshee traps.

Hitting a Dark Spike is perhaps the most interesting of all, though, as the Dark Spike surges with electricity for 4 seconds. This electricity is discharged when Hubert activates the Dark Spike, shooting out in the direction of the Dark Spike INCREDIBLY quickly as soon as the Dark Spike is ordered to attack. This no-delay attack deals 4% damage but higher than average hitstun, allowing the opponent to be kept in place for the ensuing Dark Spike attack or for Hubert to keep them there if they are far away. Where normally opponents could be safe with the knowledge of a delay, now they must be ever-vigilant for the fact Hubert can pull out a near-instant hitbox from the Dark Spike when charged this way.

You really don't want to just fire off Resonant Lightning for these buffs, as the starting lag is rather heavy for that, but if Hubert has time he can absolutely throw one out for that purpose as it also will control the stage. This also helps make up for the hitbox being almost all vertical range at a base: When your setup is on-point, you can bring wrath upon your foes greater than any false goddess!


Down Smash: Fire

While Fire is not part of Hubert's default spell list, it is automatically granted to anyone of the Mage glass and so he is fought multiple times with the spell in tow (and will almost certainly have the spell during playthroughs with him). I would say it is fair game.

Hubert holds both of his hands above his head, arms crossed, as fire ignites inside of his palms. He then throws his arms to both sides of him, causing an explosive, spherical blast of flames to both sides of him. A laggy attack to start, this serves as Hubert's massively powerful base kill move, dealing 22%-30.8% damage and killing at 77.5%-46.5%. This attack is also pretty punishable if missed, so compared to Hubert's Forward Smash it is much more unsafe to throw out in exchange for tha consistent power. It is NOT a dark magic attack, so it will not trigger Mire.

This move serves a simple and important duty inside of the set: A frighteningly powerful kill move that hard punishes people trying to get too cute dancing around Hubert's traps. The starting lag may be laggy, but it lines up quite well with punishing a roll or sidestep if used in prediction of it or even if the foe does it on reaction as the hitbox lingers for a shockingly long time. Rolls are one way around Hubert's traps and this is a great way for him to punish people who fall for it, or who attempt to use sidesteps and dodges to avoid an incoming Dark Spike to avoid taking a hit and entering his potent grab game. The hitbox size and lingering nature also make it GREAT for catching the two frame on recovery, so Hubert can be an absolute monster against people who recover low predictably. And if a Dark Spikes hit is timed so that Hubert is right in front of a foe and he isn't in ending lag when the foe is hit, he CAN combo the Dark Spikes into Fire! This is usually hard, almost any move that would combo into the Dark Spikes will take too long to finish in time to Down Smash, but Hubert can set up for a risky 50/50 by intentionally dropping a combo when a Dark Spike would be close enough: If the opponent didn't predict this, the will be hit by the Dark Spike and then blow to itty-bitty bits by Hubert's Down Smash. This is very risky since Hubert will lose combo damage AND eat a punish if the foe predicts this and simply shields (unless it is very low, perhaps helped by Mire, and Down Smash can shieldpoke) but can score ridiculously early kills.


Despicable Standards

"I will cut a bloody path."


Jab: Adrestian Enforcement

With a single fist, Hubert performs a punch forwards. Hubert follows that up by striking with a solid knee, before encasing his fists in dark energy and performing a double punch forward! The first two hits of this are bare melee strikes, while the third counts as dark magic and so will trigger Mire. The first hit deals 1% damage, the second deals 2% damage and the final strike deals 4% damage. The final hit knocks opponents away nicely, with enough base knockback that the game usually resets to a neutral position from which Hubert can play. This attack is also quite fast to come out and has low ending lag, although you still won't be safe when shielded it means whiffing is fairly harmless and it is pretty free to just throw out a Jab 1 as a check.

If Hubert has tagged someone with his Mire debuff, he won't want to waste it on his Jab. Fortunately, one can simply stop at Jab 2 to alleviate this, which allows Hubert a multitude of options with his small frame advantage. If the opponent has any form of debuff on them, they must absolutely be worried about Hubert going directly into a Forward Smash: It is easy to interrupt but it is NOT reactable, so an opponent needs to pre-emptively perform an appropriate action such as a quick attack or shield. Empty jumps will be caught by the vertical hitbox of Death Γ. In turn, Hubert can himself shield and grab. With his frame advantage, he can always put up his shield in time to stop a quick attack and he can always go for a grab before the opponent. This allows Hubert to beat close ranged anti-Forward Smash options, but it leaves him vulnerable to retreating aerials or the like. Finally, Hubert can simply move backwards or himself jump in order to gain a positional advantage. If Hubert does NOT have a crit-empowered Forward Smash ready than this is the safest option as the opponent doesn't have to reasonably worry about Forward Smash, although Hubert could just Jab 3 in that case if Mire is not specifically up.

Hubert has a particularly long time to input his jab combo between hits and have it come out, which is pretty useful for him. In addition to the potential of baiting out a shield foe and stuffing a grab, the main use of this is in combination with Dark Spikes. Hubert can delay his jab to keep an opponent in place nicely for a Dark Spikes to fly in, then have the opponent hit it and proceed to do what you want to them. In fact if you used Dark Spikes with proper timing, Jab 1 -> Jab 2 -> Dark Spikes landing -> Forward Smash can be a true combo! Needless to say, opponents need to be VERY careful of Dark Spikes positioning, debuff status and what Hubert can do when he has that kind of kill confirm off a JAB. Dark Spikes can also make the combo at least safe on shield if the opponent sees it coming, allowing Hubert to go Jab 1 -> Jab 2 -> Dark Spikes landing -> Grab to get SOMETHING out of the interaction.


Down Tilt: Shadow Lash

Hubert swipes his hand across the ground, unleashing a shadow-y string of energy that whips forward across the ground. Quick to come out, Shadow Lash has two hitboxes on it: A sweetspot, rather generous in size, at the tip and a sourspot everywhere else. The sourspot deals a mere 4% damage, but the very light knockback that pops opponents upwards will lead into Hubert's Neutral Aerial or an Up Tilt as a small combo. The sweetspot still doesn't deal a lot of damage, 5.5%, but the knockback is inwards towards Hubert and has HIGH hitstun that allows him to more solidly combo off of this move. It also is reasonably fast to come out, with only moderate ending lag! Even without the follow-up options, Hubert appreciates a decent mid-range attack without much lag. The hitbox has a very low vertical hitbox, so it is almost impossible to catch jumping enemies or the like, and its overall horizontal range is a touch longer than Byleth's Down Tilt.

Hubert can combo his sweetspot Down Tilt into a grab, into a sourspot Down Tilt, into a Neutral Aerial at all percents...and, most frighteningly, he CAN combo into Forward Smash! This doesn't require the prior setup of a Jab 1 + Dark Spike combo, but it does require hitting a specific sweetspot on this attack, and it should be noted the low hitbox makes shorthopping very effective against it. Which the vertical nature of Forward Smash's hitbox can catch! Since this always hits with a dark magic attack with the Forward Smash, you can never get a Mire bonus off of this attack since Down Tilt will trigger it. This move does not combo into your Down Smash, but you can catch an opponent off-guard sometimes with it and it will usually be Hubert's strongest kill potential if the opponent lacks a debuff for Forward Smash. A second Down Tilt can be used to enter an aerial combo, a direct shorthopped aerial, basically anything that isn't laggy at the start will come out of a sweetspotted Down Tilt. Neutral Aerial can be fastfalled for further combo potential.

The high hitstun on a sweetspot gives Hubert ample time to activate a set Dark Spikes on the stage if it is pre-set, which can give Hubert some pretty crazy combo extensions, for example with good spacing and a spike directly facing him horizontally Hubert can go Sweetspot Down Tilt -> Activate Dark Spikes -> Sourspot Down Tilt -> Fastfall Neutral Aerial to drag the opponent back where they started -> Dark Spikes impact -> Forward Smash. If the opponent has debuffs on them, this can then proceed to tack on damage and lead to a shockingly early kill! It also requires foresight and setup, not only needing Dark Spikes set up the right way (the entire combo falls apart simply by being on the wrong side of your spike!) but a debuff for Forward Smash and recognizing it. If the Dark Spikes are away from Hubert, then you might want to knock them into it, which can potentially be something like Sweetspot Down Tilt -> Activate Dark Spikes -> Forward Tilt or Dash Attack -> Dark Spikes lands while Hubert jumps -> Neutral Aerial (for damage close to the ground) / Back Aerial (kill) / Up Aeial sweetspot (spike), although the up aerial is hard to get right. Basically, there's a lot of options, but Hubert needs to both recognize it based on spacing that can vary extremely wildly, a bunch of opponent attributes and so on. And actually have it set up.

This move can shield poke shields if they get a little damage, but it isn't particularly safe if it fails to shield poke: Enemies with their shield will be drawn in with the sweetspot to punish you and the sourspot doesn't deal enough shieldstun to be safe. Hubert wants to be fairly confident when throwing this attack out if the opponent is shielding, but on the flipside the fast speed and shield poke potential lets Hubert snag shielding foes fairly well. It mostly meansit isn't a good shield-reaction identifying tool like a lot of Down Tilts.


Forward Tilt: Frozen Lance

Lance dripping with chilling frost, Hubert confidently takes his lance and thrusts it forward, starting from below and going largely forward but at a slightly upwards angle. While on the slow end of tilts at both ends of the attack, this move's long reach weaves nicely into the devious displays of Hubert to keep enemies away and give him, heh, the space to set up his space controlling moves. This attack's damage is only 10%, perhaps disappointing for the lag, and it won't be taking stocks until around 180% or so. This attack is safe on shield when properly spaced at the tip despite the laggy nature, and the slight upward slant helps it deal with careless shorthops, but nonetheless it is sluggish enough to be easier to react to, full hops go over it, and the opponent still has frame advanage on shield to rush in on Hubert which is rarely "on plan" for him.

In Three Houses, Frozen Lance's Combat Art speciality is gaining additional strength based on the user's Dexterity. Here, this is translated as additional speed allowing Hubert to strike harder and activate the frost on hit! If Hubert uses this move out of a dash, with a 12 frame window after the dash ends to input a Forward Tilt input, the icy effect on the strike picks up and it impacts with an icy effect on the foe, dealing 14% damage now and killing at 150%! This then leaves Hubert at near frame neutral with the opponent, making it more difficult for them to rush in and letting him pick at their shield, particularly potent with Mire. But Mire isn't the only debuff that's good with this move: Banshee reduces the opponent's speed, and if the foe's speed is reduced in this way, Frozen Lance's buffed attack strength occurs even from a standstill for Hubert! It seems the opponent is too slow to keep up with Hubert's speed chess plans.

And if you both dash AND hit an opponent debuffed by Banshee, you'll get a double up the power boosts, transforming the attack into an 18% monster that sends opponents flying off stage at 120%! That's a lot of damage and Hubert appreciates the kill power of a secondary KO move frankly, something he'll be able to use in neutral easier than Forward Smash and without Down Smash's horrifying ending lag. This attack even now gives Hubert a pretty nice frame advantage when impacting the shield when well spaced, and at this point only pojnt blank hits of the Forward Tilt are unsafe for him.

In addition to another addition to Banshee's power, the fact this move gets an increase from dashing lets Hubert worm his way into his enemy's mind. Something Hubert quite enjoys doing, perhaps surprisingly, is to dash at the opponent so that he can threaten to go backwards and then use Forward Tilt with spacing. Opponents who throw out buttons to stop his weak approaches will get caught out by his lance and take a hefty chunk of damage, if they shield then not only can this attack be fairly safe, but Hubert can instead go in for a grab on them if they're staying scared. This is especially true because one of Hubert's ONLY good approaching tools is his Dash Attack, so dashing in is pretty much the only way Hubert gets aggressive. If he wants to be especially risky, he can use this fakeout to set a Dark Spike out right in front of the foe, if they reacted passively then you'll get it out for free. And if you see the opponent moving back to just avoid the situation all together when you dash in, you CAN set up Mire or Banshee as you corner them like the clever cat you are.


Up Tilt: Dark Half Moon

A quick technique, Hubert takes his lance and juts it out behind him, before performing a graceful and well-practiced sweep above him that ends a good deal in front if him. This is Hubert's total coverage technique: Behind, above and in front of him are all covered at different parts of the attack, the attack itself comes out fast and while there is some duration to the attack it still ends up fast overall. Even the ending lag isn't too bad! This is a great move for Hubert to counter aerial approaches, helps him deal with cross-ups, and even lacks a frontal blindspot so he isn't helpless there.

This move's biggest downside is, quite frankly, it is just very weak. This attack only deals 4% damage, the back hit just deals spacing knockback backwards with the front hit being forward. Naturally it is unsafe on shield no matter the spacing of the attack, so an opponent just throwing up shield if you spam this to get them out of your face will beat you. And while it spaces, it isn't really the kind of large knockback that allows Hubert to easily set up. It's a specific tool with a specific execution: Get people out of your face, in range of some of Hubert's more melee offerings, and have no true ground "blind spot" on his person. Ever vigilant, that's Hubert von Vestra.


Dash Attack: Ebon Hand

For basically Hubert's only true approaching option, he gains a brief rush of speed forward as he rushes close to the ground, his hand glowing with malicious energy as he does a sweeping, downwards punch! This dark magic-infused punch hits quite low and shifts Hubert's hurtbox down. While it is far from a Snake crouch it does allow Hubert to low profile a few attacks and is appreciated with his mountainous frame. The attack itself deals a pretty meaty 13% and has a strong base knockback, although it won't kill until around 155% so it doesn't function too well as a secondary kill option without Mire's buff (which makes it kill more in the 110%~120% range). The low nature of the attack also means that Hubert can shield poke opponents, although the hitbox is a bit large and because of that Hubert needs to get some more shield damage than average to do so. Mire's shield regeneration debuff is again an eager tool to help out this dash attack! This move's starting lag is the same as Sephiroth's DashAttack, but the ending lag is more like Mewtwo's, it is unsafe on shield if you do not get the poke.

Dark Spike is a valued move to combine with this, which Hubert can use in a few ways. First off, Hubert can set the Dark Spike to launch before dashing in, threatening a few scenarios. Dash Attack AFTER Dark Spike hits will likely shield poke the opponent, hitting them. If Hubert times it so the Dash Attack hits BEFORE Dark Spike, then the Dark Spike will turn Dash Attack from unsafe on shield to a frame advantage, allowing Hubert a rare moment to be aggressive and try to use something like Forward Tilt, Grab or another Dash Attack, although be aware Hubert isn't the fasest close range fighter. His Neutral Aerial is the most powerful option, but somewhat risky. He can decline to Dash Attack at all and instead go for a pull back Forward Tilt, which will ALSO be safe on shield with a Dark Spike but will fake out people trying to trade with the Dark Spike by just hitting Hubert to stop the Dash Attack. Finally, Hubert can go in with an empty hop from his dash or just dash, either way into a grab that helps stop up opponents who just take it or for a higher reward if the higher knockback of Forward Tilt/Dash Attack aren't useful.

Hubert thus gets a LOT out of his limited approaching ability, but it should be noted said approaching is pretty flawed. In particular, the low hitting nature of his dash attack means that he loses to any hop since it'll just go over and hit him. And while his Forward Tilt CAN check shorthops, the slow nature means opponents can drift past that part, and a full hop gets around both! Hubert's up-hitting attacks tend to be either slow (Up Smash and Up Aerial), have almost no reward (Up Tilt) or are very risky from this position (Up Special), so Hubert's only real consistent option is to commit really hard to an air-to-air anti-air. Which if the opponent doesn't jump will probably lead into getting hard punished. Hubert could try aiming a Dark Spike at an anti-air angle to choke out jumps, but his approach is significantly lessened if it doesn't have a Dark Spike to help it. Opponents can also roll backwards and really only fear Hubert delaying the attack as a hard read on them back-rolling.

Interestingly if Hubert can get setup time, this is a spot where stages with platforms can help him out. By placing a Mire or Banshee trap on a platform, any opponent under it who wants to jump to avoid this is going to end up tripping the trap and getting hit, essentially taking away the easiest option for the opponent to escape this mixup. Similarly, a properly placed Mire/Banshee behind the opponent totally takes away the option to roll backwards, again cutting the enemy's defensive options down to size. This is all well and good, but you can't realistically expect this to be a super common scenario given it requires two tiers of setup (a Mire/Banshee somewhere + a Dark Spike), so Hubert WILL have to deal with the standard defensive options sooner or later. At the same time, a Mire/Banshee on a platform is already just generally useful for Hubert, so this isn't a unicorn of setup either. Cornering opponents to areas with a Mire/Banshee setup, in fact, is a cog in the machinations of Hubert's offense.


Diabolical Aerials

"To kill or not to kill is my choice alone."


Neutral Aerial: Dark Spark

Jutting his arm below him at an angle, Hubert makes a grasping motion with his palm, creating a vile dark magic that sparks in his hand three times. A thrice striking multihit attack, each hit of magic deals 4% damage, with the first two hits dragging the foe along with Hubert. The last hit deals light knockback upwards, which makes this a very rare combo starter for the enigmatic mage! His arm being at a somewhat downward angle is both a help and hinderance. When it comes to using this for more shorthopped or air-to-ground uses, it allows Hubert to strike more effectively and potentially get in all three multihits if he so desires OR fastfall to land early, giving him different combo uses. On the flipside, this Neutral Aerial's got more issues in air-to-air combat where the opponent is liable to be above Hubert to a degree and so naturally dodge the attack. It's still useful, sure, but it is a gap Hubert must think about. This move's pretty fast on both ends, so it can also just be a quick attack option when Hubert needs it, as an out of shield option cross-ups will destroy this though.

When it comes to using this for combos, Hubert has a few options. The most basic is to land with the move before the last hit, which combos into a Jab, sourspot Down Tilt (at very low percents, you can loop this once or twice, but after that the sourspot only leads to aerial Neutral Aerial), Up Tilt (though this is pretty useless) and Down Aerial. Forward Smash is an aggressive but not true option: It won't be reactable, but if the opponent hit a button or shielded in anticipation then you'll get punished pretty hard. As mentioned, a shorthop CAN land with Hubert getting the third hit in, which leads instead into his aerial game such as trying for another Neutral Aerial, an Up Aerial sourspot (sweetspot is possible, but percent specific), a fadeback Forward Aerial 50/50 (though this is hard to get), or going for a risky Up Smash predicting the opponent doing something dumb. At low percents, Forward Smash's vertical hitbox can be enough to hit too. Aerially, Hubert has to jump again in order to get his combo but Forward Aerial becomes an easier 50/50 and being able to fall while Up Aerialing can make the sweetspot a bit easier to land. Up Special is also a risky combo finisher.

As you might notice, Hubert's combo game is pretty poor even on his combo move. Most of his true combo attacks deal low damage and his more risky options tend to be kinda punishable or slow. It's there, yes, and if you can land this that's great, but by itself it just doesn't do much so don't try to play him as a quick, in your face mixup man. With proper setup, this move DOES become a pretty big combo machine, and in particular a Dark Spike flying out to hit after this attack will pretty much assure a combo into Forward Smash. Both this move and Dark Spike are dark magic so there's really no way to get the Mire bonus here, but it can still be a potent killing option. The light pop-up knockback + low landing lag also makes it ideal if you have Mire/Banshee traps on a platform above you, and it can keep opponents inside of a Miasma cloud for longer. Knocking an opponent into Mire will usually lead into a sweetspot Up Aerial, while Banshee can lead into an Up Smash or if the platform is low enough Forward Smash.


Forward Aerial: Bloody Impaler

Hubert's Forward Aerial has a pretty good chunk of starting lag as Hubert pulls the spear in, gathering all of his physical strength such as it is, before giving it a potent thrust straight forwards! Since the thrust is so fierce, Hubert doesn't have as complete of control of himself as his normally composed self, with the end result being this attack having fairly high ending lag (and landing lag) as well. The attack itself has two hitboxes, a VERY powerful sweetspot at the tip and a sourspot everywhere else. The tip is INCREDIBLY powerful, piercing opponents for 16% damage and killing at 88%! This makes it one of Hubert's strongest tools even if it is reeeal hard to get off, since it is not only laggy but specific.

On the plus side while it is not NEARLY as strong as the sweetspot, the sour spot isn't strictly "bad" at 12.5% damage and killing at 118%. Given the move has fairly solid range, this is...decent, but ultimately unimpressive on an attack with the lag of a heavyweight's hard hitters. Of course you're unlikely to hit this raw, but Hubert does have plenty of tools that can help him out, with Banshee being one of the only times Hubert can potentially combo into it. He needs to be preeeetty close to the opponent in order to really do this. Instead, you'll be doing this on hard reads of opponents, when retrating in neutral while predicting the opponent to jump in aerial, against recoveries (moreso if they're linear) or in untrue situations to keep enemies honest. The lag on this attack also means Hubert needs to resort to Back Aerials for more neutral focused keepaway in the air which is something to keep in mind.

While Hubert does rely on reads for this attack, he has a lot of ways to put opponents into those scenarios. A good one for this is Hubert's Up Smash, which can send out its dark lightning in so many directions that opponent's have little choice but to fall into Hubert's plot one way or another. The same is true for traps covering landings, if the opponent is hit high enough he might even have time to set one before they land, or if he fires off a Dark Spike and holds back instead of following it. Looks like the opponent will dodge to avoid it? You might just crush it with a Forward Aerial!


Back Aerial: Logical Point

Holding out his hand behind himself, Hubert unfurls his hand into a palm and releases a horizontal blast of dark magic behind him! This move is in many ways the polar opposite of his Forward Aerial, coming out rather quickly but being rather weak in return. The damage is a mere 8% and while the knockback will get opponents out and away from Hubert, it isn't combo-able knockback or anything. When in neutral, Hubert's best aerial to defend himself is his Back Aerial or to space opponents out in neutral, which can be a bit tricky to use and at times put Hubert in a worse position to react to opponents since you'd rather have your front facing the opponent after landing usually.

This move also has a bit of landing lag if you land during it, so shorthopping and fastfalling it makes it a worse landing tool. If you shorthop it and DON'T fastfall, you'll land after it finishes and so take normal landing lag unless you delay it a long time. While the landing lag is increased, it isn't so bad as to be unusuable and so Hubert can use it as a mixup on opponents who don't expect him to take the "worse" option for different spacial coverage. This can also be used as a combo ender if your other options are too slow and Hubert can get in the right position, aided by the move's fairly long range.

Finally, it is important to note the fact this attack both comes out fast and hits behind Hubert is pretty vital to Hubert's defensive play. This attack is very good for answering cross-ups on shield, forcing opponents to only use "truly" safe moves or to be aggressive after landing rather than reacting to Hubert because of this move's speed. Given Hubert's Neutral Aerial is very bad against crossups and his Up Special will at times be a bit of a slow out of shield option, this is greatly appreciated! Basically, this attack is more a tool to help Hubert's gameplan effective and flow than a move that focuses on itself.


Down Aerial: Nemesis Reverse

Hubert flips his body upside down, so his head is facing down and his legs are in the air, and swipes his arm below him with purple, dark magic blazing around it! A reasonably but not super fast attack, Hubert covers quite the wide range under him that deals 11% damage and knockback that's a bit odd. While the moderate knockback strength remains the same no matter what, the direction the foe is sent is the opposite direction that Hubert is traveling. So if Hubert's aerial drift is heading right, the opponent gets sent to the left. If Hubert has no horizontal aerial movement, this attack defaults to sending the opponent behind him (IE it treats him as moving the direction he's facing). This is a bugger when it comes to trying to combo this attack, which is essentially impossible by itself, but works quite well when it comes to making sure the opponent isn't in a good position to get in Hubert's face.

This highly plays into this attack's main purpose, which is as a landing tool! This attack is safe on shield, but rather than just due to having enough hitstun to be safe, it combines a high shield push that follows the same rule as the knockback along with low (but not zero) landing lag when landing with it to make it Hubert's ideal option when coming down from a juggle, or otherwise dealing with opponents controling the ground. This IS something Hubert can use to play somewhat of a shorthop game, especially because this move covers basically all the space right under Hubert, but since the opponent is sent a good distance away on the opposite side of Hubert this has almost none of the traditional payoff of a shorthop aerial approach. Still, it IS safe on shield and so can be mixed in as a low-reward but likely unexpected option to Hubert's Dash Attack approaches. Also, if you have a Dark Spike flying in on approach the fact it'll keep the opponent in shield stun can allow Hubert to use something like Forward Tilt a bit aggressively.

Since this move has good downwards coverage it can be pretty useful against enemies recovering low, with the knockback being an upside and downside. On the downside, if Hubert moves outwards then it'll hit opponents TOWARDS the stage, which is a big reason why this is largely useful if the enemy has to recover low as otherwise you'll just hit them back to the stage. It also doesn't have all that high of knockback, so a lot of opponents can still make it back if you hit them right. On the other hand, this knockback CAN hit opponents away from the stage at a nice angle if used correctly, and perhaps most importantly it hitting TOWARDS the stage allows Hubert to go for deadly stage spikes! On some stages, like Pokemon Stadium, Hubert can even send the opponent below the stage and into a forced pineapple situation, although this isn't very easy and Hubert going too deep for any edgeguard is a risky proposition due to his linear recovery.

Speaking of recovering, Hubert using this when he is recovering towards the stage will send enemies flying away from it. This makes it pretty sweet for reversing a ledgeguard situation! But since Hubert's options for not recovering low are quite limited using this for such purposes isn't easy since it hits below Hubert. it's more an option to consider in niche situations rather than a core part of recovering.


Up Aerial: Divine Destroyer

In defiance of the heavens, Hubert takes his lance and thrusts it to the sky in spite as its tip glows with sludgy dark magic! Depending on if the tip or the rest of this attack hits, it can be a pretty chunky move. First off, the sourspot. It deals 8% damage and hits opponents vertically into the air with knockback that's basically only good for juggling, being too high to combo and too low to reasonably kill. This isn't a BAD hitbox per se, but Hubert's Up Aerial has a decently large amount of starting lag that makes it very underwhelming for the cost. The ending lag of this attack isn't THAT long, but it's more long than average, so keep that in mind as well. You can do a little bit of landing attempts with this, but frankly Hubert's up hitting attacks aren't the strongest at that with only Up Smash being much of a reward, so you're better off trapping with landing responses or limiting WHERE they can land with traps.

The tip is rather interesting in that the result of hitting with it isn't just 13% damage, but a spike that sends Hubert's enemies reeling back to the earth! This has the obvious use offstage of spiking opponents to death with this fairly powerful spike, mainly hitting opponents recovering high since going too low to get under people with this will be tricky and risky for Hubert. This move actually has a lot of use on-stage, though! For a few reasons. First off, being able to force people above Hubert to the ground has a lot of synergy with his ground-based traps, allowing Hubert to bring the foe down to the ground into a Mire or Banshee. Hubert doesn't have much in the way of air based traps without platforms, so having a move that brings the combat back into the mortal realm is very appealing to him.

The other is that this is actually kind of a niche and weird combo move! The ending lag of this attack is juuust short enough that if the opponent bounces up in the right spot, Hubert can combo into an attack, with the rarer being a Down Aerial if the opponent is below Hubert. But if the opponent only has enough strength to be launched below Hubert, that's a signal he might not recover in time for it to combo, so there's a chance the opponent could air dodge out rather than it being "true". If Hubert is in that perfect area where the opponent bounces above him but not too high, then he can actually combo into an Up Special! The Up Special's reasonably powerful and so this can act as a kill confirm, especially if the opponent is bounced high to put that power over the edge! And in even MORE specific ranges, usually a range within 5% on any character (60%-65% is a good example), Hubert can actually spike, then fastfall as soon as possible into ANOTHER Up Aerial spike, then Up Special and baaarely catch the opponent! This is not only one of Hubert's most damaging combos, but one of his coolest looking. Sometimes, fastfalling or the like can also allow Hubert a bit of different combo windows, but it should be noted this is hardly the most versatile tool. You'll probably end up just getting an Up Aerial (sourspot or sweetspot), Down Aerial or maybe a Neutral Aerial over it with funky positioning.


Malicious Throws

"I welcome a change of pace."


Grab: Declaration of Intent

Hubert's standing grab is a thoughtful grab, slower in speed with a little more range than average but nothing amazing. With Hubert's variety of ways to pin down the opponent, this isn't as big of an issue as it would be for some, but it can be an issue when dealing with fast, aggressive opponents. Hubert's Dash Grab is actually the polar opposite of his normal one, trying to catch enemies off guard with a swift swipe of the hand, but it has pretty pitiful range!

Pummel: Ruthless Methodology

Hubert takes his fist and slams it into the opponent's midsection, a crude yet effective means of inflicting pain on an ensnared foe! This deals 2.5% damage on a slower speed (but not super slow) pummel.

Back Throw: Disrespectful Destruction

Hubert takes the opponent's hair (or in general their body for those without hair on their head) into a firm grip, proceeding to slam it into the ground with a fierce smash, before tossing the opponent behind him! He releases a burst of explosive magic with the dismissive toss, giving it incredible strength despite the casualness of it all. The slam itself adds 3% damage to the throw, while the explosive toss sends opponents away with 9% damage and killing knockback! This isn't the strongest kill throw on its own, it'll only begin to kill at around 180%, but if Hubert can grab an opponent while they're under a Mire buff it'll end up killing around 155% instead, which is fairly powerful for someone like Hubert. It also boosts the second hit to deal 13.5% damage, for a pretty hefty total of 16.5% from one throw!

This is a pretty straight-forward kill throw, so there isn't a lot more to say about it. The high knockback gets opponents offstage, but the angle isn't particularly suited to making it hard for the foe to get back or anything.


Forward Throw: Gambit Boost

Placing his hand against the opponent's midsection, Hubert lets loose a low powered blast of dark magic while letting go of them, sending them flying away! The damage on this attack is quite low, 4%, but it has a high base knockback that gives Hubert plenty of room to work with and serves as his primary spacing throw. A light purple glow remains around the opponent after being sent flying that lasts for 8 seconds as well. Obviously, Hubert enjoys the space to set up any of his sly traps on the stage, or to hopefully repel anyone trying to re-approach with his variety of keepaway options. If none of the other throws work for you, then this is a good one to default to unless you have a Mire debuff on the opponent since it'll consume the debuff for essentially no gain.

The glow on the opponent signals a new debuff for Hubert to inflict on the opponent, based on the Gambit Boost from Three Houses, which basically allowed Battalions to use boosted abilities or what have you. Note that Hubert has a fairly notable ability to have strong Battalions in Three Houses (and it fits one of his preferred skills). Fittingly for the boost, this debuff is all about boosting the power of Hubert's own debuffs! This doesn't work on any debuffs already on the opponent, but instead will trigger the next time Hubert hits the opponent with a debuff attack within those 8 seconds! All those little traps are sure looking more frightening now, huh? It also powers up Hubert's Dark Spike, if he should land it!

So, let's start with that Dark Spike buff actually, which causes the spike's magic to surge through the opponent on hit! This increases the damage to 14%, which is a pretty notable buff that can stack with a Mire blow if the Mire debuff was applied before the Forward Throw, but doesn't take the added damage into account for knockback or hitstun. Nonetheless, the attack's hitstun (and shield stun) is increase by 1.2x, making it an even better tool for Hubert's limited approach safety or to get opponents into combos. Some of Hubert's slower options, like Down Smash or Forward Aerial, particularly enjoy this small buff in hitstun as it can make the difference between an untrue read and something inescapable for the opponent.

When it comes to Hubert's Miasma, Hubert will need to hit the foe with the actual projectile in order for this to trigger, the opponent merely entering the Miasma cloud does nothing. But if the projectile hits the opponent, then the cloud will take on the same light purple aura as the debuff for about 3 seconds after being released. This causes the miasma cloud to follow that opponent for the next 3 seconds! The speed it travels is half of the dash speed of the affected character, so it IS possible to escape but not too easy, and essentially means Hubert is absolutely going to get some poison onto the foe. Not only does that mean assured damage, but the opponent's going to probably be dragging it somewhere inconvenient to them when the effect ends, they have to keep moving if they want to get out in an exploitable manner, and it'll tack on poison that lasts a long while for something like Hubert's Forward Smash. Very useful!

Gambit Boost on Mire has effects on two of its three debuffs, with the on-hit dark magic buff being unaffected (it is REALLY strong enough as-is!). When it comes to Mire's effect on poison, while the opponent is under Mire it not only has the base effect of doubling poison damage, but the poison timer no longer ticks down while the powered up Mire is affecting the foe! This is pretty tricky to set up, you need to both poison the foe and specifically use a Forward Throw THEN get an opponent to trigger a Mire trap and all before any one debuff runs out, but that is a pretty sizable buff in damage potential! The other is the anti-shield debuff. Not only does the opponent's shield regenerate at half the rate under Mire like normal, but half the damage that would be dealt to the shield will get through and damage the opponent! This is particularly useful with Hubert's Forward Tilt or Down Aerial, safe moves on shield that don't offer natural follow-ups on advantage, to get in some chip damage while frustrating foes.

And finally there is Banshee, which gets an increased duration on the multi-hit to begin with. This only ups the damage to 14%, a pittance really, but it'll keep opponents trapped longer allowing for more consistent setups out of a foe landing in them. It also adds the 4 extra frames of jumpsquat to an opponent's landing lag! This might not SOUND like a lot, but it can absolutely bust up a combo, makes it so options like tomahawk grabs are less effective, and generally is a sneakily powerful buff to the debuff! There isn't really a lot more to the debuff powering up here, but what little is there is nicely effective.

A final note, this counts as a debuff so it'll cause your Forward Smash to be powered up, which is useful out of a throw.


Up Throw: Personal Space

Hubert grabs the opponent tightly, taking a moment to gather his strength, before simply throwing them far into the sky with both hands! There's no magic here and the damage is a small 6%, but the base knockback is fairly high and so sets the opponent nicely to try and do a kinda weird juggle, or more aptly to catch out how an opponent lands. It should be noted that Hubert has NO true combo throw, so putting an opponent in this spot is about the closest he gets to getting to "follow up" on an opponent, in this case with his prediction of their landing. The opponent will also be sent high enough at anything but very low percents that Hubert will have time to set a trap if he desires, which makes landing that much trickier!

Similarly this allows Hubert to throw opponents onto high platforms with traps even at lower percents thanks to the base knockback, allowing him to utiliz them better than he normally might be able. The high range on his Up Smash allows him to still be potentially threatening even when opponents are sent high into the sky like this. This is also Hubert's only throw that won't trigger Mire's dark magic boosting property, so it is the default throw if you want to save that. Note that this throw won't kill until like 250%, so it doesn't really work as an alternative KO throw or anything despite the base knockback.


Down Throw: Vile Plot

Throwing the opponent to the ground and keeping them there by pressing a knee against them, Hubert places his hand against their back and unleashes a torrent of dark magic, before ending the throw by getting off them and throwing them forward like garbage. This actually doesn't deal a ton of damage, 6%, and the spacing knockback is not as far as his Forward Throw nor does it offer as much of a frame advantage. The dark energy that Hubert shocked the enemy with collects into a black and purple sphere on the foe's back as they are thrown away, which pulsates over the course of the next 6.6 seconds! After that time is up, it explodes for...5% damage and fairly weak knockback. Not too impressive, huh?

Well, this magic will feed on all of Hubert's debuffs if they are on the foe! For every debuff the opponent has on them when the explosion goes off, an additional 5% damage is added to the attack. Debuffs are Hubert's poison, Mire, Banshee and Forward Throw (note that Forward Throw buffing a debuff just counts as that debuff. If F-Throw is used up to power up a Mire, there's just a Mire debuff on the foe), meaning up to 20% extra damage can be added, at which point the explosion will kill at 90%! The explosion also gains some range and visual flair with each level of charge, although the range really only matters in free-for-alls or team matches. The magic WILL get powered up by any debuffs not in Hubert's set on the opponent, but it will always cap out at 25% damage that kills at 90% in order to prevent any super dumb instant kill team combos. Mire's dark magic buffing properties will also work on this explosion, which can lead to a pretty ridiculous 37.5% damage and sending opponents flying off stage at 60% if every other debuff is also on the foe! That is obviously an obscene level of work to get on the foe, hitting with multiple traps and having a Forward Throw that has to come later to not just buff another debuff all within 6.6 seconds (or timed to not expire by then at minimum) is a LOT to ask, but it isn't nearly as hard for Hubert to have 1-2 debuffs on the foe which leads to a solid 10%-15% damage on top of the 6% of launching the foe. And similar to Sephiroth's Side Special, there is a lot of potential to use this as a kill extender or the like.

Since this is a trap, Hubert's Up Smash will target it! This is very deadly because it essentially means the Up Smash will target the foe, putting a lot of pressure on them even from far away. The Up Smash buffs traps and the like, in this case the "buff" is an instant explosion! This allows Hubert to manipulate the timing of the explosive a bit AND adds the power of the lightning bolt to the explosion, which reduces how fast it kills by around 20%. And, yes, that means in theory if Hubert has every debuff on the foe, has Down Throw on the foe AND hits Up Smash on them (which since it is basically "combining" the knockback means Mire will be working on it) Hubert could kill the opponent at 40% in his base set. This isn't very realistic to achieve, but one day it'll happen and go into a highlight reel. More useful for this, hitting someone with 2 debuffs on them in this way will probably kill them at around 120%, which is very respectable given the two also will be dealing plenty of damage. If the Up Smash hits a shield, it will NOT trigger the explosion normally, but WILL if Forward Throw's Mire boost is on the foe and chip damage goes through. The explosion will never shield poke an opponent, but there's potential for a lot of shield damage here! Even if the opponent's shield is unbroken, the half regeneration of Mire will basically keep shielding from being an option for the foe for a good while.

Overall, Down Throw takes a LOT of work to really make the most of, but it has the potential to be one of Hubert's most potent attacks in the end. Fitting for something that requires hard work to get the most of would be Hubert's final attack in the moveset, rather than some talent gifted and squandered away.


Loyal Final Smash: For Her Majesty!


Hubert dismissively waves his hand in the air, calling upon the dark arts to bind any foolish foe in front of him! Should this insulting attack hit, the opponent is sent into a cutscene as Hubert calls upon his Battalion from the Adrestian Empire! Just like when using a physical Battalion's attack in Three Houses they proceed to rush at the foe wildly, yelling out as they trample and slash at them! Think like Yoshi's Final Smash, but medieval warfare instead. Hubert lets out a little "hmph" while sending out the army.

After the last of the army runs away, however, the eyecatch from Hubert's critical animation cuts into the scene! Fufufu...did you really think Hubert would leave dealing with Edelgard's enemies to rank and file soldiers? The screen pulls back to reveal Hubert has created countless Dark Spikes with the power of the Smash Ball while the army kept the foe busy, which proceed to all fly in and impale the foe as Hubert lets out one of his Critical Hit lines from the game and does the same dramatic spin to call upon its magic as when he crits in the game! Finally as the game returns to the gameplay plane, Hubert either lets off a subdued laugh if the opponent is alive, or a very maniacal and indulgant, over the top eeeeeeevil laugh if they've been sent flying off the blast zone! He even has a unique laughing animation for the zoom-in if it kills.

This attack overall does 66.6% damage and will kill opponents at around 50% (pre-hit), so it is a fairly powerful attack, the initial hit range is somewhat low but it comes out fast.


Last edited:

Katapultar

Smash Lord
Joined
Nov 24, 2008
Messages
1,258
Location
Australia
As an F/GO fan, you bet I was hyped to see a Fate set from another person! Was also great to hear that you had fun on her. As the one expansive series you've tackled that I know well, I better appreciated the F/GO references like to First Hassan's presence concealment. I also didn't know Passionlip and Tamamo Cat were friends, that must be a manga thing.

Surprising was her immense weight of 200 which surpasses even HUGO this contest! It's a good way to implement masochism in Smash, reminds me of how I've thought about a set for Darkness from Konosuba. I also thought giving her such high weight was a good way to represent her controversial design: I could see 200 units being controversial for some readers, it's just as inflated as her bust, it COULD hypothetically prevent Passionlip from flinching to very weak attacks at low percents like a less extreme version of the Metal status effect, but I don't have any way of testing whether this would be the case. In any case, Passionlip taking 1.6x does sort of cancel out her extreme weight.

Passionlip is probably your least "gimmicky" set, being a more melee-focused affair. Trash and Crush definitely had a lot of care put into it, especially on the balance. With its massive start-up, you could even afford to give it more damage like 30% if it doesn't kill, and I'd say the 2 minute cooldown isn't needed when you need to land this laggy attack AND have the foe at a certain percentage. I'd also say you could ease up on the end lag (though iirc this is a reference to the delayed self-stun in one of her skills, a neat way to implement it!), but most of the start-up has super armour. Also, Up Special is a pretty neat cross-up and delayed combo starter attack.

I feel Passionlip has room to room to exploit her heavyweight aspect to be more intriguing. While listing combos is certainly good, one way to make the regular attacks more interesting is to talk about how they work in Neutral. That is, their strengths and weaknesses hitbox/lag-wise and how they can encourage or discourage certain behaviors from the opponent. For example, Pasionlip's F-tilt has long starting lag (with no BV armour), but big damage, safe on block, good vertical coverage and low end lag. Foes can't do much after the attack is thrown out, instead needing to rush in BEFORE she throws it out - but they also have to be wary of Passionlip's attacks with BV start-up, which could punish the lag on their attack! It's the kind of thing you'd see in Froy melee like Slaking and Hubert, which are good reads to how attacks have fleshed-out applications with how they work and cover each other in neutral.

On the note of BV frames, I do wonder if I shouldn't always be armour, especially on moves like D-tilt which are a bit faster. You could make it so the armour is applied to one side of Passionlip, or perhaps make it heavy armour, that being attacks that deal X or less get armoured while anything dealing more punches through. This could have the fun application of conditioning the foe into using stronger attacks, which you could use to read for a counter or exploit the lag of those stronger moves to land your slow attacks like Trash and Crush! And as I said in the chat, N-air and F-air's BV frames on start-up would make them useful as anti-combo tools that the foe would have to bait out. Her Aerials are all pretty slow, I do wonder whether she could benefit from a quick "get-off-me" thta maybe doesn't use the claws so you don't have to worry about balancing extreme range, but I'll leave the frame data scrutiny for another reader.

Finally, on a different note, I quite enjoyed the landing hitbox concept (probably my favourite part of the set!), but think it was underutilized beyond saying it covers Passionlip's lag. It would be neat to know whether it could lead into quicker moves like Jab or grab, or whether it would just pressure foes and perhaps force them to play chicken in fear of Passionlip's super armour. The threat of Passionlip landing near a foe with her very high falling speed would also be worth noting - perhaps she could use the BV armour of her N-air/F-air to counter a predictable overhead attack, then go into her landing lag and damage the foe? Maybe the landing hitbox could be unsafe against shields, but you can use your N-air and what not to threaten them if they do that. In fact, I wonder if the landing hitbox is applied while Passionlip is in the middle of a Special? By starting up her Neutral Special and landing, I could see her using the landing stun to go into the grab! Finally, what if the landing hitbox dealt more stun the higher up Passionlip fell from? Like with enough height, she could go into one of her moderately fast moves. It's certainly food for thought, and would be fun to see the concept on another heavyweight.

All and all, I do think Passionlip is a good set to go along with your MYM24 count. Just that, as a more melee-based set she has room for... growth, whereas Magnus and Lavos had concepts and less melee-ish stuff to carry them a bit further. Even if you changes weren't implemented, hopefully you could take something for use in a future set, because you did say you had an even bigger heavyweight in mind...
 
Top Bottom