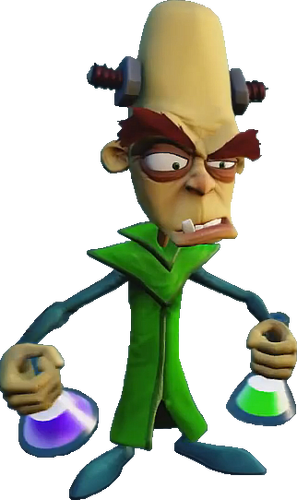
• Welcome to Smashboards, the world's largest Super Smash Brothers community! Over 250,000 Smash Bros. fans from around the world have come to discuss these great games in over 19 million posts!

    You are currently viewing our boards as a visitor. Click here to sign up right now and start on your path in the Smash community!

Make Your Move 23; Moveset Contest! Top 50 posted! Congratulations everyone! 23 is dead; see you in 24 on Feb. 24th!

Smady

Smash Master
Joined
Apr 29, 2007
Messages
3,307
Location
K Rool Avenue
Fierce Pork Trooper? What are you doing out on your own? This is a disgrace! I'll see you get a court martial for this insolence!

Now after that hilarious opener, lets dive right into the first major mechanic of the set, the Piggy Nose. I was surprised you hadn't read my set for Hugo from SF last MYM, because that set made use of auto-turn too. We'd only had a few sets (I believe one of Roy's may have used auto-turn?) ever to use the concept, but here, it's a fascinating on/off switch where "detecting" the foe makes FPT focus all his rage towards them. This naturally leads him to be unable to turn away and I think this is a very awesome use of the mechanic in Smash, without going so far as making it a full SF set like Hugo, so it's a real winner in my opinion. I've done similar ideas before such as in Matador, but the advent of auto-turn didn't strike me until this set as a cool mechanic to combine here. It's a brilliant idea.

The Lightning Tower is of course an excellent throwback to Fassad and great characterisation, which this character has in spades. I liked the later interactions off of the falling lightning on moves like down aerial and some of the minor buffs using the electricity running through the horns. The detail of the tower being built and collapsing in the bg is an awesome touch. This wasn't quite as good as the Piggy Nose, but still pretty great. The Pork Bean feels decidedly less cool than the first two specials that set a high bar, and realistically this would actually be one of the more common things you see that defines how FPT looks, and to me I almost wish it was minimized to not take away from his brutish image. He doesn't really need a vehicle, at least not in this way, I almost wish he just picked it up and threw it or used it as a catapult for this reason to make a more HMA-ish playstyle. Still, it's not bad, it just isn't that relevant to the rest of the set unlike the first two specials. Up special definitely delivers on the right feel and is pretty much exactly as you'd expect.

The grab game is largely solid if not amazing, having all the staples you'd want out of a HMA with the detection type of mechanic. I do like little touches such as mirroring Lucas' useless pitfall dthrow and I am impressed how you are working already with combos in your set, considering this was your first set in a long while, it's nice to see you settle back into the groove so quickly. I will say the grab is not as creative as it could be, even within the confides of pure heavyweight strength, I could see something being done here perhaps with some wrestling moves (the uthrow is a bit replaceable) and the bthrow is falry high impact/powerful for its animation, but not as satisfying/open to creative interpretation as say, Incineroar or K. Rool's german suplex/drag. The other two throws I can't really criticize as choices for the moves, but also aren't the best, the bull charge is especially nice.

I'll just say one last time I really enjoyed all the Mother 3 references and writing style in this set with interpreting the melee using his boss attacks. There's not a ton to say about standards, though I do appreciate the use of frame data on utilt where relevant, and it's all suitably HMA, though not just 10/10 melee, it's pretty good. I feel like some animations like utilt though are a bit laboured if you imagine using them again and again, ignoring the lag, a utilt is meant to be a fast juggle sort of option, and here it's not super justified in not being one. But it's not like it's too bad, just giving you some ideas as to how to improve.

The smashes are one of the best parts of the set, with the very satisfying powerful fsmash, the extremely useful anti-air usmash and creative dsmash bombs. It's a creative mix of melee focus and an oddball creative dsmash that's a very nice idea playstyle-wise. I will say it's a little strange the dsmash is several explosions, and might've been cooler if he just smashed a single bomb on the ground as several hitboxes/an explosion. On the other hand, it's sort of another Fassad reference, so I give it a ten.

Funnily enough the nair is very similar to my Rudy the Clown set last MYM's fair, which was also a lariat based off of Zangief. I really like the awareness of how important this move is due to its speed and range, this was a pretty fun melee move. Though I've not felt the need to bring it up yet, I think this set also has pretty good balance. He's probably erring on the side of UP if anything, he does have some super slow/read-based crazy KO %s here or there, but the set is well within reason of what you might see in Smash. If you buffed some KO %s it'd be hard to criticize much balance here at all. The fair for example is weirdly quite weak and mostly for combos, which is not that good on a HMA set. Compare to K. Rool's FAir, which itself isn't the best but one of his best moves, and it's a bit lame that FPT will find it hard to KO in the air without lightning or very good play/reads. The fair or nair should probably be a pretty strong KO move period, so he's a bit more threatening in the air.

Again I will say that the appreciation of combos in the aerials as in the grab game is pretty impressive all things considered and pretty fun to imagine. The bomb bair is kind of like dsmash to me in that, while I like it in concept, it should probably be more like "I smash the bomb (either by clapping or just smashing it into nothing because FPT is just that strong) and it explodes" rather than making it a full on projectile, it's just better designed that way and leads to more natural playstyle. The move is still fun, it's just a bit laboured. The dair is one of the best melee moves and moves post-specials. The extras were really good by the way, just brimming with personality for FPT.

I wanted to go a bit more in depth to give this set the credit it deserves as I feel it's a massive step up from your other sets, if a little flawed. I think if it just focused more on Piggy Nose and maybe another mechanic rather than the Pork Bean, not sure what, this could've been absolutely amazing. It is still really good though, and easily your best to date. After such a long absence that's quite a feat! I'm really excited to see if you can make more sets of this calibre, and I can't believe still you RNG'd such a great character. Lets hope the slots are as kind or you pick as fun a character for your next set.
 

Bionichute

Smash Champion
Joined
Jun 30, 2012
Messages
2,151
"The sea is truly a wonderland!"
Carrot


Carrot is one of the many, many characters from One Piece. She is a Mink, a tribe of animal people who live on the back of a 1000 year old elephant that walks through the sea. The Minks are an isolated society, and allegedly have a dislike towards normal humans, but they'll gladly put that hatred aside if they need to. Minks live in a society where they are governed by a dog-man during the day, and a cat-man at night, and the two sides follow a strict sleeping pattern to keep the balance. There are a few important Minks called King's Aides that have incredible stamina and can stay up 24 hours, one of which happens to be Carrot herself.

All Minks have two unique supernatural powers that aren't being weird animal people. The first is the ability to control "Electro", an electric force that all Minks are in tune with by nature. The second is that Minks will turn into Super-Werewolves called Sulong if they look at a full moon. Sulong forms are immensely powerful and dangerous, and only those trained to use them can use them while in control of themselves. If an un-trained Mink becomes a Sulong, its said they will rampage and kill until they die of exhaustion.

Anyway, Carrot first appears in the Zou arc, as a minor character acting as a partner to the more major character Wanda, a dog Mink. When a few of the Straw Hats head to rescue Sanji from a marriage arranged by Big Mom and Sanji's father, Carrot joins the crew after sneaking on board. Having never left Zou, she's amazed by basically everything around her, and is constantly positive and upbeat. However, because she's a Mink, she's incredibly powerful, and nearly manages to take out Luffy when he tries to eat her carrot snack. Of course, this power helps the Straw Hats, even as she and fellow talking animal Chopper get trapped in a mirror maze. Through the looking glass, if you will. She's even crucial to the group's escape from Big Mom, as she enters her Sulong form to fight against the Big Mom Pirates.

As of now, Carrot has been with the main cast for over 100 chapters, though she's become more of a background character as the crew finally made their way to Wano. Hopefully she ends up doing something by the end of it. Due to this major importance over the last few years, she's been featured in a lot of auxiliary media, including video games. In Smash Bros., she takes her look from the later half of the Whole Cake Island arc, which not coincidentally is her look in Pirate Warriors 4.


Stats
Weight - 90
Walk Speed - 1.14
Run Speed - 2.5
Air Speed - 1.4
Fall Speed - 0.90​

Carrots stats are, well, a bit ridiculous. She's tied with Falcon for the fastest run speed in the game, beats the top aerial speed with Yoshi, and even falls slower than Jigglypuff. Her walk speed is much slower, and has her cheerily walking along, while her run animation has her doing a fairly standard anime run. She also almost falls into the lightweight scale, but she's just barely a middleweight. These stats come from her being a Mink and being just legitimately better at these things by nature. She also has great control of herself while in the air, with high aerial acceleration, high air deceleration, and low air friction. This means that Carrot is unmatched while in air combat.

Being a rabbit, her jumps are also very good. In fact, they're some of the best jumps in the game, only being beaten out by Falco. This doesn't mean much, though, when Carrot has THREE jumps, beating the bird in total height by that fact alone. However, while the first two jumps are that good, the third is a quick backflip with much less distance to it, making it more of a strange, secondary dodge than a proper jump. It even has invincibility frames at the very start. Carrot is proportioned like most of the human characters in Smash, but comes off slightly shorter than basically all of them. She stands at a slightly wider width than Marth, between him and Falcon, and she tends to move a lot during her idle.


Specials
Neutral Special - Electro Charge

Carrot takes on a quick pose, causing her body to be charged with blue-green electricity. Carrot has now charged Electro into her rabbit paw gauntlets, which she uses for most of her attacks. With Electro, she's now granted herself a buff to all her attacks, and a few special effects on certain moves, a fairly standard buff. Before we get into the specifics of the buff, we'll cover some details on the move itself. For one, while the attack starts up very quick, it takes a bit for Carrot to become controllable again, as she needs to finish her pose and return to her normal stance. This makes the ending lag the most opportune time for an opponent to take advantage of her, but fortunately the attack unleashes a short burst of electricity in a circle around Carrot, reaching out 0.5 Grid Blocks away from her. This electrical burst deals 2% damage, but has decent knockback, though it can't kill until very late. This allows Carrot to protect herself while gaining the charge, but it doesn't last the entire move and is really only there to protect front-loaded attacks, though its knockback is fully capable of preventing opponents from attacking her before the move ends.

For the actual Electro buff itself, this affects practically every move in Carrot's arsenal in three different ways. The first is a simple buff to basic attacks, adding an extra 3% to every attack's overall damage. Though it doesn't add anything to knockback, it does add to shield damage. Second, all her attacks will gain extra hit stun, with each move having a different addition, from large to small. The third effect has the Electro charge certain moves, creating new powerful effects for her. After using one of these super effects, the Electro charge will wear off, meaning that Carrot will need to charge up again. The charge doesn't last forever either, lasting 15 seconds before it runs out. There's also a brief cooldown period before Carrot can activate the boost again, taking roughly 5 seconds. The super charged moves can be used by holding the button as they are performed, meaning that you can still access the basic moves without needing to waste the buff on accident, but the special effects are definitely worth it.

Obviously these can't be covering all of this right now, but the effects will be covered as we come to them.


Down Special - A Snack, A Carrot!

Carrot quickly drops to her knees as she pulls out an actual carrot, which she then starts to nibble on. This is a very long animation, roughly 1.5 seconds, but at the end she'll recover 15% from the very tasty carrot. You might think the opponent would want to take full advantage of this. After all, she's left wide open, and a direct hit will cancel out the healing effect. However, that's not all that happens. When hit while eating her carrot, Carrot will take the damage, but not be knocked back. Instead she'll enter a lengthy invincibility period (shorter than the animation at least) where she watches helplessly as the carrot falls off screen. She then gets to her feet and enters a feral stance, with her eyes glowing white and her face darkened. During this animation, the opponent will be stunned as well, as this is a counter.

You messed with Carrot's snack time, and now its time for you to pay. In response to the attack, Carrot will leap at the opponent who made this grievous error, and tackle them to the ground. She will then start biting at them in a very vicious looking animation, dealing a massive 15% damage, which is a lot for a basic counter attack. After she finishes attacking the opponent, Carrot will pop back to normal, and give a quick smile as the opponent automatically rolls away from her, with Carrot regaining control slightly before the opponent does. Because of this, the attack deals no knockback. This makes the move more of an odd dual support attack for Carrot rather than a traditional counter.

Carrot, being on the lighter end of the spectrum, will probably want to use that heal whenever she can, though it unfortunately has a 30 second cool down between uses. Attempting to use it in that period will result in a shorter animation where she looks for her carrot snack, before frowning and returning to her normal stance. This cool down period only activates if you manage to heal, though! Anyway, the healing is good and you should use it whenever you're able. On the other hand, Carrot doesn't have easy access to great KO moves, and 15% is a lot of damage in one go. Opponents have a choice of either taking the damage and preventing Carrot from healing, or not taking the 15% and letting Carrot heal a bit. This is a bit of a loaded choice, with both options having good outcomes for the opponent and for Carrot. Also of note is that there's a bit of starting lag where the opponent can knock Carrot out of it safely, meaning she can't trick foes into hitting her, like an actual counter. This is a very difficult point to hit, however, as the opponent would need to be incredibly prepared to actually land a hit during it.


Up Special - Mink Step

Carrot performs a very basic aerial jump (if in the air already, that is) that creates a poof of smoke under her feet as she lifts off. When used on the ground, this is the single best jump in the game, launching Carrot 10 Grid Blocks high. When used in the air, however, it only reaches 5 Grid Blocks high. There isn't any hitbox on the attack, meaning that Carrot is completely open during it, but she can use any of her aerials shortly after she lifts off, while keeping the momentum of the launch. The step is also incredibly fast, with minimal starting lag and pretty much nonexistent ending lag, since you can immediately go into aerials. In addition, she can can even aim the jump in five directions: backwards, diagonally backwards, up, diagonally forwards, and forwards.

Unlike other aimable recoveries, Carrot won't automatically turn to face the direction of the input. For example, if you perform a backwards step, she will still be facing the direction she was when the attack was inputted. This means you can dash backwards while performing BAir without having to worry about fiddly inputs. Because of this, Carrot has a different animation for each of the directions. An important thing to note about this is that basically all her Aerials, aside from UAir, become amazing approach tools. Finally, the attack doesn't put Carrot into special fall, but she can only use it once per air trip. Basically, Carrot excels in the air, and isn't particularly worried about going off stage thanks to her many jumps. Opponents will need to focus on properly knocking her out instead of trying to cheese her into freefall.


Side Special - Mink Rush

Carrot rears back, and then leaps forward, gauntlets first. She's accompanied by a a burst of wind around her, which actually acts as part of the hitbox, basically forming a full oval around Carrot's body (though the wind effect only covers her upper half). This move has a bit of starting lag, though like most of Carrot's moves, its not actually a lot. The rush travels forward around 5 Grid Blocks in distance, dealing 12% with knockback that can KO at 180%. At the end of the move, Carrot will perform a forward flip and land, performing a quick pose as she does. This gives the move a bit of ending lag, and while not especially painful, it makes it punishable if it misses.

Mink Rush can be used in the air, as you might guess, giving Carrot ANOTHER means of recovery, though this will actually put her into special fall. It can also be used out of Mink Step because of this, but it doesn't have impressive results thanks to it cancelling all momentum when used. The attack has high priority, making it useful as an approach tool, not exactly a surprise since its similar to a lot of other dash SSpecs. This is actually our first move that has a special effect while Electro is active. When used with Electro, the burst of wind is instead replaced by a burst of electricity. The change here is that, instead of dealing a singular hit, hitting with an Electro Mink Rush will result in the opponent taking multiple hits over the duration, with a max of 10 hits of 2% damage, launching the opponent automatically on the last hit, or before the move ends. The knockback remains the same. Carrot will not enter special fall if the Electro boosted version of the attack is used in mid-air.

While this is a fast damage dealer, it both requires you to hit fairly early in the attack's life in order to get the full damage, and it uses up your Electro charge, so it comes down to good timing or using it out of a combo. On the up-side, it has some major utilities, as it not putting Carrot into special fall makes it so that she can go off-stage with an opponent, dragging them closer to the blast zone and giving her a better chance of killing opponents with her rather weak attacks. She can even use a normal Mink Rush to zoom back to the stage! In both forms this can deal good damage, but in the Electro version fills a particular niche that none of her other moves can.


Smashes
Forward Smash - Electrical Luna

As a note before we get into this move, Carrot's Smashes will have her charging up Electro as she uses them, whether you have activated the charge or not. The same buffs will apply to these moves while the buff is activated, so it isn't really an issue, I just thought I'd clarify this first.

For the start of this move, Carrot takes a hadouken-esque stance, putting her gauntlets together as she charges electricity between them. This is the basic charge stance of the move, and upon release Carrot will leap slightly into the air, and then slam her gauntlets down in front of her. The attack is fast, but the start-up is one of her slower attacks by comparison. The jump notably has the ability to jump over certain low hitting attacks. As you might be able to tell from that opening paragraph, this has a bonus effect when an Electro charge is in play, but we'll cover the basic move right now. This is a very close range attack, with it only hitting directly in front of Carrot, but it is decently powerful, dealing 18-24% damage with knockback that can KO at 140%, making it one of Carrot's good kill options. The attack has some fairly bad lag, as Carrot will enter a "looking over the distance" pose for a few frames before she returns to her usual stance.

With an Electro charge, the attack changes fairly significantly. Instead of just hitting in front of Carrot, the slam will now send out a shockwave of electricity. The shockwave takes on an isosceles-right/left triangle shape (it changes depending on which side Carrot is facing, obviously), with the farthest point coming from the initial slam, and then spreading out into the rest of the triangle. The shockwave reaches about 1.4 Grid Blocks, with it hitting 1 Grid Block in height. If the opponent is hit by this, they will take a series of rapid hits, dealing 5 hits of 2%, significantly less than the damage caused by the slam. It also deals no knockback, but instead locks opponents into very bad stun that lasts for slightly longer than Carrot's ending lag. It doesn't last long enough for you to pull out another FSmash, however, but using a slightly faster move can actually result in a true combo.

With the Electro charge, the initial slam still deals the same damage, but the direction of the knockback will automatically combo it into the electrical shockwave. This will cancel out the knockback, but rack up a lot of damage. This is a rather binary choice when discussing this move in a vacuum, if the opponent has low damage use the Electro version, if they have enough for a kill use the regular version. The problem comes with Electro's single use, and you can potentially get much more stable damage out of other moves, it's just that the base hit to electric combo is by far the single most damaging standard attack Carrot has.


Down Smash - Electrical Tempesta

Carrot winds up her arm, charging her gauntlets up with Electro, and then pounds it on the ground, creating an electric burst on either side of her. The attack is fast, but compared to her other Smashes, it's the slowest of the bunch, with mediocre starting lag and ending lag, with the latter having Carrot peppily hop back to her battle stance. For the starting animation, Carrot will always have to wind her arm twice, even without charging the attack, as that's roughly how long it takes for the Electro to charge up. And yes, you have to still wait that even if you have Electro charged up outside of the animation.

The electric bursts are rather small, comparable to something like Mega Man's down Smash, but only about a fourth as tall, and with slightly wider horizontal reach. The actual attack part of the attack is fast, with either side dealing 13-20% damage and knockback that can KO at 160%, making it not really that powerful, but still decent to throw out when you need to. Functionally, it falls in the same niche as most Down Smashes, a defensive attack on both sides, so use it for edge guarding or the like.

With the Electro buff, the attack changes pretty completely. The original hitbox is removed, alongside any real hitboxes, and is instead replaced with Carrot laying down a massive electrical trap on the ground. The trap resembles a large net made of electricity, and it will remain on stage for a blistering 15 seconds, taking up 4 Grid Blocks worth of space (though it will automatically shrink down if the platform its created on is smaller than that). Carrot can move freely through the electricity, but opponents will unfortunately end up taking 1.5% damage every 9 frames they remain standing in it.

It's best to use this on main parts of a stage in order to block out combat there and move focus for a moment into jumping around the stage. With the opponent finding that the ground is less viable, it will force them into the air, where Carrot is more comfortable in combat. Of course, if you can force the opponent back onto the ground, you can have them take more damage from the trap as well. The main downside is that, as it limits the opponent, it also limits what Carrot can do. Carrot's best KO move, her Forward Smash, is pretty much useless when you can't hit the opponent with it. There's also the consideration of what stage you're on at the moment. This is incredibly effective on stages like Battlefield and Final Destination, not so much on ones like New Pork City. You may want to use your Electro charge for other things as well, so this is generally something you might not ALWAYS want on stage.


Up Smash - Moon Rising

Carrot bends down as she charges the move up, charging her gauntlet with Electro as she prepares an uppercut. Upon release, she... does that uppercut. This hits in a similar arc to other uppercut smashes, meaning that the range isn't particularly good. It's the fastest of her Smashes, however, with very minimal starting and ending lag. On contact, the opponent will take 10-18% and upwards knockback that can KO at 160%, making it Carrot's weakest Smash as well. That doesn't matter much, because the uppercut does exactly what it needs to do, and that's get opponents into the air.

While this is far from Carrot's only way to get opponents into the air, it is her most damaging. As mentioned, Carrot is very strong in the air, and having a decent damaging attack that can lead directly into combos is a pretty good thing. This ties directly into her Electro charge version, as, unlike the previous two examples, it's more just a straight upgrade. While it still deals the same damage, it has a slightly wider range as the extra Electro flies out as Carrot performs the uppercut, making what looks like a VFX into an actual hitbox. The hitbox itself isn't perpendicular to the hitbox Carrot herself makes, traveling slightly behind her fist, but surpassing it in vertical range by the end.

Anyway, the extra range basically consists of the added hitbox being a second version of the uppercut hitbox already, but with slightly more vertical reach, as mentioned. This isn't much of a bonus, but that comes in with the secondary effect. The attack now deas a lot more hitstun than before, making the attack even better as a combo tool, with nearly all of Carrot's aerials becoming true combo follow ups out of it (under the right damage circumstances, of course). The dilemma here is fairly obvious: do you want to use your Electro charge on this fairly basic upgrade instead of something a bit more useful? obviously the answer is up to you, but this one is generally safer to throw out during neutral, as it can potentially lead to a decent advantage, though a normal version of Up Smash can do that as well, just with less effectiveness.


Standards
Jab - Rabbi-Combo

In a fairly standard jab combo, Carrot will scratch with her right gauntlet, then her left, and then perform a flip kick, ending the attack standing still. This has fairly basic combo properties, with the first two hits dealing minimal knockback, but also both dealing 5%. The flip kick deals the actual knockback, which is rather weak but good at spacing. The flip kick also only deals 5%, which does total up to a decent 15% if all three hits connect, which makes up for the move's lack of launching power.

The range on the claw swipes aren't particularly great, but are slightly extended by VFX scratch marks that extend it. They're otherwise on the range of other similar jab strikes, however. The flip kick does have slightly better range to it, and actually hits above Carrot as well, giving it a bit more versatility than other jab finishers, but is otherwise pretty simple. The most notable thing about the jab is that it is potentially the fastest basic jab combo in the game, only hampered by its low knockback and some mediocre ending lag where Carrot will strike a quick V-pose after she performs the kick.

Much like other Jabs in Ultimate, holding down the attack will cause Carrot to perform a rapid jab. This will result in her rapidly scratching in front of her with her gauntlets, functionally acting as the same hitbox as the first two hits of the basic Jab animation. This is a very simple rapid jab by all accounts, not being noticeably faster than any other ones. Each hit will deal 2% damage, and the finisher has Carrot performing a stronger punch that deals 5%, and launch the opponent off with moderate knockback.

The Electro buff is notable on this attack, particularly on the rapid jab, as it can keep the opponent locked in to the move for a longer period due to the increased hitstun. This added time isn't much thanks to knockback, but it is worth keeping in mind.


Forward Tilt - Ele-Claw

Carrot quickly jabs her gauntlet forward forcefully, a simple attacking animation. This is a very quick move, though there's a notable but slight bit of starting lag as Carrot prepares to strike. The attack has decent range, slightly better than her basic Jab scratches, but it's more direct hitbox can make it good for poking. Like with a few other FTilts, this can be angled upwards and downwards diagonally, giving Carrot a bit of extra versatility when it comes to this rather simple move. The thrust will deal 8%, with average knockback that won't kill until the mid-late 100%s.

Even though this move is simple and particularly niche, it can also use stored Electro! An Electro-enhanced Ele-Claw will shoot out a thin stream of electricity directly from Carrot's gauntlet, increasing its overall range. The electricity has roughly the same hitbox size as Carrot's arm does, but slightly longer and only activates a few frames after the move starts, specifically when Carrot's arm is fully outstretched. The hitbox is lightning fast, lasting only a few frames before disappearing. It deals the same damage, but with LESS knockback and high hitstun, making it better for shield poking but not for much else when used normally. The initial thrust has upwards-diagonal knockback, which means that the initial hit can only combo into the Electro hit at VERY low percents.

This can be an extremely dangerous weapon when used in conjunction with the tilted variants of the attack, with the upwards angled one being a great anti-air, and the downwards angle being a frightening tool off the edge. This is because, thanks to the low knockback and high hitstun, any opponent who is hit while in the air will basically be forced into a slight freefall mode. It doesn't last that long, but it can be long enough for Carrot and her quick attacks and aerial superiority to land in a few game-changing hits. The downsides are twofold, the main one being that, of course, you use up your Electro charge when you might have been better spending it on something more powerful. The second, more minor issue, is that using angled tilts is finicky (or maybe that's just me).


Up Tilt - Rabbit Rise

Carrot performs an uppercut, not dissimilar to her USmash, but not the same either. It's instead a shorter range uppercut with a jump to it. There isn't a whole lot to this move, but it is useful to Carrot's playstyle. It's fast and can be used directly out of a few combos, though very rarely does it end up a "true" combo, exactly. The range is limited, only hitting opponents that are very cloe to Carrot, which is why you'll mostly want to use it out of combos. The uppercut deals 7% and light upwards knockback that won;t kill for a while, but it doesn't need to.

The attack, whether it connects or not, will end with Carrot in the air for a brief moment. From here, she can directly combo into her more powerful aerials, or boost herself up even more. The optimal use is comboing into UAir in order to get even more air time, but you can basically use any move aside from BAir (because it hits behind Carrot) and DAir (because it has too much lag). This is basically a combo string move, fast and weak, but important enough to be useful. There's a lot of things you can use this in conjunction with, especially with the added hitstun that Electro adds to most moves.


Down Tilt - Rabbi-Kick

Carrot performs a very simple crouching kick. This has decent range thanks to her legs, giving it range comparable, if not slightly better, than her FTilt. This makes the move good at shield poking, maybe even better than FTilt is. The downside is that it's slower, though because most of Carrot's attack are fast, this doesn't mean it's actually that slow, just not as fast as FTilt. Anyway, the attack deals low damage, 6%, with weak knockback and hitstun as well, giving it more of a downside compared to FTilt outside of poking.

However, because of Carrot's already mentioned VERY FAST attacks, the low hitstun still means she can combo off of DTilt easily, and it becomes even better when you factor in the additional hitstun caused by an Electro boosted version of this move. The hitstun boost is good enough that it basically allows Carrot to combo from it into nearly any of her attacks, and with the attack's slower speed and damage, this sets it firmly as a combo starter, rather than a continuation or finisher.


Dash Attack - Ele-Wheel

From her dashing animation, Carrot leaps a bit into the air and performs a spinning sweep with her claws, performing an attack that makes her look like a white wheel. On a basic input, Carrot will perform this attack once, landing with her gauntlet on the ground, before returning to her feet, for slight ending lag. Her gauntlet is the main hitbox, as she spins it around her twice in incredibly quick succession. This will move her forward automatically a bit, giving it decent range outside of just the gauntlet itself. In this form, there isn't much to it than being a very fast dash attack, though it can deal 2 hits of 6% to opponents in front of her due to the rotation, with the second one actually dealing the knockback, which can KO in the mid-late 100%s.

As I've hinted, this move is affected by Electro charge, in a fairly special way. On a basic input, nothing will seem to have changed, aside from the white VFX changing to green and it dealing the standard Electro-based buffs. The difference comes when the move ends, as you can activate the move two more times in a row by pressing the attack button during the ending lag. While this might seem dangerous, the second hit of each spin will still deal knockback, meaning that the spins won't combo into each other unless at very low percents. This does make it incredibly good as a type of wall approach, and especially good against shields due to Electro boosting shield damage.

It can also work as an edge guard technique, due to dash attacks automatically stopping at ledges. This means you can just block the ledge for a few seconds, though due to the rotating hitbox it still gives the opponent plenty of opportunities to roll back to the stage... it just requires timing. This is probably one of the main moves you'll want to Electro charge, besides Smashes, due to its versatility, but that isn't to say that its base form doesn't have merits. In fact, a lot of what the Electro charged version can do, the base version can do as well, in case you want to save your charge for later. You can even activate the charged version from the endlag of the normal version thanks to how activating Electro attacks works, meaning you can even use the move for mind games.


Aerials
Neutral Air - Jumping Flash Step

From her neutral aerial stance, Carrot will quickly vanish, appearing a few frames after she does just to the upper right, striking a combative pose. She then vanishes again, appearing to the bottom left and striking a different pose. She repeats this action two more times, appearing to the upper left and then to the lower right, before returning to where she started and striking a final cute pose for the ending lag.. This all happens over the course of a handful of frames, no longer than an average NAir's length, potentially even a bit faster. This is all accompanied by scratching VFX to signify there is actually a hitbox here as well.

This is near instantaneous to pull off, but has some middling ending lag. The hitbox itself is in a circular shape, again comparable to the average NAir that hits on both sides. Basically, the animation as described takes place in a very compact area. The hitbox will flicker on and off, disappearing when Carrot it visible and appearing when she isn't. These hits all combo into each other, making this a multi-hit attack as well The attack is weak, even for a multi hit, and especially for an aerial, with each hit only dealing 2%, and all hits having weak knockback that will eventually KO at around 230%. However, it does have a high amount of hitstun even without the Electro boost, meaning that this attack's main function is as a combo string move. It can be used out of practically any move that doesn't launch the opponent that far, or moves that leave the opponent and Carrot herself in the air. It's an incredibly versatile move despite only having one real practical use. It can become incredibly dangerous if used out of Mink Step, as it basically turns into the aerial equivalent of a multi-hit dash attack. Also regarding Mink Step, the attack still basically stays the same in regards to its hitbox, the movement caused by the attack just creates an illusion of it looking like it covers more area. It's hard to describe in a text only format. This goes for both horizontal and vertical uses of the move.


Forward Air - Ele-X

Carrot raises both her gauntlets up, and then slashes with them in an X-shape. This attack is a fairly basic FAir, coming out quickly, though with a bit of starting lag that makes it Carrot's second slowest Aerial, and having good range to it. It has very low ending lag as well, making it easy to throw out without being punished. The hitbox covers the same range that FTilt does, but slightly longer thanks to additional scratching VFX that act as a part of the hitbox. The attack is fairly powerful, being able to KO at 125%, and dealing 13% on hit.

This has an Electro charged version, which changes the move considerably. Instead of just scratching the air, Carrot's Electro-charged gauntlets will let out an X-shaped projectile made of 6 electrical scratch marks. The scratch marks will fly forward a short distance, roughly 0.5 Grid Blocks, and deals significantly lower damage, 7%, and weak knockback that pushes the opponent towards Carrot. It also has high hitstun, like you would expect at this point in the set. These aspects give the move a completely different niche, as it now becomes a combo string attack rather than a combo finisher, the low ending lag means that you can combo directly into another, faster aerial, and then maybe even back into FAir itself! The hitbox of the base move still exists, with it ending just as the projectile is created, and will hit directly into the projectile, making this string even wackier.

With a horizontal Mink Step, the move obviously gets better range, but it has some strange effects on the Electro boosted version of the attack. Instead of the projectile moving past the attack, it's actually slow enough that it will overlap with Carrot, making it actually harder to hit with the projectile. While it's still possibly to hit with, it makes this version of the move much more preferable to use outside of Mink Step. Also obviously, being Carrot's best aerial KO move, of course you want to use the base version out of Mink Step. A vertical Mink Step is a bit different and less useful, as the projectile will still only travel forward from where it's created. Not exactly much else worth noting there.


Up Air - Rabbit Ears

Carrot holds her arms out to her sides as she pulls her legs into a kneeling position, her ears flatting out to match the position of her arms. She then claps her gauntlets together in a fairly basic UAir clapping hitbox, with her ears following the same motions as her arms. This is rather speedy, and has low starting and ending lag. The range is in general comparable to her FTilt, but on both sides of her, though obviously the hitbox isn't the same at all, but you get what I mean. The arms as they go up deal 8%, with mediocre radial knockback, but there is a brief sweetspot as Carrot's gauntlets clap together, dealing a much stronger 14% with directly upwards, but still rather weak, knockback.

This move is a combo tool first and foremost, as the direction that it launches opponents doesn't entirely matter thanks to Carrot's unique jumping abilities. It has high hit stun while Carrot is Electro charged, so it's ideal to use it for combos when the buff is active, but it can still be effective without the buff active. Basically, this is a tool to keep the opponent in the air for as long as possible, as you generally will want to do with Carrot.


Back Air - Bunny Kicking

Carrot quickly spins around, performing a spinning kick in the process. This is a very simple move, but like most of Carrot's moves, is very fast. It reaches out fairly far as well, slightly farther than Carrot's usual claw swipes. The kick is moderately powerful, dealing 11% and KOing in the mid 100%s. It's knockback is decent, which is a bit of an issue for Carrot's focus on aerial combos. This puts this move in a very niche situation, as it is basically an alternate combo finisher, taking advantage of Carrot's unique jumps and recovery to make it so that she can finish with this rather than FAir or DAir. It is probably the best move to use directly as an approach tool when in regards to Mink Step, as it has high priority. A use during an upwards Mink Step can be useful as well, basically turning this into a wall.


Down Air - Electrical Shower

Carrot turns her whole body so that she's facing the ground, and unleashes a bunch of powerful punches below her. The punches fly out rapidly, each hitting for 3%, with 6 punches in total, meaning a max amount of 18% damage if you hit with the full move. Knockback is downwards and powerful, but not quite meteor smash powerful. The hitbox is in a sloped cone shape where Carrot punches, with the distance being similar to her FTilt. The hitbox is roughly 0.6 Grid Blocks wide, and the punches are semi-random, with Carrot only punching anywhere in the area of the hitbox. Of course, this is partly just animation, since the punches are fast enough that they will blur together into one hitbox. She also can't punch in the same place more than once during the move, splitting the punches into 6 different directions. It has pretty bad ending lag, as Carrot has to spin around to enter her neutral stance.

This attack has a Electro-charged version, which makes it so that each punch shoots off a projectile, creating a barrage of projectiles under Carrot! The projectiles are roughly the size of Mario's fireball, but with a green, electric design to them. They fly fast and only travel roughly 1.5 Grid Blocks worth of distance before they vanish, and are fired in the directions of the punches. This also means that the 1.5 Grid Blocks is a base estimate of distance, due to angles and math. Anyway, the projectiles are fast, but deal 2% on hit, with upwards knockback that has a high chance of sending the opponent directly into another projectile. The projectiles also have decent hitstun on them, meaning that you can potentially combo directly into the normal version of the move. The projectiles are a combo stringer, while the normal version is a good finisher or a good off-stage move, as Carrot's aerial mobility mean that she doesn't need to worry about lag in the air that much.

While the normal version of the move isn't particularly notable to talk about in regards to Mink Step, the Electro version is, for probably obvious reasons. The projectiles will be shot out like normal, but given an even larger range, whether that be horizontally or vertically, depending on how early you use it. This can give it a massive spread over a stage, making it very difficult to avoid. There isn't much of a downside to using it out of Mink Step, either, as it doesn't even mess with the move's combo potential, thanks to how Mink Step works with Carrot's jumps! Though, you will need to take note of how you've used your jumps if you want to combo out of a horizontal Mink Step.


Grab Game
Grab & Pummel

Carrot performs a simple grabbing animation, reaching out with one of her gauntlets and grabbing the foe with the big claws on it. She'll hold them in place, other hand raised. The grab has pretty basic range to it, on level with grabs for normal humans in Smash Bros. Her pummel is equally simple, as she smacks the opponent lightly with her raised hand, dealing 1% with very fast attack that can be spammed easily. Overall, this is a basic Grab, but there is a bit more to it.

If Carrot has an Electro charge, the grab will change slightly. While its range remains the same, the grabbed opponent will now be grabbed for 1.2x the length they would normally, thanks to the electricity in Carrot's gauntlet. In addition, her pummel also changes, though it receives the same damage buffs as every other move. What changes is the animation, as Carrot will now perform an electrically-charged gut punch to the grabbed opponent. This is much slower, preventing the grab from being spammed, though it isn't the slowest grab in the game. This can be a great way to get easy damage, something Carrot doesn't have really great access to, but your Electro charge will still run out during this. If it does run out, Carrot and the opponent will be forcibly separated, Carrot being knocked to the ground for a bit of ending lag.


Forward Throw - Bun Punch

Carrot lets go of the opponent and takes a step back, winding up a punch in an exaggerated manner. She then unleashes an also exaggerated and cheerful looking uppercut, launching the opponent off. This is a basic throw, and is Carrot's main spacing tool, as it has slightly bad ending lag and high hitstun on the opponent. It isn't strong enough to function as a KO, as it will only KO in the mid-late 100%s, but it is decent enough to be a quick way to get the opponent away from you. It also deals a healthy 6%, but it obviously isn't that great for dealing damage much either.


Up Throw - Rabbi-Toss

Carrot grabs the opponent by the arms, and tosses them above her head, for a very weak 4% and incredibly weak knockback. This is because this is directly a combo throw, used to lead directly into Carrot's aerial combos. It's a bit slow for a throw, but it also has decent hitstun and low end lag, meaning that Carrot can lead directly into her aerials. Mink Step is particularly important to note due to how good of a chasing tool it is, and it's interactions with Carrot's Aerials. There's not much else to mention there.

There is more to mention about the move's Electro boosted version, however. Carrot will quickly follow up the toss by unleashing an electrical blast on the opponent, launching them upward with more knockback. This still isn't great, but it is her strongest throw, dealing 10% in addition to the 4% from the base attack, and KOing before 130%. This makes it one of Carrot's two choices for a definitive KO throw, but it comes at the expense of higher ending lag, removing combo potential from it.


Back Throw - Behind You-teia!

Carrot quickly steps away from the opponent, letting go of them in the process, before she becomes a white blur and moves to their backside. She then quickly kicks the opponent, launching them off. The throw is average, dealing 7% and knockback that launches at a low-upwards angle and can KO in the late 100%s. This attack will end with Carrot on the opposite side of where she was before, and has low endlag, meaning that Carrot can near-instantly go from the attack to chasing after the opponent, though it will only be able to true combo into her other attacks at lower percentages, making it a good combo throw.

The attack has an Electro boosted version, where Carrot will charge her feet with Electro, drop to her haunches, and then perform a rabbit kick into the opponent, launching them off. This deals significantly higher knockback, KOing at 130%, but has higher ending lag on Carrot's end as she pushes herself back to her feet after performing the kick, and strikes a cute pose. This means that the attack can't be used to chase any more, and becomes more definitively a KO throw, the second of her two KO throws, and not coincidentally the second of her two throws with an Electro boosted version.


Down Throw - Bunny Step

Carrot lets go of the opponent, and quickly bops them on the top of their head with her gauntlet, knocking them to the ground. She then leaps up and performs four quick stomps, alternating between legs, before finishing off with a stronger stomp with both legs. This final hit launches the opponent upwards and diagonally. Each stomp deals 1%, while the final hit deals 5%, equaling 9% in total. The knockback is notable, as its the strongest of Carrot's base throws, KOing at around 140%. Yes, this is the strongest of Carrot's base throws, making it her KO throw. She's not exactly a grappler, you know. It has some fairly bad ending lag, as Carrot will use the momentum from the final stomp to backflip and land back on the ground, but at lower percents it can still be used as a less effective combo throw than UThrow.


Final Smash
Sulong Unleashed


Carrot has the Smash Ball! Unleashing it's power, a cinematic will start which recreates the iconic scene where Carrot first transforms into her Sulong form in the manga, which should be shown partially above. Carrot will look up into the sudden full moon, and then transforms into her Sulong form, before it transitions back to gameplay. Sulong Carrot will launch up into the air as she lets out a roar, creating a massive hitbox of electricity above her that covers most of Battlefield's main platform, hitting the inner halves of the lower two platforms. Any opponent caught up in this will be completely stunned for the rest of the attack's duration, and take 20% in the process.

Carrot will then spin around, entering a brief cinematic where she prepares to launch a downwards kick. She then performs said kick, going directly downwards this time, creating a near identical hitbox, which instead of stunning, launches the opponent's off. This deals 20% more, and deals massive knockback, like you would expect from a Final Smash. It's basically a KO if you get hit by it at all. Once Carrot lands back down, she'll fall to her knees and transform back, before quickly glancing around and hopping back to her feet.
 
Last edited:

GolisoPower

Smash Master
Joined
Sep 17, 2017
Messages
4,338
So after careful deliberation, I've decided to rework Reimu's hurtbox gimmick. It should be much more balanced by now, I hope.

Also, I'm almost done with my next moveset, so please look forward to it! :)
 
Last edited:

GolisoPower

Smash Master
Joined
Sep 17, 2017
Messages
4,338
A storm of white whirls around one side of the Battlefield as a blue-clad figure walks out, cold winds building in his hands. On the other side of the stage, Ahri hops onto the stage and creates an orb of essence in her hands. She then looks up to her adversary.

"I take no liking to the look in your eyes..."

Ahri's tails sway in the wind as she sensually pets one of them as if it were a pet.

"I can't help it if your essence looks...enticing~."

Ahri's adversary enters a combat stance, the glare in his eyes unrelenting.

"Then consider this your last meal before your demise."
 

ForwardArrow

Smash Ace
Joined
Aug 17, 2011
Messages
502
Hotaru Futaba
Its really nice to see these "fighting game" style sets continue to innovate, as Hotaru takes more inspiration from Terry Bogard than the usual Street Fighter subjects. Her base mechanics with T.O.P. and how her shield works feel well translated to Smash's engine and immediately got me interested in the set, as they allow her to lightly regulate how much damage she takes with good play, and also capitalize on that regulated damage with a Terry-esque super moves that get better the higher you set the bar to entry. It was a fun start to the set... which is why I ended up feeling a bit let down down by the Specials. The Specials aren't so much bad as they are very specific melee hitboxes, with a lot of little details to them that don't look like they're going to add up to a particularly interesting big picture. I say look like, because this is neglecting a very important detail of the set's design. Hotaru can cancel several of her moves into her specials on hit, and this makes their relative simplicity in gameplay a lot more interesting, because they're attacks Hotaru can cancel most of her fast moves into, and once you get into the Standards Kat shows how these cancels are actually quite interesting. You said in chat that you weren't 100% sure of the set's direction when making the specials, so props for figuring it out. Even something I wasn't so fond of, the projectile negation on Down Special, ended up pretty relevant when Hotaru's playstyle is heavily based on getting her and her opponent to fight on a specific part of the stage, so she needs something to help her fight the opponent's camping ability to make coaxing them to her with her fireball viable.

The big selling point of this set, at least for me, is the grounded Super Special. This is kind of where all her mechanics come together in a legitamately compelling way, with an insanely powerful move that has just one thing holding it back. You need a long runway of stage to use it. This encourages Hotaru to try to get into a situation where her back is to a ledge or at least with a large enough amount of stage to work with, and then go for this incredibly powerful move. What's particularly horrifying about it is that she can confirm several of her fast moves into it because of the Special cancelling, so all the specifics of setting it up become quite worth it when you consider how easy it is to make happen once you DO get your ideal circumstances.

Beyond the two Specials I mentioned the set feels quite built for having this in mind. One of the more memorable interactions is Forward Smash's on shield backslide give Hotaru an odd "reward" for hitting shield with it, the positioning she wants in addition to getting out of range of retaliation. There's also other moves (like Down Smash) which actually capitalize on having a runway themselves, so she's not a one trick pony once she gets the spacing she wants and can even do some pretty cool things with it when T.O.P. isn't active. Admittedly some of the set isn't as focused on these mechanics as it is allowing her to play neutral well, but said neutral game ends up quite interesting in its own right, and does in the end flow out into her flashier mechanics in a surprisingly compelling way. Also I should really bring up the Bair, that was the move that made my opinion of the set as high as it was because for how simple a move it is on paper, it has a very impressive amount of depth to how the hitbox works and serves as a fantastic reward for the fact that its locked behind a reverse aerial rush. I remembered Hugo's Bair doing something similar and I liked it there, but this set took it to another level by having said Bair be more than just a big hit.

All in all, I came out of Hotaru really enjoying it, and glad to see fighting game sets expanding in new directions from the old Street Fighter super meter sets that, while awesome, we'd probably get sick of if we saw too many of them. I came out of the set not actually having all that many complaints aside from the fact that, as someone who isn't as technical in terms of Smash knowledge, there were moments the set would suggest something and it would just fly over my head. I really hope the more technically proficient people in MYM like Smady, Froy, and Jamie are able to get full mileage out of this set when they do read it, because even I feel its the kind of thing I'd like to Super Vote. Great job, Kat.
 

FrozenRoy

Smash Lord
Joined
Apr 26, 2007
Messages
1,261
Location
Las Vegas, Nevada
Switch FC
SW-1325-2408-7513
BTW given things have been slow (and life kinda crazy), the franchise challenge has been extended to July 7th y'all.
 

The Jim Jims

Smash Cadet
Joined
Jul 9, 2018
Messages
60
Location
"All you do is forward smash!"
When you were young you were the king of carrot flowers
And how you built a tower tumbling through the trees
In holy rattlesnakes that fell all around your feet


And your mom would stick a fork right into daddy's shoulder
And dad would throw the garbage all across the floor
As we would lay and learn what each other's bodies were for


And this is the room one afternoon I knew I could love you
And from above you how I sank into your soul
Into that secret place where no one dares to go


And your mom would drink until she was no longer speaking
And dad would dream of all the different ways to die
Each one a little more than he could dare to try


Neutral Milk Hotel - King of Carrot Flowers Pt. One

Yall ready?
 

GolisoPower

Smash Master
Joined
Sep 17, 2017
Messages
4,338
BZZT

"Operator, I am detecting two signals of immense power fast approaching our coordinates. One of them is oddly warm and inviting, though not very friendly. The other is more dark and cold, and just as much threatening. Whatever they are, if they arrive in the Origin System, they will surely cause unforeseen consequences. Please be kind as to - flay them alive - politely deny them entry."

OBJECTIVE: Join the Fight
 
Last edited:

GolisoPower

Smash Master
Joined
Sep 17, 2017
Messages
4,338
Lucas warily walked through the dim, claustrophobic hallways of the hospital, the soft sound of his soles tapping on the floor ringing through. He had never been in a place like this, nor had he ever heard of it. And yet here he was, wandering the halls, lost. The place was rather eerie and reminded Lucas of his time in New Pork City. However, his PSI powers told him that something was amiss. Something dark within it was lingering...

Suddenly, a new sound graced his ears: a mechanical wailing heard from the distance, slowly fluctuating in pitch. A siren. Before he knew what it meant, he saw the environment change around him. The walls peeled like flesh, the lights that barely lit the hallways flickered out. Suddenly, he heard more sharp footsteps, getting louder and louder as they get closer and closer. He turned around, seeing what appeared to be nurses with grotesque faces shambling towards him. Lucas let out a muted wail of fear before attempting to toss a PK Fire in their direction. Nothing. For some reason, his powers had been locked away, leaving him open to his new oppressors. He turned and ran, the disfigured nurses not letting up the pursuit.

After what felt like eons, Lucas finally evaded them, his back pressed against a table on its side. He peered from his hiding place and looked around. Nothing. Though the hospital was still transformed, it was now empty, devoid of monsters for now. He let out a sigh of relief and turned to continue.

*SMASH!*

Just inches from his face, erupting from the door next to him was a massive, rusty blade that just missed its mark. Lucas was knocked on his rear, his previously-dispelled fear renewed. He watched with heavy breaths as the knife slinked back into the door, before being stabbed through it a second time. Lucas attempted to scream out, but his scream was muted out by the sound of the door bursting into splinters.

...thump...thump...THUMP...

Lucas' eyes welled with tears as he saw the wielder of the massive blade in all its glory: a towering figure clad in naught but a butcher's apron, dragging the blade with the sounds of grating scratches. Upon its completely obscured head was a large pointed metal helmet that was a dark red. It turned to Lucas, its intent unknown. Just before Lucas would get up and retreat...

It began to strike.
 

redrain

Smash Rookie
Joined
Jun 29, 2020
Messages
7


Ripper Roo (also known as Doctor Roo) is an insane blue mutated kangaroo. He is widely considered to be Dr. Cortex's first and failed experiment with the Evolvo Ray, which is debatable seeing as how he managed to complete university-level education as of Crash Bandicoot 2: Cortex Strikes Back. He frequently uses explosive crates when battling Crash. This can be seen in Crash Bandicoot 2: Cortex Strikes Back, where he lays down TNT squares and nitro squares with his cane, in Crash Team Racing where he drops TNT Crates, and in his appearance in Crash Bash where he will lay down TNT squares on random tiles. He also has razor sharp claws on his toes that are his main method of attack.

===================== Stats =====================

Size: Luigi
Weight: Ivysaur
Run Speed: Ness
Jump Height: Greninja
Fall Speed: Samus


===================== Specials =====================

Neutral: TNT Crate
Ripper Roo takes a TNT Crate out of nowhere and places it on the ground in front of him. It's smaller than the regular item crates by a little bit. Ripper Roo can have one of them out at a time and if it's hit by anything other than a projectile it will explode and deal a good chunk of damage and knockback. If someone jumps or lands on the top of it they will bounce up like on PACMAN's trampoline and the crate will start flashing, one a second. After three flashes, the crate explodes with bigger knockback and damage that can easily KO. The explosion for either of these isn't that large but it can control space effectively if used right. If the timer starts, it can't be interrupted by attacks. Ripper Roo can be damaged by his own explosions and if you use this again with a crate out that hasn't exploded yet or started a timer the existing crate will vanish and Ripper Roo places a new one.

Forward: Crash Team Racing
Ripper Roo gets in his cart from Crash Team Racing and drives forward. This controls just like Wario's bike but if Ripper Roo is knocked off it the cart immediately dismantles and falls apart into pieces, with his wheels rolling off, etc. These pieces can be picked up and thrown as items just like Wario's bike. Also has the same cooldown after the bike being destroyed. Ripper Roo's crates are normally stationary but Ripper Roo can actually push them along with the cart without making them explode. He also takes reduced knockback if a crate explodes while he's in the cart, he'll be covered in soot like a cartoon character and take about half the knockback. Jumping while in the cart and touching a TNT Crate has Ripper Roo do a bunny hop onto the crate and set off its timer while getting some air. Ripper Roo can cancel this with some lag when launched into the air to go into an aerial this way.

Up: Cane Bounce
Ripper Roo takes out his cane and bounces on it like a pogo stick, getting some air and looking like Scrooge McDuck from DuckTales. The bottom of the cane is a spiking attack that deals great damage but it's only Ripper Roo's sides and bottom so it does nothing against people above him. Using this next to a TNT Crate makes Ripper Roo bounce off the top as if he had used it on another player and sets off the timer.

Down: Nitro Tile
Ripper Roo lays down a nitro tile, turning a square beneath his feet the size of his crate into it. The nitro tile is bright green to differentiate from the red TNT Crate. If you jump off of or land on one of these tiles, it explodes dealing great damage and knockback. Ripper Roo can lay as many of these on the stage as he wants but beware, he is vulnerable to them too. No two nitro tiles can touch. The catch is that while Ripper Roo can have as many as he wants if one explodes all of them explode. Also, they trigger TNT Crates and vice versa. If Ripper Roo drives over a nitro tile with his cart, he gets a speed boost and becomes a temporary hitbox that deals great damage and knockback.


===================== Normals =====================

Neutral Tilt - Ripper Roo does a 1,2,3 smack with his feet, alternating between them for weak damage on the first two and good damage and knockback on the last. The hits will push Ripper Roo's crates along without triggering them and the last one makes enough space so if an enemy hits back Ripper Roo will be out of the blast zone because it also pushes Ripper Roo back some.

Forward Tilt - Ripper Roo swipes forward with his cane's curved end and knocks enemies forward and up some for some good damage and weak knockback. Because Ripper Roo knocks them up if they land on a nitro square it will trigger it.

Up Tilt - Ripper Roo flips upside down and kicks up, dealing okay damage and good knockback. If used next to a TNT Crate it will kick it up in the air and trigger the countdown if it was undisturbed. The crate will lob in a sharp arc so going mostly up but landing a little bit forward too. Can reach a height of the top floating platform on triplats and can actually land on there.

Down Tilt - Ripper Roo kicks low dealing very weak damage and knockback in a fast attack that can be chained together to stunlock foes until the knockback/stun falloff pushes them out of its effectiveness so just for a few seconds. This is to trap enemies in an explosion from a TNT crate/nitro tile.

Dash Attack - Ripper Roo hurls himself forward like a Luigi Missile with a small explosion happening at his feet to propel him forward. The explosion is actually stronger than Ripper Roo's body and can deal great knockback and damage but like Rest only works if touching the enemy. Otherwise it just deals good damage and knockback and helps Ripper Roo close the gap.

Forward Smash - Ripper Roo's head grows comically large for the attack as he unleashes a barrage of bites like a rabid pit bull after the charge. At low charge it is just a combo tool with low damage/knockback but at full charge it can be a great finisher.

Up Smash - Ripper Roo dons his professor appearance and starts reading a book as he charges. When released he gets an idea and his hat is blown up off his head as a mushroom cloud explosion appears on top of his head and Ripper Roo looks mindblown. Does good damage/knockback uncharged and awesome fully charged but is mostly vertical so you know how that goes (Hero)

Down Smash - Ripper Roo starts sniffing the ground as if looking for clues and then when released he licks all over the ground around him with a comically large tongue leaving slobber on it and any one caught in the move. This deals very little knockback but some good damage and trips enemies. Also triggers nitro tiles and crates from a safe distance (his tongue is very long so this has a wide hitbox but is very low so can be jumped over)


===================== Aerials =====================

Neutral Aerial - Ripper Roo's feed rapidly move around him like the Road Runner making a hitbox that covers him and deals multiple small hits for low damage and weak knockback reminiscent of Paultena but slower as an attack making it weaker. Again can trap enemies looking to get out of explosions.

Forward Aerial - Ripper Roo picks up his hat with one foot and tips it with his toes while spinning his cane with the other foot, giving them the ol' razzle dazzle with an okay damage move that deals good knockback. Good range too for spacing and edgeguarding.

Backward Aerial - Ripper Roo farts, except it's a nitro fart with a lime green explosion that deals great knockback and damage but is slower than most moves making it a fishing tool at best. Think uncharged Ivy down smash but a lil slower.

Up Aerial - Ripper Roo jumps out of his straightjacket revealing another straightjacket underneath, his body a hitbox that deals okay damage/knockback. The range here can aid in his recovery which might be broken idk. His old straightjacket disappears in a puff of smoke and is actually a weak attack that flinches underneath.

Down Aerial - Ripper Roo stops in midair, looks down, then back at the camera and hollers as he falls dramatically fast leaving a cloud behind him that looks like him. This is a standard stall-then-fall attack and deals good damage/knockback.


===================== Throws =====================

Grab - Ripper Roo wraps his tongue around the enemy like a straightjacket.

Pummel - Ripper Roo constricts his tongue, wringing them for a couple frames like a dishcloth. Weak damage but fast.

Forward Throw - Ripper Roo spins them like a toy top, sending them spinning forward comically a good distance with some okay damage to offset.

Backward Throw - Ripper Roo suplexes them slamming them into the ground behind them and letting them fly a distance a little shorter than the forward throw but dealing more damage. Also note that this triggers crates/tiles Ripper Rool eaves down.

Up Throw - Ripper Roo lays down a TNT tile (not a crate, and not a nitro tile) on the floor and withdraws his tongue, and turns around while crouching and closing his eyes and holding his ears shut with his feet as they blast into the air with great damage and knockback but it's purely verticle.

Down Throw - Ripper Roo stuffs them into a TNT Crate for an effect similar to a bury. He can then move and the countdown starts, if they don't escape in time they take awesome damage and knockback.


===================== Final Smash =====================

Ripper Roo straps the enemy onto a raft loaded with TNT crates and sends them down the waterfall from his boss arena in Crash 1. He looks down at them and when they reach the bottom of the waterfall, the explosion sends them flying back up and past him as he looks up and laughs, then accidentally falls off and down the waterfall.


===================== Misc =====================

Taunts - Ripper Roo either takes out a book and reads it, laughs maniacally, or licks his entire body with his tongue before spinning around and retracting it.

Victorys - Ripper Roo is seen jumping around on some nitro tiles which explode and cover him in soot, or he is seen in his cart crossing the finish line for a CTR-inspired victory screen, or he is seen reading books on a desk like his Crash 2 intro.

Kirby Hat - Kirby gets Ripper Roo's straight jacket.
 

plague126

Smash Cadet
Joined
Jan 11, 2020
Messages
35
This contest has has many sets in the past that use explosions...look at last contest, for example! The short-tempered Katsuki Bakugo, the serial killer Kida Yoshikage, and Solf J Kimblee, from Fullmetal Alchemist...alchemist, you say? Well, if i recall correctly, alchemist have a saying...

The bigger the explosion...the better the alchemist.
 

redrain

Smash Rookie
Joined
Jun 29, 2020
Messages
7

Don Pinstripelli Potorotti (commonly shortened to just Pinstripe Potoroo) is a potoroo subjected to the Evolvo-Ray to be Doctor Neo Cortex's bodyguard. He is well known for wielding a Tommy Gun and laughing madly. He made his first appearance in the first Crash Bandicoot game. In Crash Bandicoot and Crash Team Racing, he is voiced by Brendan O'Brien, whereas in the N. Sane Trilogy, he is voiced by Jess Harnell. In Crash Team Racing Nitro-Fueled, however, he is voiced by Robbie Daymond.

===================== Stats =====================

Size: Snake
Weight: Robin
Run Speed: Falco
Jump Height: Mario
Fall Speed: Chrom


===================== Specials =====================

Neutral: Tommy Gun
Pinstripe Potoroo whips out his tommy gun and fires it for as long as the button is held in. The bullets deal weak damage and very weak knockback that flinches before the falloff and can chain together but because he sweeps it from side to side there are windows where the enemy can jump or shield or roll out of it without getting hit. These bullets have very long range.

Forward: Crash Team Racing
Pinstripe Potoroo gets in his cart from Crash Team Racing and drives forward. This controls just like Wario's bike but if Pinstripe Potoroo is knocked off it the cart immediately dismantles and falls apart into pieces, with his wheels rolling off, etc. These pieces can be picked up and thrown as items just like Wario's bike. Also has the same cooldown after the bike being destroyed. Pinstripe Potoroo can use his tommy gun while driving at the cost of shortened range.

Up: Barrier
A table with stacks of money on it appears out of nowhere and Pinstripe Potoroo jumps off it to recover. The table will flip over and go tumbling into the abyss. If this is used on the ground Pinstripe instead flips the table over and uses it as a barricade to crouch behind and sticks around. It covers his entire front from projectiles as long as he is crouching otherwise it only covers his lower body. This table can be pushed along with his cart. The table cracks in half from two melee attacks. Pinstripe Potoroo can only have one at a time and the other vanishes if this is used again.

Down: Bomb
Pinstripe Potoroo takes a bomb out of his pocket like his intro in CTR and holds it. It is just like one of Young Link's bombs but smaller. It deals great damage and knockback if thrown. The bomb will send overturned tables sliding forward a good distance and as a hitbox that deals good damage and knockback. If Pinstripe Potoroo drops one of these and drives over it with his cart it will boost him into the air and he can cancel it quickly to do an aerial.


===================== Normals =====================

Neutral Tilt - Pinstripe Potoroo swipes with his gun barrel once then smacks forward with the butt of the gun. First hit deals weak knockback but good damage, and the second hit is the opposite dealing weak damage but good knockback to make some breathing room.

Forward Tilt - Pinstripe Potoroo fires a wild burst from his gun but the bullets don't actually hit anyone it's the muzzle flash that is a hitbox that deals great damage and good knockback. Very quick to come out compared to his other moves with some good range.

Up Tilt - Pinstripe points his gun upwards and fires off another wild burst this one very similar to forward tilt with the muzzle flash being the hitbox again.

Down Tilt - Pinstripe flicks a cigarette onto the ground and grinds it into the dirt with his foot. The foot here is the hitbox that deals decent damage and great knockback that is quick to come out but has limited range.

Dash Attack - Pinstripe Potoroo does a shoulder barge like Ganondorf to close the distance, dealing pretty good damage and knockback to boot but some increased lag at the end making this slow to recover from but quick to start.

Forward Smash - Pinstripe Potoroo pulls his arms behind his back like he's going to swing a bat and comes back with a sack full of cash and uses it as a battering item. The cash sack is comically large for a good hitbox and deals really good damage and knockback for a KO move.

Up Smash - Pinstripe Potoroo's phone rings for the charging animation and when released he finally answers pulling his cell phone out of his jacket. A speech bubble with Cortex's angry head appears above him and starts yelling at him, actually moving out of the bubble like a cartoon and Pinstripe Potoroo cringes as he is scolded by his boss. The speech bubble and Cortex's head is the hitbox and deals multiple hits of weak damage and knockback that can be really strong when charged. Pinstripe Potoroo hangs up the phone afterwards looking disgruntled.

Down Smash - Pinstripe Potoroo crouches down with his back to the camera and starts working on something unseen. When released he reveals a bomb with a device attached to it that will blow up when in proximity to an enemy dealing good/strong knockback and damage. This move has a unique interaction with his forward special in that if he cancels it into the cart his cart will be upgraded from the tinkering which while vulnerable for a short period at the start lag is faster for this usage and when it blows up like wario's bike will deal a strong hitbox to enemies.


===================== Aerials =====================

Neutral Aerial - Pinstripe Potoroo turns and shoots at the camera making a circle of bullet holes in the "glass" which is just a hitbox around him that deals good damage and knockback then fades away.

Forward Aerial - Pinstripe Potoroo chucks a bomb that explodes on impact dealing good damage, great knockback but has short range and disappears soon after being thrown.

Backward Aerial - Pinstripe Potoroo kneels in midair somehow and fires off a concentrated burst that has great horizontal hitbox going for it. The bullets deal low damage but chain into each other and push enemies along like FLUDD.

Up Aerial - Pinstripe Potoroo takes a drum out of his gun and chucks it overhead as he reloads it with a new drum. The hitbox is weak in damage but deals some good knockback and has a sharp arc making it good for pestering enemies overhead.

Down Aerial - Pinstripe Potoroo does a WWE-style elbow drop below in a quick falling down aerial that deals good damage and spikes.


===================== Throws =====================

Grab - Pinstripe Potoroo holds the enemy with his free hand like they owe him a debt.

Pummel - Pinstripe Potoroo bashes the enemie in the face with brass knuckles for a good damage pummel that is slow.

Forward Throw - Pinstripe Potoroo kicks them in the stomach with his fancy shoes dealing awesome knockback and some good damage.

Backward Throw - Pinstripe Potoroo speed dials his goons on his phone which appear and drag the enemy away as he lights a cigarette. After a short distance they toss the enemy in an arc, dealing low damage but spacing then good knockback. If they reach a ledge before the set distance they stop immediately and chuck them.

Up Throw - Pinstripe Potoroo tosses the enemy overhead and riddles them with bullets dealing multiple small weak hits that carry the enemy up before a finishing good knockback hit.

Down Throw - Pinstripe Potoroo shoves a sack over the enemy's head before taking out a baseball bat and cracking it over their head, the bat splintering. This deals awesome damage and knockback that kind of just pops the enemy into the air letting Pinstripe Potoroo have the opportunity to set up another attack.


===================== Final Smash =====================

The scene turns to Pinstripe Potoroo's office and the enemy hides behind one of his chairs before he appears behind them, grins showing a gold tooth and the screen turns black before being riddled with bullets and the glass breaking to return to the normal fight.


===================== Misc =====================

Taunts - Pinstripe Potoroo says "Say hello to my little friend!", or Pinstripe Potoroo flashes a stack of money, or Pinstripe Potoroo lights a cigarette and smokes it.

Victorys - Pinstripe Potoroo is talking on his cell phone to Cortex who congratulates him on a mission well done, or Pinstripe Potoroo does a CTR-style racing finish in his cart, or Pinstripe Potoroo sits at his desk in his office with his feet on it counting a pile of money.

Kirby Hat - Kirby gets Pinstripe Potoroo's suit and tommy gun.
 

redrain

Smash Rookie
Joined
Jun 29, 2020
Messages
7

Dr. Nitrus Brio (N. Brio for short) is a scientist who formerly worked under Doctor Neo Cortex. Brio's loyalty has fluctuated throughout the series, working on his own accord in Crash Bandicoot 2: Cortex Strikes Back, with Doctor Nefarious Tropy in Crash Twinsanity, and even returning to Cortex's side in Crash: Mind Over Mutant. His name is a play on the word "embryo" (a fact that he himself alludes to in Crash: Mind Over Mutant).

===================== Stats =====================

Size: Min Min
Weight: Dr. Mario
Run Speed: Lucas
Jump Height: Bowser
Fall Speed: Samus


===================== Specials =====================

Neutral: Chemistry
N. Brio takes out two beakers, one filled with red liquid and the other filled with green liquid. This can be held in to change its effect or tapped to just toss out the basic potion. When the move is held N. Brio mixes the beakers together like in his boss battle in Crash 1 and when released N. Brio throws the beaker that recently had potion poured into it. The potion can be thrown to throw the current type of potion that was mixed (see below) and if canceled it will stay that way and N. Brio can continue mixing by using this again or just tap to throw the current type of potion.

Types of potions:
Red Potion: An explosive potion that deals low damage/knockback.
Orange Potion: An explosive potion that deals some better damage/knockback.
Yellow Potion: Another explosive potion that deals even better damage/knockback making it much like a charged shot.
Green Potion: A slime potion that when it breaks spawns a round green slime about half of N. Brio's size that slowly moves along the ground back and forth like a patrol. Deals knockback/damage similar to an orange potion and has to be killed by enemies before it goes away. Takes a few hits but it's fragile all things considered.
Blue Potion: A slime potion that spawns a green slime like the prior one but this slime has a face and resembles the remastered slime. This one is tougher and chases after enemies not just blindly patrolling. It deals damage/knockback similar to the yellow potion so watch out. These slimes actually splash goo when they die which hits both enemies and N. Brio if he is close and deals an attack as if they got hit by it normally.
Purple Potion: The most powerful potion and the last one. This one N. Brio will drink when he is done and turn into a Giant character for the standard time, but his Giant form in this way actually looks different than others - it looks like his monster form from his boss battle. In terms of shape it is similar to Giant Donkey Kong. While powerful this takes as long to charge as it does PAC MAN's key fruit and cannot be stored when charged, he has to use it immediately and if this is canceled he drops the beaker breaking it. N. Brio's neutral special is disabled while in monster form.

Forward: Crash Team Racing
N. Brio gets in his cart from Crash Team Racing and drives forward. This controls just like Wario's bike but if N. Brio is knocked off it the cart immediately dismantles and falls apart into pieces, with his wheels rolling off, etc. These pieces can be picked up and thrown as items just like Wario's bike. Also has the same cooldown after the bike being destroyed. Using this in monster form doesn't make the cart bigger because his legs are so tiny that they can fit into the normal-sized cart.

Up: Bird Biology
N. Brio flaps his arms like bird wings as seen in his death pose in Crash 1 for his recovery. His arms are hitboxes here and deal weak damage but okay knockback. It also doesn't catch mutch air, he's not the best at recovering.

Down: Evolve-O-Ray
N. Brio takes out a handheld ray gun that is a miniature version of the Evolve-O-Ray. He presses the button with a sci-fi beam noise and fires off a solid beam the length of a triplat platform. This has little less than half a main stage solid platform and travels in a straight line. When it hits a creature such as an enemy or a slime it will force them to evolve instead and make them Giant like his powerful potion. While you may think this is a buff this is actually a curse because their attacks don't get stronger contrary to N. Brio's purple potion and every existing Giant effect in the game. This just makes them a bigger target or in the case of the slime a bigger hitbox. This lasts for a few seconds before they return to normal.


===================== Normals =====================

Neutral Tilt - N. Brio does a single strong kick forward that deals okayt damage/knockback but is a pretty bad move overall. If he kick a slime like this it will rocket forward like a soccer ball item.

Forward Tilt - N. Brio slings the contents of a beaker forward like splashing the enemy with a glass of water. The chemical deals fire element damage and great damage with some good knockback that can hardly kill but makes space for N. Brio.

Up Tilt - N. Brio tosses a failed mixture up above his head in an arc that will have the beaker fall behind him and shatter on the ground. If tossed past the ledge it continues until it falls below the blast line making it an edgeguard move. The beaker deals great fire element damage/knockback and has good vertical coverage but is slow and has no sideways range. The beaker also leaves a puddle of the potion on the ground which disappears after a few seconds but until then is the same if stepped on as it would if it hit the enemy.

Down Tilt - N. Brio stomps his feet in frustration dealing two light hits of low damage and knockback that pop the enemy in the air to set them up for a follow-up attack.

Dash Attack - N. Brio trips on his lab coat and falls forward on his face, sending a beaker flying forward a good distance and breaking on the ground. This also leaves a puddle like up tilt. The potion deals good damage/knockback weaker than up tilt but is pretty fast to offset.

Forward Smash - N. Brio mixes together potions just like his neutral special. It looks similar so you can kind of fake opponents out with this. C-sticked forward smash is the same as just tapped neutral special. The difference is even a slightly more charged forward smash is stronger than tapped neutral special and a fully charged one is stronger than a yellow potion and is a projectile KO option. You cant store forward smash potions by canceling.

Up Smash - N. Brio holds up the gems Crash collects in his hands and they float above him in a pillar when released. The more charge the more gems appear. good to strong knockback on this but weak damage and is slow to put away although the hitbox lingers longer than most.

Down Smash - N. Brio takes out a scientific laboratory table stocked with chemicals while charging this and works on something for the animation. Whatever it is it doesnt matter because when the move is released it all blows up in N. Brio's face leaving him covered in soot. The explosion deals amazing knockback and damage to enemies though making it a good KO move but a close range one.


===================== Aerials =====================

Neutral Aerial - N. Brio takes a swallow of a potion and develops a mutation, this time porcupine quills that stick out from him in all directions and deal a single hit of good damage and knockback. The quills retract and he turns to normal.

Forward Aerial - N. Brio takes a swallow of a potion and develops a mutation, this time bird feathers which he slings forward and deal rapid hits of weak damage and flinching that total up to a good chunk of damage but just pushing knockback like FLUDD.

Backward Aerial - N. Brio takes a swallow of a potion and develops a mutation, this time a lizard tail which he does a butt shake and slams the enemy for great knockback and okay damage. Ledgeguard tool and sometimes a KO move if done right.

Up Aerial - N. Brio takes a swallow of a potion and accidentally lights his head on fire, the fire covering vertically pretty good and dealling great damage and knockback. He puts it out with another potion and grows Einstein hair that then falls out.

Down Aerial - N. Brio dumps the contents of a beaker out below him. They fall a good distance and deal poison damage that lasts for a few seconds and totals up to some good damage. Little to no knockback but stops the enemy from gaining vertical height whether from jumps or recovery.


===================== Throws =====================

Grab - N. Brio timidly holds the enemy in his grip.

Pummel - N. Brio sucker punches the enemy in the head.

Forward Throw - N. Brio pours a potion down their throat and makes their belly expand then explode sending them rocketing backwards with some decent damage.

Backward Throw - N. Brio pours a potion down their throat and turns them into a balled up armadillo which he kicks like a soccer ball knocking them in a good arc away with average damage. They turn back after the knockback.

Up Throw - N. Brio pours a potion down their throat and inflates them sending them flying up like a balloon before they deflate comically. Low damage but this throw lasts a while and they are helpless during it making them easy to set up on or buy N. Brio some time to mix neutral special.

Down Throw - N. Brio breaks a potion over their head and covers them in scalding potion which deals fire element damage and great damage and knockback.


===================== Final Smash =====================

The scene turns to N. Brio operating a giant beam gun and all 5 gems are in there, and N. Brio boots up the beam and fires it at the enemy.


===================== Misc =====================

Taunts - N. Brio tightens his screws as self-punishment, or N. Brio holds a beaker up and swishes it around while looking in it, or N. Brio laughs maniacally

Victorys - N. Brio holds up an award while standing next to a scientific invention he made, or N. Brio does a CTR-style racing finish in his cart, or N. Brio has an animal strapped to a table while he prepares the Evolve-O-Ray

Kirby Hat - Kirby gets an enlarged head and N. Brio's screws.
 

redrain

Smash Rookie
Joined
Jun 29, 2020
Messages
7


Koala Kong is a koala evolved by the Evolvo-Ray. He has a speech impediment and works more often in tasks that require pure strength. Unlike Tiny Tiger, Koala Kong shows no intellectual prowess in any task.

===================== Stats =====================

Size: Donkey Kong
Weight: Donkey Kong
Run Speed: K. Rool
Jump Height: R.O.B.
Fall Speed: Incineroar


===================== Specials =====================

Neutral: Rock Throw
Koala Kong pulls a big rock out of the ground and carries it overhead until thrown. To throw it you have to do a smash attack or a Z-smash and Koala Kong chucks it like a heavy item. It deals awesome knockback and great damage on contact but is predictable. After that it creates a pile of rubble on the stage which lingers for some time. This pile of rubble can be stood on and is a small slope or can be dropped through like a platform to drop to the normal stage level. Koala Kong can pile on more rocks onto the rubble by repeating this move and it increases the size of the pile. Once the first rubble pile vanishes after its time goes up the pile will grow smaller if multiple rubble had been piled on top of it.

Forward: Crash Team Racing
Koala Kong gets in his cart from Crash Team Racing and drives forward. This controls just like Wario's bike but if Koala Kong is knocked off it the cart immediately dismantles and falls apart into pieces, with his wheels rolling off, etc. These pieces can be picked up and thrown as items just like Wario's bike. Also has the same cooldown after the bike being destroyed. Koala Kong can drive up and down slopes he makes with rocks using his cart.

Up: Mine Cart Madness
Koala Kong jumps into a mine cart from his boss stage Donkey Kong Country-style and does a big hop before riding it forward a short distance while at the same time obeying gravity. This is kind of like a second forward special when you think about it. If used on the ground Koala Kong instead places a minecart in front of him and punches it forward sending it rolling quickly. It will run off when it gets to a ledge but until then deals great knockback and good damage to enemies it hits. If it hits an enemy it stops and turns over then vanishes. Koala Kong can throw a rock into one of these mine carts to increase its weight and the knockback/damage it deals when it hits someone and also the cart will dump the rock inside of it and create a pile on the spot. Mine Carts obey gravity so they will roll fast down slopes and if they roll up a slope they will stop at the top then roll back down. In this way Koala Kong can put one between two rock piles and it will roll back and forth as a constant attack. Koala Kong can have one mine cart at a time and it will vanish if he places another one. They do last for a long time though if no one hits it off the stage.

Down: TNT Crate
Koala Kong takes a TNT Crate out of nowhere and places it on the ground in front of him. It's smaller than the regular item crates by a little bit. Koala Kong can have one of them out at a time and if it's hit by anything other than a projectile it will explode and deal a good chunk of damage and knockback. If someone jumps or lands on the top of it they will bounce up like on PACMAN's trampoline and the crate will start flashing, one a second. After three flashes, the crate explodes with bigger knockback and damage that can easily KO. The explosion for either of these isn't that large but it can control space effectively if used right. If the timer starts, it can't be interrupted by attacks. Koala Kong can be damaged by his own explosions and if you use this again with a crate out that hasn't exploded yet or started a timer the existing crate will vanish and Koala Kong places a new one. Koala Kong can place TNT Crates in mine carts and they will detonate when the mine cart hits someone.


===================== Normals =====================

Neutral Tilt - Koala Kong does a meaty right hook for a move that does good damage and knockback. Good range too on the melee here.

Forward Tilt - Koala Kong claps in front of him for a great damage/knockback and a move that is faster than his other normals.

Up Tilt - Koala Kong flexes like a beach bodybuilder and his flexing arm above him has a huge muscle that is the hitbox. It is a little weird but deals okay damage and knocbkack. The worst move of his normals.

Down Tilt - Koala Kong pounds both sides of the ground around him with his knuckles not the side of his fist dealing decent damage and knockback and popping enemies up for a follow up hit.

Dash Attack - Koala Kong does a straight punch that has a good chance to shatter shields and deals great damage, knockback. He slides forward some distance while doing so.

Forward Smash - Koala Kong digs up a round rock and punches holes into it with his fingers then bowls it forward like an actual bowling ball with the size strength and range of the move being more the more it charged. Starts off decent but ends up a super good move. Also the bowling ball behaves nicely with the rock slopes he can make.

Up Smash - Koala Kong jumps up then comes crashing down in a move that can avoid some moves entirely. Deals awesome damage and buries enemies underneath him but the initial jump is a pretty weak move that deals some okay knockback. This will instantly flatten a rock pile and make it deal more damage and deals damage to anyone touching the pile besides Koala Kong.

Down Smash - Koala Kong flexes for the charge animation and then unleashes a spinning lariat in the style of his adversary Crash Bandicoot. Good damage and pretty good knockback with a long series of hits that leaves Koala Kong open if he misses.


===================== Aerials =====================

Neutral Aerial - Koala Kong flexes twice for a two-hit attack first in front then in back. Pretty decent damage and knockback and comes out fast for the first hit at least.

Forward Aerial - Koala Kong balls up both fists and does a spiking punch. Great damage and very satisfying to land.

Backward Aerial - Koala Kong does a backhand smack dealing great damage and decent knockback and fast for an all around great overage move when shorthopped.

Up Aerial - Koala Kong strikes a pose as if about to throw a touchdown pass and his hand he points to the air with is a hitbox that deals good damage and great knockback. It covers above and some in front of him but is slow to end leaving him vulnerable if whiffed.

Down Aerial - Koala Kong flops onto his belly crashing down at a high speed with a good spiking change and great damage. IF he lands on an enemy he bounces back up and exits the move. He has little to no control during this move so if you use offstage and miss it is a suicide KO.


===================== Throws =====================

Grab - Koala Kong grips the enemy with his freak strength.

Pummel - Koala Kong hugs them squeezing them for a normal pummel.

Forward Throw - Koala Kong grabs them by the ankles and swings them around and round before launching them a great distance with some good damage.

Backward Throw - Koala Kong suplexes them dealing awesome damage and some okay knockback that bounces them up and near him but behind him.

Up Throw - Koala Kong squeezes them and they slip up a great distance like a banana shooting out of a peel in a cartoon.

Down Throw - Koala Kong sets up a table and forces them to play arm wrestling with him. Both players have to quickly tap A to win but Koala Kong has an advantage (70:30). The loser takes some damage and gets pitfalled as the winner breaks through the table and piledrives them into the ground.


===================== Final Smash =====================

The scene changes to a bodybuilding competition and the enemy is trying to lift a massive weight on the bench. Koala Kong spots for them easily but drops the weight back down on them when they get it up, crushing them and sending them flying through the ceiling leaving a hole the shape of the character.


===================== Misc =====================

Taunts - Koala Kong does a bodybuilding flex. Koala Kong mumbles something but because he sounds like Stallone he is unintelligible. Koala Kong cracks a rock open and takes out a big diamond which he then eats like a freak.

Victorys - Koala Kong is seen mining and finds a pile of diamonds for Cortex. Koala Kong is seen in his cart crossing the finish line for a CTR-inspired victory screen. Koala Kong is seen lifting weights with a minecart loaded with boulders instead of a normal weight.

Kirby Hat - Kirby gets Koala Kong's ears and fur.
 

NeonVoid

Smash Journeyman
Joined
Dec 31, 2019
Messages
212
Cinderace - Fighter's Pass 2 (hopefully challenger pack 9, don't crucify me)
Alright, so I know it's been a while, but I have officially made improvements to the Cinderace moveset to turn this guy into a fun character, while still keeping his stereotype in the main games. In this, damage percentages and frames have been added, Court Change has been replaced with Bounce, and Cheering is a new gimmick that goes beyond in-game abilities. I knew Cinderace's personality wasn't represented enough previously, so based on his pokedex description, I figured a gimmick that revolves around cheering and determination would show who he is the most and keep his personality away from mimicking Incineroar.


As always, if you have any questions or suggestions, please me know!


Why Cinderace?

Currently, Cinderace is noted as the most popular starter Pokemon in Sword and Shield, and perhaps one of the best new Pokemon in the games. Not only that, but Cinderace has some of the cleanest animations in the game, especially his signature move, Pyro Ball. Because of that, I have been able to design a moveset which makes Cinderace original. Also, this whole evolution line has received a lot of promotion just like Greninja and Incineroar, and I see people warming up to Cinderace everyday, so I strongly believe that this guy will most likely be added in FP2 and release over other Pokemon like Rillaboom, a Grass type.


The cheer gimmick was added upon reviewing the pokedex description for Cinderace in Pokemon Shield, which says “It's skilled at both offense and defense, and it gets pumped up when cheered on.” That's when it snapped for me. When Byleth was revealed, Sakurai said that he and the team wanted to make the most out of another FE character, and sure enough, he was unique. I feel that this cheering gimmick would make Cinderace a very bright and innovative character, despite already having two Fire type starters in the game like Charizard and Incineroar.


Updates
  • Court Change was replaced with Bounce for Down Special. I contemplated having Court Change flip the stage over, but I knew that would either make Cinderace too confusing or too powerful. Luckily, Bounce is much more useful and funny if you use it wrong.
  • Blaze has been replaced with Cheering for a gimmick to represent who Cinderace is and solely for an entertaining player.
  • Damage done by moves and frame data has been added
  • Jab damage has been added
  • Down air has also been changed

As such, every character has both advantages and disadvantages, so I hope there will be a fair balance like other characters.

Jabs: Cinderace will throw out a series of fists, comes out on frame 3 and deal around 17% damage., one of the fastest jabs in the game for quick damage or for getting out of disadvantage state. This is one of the moves with laggy animations and buffering time, which could leave you vulnerable if the opponent is out of range from the jab.

Side Tilt: Cinderace will release a roundhouse kick directly in front of it. Like Greninja’s side tilt, this will start on frame 10 and does around 8% damage.

Up Tilt: Cinderace will simply hop up and use a headbutt upwards like a soccer player when they use their heads (imagine Pikachu's up grab). Comes out on frame 8 and does around 6% damage.

Down Tilt: Cinderace will do a low sweep kick on the ground. This generally has a 30% chance to trip the opponents. Comes out on frame 6 and also does around 6% damage.

Dash Attack: Cinderace will simply charge forward and slam its elbow into the opponent and push them down towards the ground (imagine the taunt that Incineroar does when he lands his dash attack). This will come out and attack on frame 8 and does around 14% damage. With the strike and elbow, this move would act as a double hit.


Neutral Aerial: Cinderace, like Mario, will release a kick in the direction he’s facing. This will come out and start attacking at frame 5 and is good for pressuring opponents, while additionally doing nearly 7% damage.

Forward Aerial: This move would run like Captain Falcons kick, where Cinderace jabs a flaming knee forward. This will come out at frame 7 and does around 16% damage.

Back Aerial: Cinderace will rotate 180* and slam the back of his foot into the opponent. This comes out on frame 11 and will deal nearly 13% damage.

Up Aerial: Once in the air, Cinderace will backflip into an uppercut kick. This will come out at frame 8 and will do about 8% damage.

Down Aerial: With this move, like other select fighters, you can spike opponents. Cinderace will stomp three feet directly below him (imagine the motion where Kirby/Meta Knight does a downward grab). Additionally, if you hit an opponent while on stage with this while they're on the ground, this will bury them. Likewise, this move comes out at frames 9, 11 and 14, with the final kick being the strongest. In order of kicks, the damage will be 4% -> 4% -> 10%, with the final kick having a meteor effect.


Forward Smash: Cinderace now has a stronger roundhouse kick, which slams forward. The hitbox will start at frame 5 and will do about 16% damage.

Down Smash: Cinderace will literally do the split and move his feet around him, covering both the front and the back. Like the most recent fighter addition, Min Min, the animations would be similar to hers, but weaker in terms of frames after the attacks are done, as it would take longer for Cinderace to get up. This comes out at frame 6 but doesn't end until frame 18, with laggy animation and buffering to follow.

Up Smash: Cinderace does a backflip and swings his feet above him. The hitbox will start in the direction Cinderace is facing and starts at frame 3, the hitbox will be directly above Cinderace at frame 6, and the hitbox will finally begin to diminish at frame 9.

Basic Grabs:. Cinderace will grab the opponent and knee them in the stomach. Starts at frame 2, usually does around 2% for the pummels.

Forward Throw: Cinderace will push the opponent in front of him and push him away using his foot (good going into a down tilt). This does around 6% in damage.

Down Throw: Cinderace will do what Greninja does for his Down B and will simply throw the opponent towards the ground. Like Greninja, this is good for transitioning into combos. This does about 10% damage, which is why many combos have an origin of down throw due to the ability to avoid buffering delays.

Back Throw: Cinderace will throw the opponent backward and give them a hard knee, which is good for a kill-confirm at the ledge if the opponent is near 100-120%. This will do extra damage and the dark-lightning screen will occur if cheering is active (more on the cheering gimmick below) and can kill most heavyweights at 80%, with lightweights being KO’d as early as 50%.

Up Throw: Cinderace will headbutt the opponent upright, kind of like how a soccer player would hit a ball with their head. This, like forward throw, also does around 6% damage.


Neutral B: Pyro Ball

The charge time would be very slow, but the Pyro Ball can bounce around the stage. Tap B for a small Pyro Ball (good for edgeguarding), does about 12%, but you can tap the button twice for a large and durable one that can bounce across the ground and off the stage, as well as do as much damage as Charizard’s Flare Blitz, which is about 28% damage.. After charging, you can press B at any time to release it (unless you get hit), so Cinderace can maneuver the ball within his feet while moving. You can even kick it behind you while offstage if you flick the joystick and press B at the right time. This move has roughly the same animation as in Sword and Shield, which includes the clean sound effects. If cheering is active, the fully-charged Pyro Ball will do a whopping 38% damage, and the dark-lightning screen will appear if contact is made. The small Pyro Ball comes out at frame 9, while the charged one comes out at frame 13. Additionally, cheering will lower the start-up time to frame 6 and frame 9 respectively. Like a Gordo from Dedede, this can be knocked around the stage, and the ball will get bigger every time Cinderace kicks it back, and the ball will disappear once it deals damage.


Side B: Iron Head

Cinderace would charge forward and slam his head into the opponent. This can be used for knockback, but could leave you vulnerable if you missed (imagine Banjo’s side B). This move comes out almost instantly and the hitbox is active at frame 3, dealing around 15% damage. If cheering is active, this move will spike an opponent upon contact if hit while offstage, as well as spike them on-stage. This move additionally goes up to 20% damage during cheering.


Up B: High Jump Kick

When recovering after being hit off stage, Cinderace will move upward like Captain Falcon, but at breakneck speed. On the ground, Cinderace will charge ahead and do a 360* spin kick and deal a good amount of damage (like Little Mac’s neutral B, but without charge time and vulnerability frames, and no laggy animations/buffering). The hitbox comes out at frame 5 and the move does 12% damage. When cheering is active, a shield break can occur, and the power goes up to 22% damage, but no difference in frames.


Down B: Bounce

This Flying type move is similar to the up special (recovery) of Fox. Cinderace will have a white gust of wind form around him, and he will move in the direction of your joystick. Like the name suggests, you can actually bounce back up in the air if you miss the opponent the first time. The only downside is you can ONLY use it while in the air. If you try using it on the ground, Cinderace will “think he can fly” and jump up, flap his arms like wings and ultimately fail by falling on to the ground. Cinderace will have the same penalty of being tripped if this move is used like so. The animation is really good if you’re looking for humor. Cinderace will begin to move in the chosen direction on frame 8, and this does as much as 18% damage. This does as much as 24% damage if the cheering gimmick is active.


Gimmick - Cheering: I figured I’d make the most out of the possibilities for Cinderace, so this is a gimmick that boosts this character's power when cheered on. There will be a bar above the player icon (kind of like the MP bar on Hero), but this will work somewhat like a limit gauge, where the power boosts will only occur when the bar is filled. Cinderace, unlike any other character, can get the crowd to cheer with almost anything stylish he does, including a combo or edgeguarding, or even a strong hit from a move like a smash attack or Pyro Ball. Even gasps will fill this gauge. When cheering is activated and in effect, the whole crowd will go crazy and cheer like in the backgrounds of the gym stadiums in the actual Sword and Shield games. Like the Smash Meter, this gauge will slowly dwindle as soon as it's active. To avoid this being too powerful and unbeatable, this will mainly affect grabs, specials and smash attacks, with tilts and aerials practically unaffected.


Also, there is a fun little easter egg with Bounce. If you constantly use Bounce on the ground, the audience will start laughing, and this will also power up Cinderace. Not good for competition, but like all characters, easter eggs are just there for fun and nothing more.

Final Smash: Gigantamax Cinderace

Cinderace will start by throwing a Pyro Ball at the opponent, dealing around 15% damage and will cut to a cinematic. This cutscene takes place at the Wyndon Stadium, and the opponent will get up, only to be met with Cinderace Gigantamaxing and kicking his strong “mind of its own” Pyro Ball towards the opponent, who is small and powerless against this giant fireball, which does about 50% damage. Cool cinematic with the size comparison between the player and Gigantamax Cinderace.


Speed & Jumps: Cinderace will maintain a low jumping distance, but can move extremely fast. While High Jump Kick is an excellent recovery option, Cinderace’s speed and jumps are somewhat on par with Little Mac.

Out of Shield (OoS) options: Great, as Cinderace has a lot of options after shield buffers and other moves, almost like Chrom & Roy.

Grab Range: Pikachu

Weight: Average

Rolls: Fast. Cinderace will leap forward into a barrel roll.

Up Taunt: Kicks the ground and kicks around a small pebble.

Side Taunt: Proudly pounds his fists up with excitement.

Down Taunt: Gets down on his knees and roars, like in Sword and Shield (more specifically the Dynamax starting animation without Dynamaxing).


Win Animation #1: Cinderace is seen doing all sorts of flips and kicking a Pyro Ball in a circular motion around him. This ends with Cinderace taking a kneel and having his foot on top of the ball like a soccer player.


Win Animation #2: Cinderace is looking around with cheering noises in the background, and Cinderace is visibly proud.


Win Animation #3: This will be unique, as you’ll get a background view of Cinderace jumping from another distant island, and he will land on his knees, skidding across the ground and leaving fire behind him.

Bonus Win Animation: If you take the last stock with a final smash, then the victory screen will pause and you'll see nothing but that giant Pyro Ball with eyes. This is like Joker, where the game can end instantly if the finishing move is a final smash.


Idle Animation: Cinderace will follow his idle animation from Sword and Shield, where he will eventually start to kick a pebble and turn it into a Pyro Ball. Cinderace will kick it over his head, and the ball will disappear. This is unique, where an opponent can actually take damage if hit by the ball.
(I know, this won’t really have any effect in competition, it’s just there as an easter egg)


Analysis: Cinderace is a highly unique fighter with quick speed, stylish combos and animations, and strong options for combo starters and kill confirms. A perfect character for entertaining players like content creators who create montages and such. Edgeguarding has been built into this character’s concept, with Pyro ball and Iron Head being great utility moves. Out of shield options give Cinderace a great deal of flexibility, and speed allows it to easily bait and punish his opponents. However, buffering and somewhat counter-productive offstage play can make competition tricky, but still interesting. Cinderace thrives in the advantage state, and the ability to go offstage with Iron Head, as well as using bair/fair can easily make Cinderace a threat to you once you’re off that stage, especially if Cinderace can read you.


Difficulty - Hard: For any player devoted to Cinderace, it will be difficult to control his mechanics, as you have a lot of risky scenarios with a high reward. Moves like Iron Head leave you vulnerable, which could end in a quick defeat if you're not careful. If you know Cinderace's combos and can time your smash attacks just right, then you might be able to quickly gain control of the final outcome of the match, regardless of how far down you are in stocks.


Fighter Classification (Hit & Run/Zoner): Depending on how you play, Cinderace can easily be used to quickly approach the opponent for close-combat attacks and get out of the opponents range just as easy, due to a small hurtbox from the front and back ends. Cinderace can also classify as a Zoner thanks to Pyro Ball. Like Pikachu’s thunder jolts, Pyro Ball is a stellar option for edgeguarding and stalling the opponent, as it can go off the screen to hit an opponent into the blast zone, as well as bouncing under the stage when necessary. A lot of moves give Cinderace quite the variety of uniqueness!


Classic Mode - Courageous Spirit!

In this route, Cinderace will take on opponents that have some relation to arrogange or determination. Cinderace's whole evolution line, as described by developers is drastic growth and character development. This path would represent a personal journey to improving for the better by working your way through overcoming arrogance from the ground up, and by beating characters that have passion and motives, as well as overcoming darkness (the boss). I want this mode to be about personal growth because that describes the evolution from Scorbunny all the way to Cinderace.

The idea here is to not include any type of items to represent Cinderace overcoming adversity. Instead, Cinderace will get his final smash when his cheering meter is filled. He can only get one final smash per round.
  • Stage 1: :ultkrool: (:pirateship:)
  • Stage 2: :ultbowser: & :ultbowserjr: (Bowser’s Castle on Paper Mario; multi-battle with two Bowser and the koopalings)
  • Stage 3: :ultryu: & :ultken: (Suzaku Castle; Free for all, stamina battle)
  • Stage 4: :ultfalcon: & :ultwiifittrainer: (2v1; Big Blue)
  • Stage 5: :ultgreninja: - Greninja gets Final Smash every 30 seconds, but starts with one (Kalos Pokemon League)
  • Stage 6: :ultincineroar: and :ultcharizard: (free for all; Wyndon Stadium)
  • Boss - Eternatus (Eternamax form): While it’s unlikely, one can dream, and this would be a cool way to add more bosses to the game for fun. Cinderace will look at Eternatus in confusion at the top of Hammerlocke tower (separate from Wyndon Stadium) and see Eternatus slowly get bigger and change into its Eternamax form. During battle, parts of Eternatus will pop in and out of the screen, and that’s when you damage it. Cinderace will be on a platform that rotates around Eternatus, surrounding it in a circular motion. After a while, Eternatus will break the platform and you’ll be wandering on chunks of debris, or even Eternatus himself. In this fight, final smash on Cinderace is disabled.

New Game Feature - Boss Blitz: Sort of like the all-star mode, Boss Blitz will allow you to go through all of the bosses in the game for prizes, including a couple of new bosses to be added in over time (Eternatus, for example).


Stage - Wyndon Stadium: This is a different stage compared to other Pokemon stages. In this stage, the players will be on a platform that moves throughout the Galar region, and this will partly work like Poke Floats did in Melee.
  • The battle will start on a midair platform made out of glass (you can't go under it), with three additional platforms above it (like Pokemon Stadium 2 with an additional platform). The stage will move around the rim of the Wyndon Stadium. You will see two Pokemon fighting down on the field, but soon, the Pokemon Dynamax. These Pokemon will be random, but mainly, new Gen 8 Pokemon will appear. The fossil Pokemon, Galarian forms, the other starters, and even some Gigantamax Pokemon will appear. While the super-sized Pokemon fight, the platform will begin to disappear and drop you on to the Dynamax Pokemon, where you can move around like Poke Floats from Melee. The players will eventually return to the platform, and the two Pokemon fighting will use Max Moves that result in a bright light covering everything but the platform you’re on.
  • When the light goes away, you’ll see that the platform is moving away from the stadium, still filled with battling and cheering. The players will continue to tour the Galar Region, and the platform will fly by all sorts of places in the region, such as the other cities and the hometown.
  • The next stop is the Wild Area, and the platform will move all around it, kind of like the Prism Tower stage, just horizontally. You’ll go through parts like the bridges and the Lake of Outrage, and you will see a bunch of Pokemon running around and living in the area.
  • After a while, the stage will approach and enter a max raid den. You enter as the raid is starting, and you'll see a random Dynamax/Gigantamax Pokemon fighting four Pokemon below. Once again, the platform will drop you onto the Pokemon, soon enough, another Pokemom from below will Dynamax, and the Pokemon will collide with each other. This will end with the raid Pokemon blowing your platform out of the den.
  • This is how the cycle goes, but you can also turn off stage hazards, and you’ll just fight on a floating platform, with one mini platform above it. This time, the Smash fighters are the attention. Dynamax Pokemon will come in, but they will fight each other and not interfere with you in any way. Occasionally, they will glance at the platform, however.
  • Obviously, no new Pokeball Pokemon will get added, but this stage will more than make up for it.
  • Additionally, stage hazards can be turned off, and you’ll just stay on the glass platforms and stay in the stadium, making this stage legal in competition.

Music Tracks
  • Battle! Wild Pokemon (Remix)
  • FInal Battle! Hop
  • Battle! Gym Leader (Remix)
  • Battle! Marnie
  • Battle! Rival Bede
  • Motostoke
  • Hammerlocke
  • Wyndon
  • Battle Tower
  • Battle! Max Raid
  • Battle! Zacian/Zamazenta
  • Eternatus Phase 1
  • Eternatus Phase 2
  • Eternatus Phase 3 (Remix)
 
Last edited:

plague126

Smash Cadet
Joined
Jan 11, 2020
Messages
35
Cinderace: I think the new changes you made help make the set seem way better! Good job! Though you missed damage percentages on Jab.

Ripper Roo, N. Brio, Pinstripe, and Koala Kong: First of all: Dang, you’re getting a lot of sets out! Good job on that! Now, as for actual stuff about the sets themselves, I think they’re good for first sets! They have some good unique moves, and they feel fitting to the character! I do like how all the moves also have some real personality to them, which is something I believe a good moveset should do. For critiques however, I think there are two things that these sets need. I’d recommend detailing the specific damage the moves do, and also try to detail more what the moves’ uses are and how they work together. Hopefully you can keep improving! Also, if you ever want some fast feedback or just a cool community: the discord for this is always open to join! It should And I personally think joining helped me improve my sets a ton!
 

redrain

Smash Rookie
Joined
Jun 29, 2020
Messages
7
Cinderace: I think the new changes you made help make the set seem way better! Good job! Though you missed damage percentages on Jab.

Ripper Roo, N. Brio, Pinstripe, and Koala Kong: First of all: Dang, you’re getting a lot of sets out! Good job on that! Now, as for actual stuff about the sets themselves, I think they’re good for first sets! They have some good unique moves, and they feel fitting to the character! I do like how all the moves also have some real personality to them, which is something I believe a good moveset should do. For critiques however, I think there are two things that these sets need. I’d recommend detailing the specific damage the moves do, and also try to detail more what the moves’ uses are and how they work together. Hopefully you can keep improving! Also, if you ever want some fast feedback or just a cool community: the discord for this is always open to join! It should And I personally think joining helped me improve my sets a ton!
Thank you for reading I glad you liked them! I have to make an account but I see if I can join the server.
 

NeonVoid

Smash Journeyman
Joined
Dec 31, 2019
Messages
212
Cinderace: I think the new changes you made help make the set seem way better! Good job! Though you missed damage percentages on Jab.

Ripper Roo, N. Brio, Pinstripe, and Koala Kong: First of all: Dang, you’re getting a lot of sets out! Good job on that! Now, as for actual stuff about the sets themselves, I think they’re good for first sets! They have some good unique moves, and they feel fitting to the character! I do like how all the moves also have some real personality to them, which is something I believe a good moveset should do. For critiques however, I think there are two things that these sets need. I’d recommend detailing the specific damage the moves do, and also try to detail more what the moves’ uses are and how they work together. Hopefully you can keep improving! Also, if you ever want some fast feedback or just a cool community: the discord for this is always open to join! It should And I personally think joining helped me improve my sets a ton!
Alright, jabs damage has been added, and I also allowed down aerial to bury opponents in certain circumstances
 

redrain

Smash Rookie
Joined
Jun 29, 2020
Messages
7


The Komodo Brothers (Japanese: コモドきょうだい/Komodo kyōdai) are genetically engineered komodo dragons from Indonesia that were created by N. Brio, known simply as Joe and Moe. Joe is the skinny one with a lot of speed who is able to spin for a long time until getting dizzy. Moe, on the other hand, may not be fast like his brother Joe, but delivers brute strength at the same time. He is also good at throwing swords.

===================== Stats =====================

Size: Piranha Plant
Weight: Lucario
Run Speed: Sheik (Joe), Ganondorf (Moe)
Jump Height: PAC MAN
Fall Speed: Wario

You control both brothers at the same time like Ice Climbers. Komodo Joe is faster than Komodo Moe and can move past his brother like you could in other Smash games so you can actually make space between them by dashing. They do not lose a stock until both Brothers are KOed but if one is KOed it doesn't respawn until the stock is lost.


===================== Specials =====================

Neutral: Sword Toss
Both Komodo Bros turn to face each other and start throwing swords in the direction of the other brother. The brothers catch the swords and continue throwing them for as long as this move is held in. The blades deal great knockback and damage knocking enemies up where they could fall back down into the blades. If the brothers are right next to each other they instead toss the blades away from each other. The blades travel about half a stage length before disappearing.

Forward: Crash Team Racing
Both Komodo Bros get in their carts from from Crash Team Racing and drives forward. This controls just like Wario's bike but if either Komodo is knocked off it the cart both immediately dismantles and falls apart into pieces, with his wheels rolling off, etc. These pieces can be picked up and thrown as items just like Wario's bike but they don't make double the cart pieces so the stage isnt flooded with items. Also has the same cooldown after the bike being destroyed. They follow at the same speed so Joe isn't faster than Moe here because he is in a kart instead of running. The cool thing here is that they turn at the same time so you can change who is in front and who is in back.

Up: Blade Whirl
Both Komodo Bros twirl their swords overhead like batons which lifts them up similar to King K. Rool's recovery. The blades deal good damage and knockback.

Down: Whirlwind
Komodo Moe reaches forward like to grab and Komodo Joe spins in place with his swords extended as a really good hitbox that lasts a while and deals some good damage and knocbkac before falling down and becoming dizzy. If Komodo Moe grabs anyone with the first part of the move including Komodo Joe he spins them too and sends them forward a good distance away from him during it. Moving while Joe is spinning will only move Moe.


===================== Normals =====================

Neutral Tilt - Joe does a 1-2 slash followed by Moe who does a single cross chop. Joe's hits are fast and weak while Moe's appearing to follow right behind Joe's is way slower but strong, dealing good damage and great knockback. Keep in mind that the brothers do their attacks separately so this is considered two different attacks just combined. This goes for all of the attacks so if a brother is far away or one is KOed imagine their part of the attack playing out separately.

Forward Tilt - Joe and Moe step forward and occupy the same space as they do a combined attack with Joe stabbing at head level and Moe stabbing at ankle level. Both attacks hit at the same time but doe to heights and jumping and crouching the outcome may be a weaker attack that knocks enemies a little forward or a strong attack that pops enemies up. Also keep in mind that Joe's parts make him recover from attacking faster so Joe will not be in lag at the end of this while Moe is making him able to move away from Moe or even start up another attack for instance Joe doing his version of the this move without Moe.

Up Tilt - Komodo Moe twirls one blade above him in a weaker attack like his up special and Komodo Joe spins around once in a weaker version of his down special. Down special-type attack here is angled a little up which makes enemies knocked up instead of to the side. He also doesn't get dizzy during it thankfully.

Down Tilt - Komodo Joe stabs a blade in the ground to the right and Komodo Moe does to the left before they take them back. This is a fast attack for Moe but not for Joe. Both deal okay damage and good knockback.

Dash Attack - Joe turns and slashes behind him and Moe throws his sword forward at Joe. If Joe catches it he spins an additional time. Joe's hit is designed to knock an enemy back towards Moe if they are caught in it. Deals good damage and okay knockback as it is not intended to KO.

Forward Smash - Komodo Brothers both charge up their swing and then toss several swords forward about half a stage's distance before it returns to them like a boomerange. The swords lay flat not vertical. Moe's sword is thrown at head level and Joe's is thrown lower than that. This is the reverse of the forward tilt. The swords can deal multiple hits that total up to massive damage and knockback when charged but uncharged are just a trapping tool. If a brother is alone they can be crouched under/jumped over.

Up Smash - The Brothers juggle their swords like circus preformers this getting faster with charge so they can juggle more swords which increases its damarge (more swords to hit with. If they are bunched up this can cover a huge space and is a great anti air move. Pretty good damage and weak knockback that is straight up so they can get multiple hits unless enemy moves out of it (DI).

Down Smash - Moe flings a bunch of swords around him leaving them sticking in the ground looking like spikes. They deal good damage and weak knockback when walked in to but if charged there can be a lot of them. They vanish when touched by an enemy but the more there are the more hits they can do (they vanish individually rather than all at once). Komodo Joe breakdances and spins with his sword in his teeth which is a very fast attack and in fact comes out before Moe's part dealing rapid hits that total together for good or amazing damage and finish with some great knockback.


===================== Aerials =====================

Neutral Aerial - Komodo Bros hold one of each other's hands and extend the other with a sword in hand around them doing a spin like a hillbilly dance. This is just a simple attack that covers their left and right side with some good damage and knockback. Individually it's an okay move but if you double team someone trapped between them you can rack up damage like a pinball machine.

Forward Aerial - The Komodo Bros throw a sword forward and each one curves but Moe's curves down and Joe's curves up. Both deal good damage and great knockback.

Backward Aerial - Both Komodos do a DK-style backwards. Deals weak damage but good knockback for some ledgeguarding.

Up Aerial - Both Komodo Bros lob a sword up and forward in a perfect arc. The sword deals great damage and knockback but is of course predictbale.

Down Aerial - Both Komodos face the screen and slam their tail down. This is a spiking hitbox that while skinnier than Ganondorf's stomp covers way more space than Ganondorf's because there's two of them. Deals pretty good damage too.


===================== Throws =====================

Grab - Both Komodos reach forward but only one can grab (if they grab two characters at the same time it's a 50/50 shot at who gets grabbed).

Pummel - Komodo bops them over the head with the hilt of their blade dealing okay damage.

Forward Throw - Komodo kicks them in the keister and sends them flying for good damage and good knockback.

Backward Throw - Komodo spins them behind for okay damage but puts good space between them.

Up Throw - Komodo throws them upwards like they're juggling a sword but follows it up with a sword slash dealing great damage and okay knockback.

Down Throw - Komodo calls over the other one and they toss the enemy to the ground and start pummeling them with their fists for absurd damage but it is very minor if there is no other brother. That's because this has to be mashed out of and is super easy with only one brother.


===================== Final Smash =====================

The scene changes to the enemy tied up in front of a dartboard and it turns to show both brothers (even if one is KOed) throwing swords at the enemy like darts. The camera is facing the brothers when a wet sound and thunk is heard and confetti pours down as the crowd cheers.


===================== Misc =====================

Taunts - Komodo Bros do a sinister pose like anime villains. Komodo Bros hold their swords to the light and they gleam off them. Komodo Moe yells and Komodo Joe looks at him with a dumbfounded expression (if one of the brothers is missing, the present one calls out for him by name.)

Victorys - The Komodo Bros sit on a throne surrounded by attractive female lizards in veils and dance attire as they lavish them. The second is a standard CTR style victory screen with both brothers crossing the finish line. And the last is the inside of a circus cannon aimed at a pile of swords, and the camera moves out to show the Komodos stuffing a panicked Crash into it.

Kirby Hat - Kirby gets their pointy hat.
 

Altais

Smash Champion
Joined
Nov 14, 2007
Messages
2,083
Location
Starbase, where no turtle has gone before.
Last time, I planned to do a move set for Miriam, Jason, and a secret WTF character, but was unable to get them done due to various offline problems. Ergo, I’ll be carrying those to this thread. I’m thinking about writing a move set for The Wonderful 101 as well; not just Wonder Red, but the entire default 7. I’ve already thought of a gimmick that would work, as well as reflect the spirit of TW101.

The reason I never commented on other sets in the past was because I didn’t yet feel I was on a high enough level to critique. Ergo, now that I have some experience under mine belt as far as writing move sets is concerned, I think I’ll try commenting on some other sets.

The place I’m currently staying at has no WiFi at the moment, though, so it’s going to be a while before I post these movesets. Here’s hoping I get them done this time.

Sent from phone.
 

BKupa666

Barnacled Boss
Moderator
Joined
Aug 12, 2008
Messages
7,788
Location
Toxic Tower
FIERCE PORK TROOPER:
Due to life busyness, I ended up starting and restarting portions of FPT a handful of times over the last few weeks to keep myself refreshed. Twas a trying reading experience for reasons that had nothing to do with the set itself, but the silver lining is, I got the chance to look back over the set a handful of times, familiarize myself with it and come away finding it a rather delightful mix of concepts overall. Piggy Nose in particular is well-designed in its combination of both situationally-fast dash speed (only when facing a target) and a passive combo-starter hitbox. It creates a sort of subversion of the stock heavyweight, where FPT almost can get away with having a handful of laggier moves among his standards because his ability to create inherent pressure on a victim can bait adverse defensive movements or reactions he can punish. I could see players getting quite creative as far as suddenly rendering it unsafe for opponents to roll behind FPT by virtue of the newfound "he always faces you" state, setting him up to land a truly devastating follow-up.

The Thunder Tower is another piece I like here, mostly for the aerial interactions and growing dead FPT could instill in cornered foes as the lightning prepares to strike. The one component to the move I'm more ambivalent on is his restriction on triggering the lightning right where he initiated the move, instead of having this be more controllable. Specifically, I worry that, in Ultimate's engine, faster opponents will just repeatedly shorthop and dash to safety, with FPT seemingly not having a ton of ways to keep up, besides darting over his with Pork Bean or throwing B-Air bombs. Then, getting more into standards, there's a good amount of competently-designed heavyweight fare. I don't know that too many individual moves "pop" as standalone writeups, moreso that their intrigue inherently jumps up as a result of interactions with the more compelling Piggy Nose and Thunder Tower.

I remember reading that you already diminished some of the self-damage figures across Thunder Tower and Pork Bean and, though I don't think they're too crippling for Piggy Nose as is, I wouldn't be opposed to just getting rid of the self-damage on the whole. From my perspective, the self-damage seems to exist as a flourish with those bombastic animations, rather than for any specific balance or playstyle reasons (charging a mechanic, for instance, or getting a new setup option based on rage) — imagine if Ganondorf or Dedede (FPT's weight comparisons) regularly took 12% for staple setups. In any case, setting those aside, grab-game and Up Special work well in setting FPT apart as a heavyweight with great grappling capabilities (beyond Smash's typical application of "use throw and then use specific aerial a lot"), and DSmash in particular boasts some hilarious characterization. The occasional villain parallels to Ness and Lucas' attacks also painted a rather convincing picture, as far as a rather in-Smash moveset I could see translated over relatively easily if MYM grabbed the reins to Smash like ten sequels down the line (and whether from you or anyone else, FPT definitely piques my interest in seeing more Earthbound sets down the road). Applause to you, and I hope FPT isn't the last heavyweight you cobble together down the road.

KOMODO BROS.:
Welcome to MYM! This isn't the first time I've said so, but I still get such a kick out of how, 12+ years since MYM's inception, the core premise of the contest series still attracts newcomers compelled to conceptualize this eclectic mix of characters. As a shorter set, I don't have that many overlong thoughts about these two Komodos, but want to commend you on a few pieces. It's clear you've got an eye and a developing knack for neat underlying mechanics, what with the different dash speeds on a duo character as a means for positioning both onstage and influencing projectile trajectories. There's also a good start to visualizing how different attacks would translate over in an actual match, rather than just on paper (an underrated MYM skill) — that FSmash swords from solo brothers can be leaped over or crouched under, for instance, or how one brother can react faster than the other with FTilt.

Your challenge in future sets now boils down to conveying a more comprehensive picture of this functionality across the set as a whole, where there are a good number of missing pieces that, depending on how they work, could influence my thoughts on the Bros. moreso. For example, how might the trajectories of their Neutral Special swords vary based on how far apart Moe and Joe are? Is Up Special literally a clone of K. Rool's helicopter pack, just with better knockback, or are there different properties to how the brothers ascend and navigate around midair? And as far as playstyle, how do the Bros. approach fighting differently together as opposed to apart (i.e. when, if ever, will they want to intentionally separate to come at opponents differently, and when doing so, how might one Komodo's solo attacks combo into the other's, even from afar)? I can't personally rank the Bros. too highly at the moment based on these and other outlying details — chief among them, specific damage percentages — but there's definite promise in here that leaves me interested in reading your other Crash sets so far, and eager to see how they serve as a jumping-off point for new works in this contest and (hopefully) future ones, too.
 

FrozenRoy

Smash Lord
Joined
Apr 26, 2007
Messages
1,261
Location
Las Vegas, Nevada
Switch FC
SW-1325-2408-7513
OOPS I WAS SUPPOSED TO DO THIS LIKE 4 DAYS AGO BUT FORGOT

Anyway we're just gonna YOLO the franchise challenge to last the rest of the contest given how much summer has drained everyone. Instead of getting to 12 sets within a certain timeframe, we'll be doing the comment bonus on the first 12 sets that qualify for the franchise challenge. This includes any sets already posted. Have fun, all!
 

BKupa666

Barnacled Boss
Moderator
Joined
Aug 12, 2008
Messages
7,788
Location
Toxic Tower

The first major boss ghost of Luigi's Mansion 3, and fifth boss ghost overall, Amadeus Wolfgeist awaits the eponymous vacuum-toting Italian on the Last Resort hotel's fourth floor. Tranquil at first, the undead conductor appears content to serenade a seemingly-empty theater indefinitely, playing a piano sonata atop his floor's so-called Great Stage. His dignified, disinterested visage gives way, however, after Luigi attempts to rescue the portrificationized Toad he's guarding. Wolfgeist's hot temper truly is lit ablaze after his barrages of theater seats and Goob mooks miss their mark, prompting him to cut his performance short and possess his own piano for enhanced musical firepower. Only by outmaneuvering and cracking open Wolfgeist's percussive fortress is Luigi able to whittle down his 450 HP and capture the wrathful wraith. With its multiple, escalating phases and arguable status as the hotel's first real challenge, Wolfgeist's fight has been heralded as a game highlight, even earning a prestigious "Best Boss Ever" designation on esteemed pop culture aggregator TV Tropes. Which, where MYM is concerned, anything listed on TV Tropes has got to be true, yes?

STATISTICS

Aerial Movement 9 / 1.271 units (8th, tied with Wario)
Size
6.5
Ground Movement 3.5 / 1.566 units (61st, tied with Bowser Jr.)
Jumps
3 (comparable to Peach)
Fall Speed
2.5 / 1.32 units (65th, tied with Luigi and Villager)
Weight
2.5 / 83 units (63rd, between Zelda and Rosalina)

Wolfgeist hovers two training stage square grids off the ground, peering around in a distinctly unimpressed manner and occasionally waving his hands around in rhythm with the background music, as if conducting it as maestro. His stature lets him dodge the lowest of low D-Tilts, like Kirby's, at the expense of being a more susceptible target for higher-hitting hitboxes than a character his size — approximately that of Yoshi, if Yoshi had no feet — otherwise would be. As a ghost, Wolfgeist controls rather airily, and left to his own devices, is lacking as far as durability goes. He'll have to turn to reinforcements if his ghoulish show is to go on.

Wolfgeist boasts an airborne movement quirk: the ability to perform a limited float. The player can hold either the first or midair jump inputs up to one second, for Wolfgeist to hover either in place or in a controllable path, folding his arms sternly to distinguish the stance from his regular aerial state. He glides around at Luigi's dash speed, able to perform aerials, before returning to his regular airborne state after the jump input is released (he also can cancel out early with a dodge). Wolfgeist is able to float into the air from onstage and then perform his (relatively unimpressive) midair jump but cannot jump again after starting his float offstage. With his float used well, Wolfgeist can turn into quite the slippery opponent, dipping in and out of enemy attack range while gaining easier access to different vantage points from which to strike. Floating also is a boon to Wolfgeist in mixing up his recovery, which given his other more predictable options in that realm, he finds quite refreshing. If an aggressive foe reads his float path or else baits him into air dodging prematurely, however, Wolfgeist likely will find his stocks polished off even more quickly than they otherwise can be.

Unless otherwise stated, KO percentages are on Mario from the middle of Final Destination.


SPECIALS

NEUTRAL SPECIAL - MAD PIANO


Wolfgeist snaps his overlong fingers for his grand piano to spawn behind him, overlapping slightly with his model, over 10 frames. Translated into Smash, Wolfgeist's piano appears in its demonic state, red eyes gleaming as it wobbles threateningly in place, turning as needed to face the nearest foe, even though Wolfgeist is not yet directly possessing it. The piano is slightly smaller than in its source material, at three training stage squares wide and 1.5 squares tall, or ever so slightly more space than crouching Dedede occupies. With no further action, the piano sits in place as a solid construct for two seconds before vanishing, unable to take knockback but with 70 HP that can be lowered over multiple successive summons. The piano becomes progressively more cracked as it sustains damage and, though it regenerates 5.8 HP per second it's off the playing field, cannot be called back out for 12 seconds after it's fully destroyed, shattering into pieces with a musical thunk. Summoned in midair, the hefty instrument will hover eerily in place for its onstage duration.

Now, onto the meat and potatoes: Wolfgeist can prime his piano as a veritable death machine by way of an overarching mechanic, herein christened Specter's Symphony. For every three successive attacks Wolfgeist lands on a character or construct (but not shield) within a four-second window, an ominous organ note will play, as he taps into the rhythm and gains access to one juiced-up piano attack. Sweetening the pot further, if Wolfgeist is prodigious enough to land six successive attacks within a seven-second window, the organ rings out with a more triumphant air, denoting the award of -three- such piano attacks. Piano moves are triggered through one among several Neutral Special inputs, which can be performed any time Wolfgeist is not in hitstun, including in the middle of other attacks, so long as the inputs do not conflict.

Piano attacks effectively serve as Wolfgeist's firepower in any given match as, while the ghostly conductor has no issue stringing together his myriad combo-oriented attacks, he's rather unfortunately lacking as far as other finishers that let him crescendo to a KO. The four-second timer effectively starts after each attack Wolfgeist uses but resets after he gains a piano move — in other words, in a situation where Wolfgeist lands one attack but cannot string together attacks two and three before four seconds are up, attacks two and three still will count toward one piano move if he can quickly land a fourth attack within four seconds of hit two. Grab and pummel do not count as attacks, though throws do. Piano moves cannot, in turn, count toward the three rhythmic attacks for additional piano moves, though slipping a piano move into the mix generally is crucial at times when Wolfgeist wants to go for broke and attempt a six-hit combo. In essence, he gambles one piano move for the chance to gain three more such moves second later — a net gain of two or three, depending on whether he exhausts a piano move before or after collecting one on his third hit. Stay tuned at this moveset's end for a broader bulletpointed index of some among the numerous imaginative strings players can attempt to earn Wolfgeist these bonus piano moves. Wolfgeist starts each new stock with one piano attack and can save up to five piano attacks at once, signified by the corresponding number next to a music note aside his HUD.

In any case, once Wolfgeist has summoned his piano, he might choose to linger around the bulky instrument, perhaps in defending it from would-be attackers. As Wolfgeist can initiate piano moves wherever he's located onstage, and with no visible animation on his part, however, he also can rush away from the instrument. This can let him better position himself to ensure foes take the piano's stronger hits, or else follow up on them with his own attacks, at the cost of leaving the instrument potentially vulnerable. Summoning the piano at all demands some level of exposure, as Wolfgeist cannot cause it to vanish again before its requisite two seconds onstage are up. A maximally-protectionist Wolfgeist player could call forth his piano only to perform its attacks, though if the player is willing to wager some of the instrument's HP, they could keep the piano around onstage before unleashing its moves — this shaves off 10 frames of startup the piano otherwise would take to spawn before attacking. After performing an attack, the piano remains onstage around an additional second before vanishing, giving Wolfgeist the same window to command it to use another attack, if he has multiple piano moves stored.

While his piano is onstage, Wolfgeist can order the instrument to feint moves — with no visible animation and without using up piano attacks — if the various Neutral Special inputs to come are input lightly as opposed to smashed. In broad strokes, this involves the piano harmlessly starting but not following through on its attack animation. Feinting can help instill fear and prompt punishable defensive maneuvers if Wolfgeist keeps his victim guessing as to when he'll throw out a piano move over the course of a match, or if he's got multiple moves saved up. As with its regular attacks, the piano remains onstage one second after a feinted move. Performing repeated feinted moves is the easiest answer if Wolfgeist for whatever reason wants to keep his piano onstage for a prolonged time, instead of summoning and re-summoning it, though as you might recall the piano only regenerates HP when not in play. An important consideration to feint spam involves foes wising up that Wolfgeist has no intention of using a legitimate piano move, especially if he has no such moves in his repertoire and rushing in to attack. That being said, perhaps he could use such a set-up as bait to get foes in range for the real deal?

Lastly, Wolfgeist is able to harness his piano as a defensive tool, too. The player can input Shield Special, while Wolfgeist is within a radius half of Final Destination's distance around his piano, for the instrument to immediately vanish and re-materialize around him. This Shield Special command also can be used for Wolfgeist to summon his piano directly around, as opposed to behind him, though he remains vulnerable in the 10 frames before it appears. His piano effectively serves as a second shield, with different pros and cons compared to his garden-variety bubble counterpart. Wolfgeist can remain inside his piano for up to 5.5 seconds — as long as an Ultimate shield can be held before shattering — before he's automatically forced out over 13 frames (2 longer than a regular shield drop). The player also can repeat Shield Special to exit early, with the piano remaining present one extra second after Wolfgeist leaves. He remains fully capable of performing piano attacks, both real and feinted, while directly possessing the instrument, able to ride along for the duration of the move or pop out early midway through with a repeated Shield Special.

With the piano's full HP intact, Wolfgeist can tank more damage before he's in defensive danger. Reforming the piano around Wolfgeist also can let him reposition it onstage to a certain extent, and potentially save it from an enemy's blows, albeit only within a certain range and while he's on the ground (as Shield Special in the air is a no-go). That being said, Wolfgeist's piano cannot roll, spot dodge or parry attacks and, if its HP is fully lowered while its master is inside, he'll pop pathetically out of its front, shield-stunned as per usual. Selective, smart use of Wolfgeist's piano shield works best as far as granting his flighty frame any longevity in a match, and helping him keep the instrument present and positioned to attack. Call the instrument over for protection too often, or while its HP is negligible, however, and a crafty foe could be prepared to greet it with a charged Smash attack.

As a footnote, for MYM purposes, Wolfgeist's piano does not count as a minion, and as such cannot be grabbed, pocketed, eaten, mind-controlled or otherwise manhandled in such a way as a more traditional summons.


NEUTRAL PIANO SPECIAL - IVORY BARRAGE


Repeating Neutral Special while Wolfgeist's piano is out, or double-tapping the input when it's not, has the instrument lean forward slightly over 10 frames before quickly spitting out a multitude of keys in a forward arc. Tapping the input prompts the piano to feint, simply leaning forward for half a second, while holding the input triggers the projectiles. The piano spits a total of 10 Pikmin-sized keys in an arc that expands from 1.5 Ganondorfs tall and 1.5 training stage squares wide to three times that as the keys disperse outward in midair. The keys by default travel at the speed of Wolf's laser, though the player can hold the input up to half a second for the piano will spit them faster, up to a maximum speed of Link's charged arrow. Depending on their speed, each key deals 4-6%, plus 3% in added shield damage apiece, and outward knockback KOing from 95-80% at the ledge. Foes caught directly in front of Wolfgeist's piano can get hit with multiple keys at once before their arc disperses, up to six or seven at a time depending on their size — it's certainly a scarier proposition moving in to attack the instrument when Wolfgeist has multiple piano moves to spare.

In any case, Wolfgeist's piano keys are an effective bread-and-butter projectile, letting him momentarily cover a significant amount of airspace to supplement damage-dealing. Common strategies can involve Wolfgeist forcing an air dodge or shield with a fired round of keys before moving in from behind to attack, or else rushing at a foe from in front of the keys, covering a range of reactions. If Wolfgeist sandwiches a foe up against his piano, he can knock a foe inward to be hit by the keys, just as they're being fired, so they're knocked back outward at him for a three-hit combo. Meanwhile, the keys' shield damage and stun renders this an effective pseudo "out of shield" option when Wolfgeist is turtling inside his piano, without him necessarily having to even leave it just yet.

It's possible to roll or air dodge through the keys with good timing, especially if they're fast moving or at their arc's outer range, though if Wolfgeist is willing to expend multiple piano moves, he can send out one or more additional key barrages to punish their maneuver. He also can send out one barrage within half of Final Destination before using Shield Special to bring the piano over to him, and peppering his victim from the other side to trap them in shield, crossing them up in the process. Multiple barrages can prove especially effective when a foe is offstage — not only can the keys' arc cover numerous high and low recovery possibilities, but Wolfgeist also can bait out an air dodge with a round of slower keys before firing off a second, faster round for the KO.


SIDE PIANO SPECIAL - SOUNDWAVE SONATA


To trigger Wolfgeist's remaining piano moves in lieu of his regular Specials, the player must perform one or two inputs of B, depending on whether or not the piano already was onstage, followed by the relevant directional Special within a five-frame window (any longer, and the instrument will proceed with Neutral Piano Special). Here, Wolfgeist's piano leans back over 12 frames before letting out a cacophonous bellow, producing a cone-shaped soundwave that doubles as a wind hitbox. Skowl has entered the chat The wind extends out four training stage squares, or about twice as far as K. Rool's blunderbuss suction, lasting for 45 frames and pushing foes back with the force of Mario's fully-charged FLUDD. Unlike Ultimate's water-based pushing moves, Wolfgeist's soundwave still will push back shielding opponents, complimenting the more offensive piano key "out of shield" option with the more defensive wind burst.

That the piano's startup animation for its soundwave closely resembles that of the keys, two extra frames aside, is great for mixing up foes intent on staying at close range and attacking while Wolfgeist is inside. Guessing wrong means getting blown back if they try spot dodging or rolling around expected keys, while shorthopping over expected wind can mean several keys to the face. Wolfgeist's piano endures 40 frames of cooldown after each soundwave, meaning even with multiple piano moves, he can't just spawn the instrument offstage and mindlessly blow foes to the blast zone. A well-timed burst still can spell doom for foes who insist on recovering low, however, while a feinted soundwave can coax high-recovering adapters right into Wolfgeist's waiting arms.

One more use of note — Wolfgeist himself is able to propel himself forward with his own soundwave. There's some calculation on his part as to spacing his own contact with the soundwave, factoring in how far away his piano and opponent are. He's pushed most strongly from point-blank range, with the wind diminishing in strength the further away he is from his instrument — meaning, if Wolfgeist would rather only travel a short distance, it behooves him to float gently into the wind's outer range, or else initiate the soundwave from inside the piano before buffering an input to exit and leap into the wind hitbox's tail end. Though disruptive, even potentially fatal if used in error, Wolfgeist can burst forward and cover substantially more distance with some attacks, catching foes at mid- to long ranges. There's also, of course, the option of faking foes out by initiating an attack as his piano feints a soundwave behind him, in turn opening the door for the third mix-up of shooting piano keys from this position.


DOWN PIANO SPECIAL - WILY WIRES
Wolfgeist's piano lid opens up and, after 15 startup frames, a mass of piano wires stretch outward, writhing angrily in a ZSS-width pillar shape. The wires reach five training stage squares upward, or slightly more than the distance from the main and top Battlefield platforms, vertically by default but with the player able to angle them up to 30 degrees diagonally to either side. If the pillar's top half touches a victim, the wires will coil ominously around them before snapping instantly backward. If the musical tendrils have passed through a drop-through platform or non-solid construct, the foe won't be pulled through, but rather will be respectively put into prone or released (taking damage and knockback if the construct had a hitbox). Otherwise, they're pulled inside Wolfgeist's piano, where they'll enter a pseudo grabbed state, from which they must mash out with 1.12 times a regular grab's escape difficulty.

While a victim is inside Wolfgeist's piano, they'll automatically take 1.5% per half second, and the player can tap B for the instrument to "chew" them with its lid, dealing a further 5% at an average pummel speed. By smashing an additional Down Special with a foe captured, the player will prompt the piano to spit them forcefully out after 15 frames (tapping the input has Wolfgeist perform his regular Down Special). This throw deals 15% and strong knockback that scales quickly to KO around 90%, vertically by default but, like the wires themselves, able to be angled up to 30 degrees diagonally to either side during startup. In a FFA, one tendril of wires can grab up to three foes simultaneously; a throw input then prompts the piano to spit out the multiple characters one at a time, ordered based on proximity to the instrument upon being grabbed, and staggered apart by 15 frames, during which the player can alter which direction each one is thrown.


As an alternative to this Special KO throw of sorts, Wolfgeist also can use his piano to force his victim into different grab release states. If the victim mashes free without Wolfgeist's piano pummeling them, they'll slide backward two training stage squares upon release, whereas they'll leap away from the piano in a short arc that lands them three squares away if they break free after getting pummeled. Either option can serve Wolfgeist well, depending on where he's positioned or what specific combo he wants to go for, though it of course does not behoove him to give up that sweet pummel damage for a grounded release unless he's sure he can land his own follow up.

Characters who escape or are thrown from the piano have a two-second, rather than one-second re-grab timer, applying both to the piano wires and Wolfgeist's own grab. He can't casually stand outside his piano to catch the victim and throw them right back at the instrument. Still, the wires' combination of speed, range and damage makes landing against Wolfgeist a frightening proposition, especially when he can feint this Special grab to bait an adverse air dodge before going for the real thing. Most characters can stand or duck under the wires on the ground, though if they're angled the maximum amount to the side, they still can snag some taller combatants. The wires linger in place, active, as long as Samus' tether before retracting over 45 frames if they fail to grab anything. This longevity can work for or against Wolfgeist — he can angle the wires diagonally to catch a foe falling with an aerial or in helpless, but because the wires' hitbox does not extend to their base, a foe who evades them has a clear opening to rush in and put a dent in the piano's HP.

A few more tricks worth discussing with Down Piano Special — though Wolfgeist cannot initiate other piano moves once the instrument has snagged prey, he can buffer them while the piano is throwing or undergoing its grab release animation. Both piano keys and soundwaves can situationally serve as effective follow-ups from either grab release animation, pelting or blowing back a shielding grounded foe or catching an aerial one's landing unless they react quickly. He also can buffer a Shield Special right after the foe is out of the instrument to put it at a better vantage point for a subsequent piano move. If Wolfgeist's piano grabs a foe while he's inside the instrument, a throw results in him being spat harmlessly out alongside his (first) victim at the same launch trajectory (obviously stopping short of being KOed if their launch is sufficient to do so). Wolfgeist can't immediately act upon being spit but regains mobility with a three-frame advantage over his victim. Given that he can both buffer another piano move and act out of this thrown state, most often with an aerial, the right preparation can let Wolfgeist land multiple follow-up hits. If he's too slow on the uptake, however, a foe can turn the tables on him, potentially fatally so if the throw takes both characters too close to a blast zone.

And, whether he's feinting or using the grab for real, Wolfgeist's piano can catch and store solid projectiles (the grab itself also can pull in solid constructs or minions). Then, the next time Wolfgeist uses either variant, the piano will spit out its contents, with the projectiles all retaining their original trajectories. Using feints can serve as a helpful way for Wolfgeist to reposition some of his remaining constructs, some of which can threaten foes with horizontal hitbox coverage as a real wire grab threatens them vertically. Timed right, a released construct even could launch a foe up to be grabbed by the lingering tendrils! Just don't hoard your construct collection too greedily, as all will disappear along with the piano if it ends up being destroyed.


UP PIANO SPECIAL - PERCUSSIVE PLUNGE


Wolfgeist's piano hunkers down momentarily, for 30 frames, before leaping off the screentop with an instrumental roar. The piano travels vertically at twice Sonic's dash speed, dealing 7% and below-average set knockback to foes it strikes as it ascends. It travels straight up by default, though the player can angle their input for the instrument to ascend very slightly diagonally to either side, at an 80-degree angle. After a time, the piano then plummets downward at the same pace, keyboard-first, passing through drop-through platforms to simultaneously crush and chomp foes. This deals a rather devastating 28%, dealing diagonal knockback KOing around 65% and instantly shattering shields regardless of size, all of which is made all the more terrifying for foes given the piano's sizable hitbox. The instrument also creates a small ring-shaped shockwave upon landing, two training stage grids tall and expanding three squares to either side over a second and a half. The wave deals a minute 4% and stun comparable to ZSS' half-charged paralyzer.

When, precisely, the piano will drop is largely up to its master. If the player simply performs the piano move input and nothing more, the piano will pause for 60 frames after disappearing off the screentop before falling straight back down, or — with a diagonal input — around one to two squares from where it leaped up, depending on how close to the top blast zone it already was. The player also can hold the input up to 60 frames after the piano leaves the screentop to stagger its fall, with each 20 frames adding another two seconds to the instrument's airtime (in other words, up to a seven-second maximum). What's more, if the player holds down B, the offscreen piano will follow Wolfgeist around, levitating side to side to hone in on his current position around Ganondorf's dash speed if necessary. Releasing B causes the piano to pause in place again, giving Wolfgeist a means for repositioning where it will drop to some degree. Of course, he doesn't have too long, as the instrument's offscreen timer still ticks down as the instrument moves, and he functionally cannot use his other regular Specials as the player holds B.

The fear factor of an offscreen piano, already rather high for opponents on account of not knowing whether it's a stationary falling trap or honing in on Wolfgeist, is exacerbated by his feint option. A fakeout Up Piano Special has the instrument leap off the screentop as usual, being the one feinted move to still deal damage as the instrument ascends. This time, however, it won't fall back down, instead effectively vanishing offscreen, though the requisite two-second timer remains in effect (for re-summoning and HP regenerating purposes). Of course, foes will be none the wiser — a music note signifying the regular move only vanishes from Wolfgeist's HUD after the piano falls back down — which can serve to deter enemy shields or encourage defensive twitchiness in situations where, at least for a few seconds, they believe the piano could collapse upon them. From a more defensive standpoint, Wolfgeist also can feint Up Piano Special to send the instrument away, for example, if he's summoned it in error and wants to minimize its vulnerability. This isn't foolproof, however, as foes still can rush in and damage the instrument during its long startup or with a quick aerial as it ascends.

Some more miscellaneous background to close out this section-length Special: Wolfgeist can prompt his piano to leap up while he's inside it with Shield Special, though regardless of input shenanigans, the instrument only can pause offscreen for one second before plummeting, deterring stalling. With great timing, the player can double-tap Shield Special as the piano is falling, giving Wolfgeist a near-instantaneous means for essentially teleporting into the air. Threatening as it may be offstage, as Wolfgeist works to combo foes in its direction or waylay them underneath, the piano's fast descent speed means a careful foe can time an air dodge for the instrument to pass right through them. The instrument also will remain stationary for a second and a half after landing, until its shockwave vanishes, restricting Wolfgeist from just spamming the leap with multiple piano moves. The player can continue to hold B for the offscreen piano to continue honing in on Wolfgeist after he's grabbed a victim, though its levitation slows down to half Ganondorf's dash speed so as to not make its master's job too easy. And, as for another devious strategy, Up Piano Special is a helpful move to throw out if Wolfgeist is in imminent danger of being knocked offstage. It costs a piano move, of course, but the threat of Wolfgeist calling the offscreen piano over to him as he recovers is an effective deterrent for would-be gimpers, who will almost certainly be KOed if the piano falls down on them offstage near a side blast zone.


DOWN SPECIAL - SYMPHONIC SPOTLIGHT
Wolfgeist spins around in place with increasing fervor as an electric crackling noise — comparable to that of Luigi's own flashlight — intensifies. He can remain in this charging state for up to 90 frames, able to cancel out with a defensive input after 15 frames but not power up the ensuing move any further. Upon a second Down Special input, he lets out an arrogant chuckle as a cone-shaped spotlight flashes around him over 8 frames, shining down 20 training stage squares from the screentop (sufficient to reach the main stage from the top blast zones of Battlefield and Final Destination, albeit without infinite vertical range). By default, the spotlight centers around Wolfgeist, though if the player angles the second input, they can call it down directly in front of or behind him as well. The spotlight's upper half is a consistent one square wide, while the coverage area for its bottom half expands a varying amount, based on charge. Thirty frames or fewer has the spotlight grow to two squares wide at its furthest reach, up to a maximum three-and-a-half-square width at full charge. Power-up time also extends the spotlight's time onstage, from a 1.5-second minimum up to five seconds.

In terms of function, the spotlight operates as both an offensive and defensive tool for Wolfgeist. Foes within the spotlight's coverage area at the moment it shines onto the stage take 3% and are stunned briefly in place, as though struck by ZSS' paralyzer at three-quarters charge (entering their dizzy state on the ground while hovering momentarily in midair). They'll also take a flinchless 1% per second they remain under the beam's glare. Like a piano move, this flash does not count as one of the three combo hits under Specter's Symphony. With smart timing and placement, however, Wolfgeist can weave his spotlight in between attacks to significantly boost his odds of extending the combo at hand. The spotlight also can be used in initiating combos, for example, if Wolfgeist shines it down against overly aggressive foes approaching him, or behind him to call out a close-range roll. And, of course, it's a handy tool to have on hand for when Wolfgeist is ready to KO. As one premier example, Wolfgeist may line up the spotlight's stunning hitbox with the timing and placement of his falling piano to really squash the poor soul underneath. Used offstage, the spotlight reaches down about two vertical training stage squares, not enough to snag foes who recover low but sufficient to cover the ledge, meaning a calculating Wolfgeist player can go for a two-hit two-frame set-up. The light's stun also can freeze foes just long enough for Wolfgeist to land one of his stronger hits, an especially scary prospect for midair foes attempting to land, now stuck in range of piano wires or its drop-down plummet.


The spotlight's perks don't stop there. If Wolfgeist is struck with an enemy attack while under the beam, he'll perform a quick bow, automatically parrying it in an exaggerated display of showmanship. What's more, if Wolfgeist strikes a foe underneath his beam, they'll take 1.33 times the regular amount of hitstun from that move. Wolfgeist only can auto-parry and increase hitstun of one attack each per Down Special (with the functions thankfully still applying to all hits of multi-hit moves). Even still, this parry-hitstun combo can really widen the aperture of potential combos Wolfgeist can attempt. The hitstun gives him great odds of being able to string at least two attacks together upon a successful close-range parry under the spotlight — a defensive maneuver he's also here able to perform in midair, rather than just on the ground out of shield.

Intricate little games of chicken can ensue when Wolfgeist is playing neutral against a foe who's aware he's got the spotlight primed and ready to shine. He can go the aggressive route, gliding into a foe's face and calling down the spotlight to try baiting them into triggering the auto-parry, or else flash and punish foes mindlessly button-mashing to whale on him. The auto-parry also can come in handy when Wolfgeist has stunned a foe under the initial flash, generally discouraging them from responding with a get-off-me attack in lieu of a more punishable defensive option. That being said, a crafty foe could catch Wolfgeist off-guard with a quick combo starter attack, looking to bait out his spotlight, before either going for a safe grab or wasting his auto-parry with a sufficiently disjointed attack (something they also can do with a projectile if he's turtling underneath the spotlight from afar).

Given the commitment and vulnerability required to charge a spotlight, Wolfgeist won't want to use the option frivolously. That being said, its potentially broad coverage area serves as a helpful stage control tool in a number of circumstances. In advantage, Wolfgeist can pressure a foe toward a spotlight, potentially keeping the upper hand for longer with one attack's worth of enhanced hitstun while forcing his victim to react with deliberation to get around the auto-parry. The spotlight also can prolong Wolfgeist's longevity per stock. Called down offstage, Wolfgeist's spotlight auto-parry can save him from a gimping attempt, even letting him turn the tables on occasion (for example, if his piano is nearby and ready to send out keys or a soundwave). More situationally, if Wolfgeist is using Shield Special to reposition his piano when it's at low HP, he can park his spotlight in front of the instrument. Then, if the foe shatters the piano, he'll fall into his dizzy state within the spotlight, forcing foes to expend precious punishment time getting around the auto-parry (whether by waiting for the light to vanish before attacking or walking against the stunned Wolfgeist to push him out).


SIDE SPECIAL - BALEFUL BALLERINA


Wolfgeist gestures before him with one hand, prompting a ballerina-costumed Goob — essentially the "Goomba" of Luigi's Mansion 3 — to spawn in front of him. The Olimar-sized ghost spins in place as it fades into being over 27 frames, with its master regaining control 12 frames in. Once active, the Goob begins pirouetting across the stage, bursting forward two training stage squares with a spin once per second. The minion's 20-frame spin has an initial stronger hitbox for the first five frames, dealing 9% and backward knockback that can KO upward of 160%, with the remainder of the animation dealing 4% and a moment of flinch. The whimsical Goob spins in the direction of the nearest opponent, though not too precisely; if passed by, the ghost performs two more spins before turning around to continue its pursuit, unless it reaches a ledge first. If summoned in midair, the Goob isn't deterred by its lack of solid ground as it pirouettes forward from where it was summoned, a little more unrestrained on account of the lack of midair ledges. Wolfgeist may have one Goob onstage at a time, with his summons lasting until its 30 HP is depleted, 20 seconds pass or he loses a stock. In the former two scenarios, he must wait five seconds before calling his Goob back for an encore.


Though the Goob's attacks do count as combo hits for Specter's Symphony, its individual spins won't reliably combo together on account of the pause between them. The ghost takes damage but does not flinch from attacks dealing fewer than 55 knockback units, or the knockback Olimar takes at 55% from Mario's F-Tilt — foes without quick attacks that rise to that threshold still can perform a defensive maneuver to avoiding being trapped in multiple spins at close range. Struck with that force, however, the Goob loses control, spinning blurrily backward like a top from where it was struck. For the next two seconds, the ghost moves at Ness' dash speed, dealing 15%, plus 10% in extra shield damage, and below-average vertical set knockback to any character it strikes (including Wolfgeist), forcing them into their tumbling state in a manner not dissimilar to the Mii Swordfighter's gale.

Wolfgeist is fully capable of attacking his own minion, which can have several applications. If a foe is stalling or camping...err, "zoning" against Wolfgeist to prevent him from building Specter's Symphony, he can call forward a Goob to abuse with consecutive hits for a piano move. If, during the ghost's spawn period, the foe wants to stop this, they'll have to be careful in approaching, as Wolfgeist can pick and choose when to use a stronger attack and send the ghost whirling on a collision course.

He and his opponent can bat a Goob back and forth as long as its HP holds out, though the ghost does not build momentum as it pinballs. Wolfgeist tends to be better positioned in these mini-tennis matches, as he'll contribute hits toward piano moves both in attacking his Goob and if the ghost itself spins into a victim, in which case their stun sets him up nicely to follow up with that crucial third strike. If things get out of Wolfgeist's control, he also can float out of the Goob's range or shine his spotlight down for a guaranteed parry and return hit. In terms of miscellaneous properties, a whirling Goob will cross up shields, which can spell trouble for foes holding that input too close to ledges, where the ghost will turn around and whittle down their shield with two successive hits. And, for better or worse, a midair Goob will disappear off the side blast zone if sent spinning in close enough proximity, potentially stymying some linear recovery efforts as it goes.

Left to their own devices, a Goob can function as a hybrid combo starter and extender. With good timing, Wolfgeist can knock a foe into a Goob as it pirouettes toward or above him, or lurk close behind the minion as it approaches a victim. Under this latter gameplan, Wolfgeist has mix-ups in terms of whether he tries pressuring his foe into the Goob's light spin or launching the ghost into them, though he'll want to build in enough breathing room to react if the foe lands that launching hit first. Even by its lonesome, a pirouetting Goob can prove dangerous, holding a foe in place just long enough for Wolfgeist to land something truly damaging, like a piano move. Foes can work around the comedic minion easily enough, though they can find themselves deterred from throwing attacks out willy-nilly if they don't want to serve Wolfgeist up a spinning Goob to harness. Whether spinning of their own volition or uncontrollably, Goobs will pass through Wolfgeist when he's holding a grab victim, dealing their damage — and piano move hit — without breaking their maestro's grip in a manner similar to Dedede's Gordos.

Speaking of grabs, Goob is one such construct Wolfgeist's piano is able to snatch, either via snagging the ghost with Down Special wires or coming in contact with it while feinting. This command grab can be an effective way for Wolfgeist to reposition the same Goob from air to ground, or vice versa (potentially saving it from drifting too far offstage, too). Upon a repeated Down Piano Special, feinted or real, the Goob is spat out the piano's side, taking no damage but entering its whirling state nonetheless. As suggested earlier, this can prove rather dangerous at close range, as, if Wolfgeist's piano wires are angled diagonally, the ghost can launch them right up into their clutches. Even with the special feinted, Wolfgeist can find openings for a legitimate piano move if his whirling Goob is successful in baiting out his enemy's shield.


UP SPECIAL - LOVELY MUSIC SHEETS
Wolfgeist hunkers down, charging while levitating in place, before a thin stream of wind appears underneath to blow him, and an assortment of animate music sheets, vertically upward. The mad pianist can power his recovery up to a second to boost his distance traveled, from what effectively is a third jump when the input is tapped up to three Ganondorfs, after which he enters helpless. This charge also dictates the force of Wolfgeist's wind and the number of music sheets along for the ride. One training stage square thick, the wind relatively harmlessly pops foes up a short distance with no charge, a bit like Hero's Up Special, while at full charge pushing them forcefully into the skies with the force of Mario's maximally-charged FLUDD. Each music sheet, meanwhile, deals 2% and brief stun to foes caught in the updraft, with Wolfgeist able to send up between three and nine sheets depending on charge (all sheets under a single Up Special count as one hit for the sake of Specter's Symphony).

While on solid ground, Wolfgeist is able to cancel out of his Up Special charge to convert the wind stream into a trap of sorts. Upon doing so, he'll leave a training stage square-wide patch of mist on the ground that, when walked over by any character or construct, will trigger the wind, a bit like Isabelle's rocket. The released wind doesn't last long, only about 18 frames, but still can help put some much-needed distance between Wolfgeist and his opponent. Keeping in line with the regular move's GTFO properties, Wolfgeist can move over to trigger his own wind stream if he needs to make a quick escape, or wants to send up both himself and a foe in close quarters to disorient the latter. Foes can carefully walk up to a mist patch and shield to safely get rid of the wind, at the cost of giving Wolfgeist an opening to pressure them. He can have just one mist patch onstage at a time, with it vanishing early the next time he inputs Up Special, and automatically after nine seconds.

Whether the mist is placed underneath a spotlight or lit up underneath one, the wind stream can take on Down Special's enhanced hitstun, causing caught foes to linger a moment longer at the stream's apex amid the music sheets' hits. This can put foes in an even more perilous spot when it comes to dodging Wolfgeist's Down or Up Piano Specials, both of which are highly tempting against a target attempting to land. Down Piano Special also can catch the wind stream and sheets if they come in contact with the wires or the instrument mid-feint, letting Wolfgeist effectively have a second stream in play. A repeat use then will prompt the stream to emerge from the piano, blowing foes close to its lid up into the wires, or simply into position for the piano to strike them as it leaps offscreen. Of note, the stream doesn't reach high enough for the sheets to result in top blast zone KOs, even from the top platforms on legal stages. It can be another story, though, if Wolfgeist leaps up and summons the piano in midair against a higher-up opponent past a certain damage threshold.

The wind stream's short duration keeps it from being a persistent pushing force akin to Wolfgeist's Side Piano Special. That being said, the wind stream can be put to some of the same uses, or even used in tandem with the piano's soundwave for some movement shenanigans. A vertical wind stream could push Wolfgeist up into a horizontal soundwave from his instrument as it sits on a platform or in midair. This could be timed (or feinted) so as to let him vary his trajectory as he boosts up and then out at foes, say, with a lingering aerial or two. The inverse also can be valuable, as a soundwave pushes Wolfgeist forward into a mist patch while attacking on the ground or during a laggy move's cooldown. That way, the stream pushes him up and out of the way of any retaliatory enemy hits, canceling him out of his grounded animation and putting him into position to punish.

Both interactions also carry over to Goobs, which can trigger mist patches and be blown between the wind hitboxes whether they're pirouetting normally or uncontrollably. The ghosts retain their hitboxes as they're pushed around, and resume regular movement upon exiting the wind. Sending a Goob over a wind stream can neatly let Wolfgeist threaten foes from down below while repositioning the minion in the air in one fell swoop. One more situational possibility to close this section out — with a wind stream pushing his opponent upward, Wolfgeist can have his piano feint a soundwave, perhaps baiting them into punishable DI in anticipation of being blown horizontally.


GRAB-GAME

GRAB - MUSICAL PULL


Wolfgeist takes on a (more) malevolent expression as he stretches his arms out, gradually extending them in the hopes of bringing a victim into his clutches. He's got a rather unsettling 22 frames of startup here, as he wiggles his fingers momentarily before reaching out over 62 frames; for a comparison, Min Min's grab comes out on frame 18, and lasts 56 frames. That being said, Wolfgeist can reach a pinch further than the ramen aficionado, at five training stage squares, rather than four (and up to five-and-a-half squares from a pivot or dash grab, at the cost of a few more end lag frames on whiff). The player also is able to angle Wolfgeist's arms diagonally up or down during his startup, letting him pull foes out of midair when spaced properly or reach down from a platform at his target. When Wolfgeist's arms are angled down anywhere other than at a ledge, his hands will begin angling upward from the point where they touched solid ground, giving him grab coverage between that of his regular and upward-angled versions.

Should Wolfgeist catch a foe, he won't just reel them in, as is the standard for such extend-a-grabs. Rather, he'll simultaneously pull his victim to him as he pulls himself to his victim, gripping them in a throttling stance after the two parties meet in the middle. Where, specifically, Wolfgeist comes to hold his target depends on how the player has angled his grab. If he's grabbed a foe out of midair, Wolfgeist actually will pull himself into midair and hover a short distance off the ground until he throws his victim or they break free (up to 2.75 squares above ground if he snatches a foe at maximum range from an up-angled dash grab).

Wolfgeist's ability to micro-position himself upon a successful grab puts another mobility option in his toolkit, and supplements his existing options on that front to boot. He can transition right from throwing a foe in midair to buffered hovering after them, for example, especially if the midpoint between characters fell underneath his hitstun-boosting spotlight. Moving around mid-grab also can serve to pull and hold a character below where Wolfgeist's piano is going to fall, or else prompt the offscreen instrument to hone in on him from behind — both helpful setups for polishing off an enemy's stock.

Wolfgeist will reach through a good number of non-solid objects when grabbing. If he spaces grab against a foe from opposite an object in his own kit — slow-moving piano keys or Goobs — he'll pull the victim into the object, upon which they'll take its damage as the grab is broken apart early. Though Wolfgeist won't get to perform a throw, he has virtually no lag as his grab ends. This effectively transforms the middle object into a combo starter, as he's free to swoop in and attack while the victim endures its hitstun — an efficient way to land at least two contributing hits toward a piano move. What's more, if Wolfgeist lands his grab opposite an Up Special mist patch, his pulled-in victim can find themselves blown up into dangerous air space (perhaps into a piano's waiting wires, so long as their regrab timer has expired), taking some extra damage from the music sheets as they go. Depending on his spacing, Wolfgeist will pull himself through his own middle object before it impacts his grab victim, often leaving them to be hit mid-grab for extra damage — or, if it's a mist patch, blowing him skyward for a new vantage point against his freshly-released victim. While on this subject, Wolfgeist will not physically drag victims through drop-through platforms, but will pull them into prone on such platforms and cancel out of grab if he successfully lands it from underneath.

Wolfgeist can poke his arms through opponents' non-solid constructs, too. Characters pulled in first won't take damage from their own constructs but will enter their grab-release animation as Wolfgeist's grab is interrupted. Which, when you consider Wolfgeist retains his quick first actionable frame from pulling victims into his own objects, lets him better follow up on foes at higher damage — their grab-release animation keeps them relatively stationary, compared to a Goob or piano keys knocking them out of reach. If Wolfgeist pulls himself first into an enemy construct, he'll take its damage, with the hitbox's strength determining whether he's knocked out of his grab (doing so requires the same force one character needs to interrupt another when they're grabbing a third). In skillful hands, Wolfgeist can leverage his grab range to reach past and pull himself through some weaker enemy projectiles at mid-range. Given the featherweight maestro's vulnerability if he misses, however, it's not advisable for him to lean too excessively on this as an approaching tactic.


PUMMEL - STRANGLE
Wolfgeist wrings his grab victim's neck or neck equivalent, dealing 1% at an above-average rate. Though Wolfgeist does not mind some degree of stale moves, in terms of comboing more easily with his standards, he'll generally want to throw in a few pummels for the sake of being able to use a few piano moves, namely Neutral and Down Piano Specials, over the course of a match without diluting their KO power for later on. Wolfgeist's victim will be grab-released in a short arc, rather than along the ground, if he's pulled them into an aerial grab stance. One situation where this can come in handy is at the ledge. There, Wolfgeist can scoop up a foe recovering low and, instead of throwing them, release them up at a prime angle for gimping with an aerial. If desired, he also can use Side Piano Special's wind hitbox to escort him and his victim along the stage as he continues pummeling, further affecting where the actual grab-release takes place. As a reminder, Wolfgeist's pummels will not count toward his piano moves. Even still, with practice he can wield grab-release trajectories to set himself up for a beneficial string, perhaps trading the piano move-contributing hit from a throw for a greater likelihood of comboing into an external element, like a returning Goob or a wind stream's music sheets.

FORWARD THROW - A-FLICK-TION
Wolfgeist holds his foe in one hand, placing the other at their back in an 'o' shape before flicking them forcefully forward. The gesture deals 7% and by default sends foes at a low horizontal angle that won't KO until obscene percentages but, unless teched, will leave them in prone about a platform's length away. During the momentary startup, the player also can angle Wolfgeist's flick diagonally up or down, respectively popping his victim a short ways into the air or bouncing them untechably against the ground in front of him. The precise positioning of his foe will depend on whether Wolfgeist initiated the throw from onstage or from varying distances above the stage. Flicking a foe upward while in midair gives Wolfgeist the option to fastfall downward and try pressuring them as they attempt to land, while flicking them downward from a sufficient enough height will keep Wolfgeist above them, able to descend with a quick aerial.

Generally speaking, F-Throw is a versatile tool for repositioning a victim and setting up 50/50 scenarios, depending on how his opponent jumps or air dodges out of the angled flick variants. A jumping foe could find themselves greeted by a barrage of piano keys, for instance, while a careless air dodge could result in them getting caught under a sudden spotlight. Speaking of which, F-Throw tends to be Wolfgeist's go-to throw while under the bright lights, as the added hitstun renders him able to pull off some bread-and-butter combos on foes with higher damage levels than he otherwise would.

When most foes are at 0%, Wolfgeist can string together F-Throw into dash attack as a true combo; unless his victim reacts quickly, F-Throw also can flow into jab, F-Tilt or shorthopped F-Air if Wolfgeist dashes forward a smidge first. Beyond 20-25%, however, all but the heaviest characters will end up just out of reach for these options to work, unless Wolfgeist puts them back on the table with his spotlight. One more situational option where F-Throw is concerned — if Wolfgeist triggers Side Piano Special behind him mid-F-Throw, he'll complete his flicking animation before the instrument's soundwave boosts him forward, putting him right up against his victim as they exit hitstun. From there, Wolfgeist generally can perform at least one or two aerials while pushing up against his victim with momentum (a boon for several aerials that carry sweetspots or multiple hits), though he'll have to act quickly, lest his airborne foe strike back first.


BACK THROW - SO LONG, GAY BOWSER!
Wolfgeist puts his unique anatomy to use in performing his own variant of the (potentially problematic, recently-datamined) plumber throw, stretching his arms out as he spins his victim around once before releasing them with momentum behind him. The toss deals 9% and diagonal knockback capable of KOing at higher damage levels, around 120% at the ledge. The base damage here is lower than Mario's counterpart throw (11%), though Wolfgeist can compound his output here with help from his constructs.

By default, Wolfgeist holds his victim one training stage square away as they're spun in three steps, first behind him, then in front of him, before they're released behind him once again. During either or both of these first two steps, the player can tap or smash the control stick for Wolfgeist to stretch his arms further, holding his victim two to three training stage squares away mid-spin instead. This doesn't affect the throw's damage or knockback but does enable Wolfgeist to tack on extra damage, as he reaches his arms out the right length to sling his victim into Goobs, piano keys or music sheets to either side. If Wolfgeist manages to land a grab while in between two such constructs, he can secure himself a guaranteed piano move, as each construct his victim hits mid-B-Throw will count as a contributing move without knocking them out of his grasp.

Stronger external attacks still can launch foes out of B-Throw as Wolfgeist is performing it — a helpful feature in case he's able to sling them underneath his piano as it falls from Up Piano Special. The instrument's soundwaves also can push Wolfgeist and his spinning foe a short ways across the stage. If he's pushed into his own Up Special mist patch early enough in his B-Throw animation (or if a Goob triggers the patch underneath him on a platform), Wolfgeist and his foe will be boosted upward. This can let him perform the finishing toss higher off the ground, and potentially closer to the blast zone.


DOWN THROW - HAUNT
Wolfgeist turns to hover behind his victim, gripping them by the shoulders and shoving them roughly to the ground, before poofing away with a dark chuckle. The shove deals 3%, bouncing his foe untechably off the ground and into the air a sufficiently short distance that they're left to either tech, roll or fall into prone. After disappearing, the Wolfgeist player has one second to time and position his reappearance, upon which he'll poof suddenly back with a bellow, enveloped in flames and face contorted with rage. Foes who make contact at point blank range suffer 15% and vertical knockback capable of KOing around 105% — his strongest throw, and one of his most powerful non-piano moves in general. Wolfgeist will reappear in place with an input of A, covering his victim if they remain stationary, while tapping the control stick to either side has him reappear a training stage square in that direction (though he won't hover off ledges to do so). With no input, he'll reappear in place after the full second has passed.

Where and when to poof Wolfgeist back often will turn into a game of conditioning and punishing opponents, not dissimilar from repeated uses of Ganondorf's Flame Choke. Poofing to either side will cover enemy rolls, while poofing in place covers foes that do nothing or simply stand up in place. The victim is capable of smacking Wolfgeist out of his reappearance with a getup attack, which in turn creates a game of chicken within the game of chicken. They could attack right away, in which case Wolfgeist could wait it out and then poof into being right around them, or wait until nearly a full second has passed before attacking, fending off Wolfgeist if he's slow to return but leaving themselves open to him poofing back earlier, as soon as their invincibility frames wear off. Wolfgeist's reappearance deals an additional 10% to shields if he's waited until his victim has stood up and done so, though this isn't safe at point-blank range, where the foe can grab or do a quick aerial before he can react. That being said, Wolfgeist can bail himself out both from such a retaliatory hit or a getup attack via his spotlight's auto-parry feature, giving himself an opening to strike back in return.

Used to its fullest potential, Wolfgeist can use outside constructs to help reduce his opponent's getup options, and increase his odds of reappearing around them — say, by planting a mist patch to one side to keep his foe from rolling that way. That being said, sometimes, the threat of Wolfgeist's poof hitbox can be as potent as the thing itself. That's because, even though his reappearance isn't safe at point-blank range, Wolfgeist still boasts a rather fast first actionable frame. As such, if he poofs next to, but not overtop his opponent, he still can pressure them with a quick jab or tilt before they can get away. One fun mix-up involves poofing away and overtop a nearby Goob, sending it hurtling uncontrollably at the victim.

A few miscellaneous items: Wolfgeist's shove and reappearance do not count as separate hits toward a piano move. Rather, his shove will count as a hit, regardless of whether his poof does. This renders D-Throw a good 'third hit' option for Specter's Symphony, letting Wolfgeist trigger a piano move immediately after his shove to threaten his foe in this tech chase scenario (say, by firing off piano keys to one side). Underneath his spotlight, Wolfgeist's shove will count as his one hitstun-enhanced attack, resulting in his victim falling into guaranteed prone before they can react. If Wolfgeist initiates D-Throw in midair above the stage, he'll drift down to the ground while shoving his victim, allowing his reappearance options to take place along the ground as usual. On occasions when Wolfgeist has grabbed a victim above a blast zone, D-Throw takes on significantly less hitstun so as to prevent cheap gimps. As such, almost all foes can react quickly and leap back up to safety, though they ought to beware footstool attempts from Wolfgeist as they do so. And, if Wolfgeist is pushed into a mist patch while performing D-Throw, he'll shove his victim down into the vertical wind stream, culminating in them being blown above him. Though this removes the throw's reappearance phase, it can position Wolfgeist nicely to be blown up after them, perhaps to greet their landing with a few U-Airs.


UP THROW - BOO BOMB
Wolfgeist ascends a short distance into the air, turning his victim upside-down and gripping them close as he pirouettes in a rapid spiral. Half a second later, he descends suddenly, piledriving his victim headfirst into the stage. On impact, the opponent takes 10% and relatively strong, but slow-scaling vertical knockback, capable of KOing from the top Battlefield platform around 145%. The point to which Wolfgeist pulled himself with grab has some bearing on where he'll land his piledriver on stages with platforms. Wolfgeist rises up two training stage squares before descending, meaning, from a grounded grab, he can rise up onto a low Battlefield platform, while from a higher midair grab, he can ascend onto the top platform.

The vertical nature of the piledriver's knockback enables Wolfgeist to threaten his opponent both from above and below, namely with his piano. The foe's regrab timer keeps piano wires from being an immediate threat, but if Wolfgeist has stored a wind stream within the instrument, he's able to leap up after U-Throw and open the piano in midair to send the wind and its music sheets skyward. This is far from a reliable way to secure KOs, but if a foe constantly lingers around the top blast zone — say, they're a Game & Watch player using the extremely skillful, balanced move that is Up B — the sheets situationally can carry them off to their doom, in a manner reminiscent of Mega Man's U-Air. At certain damage levels, U-Throw used below a higher platform can launch a foe just far enough vertically that they're forced to land in prone on top (a window that grows greater if the throw was initiated under a spotlight). This can free Wolfgeist to hover up and punish with an aerial, or even stall his foe right as his piano is about to collapse from the screentop.

During the second half of Wolfgeist's rise, the player can tap A for him to casually fling his victim forward instead of following through with his piledriver, dealing 7% and horizontal knockback KOing around 155%. The primary purpose of this mix-up is to toy with his victim's DI — a foe expecting to be piledriven often will DI horizontally to blunt an anticipated vertical launch. If Wolfgeist tosses them early, however, their horizontal DI can be turned against them, simultaneously giving him some breathing room and steering them into less-ideal positioning onstage (perhaps opposite Wolfgeist's piano or a spinning midair Goob).


If Wolfgeist has grabbed a foe in midair, ascends and piledrives them without landing on a higher platform, his greater descent will deal an added 2% and subtract 10% from the throw's KO percentage. This can increase further if he finds himself within a wind stream while performing U-Throw's initial spin; the vertical wind will push him up as he tries to descend, leaving him to perform the piledriver from the stream's apex as it dissipates. If — as is the case here — he descends more than five training stage squares, Wolfgeist's piledriver will deal an added 5% and KO 20% earlier.

And, when Wolfgeist performs U-Throw with no solid ground beneath him, he'll perform his ascension as usual, before piledriving his foe down four training stage squares and tossing them, as though the player had pressed A early while onstage. In a manner similar to Ridley's Space Pirate Rush offstage, Wolfgeist can bring a victim down closer to the blast zone, not to the point of a guaranteed gimp or suicide KO, but enough to render their path to the ledge that much more predictable. Every now and then, if a piano soundwave has blown Wolfgeist and his victim offstage, such that he's facing the stage, U-Throw lowers him to the point where he'll throw his victim into the stage for a stage spike if they miss their tech.

STANDARDS

JAB - FIERY FISTICUFFS
Wolfgeist performs a quick one-two punch with the first two button presses, stretching his arms out a bit to clobber opponents from afar. Each punch deals 3% and a moment of flinch, keeping the target stuck in place for Wolfgeist to follow through with the third hit. By default, the first punch comes out on frame 3, with Wolfgeist reaching out about one training stage square and performing the consecutive hits between frames 3-4 and 10-11. In some ways, the punches are analogous to Little Mac's F-Tilt, trading any strength for a tiny bit more speed and range. If Wolfgeist does not continue jab beyond these first two hits, he also possesses an impressively fast first actionable frame, at frame 21. This renders hits one and two an effective safe-on-shield poking tool at close range, good both for stringing into faster standards like D-Tilt, as a follow-up to a landing aerial or, if the victim is baited into spot-dodging or shielding, a grab. The faster hits also can be effective in assailing a Goob to build up a piano move — more on the mechanic in the context of jab in a moment.

In inputting the first jab hit, the player can hold instead of tap A up to 10 frames for Wolfgeist to stretch his arms up to two training stage squares in punching. This doesn't affect the timing between the two hits, but adds to startup so the punches come out on frames 13-14 and 20-21. Wolfgeist also undergoes more tilt-like end lag if he discontinues jab here, with a new first actionable frame of 36 as his arms snap back in. In a good number of melee scenarios, Wolfgeist's vanilla first two jab hits will suffice perfectly fine, and literally overextending too often can prompt foes to leap over his outstretched fists and punish him. That being said, much like some characters' longer tail or leg attacks, Wolfgeist's fists here are intangible, enhancing his ability to badger zoners from a short distance away. In a pinch, he also could harness the extra range in to salvage a piano move, stretching out to land that integral third hit right as the four-second timer is about to expire.

For his gentleman's hit, Wolfgeist snaps his fingers at whatever range his fists had reached, four frames after his second punch. His fingers catch momentarily on fire, dealing 4% and low horizontal knockback, capable of putting foes into prone if their tech timing is off. Wolfgeist is able to act about as quickly out of jab as Mario with his arms at the default length, and a bit more slowly with them extended. He's definitely capable of pursuing a jab lock combo if his foe falls to the stage, though he might have to extend his arms a varying amount or dash forward before punches one and two, depending on how far away he was when he knocked his target down in the first place. Here's a good place to mention that jab in and of itself counts for just one contributing hit for Specter's Symphony — though jab is a great bread-and-butter tool to weave in while building piano moves, Wolfgeist can't effortlessly build such moves up by spamming nothing but jab's various hits.


Lastly, with repeated taps of A, Wolfgeist will let out a German-accented utterance as he begins drumming his fingers against the stage, as though he were playing his beloved piano. His fingers deal multiple rapid hits of 1% and begin drumming at the same range that Wolfgeist punched with his previous two hits. While holding out jab, the player can use the control stick to alter the placement of Wolfgeist's hands, in an offshoot on the Belmonts' jab. Here, by tilting the control stick forward or backward, the player can guide Wolfgeist's drumming fingers forward or backward, retaining their hitbox as they glide at Mario's walk speed. As with the previous jab hits, Wolfgeist experiences a small bit more end lag if he ends jab with his hands farther away. The tradeoff here is, once he's made contact with an opponent or their shield, he's able to push them away with his extended drumming fingers, at the very least guaranteeing himself some breathing room. In other circumstances, he can use this extension in tandem with his snap to control more precisely where foes are launched, or push them underneath a spotlight to land a few more of jab's multiple hits before they can DI out. By shoving a shielding target over a mist patch, they'll be met with a wind stream if they lower their defenses too soon.

DASH ATTACK - SPOOK
Wolfgeist poofs briefly out of existence mid-dash before suddenly returning with a snarl, body enlarged ever so slightly as he faces the nearest opponent and raises his arms like a Scooby-Doo ghoul to unnerve them. The player has a degree of control over how long Wolfgeist remains invisible and where he reappears. By default, he'll poof away on frame five and reappear two training stage squares away 24 frames later, dealing 8% and diagonal knockback KOing around 140%. Holding down the A button, however, has Wolfgeist delay his reappearance up to one second, returning automatically after this time elapses or the input is released. If the player continues directing the control stick forward this full duration, Wolfgeist will reappear five squares away. Meanwhile, with no directional input, holding A after inputting dash attack results in Wolfgeist simply poofing back in place as a mix-up.

Wolfgeist can't be struck while invisible but holds his reappearance pose for 22 frames, a semi-punishable state, given his returning hitbox only lasts two frames. Counterattacking the conductor isn't a mindless feat, however, in that — because of the animation's "turn to face the nearest opponent" feature — foes can't just roll behind Wolfgeist and punish free from any worry. Indeed, perhaps one of dash attack's standout benefits involves Wolfgeist reappearing and automatically facing close-range foes with buffered attacks, especially if he's disoriented them by crossing up their shield while invisible. Dash attack generally works best in combination with several of Wolfgeist's variable arm length attacks (see: grab, jab), letting him tailor how far away he reappears based on the spacing he wants for the string at hand.

In terms of other uses, dash attack renders Wolfgeist rather adept at tech chases, in that he can either time his reappearance to punish his foe's getup option or poof ahead of them to cut off their escape route, perhaps from some of his other constructs. Then, once a foe is conditioned to expect longer-ranged poofs later on in the match, Wolfgeist can start reappearing in place or not far from where he initiated dash attack to pull the rug out. Dash attack is another likely candidate for piano moves' third contributing hit, as Wolfgeist can use it both to extend some nice jab-lock prone abuse or to snag foes fleeing to foil Specter's Symphony. Wolfgeist's brief intangibility while invisible enables him to pass through slower-moving piano keys and pressure foes casually standing in front and shielding, or to get past mist patches he'd rather not trigger at that given moment. From a more defensive standpoint, if Wolfgeist reappears underneath a spotlight, he effectively can mask dash attack's end lag with the beam's auto-parry feature — a handy option, as repeated dash attacks across the stage are far from safe. Lastly, Wolfgeist can use dash attack's burst movement to suddenly get within range of his piano's protection, one buffered Shield Special away, before repositioning or attacking with the instrument to his undead 450 HP heart's content.


FORWARD TILT - BACKHAND
Wolfgeist extends an arm with an expression of mild disgust, performing a quick backhanded slap before reversing the motion to slap back in the opposite direction. Under normal circumstances, the two slaps deal a respective 3% and 5%, with the former chaining into the latter, which knocks them back with moderate force sufficient to kill from the ledge around 110%. The backhand becomes active between frame 10-12, with the second lasting from frame 16-20, and the entire gesture complete by frame 35. By default, Wolfgeist reaches out about as far as Mewtwo's F-Tilt, though if the player holds rather than taps the control stick, he'll reach out about 1.33 times as far, at the cost of four extra frames of startup and end lag.

Even though two hits don't count separately toward Specter's Symphony, they can serve as an effective approaching tool-combo starter hybrid. Wolfgeist's slapping hands retain their intangibility from jab, giving him relative safety in dashing reasonably close to a foe before suddenly stopping and lashing out with his backhand. If he connects at low damage levels, there's a reasonable chance he can knock a foe into prone, ready to strike with jab. Even if they tech or roll, F-Tilt's range can let him dash up and backhand again to continue ushering his foe across the stage, and potentially into harm's way. From a more defensive standpoint, F-Tilt is relatively effective when thrown out as a deterrent to approaching foes. For instance, if Wolfgeist whiffs dash attack, he could threaten an opponent rushing in to grab with a buffered turnaround F-Tilt. Angling the backhand slightly upward or downward also gives it utility from anti-air and ledge-guarding standpoints, with the latter scenario even giving it some KO value against high-damage foes. And F-Tilt will virtually always be Wolfgeist's preferred option for striking Goobs — compared to his other grounded standards, the base knockback is high enough to send them spinning away, whether at a foe initially or as a return serve in a game of ghost tennis. In this regard, F-Tilt is simultaneously quick enough to not give foes a ton of warning that a Goob soon will be spun their way, while also having a long-enough active hitbox via the two slaps that the timing isn't too punishing on Wolfgeist's end...

...Especially since, Wolfgeist boasts one more trick to catch both spinning Goobs and overly-aggressive foes with F-Tilt. If the player holds A after inputting F-Tilt, Wolfgeist will perform his initial backhand, but delay the second slap until the button is released, up to 30 frames. Beyond holding back momentarily to smack Goobs foes have sent in his direction, Wolfgeist also enjoys this perk in those pesky melee scenarios where a foe is alternatively spamming a fast attack and a kneejerk spot-dodge. In those cases, Wolfgeist can stagger his second slap, striking his target right when their dodge ends. The same principle holds true in cases where a foe unthinkingly runs up and shields, but drops their defenses too soon. And, in cases where Wolfgeist has pressured his foe up against his piano at close range, he either can backhand the foe into its keys, holding out the second slap to strike them out of the projectiles' hitstun, or have the instrument feint its Neutral Piano Special, staggering slap number two so it still connects in cases where he'd rather save keys for later. Delayed F-Tilt is not a foolproof safeguard against smart defensive maneuvers, as Wolfgeist still remains entirely vulnerable while preparing to slap, and still suffers its regular end lag. That being said, as fragile a character as Wolfgeist might be once a foe gets past his ranged summons and stretchy arms, he's not going down with a whimper.


DOWN TILT - DUST-UP
Wolfgeist puts a hand to the ground and swipes it upward with a German-sounding "ugh," unsettling a small cloud of dust directly in front of him. His hand comes out relatively quickly, on frame 5, reaching out a short distance and popping foes lightly into the air with a 3% hit. The Kirby-sized dust cloud appears 20 frames later, lingering for an additional 30 frames and dealing multiple stunning hits of 1% for its duration. Foes caught in the cloud's entirety take a cumulative 12%, with the last hit dealing weak upward knockback that won't KO. Wolfgeist's first actionable frame comes 25 frames into the dust cloud, letting him leap back into action right before the dust cloud disappears, though D-Tilt still keeps its place as his most committal tilt, aside from a fully-staggered F-Tilt. The swipe and dust cloud both count as a single Specter's Symphony hit, but nevertheless find themselves among Wolfgeist's more versatile combo starters.

Generally, if Wolfgeist swipes a low-damage foe with D-Tilt's first hit, they'll be stuck falling back down into most, if not all of the dust cloud's hits. From there, Wolfgeist could seamlessly transition into a shorthopped aerial or, if it's a larger foe or one caught under a spotlight, try pestering them by walking forward and catching them in an additional D-Tilt cloud or two. At mid-to-higher damage levels, once his swipe starts sending foes high enough to jump or air dodge away from the dust cloud, Wolfgeist has access to a 50/50 if he times his options right. If his foe leaps directly up, intending to fall back down and punish Wolfgeist once his dust cloud dissipates, he either could leap up to intercept them with an aerial or wait below to use a grounded option, perhaps charging a Smash. Meanwhile, if they leap or dodge away for distance, Wolfgeist can reach forward with jab, F-Tilt or grab, or even try poofing overtop their landing with dash attack. However Wolfgeist decides to react, he ought to do so quickly; his dust cloud can deter foes from immediately rushing in to punish him from the front but offers little in the way of protection from distant projectiles.

A few other contextual uses: if Wolfgeist is sitting below a drop-through platform, D-Tilt's dust cloud can keep a foe up top from dropping through, at least long enough for him to continue pressuring with other options, like U-Tilt. If Wolfgeist uses D-Tilt as he's being blown sideways via his piano's soundwave, the dust cloud will manifest through the entire horizontal wind stream. This gives it a larger hitbox and a slightly longer duration (45 frames compared to the usual 30) that surrounds Wolfgeist protectively as he's pushed forward. Throwing Side Piano Special feints into the mix, he can foment confusion as to which dust cloud shape he's about to form.

And Wolfgeist can achieve a similar vertical cloud hitbox upon using D-Tilt right at the edge of an Up Special mist patch, triggering its wind stream in doing so. The cloud remains onstage for a shorter 18-frame period in this form but still can be a helpful damage-building supplement to Wolfgeist's existing music sheets. Standing at the edge of a mist patch, Wolfgeist could throw out a D-Tilt so foes approaching from the ground or air suddenly are met with a more damaging stream, with the combination of D-Tilt and Up Special counting as two Specter's Symphony hits in the process. With its hitstun enhanced under a spotlight, a fully-charged wind stream with dust will deal a full 30% to foes caught at its base — a setup Wolfgeist can render slightly easier if he captures the vertical dust cloud inside his piano and then relocates it under the light with Shield Special.


UP TILT - APPLAUSE BREAK
Wolfgeist reaches above his head and claps both hands together in a more refined, less forceful iteration of DK's U-Smash. As Wolfgeist's fastest tilt, his hitboxes here are active between frame 4 and 6, on an 18-frame animation, comparable to an upward-hitting variant on Diddy's D-Tilt. His hands boast a base hitbox, dealing 6% and low vertical knockback that won't KO until extremely high percentages, comparable to Fox's U-Tilt. His clapping hands also produce a small arc-shaped wave a short distance above his hands, dealing 3% and a moment of stun. By default, Wolfgeist's U-Tilt extends far enough vertically to where his hands reach about half a training stage square through low Battlefield platforms. As with F-Tilt, holding rather than tapping the control stick also has him extend his arms up further, clapping two training stage squares up through low Battlefield platforms at the cost of 4 extra startup and end lag frames.

All in all, U-Tilt is perhaps Wolfgeist's most helpful direct anti-air tool. It's not generally a tilt he'll throw out in neutral, but it's quite useful in intercepting shorthopping foes, upon which its quick duration lets him string multiple claps together in one sitting. This can prove especially threatening against heavier foes, who at low damage levels can get caught in enough subsequent U-Tilts for Wolfgeist to build up one, sometimes two piano moves before they're able to DI or jump away — a good thing, too, as good luck KOing remotely heavy opponents without your precious instrument. A solo U-Tilt still can come in handy as a combo starter, letting Wolfgeist immediately leap up with an aerial or, if his victim has hopped far enough up and away, snare them with his piano's wires. If Wolfgeist has cornered a foe atop a platform, he can hound their shield with multiple claps, potentially holding them in place for an aerial Goob or falling piano to shatter it. And, if the target jumps up to escape or shorthop an aerial through the platform, Wolfgeist can use his stretched-out U-Tilt variant to keep them in line. Just don't get too comfortable mashing U-Tilt, lest foes take advantage of its hitboxes' lack of horizontal coverage in clapping back at Wolfgeist.

SMASHES

FORWARD SMASH - ORCHESTRAL INFERNO


Wolfgeist locks his fingers together and stretches his hands backward, as though cracking his knuckles while charging, before casting them forward to produce an initial flaming music note. Depending on charge, the Soccer Ball item-sized beam note () travels one to two Battlefield platforms in a low-to-the-ground horizontal trajectory, dealing 13-18% and knockback KOing from 130-95%. By default, the note travels at Luigi's dash speed, though, if the player directs the control stick backward during his 13 startup frames, its movement slows down to that of K. Rool's cannonball, increasing its longevity onstage by a decent margin.

Wolfgeist can find KOing at close range with these notes a tad inelegant, somewhat similar to Mega Man's F-Smash, and he suffers an unfortunate 32-frame cooldown to boot. He struggles to reliably camp with these notes, given that he only can have one beam note out at a time. That being said, Wolfgeist enjoys hovering along behind a note he's emitted, ready to follow up with an aerial or extended tilt on impact, or grab if his foe has shielded. The note also can prove effective in pushing a foe up against a returning Goob for two quick Specter's Symphony hits. And, caught in Wolfgeist's piano, the note can be spat back out to condition opponents into jumping up, and possibly into the instrument's waiting wires if its master has opted not to feint.

While Wolfgeist is limited to one beam note at a time, the player can repeat the input during the first half of his end lag frames — comparable to Link's F-Smash — for him to follow up by emitting a slightly-smaller flaming single note (). These single notes come out at a faster 7 frames and, though they retain the beam note's end lag, Wolfgeist can briefly stave this off by sending out up to two more successive single notes (for up to three extra notes total). Rather than travel linearly, these single notes bounce up and down, dealing 7-12% and slow-scaling set diagonal knockback ranging from low to below average. By default, single notes bounce at approximately the speed and trajectory of Dedede's Gordos, albeit a bit less far, at one to two Battlefield platforms, depending on charge. Though these single notes cannot be slowed down like their beam counterparts, Wolfgeist can angle their release upward or downward, also respectively decreasing or increasing their range a tad, as another shared Gordo similarity. In scenarios where Wolfgeist has forged a single note that falls from the edge of a high platform, rather than completing its trajectory, these notes will last up to 2.5 seconds before vanishing.


As one might assume from the single notes' properties, they're even less conducive to KOing than the initial beam variety. Regardless, Wolfgeist finds F-Smash, and the varying number of notes he's able to put out at any given moment, a rather versatile tool in his kit. Sufficiently spaced from his opponent, he can preface an approach with both a slow beam and a bouncing single note, creating a short-lived projectile wall in front of himself for added defense. Foes have options in terms of counterplay, as all notes constitute reflectable projectiles, and Wolfgeist can be blugeoned in the gap between the beam and single notes, especially if he's slow on the uptake sending out his first single note. That being said, the disjointed hitboxes can help Wolfgeist steer foes toward other, more external constructs like returning Goobs and mist patches, earning him a near-guaranteed follow-up if one connects. Upward-angled notes can give him a limited means for poking up onto low platforms, as they bounce onto them from below, while downward-angled ones bounce out far enough to pester foes trying to keep their distance.

Alternatively, if Wolfgeist sends out all three single notes after his initial beam one, the number of small, yet needling projectiles can coax foes into a more committal, and punishable, reaction, whether that's sitting in place to shield each note or leaping high over the entire barrage. Used close enough to the ledge, bouncing single notes also will drop down to create a temporary headache for foes, in the same vein as Game & Watch's sausages. And though notes themselves won't trigger mist patches, Wolfgeist can time F-Smash so as to send the flaming symbols through a wind stream right as a foe is being blown upward. Beam notes are blown diagonally upward at 1.5 times their remaining distance before vanishing, while single notes travel 1.5 times the regular upward movement of their arc before beginning to fall again. The window for timing here is tough, but if Wolfgeist pulls this off, these ready-made aerial hitboxes can essentially lock his upward-blown foe off from easily landing on one side, letting him more easily catch them on the other.

And, if Wolfgeist's bevy of existing note trajectory mix-ups weren't enough, he can cast an F-Smash worth of notes into his piano during a real or feinted Down Piano Special — given the wire grab's lengthy cooldown, he has a relatively generous window for getting multiple notes in, though he can ensure each of the beam and three single notes make it by using F-Smash right next to the instrument. Then, the next time the piano uses or fakes the wire grab, each note will come cascading out in succession, refreshed as if from Wolfgeist himself, regardless of where the instrument caught them in their duration. If Wolfgeist summons his piano in midair before releasing the projectiles, he can prompt the beam note to travel through the skies, while the single notes rain down on foes below and bounce in modified, steeper arcs. Depending on their speed and angle, beam and single notes sometimes can combo together; this does not count as separate hits toward building up a piano move, though Wolfgeist certainly won't find himself complaining about the added hitstun.


DOWN SMASH - POUND TOWN


Wolfgeist lowers himself to hover even closer to the ground, appearing to concentrate while charging. Upon release, he raises himself abruptly into the air, reaching upward and pausing for an instant before slamming his enlarged palms against the stage, twisting them slightly in place as though to ensure an insect has been squashed. There are a handful of hitboxes to mention here, starting with the underside of Wolfgeist's hands against aerial opponents, which deals 12-17% and moderate downward knockback. This won't won't KO until extremely high percentages but bounces foes against the ground for varying follow-ups on Wolfgeist's end, depending on whether his foe techs and/or rolls, or misses and is popped up right in front of him. Against grounded foes, his hands deal 14-20% and diagonal knockback capable of KOing from 140-105%. Here, there's also a small hitbox at the dead center of his palms that will pitfall foes with the strength of WFT's third jab hit. And, a miniscule distance to either side of Wolfgeist's palms is a weak shockwave hitbox, dealing 4-6% and light upward knockback that won't KO, but can stall a foe just long enough to save Wolfgeist's skin if he whiffs with the move's main portion.

D-Smash is in some ways an inverse to Wolfgeist's hitbox-shifting standards in that here, it's his hurtbox that suddenly lurches into a different position. Upon release, he suddenly raises his body two training stage squares the air as his hands enlarge over 18 startup frames. This doesn't render him immune by any means — though his hands are briefly intangible as they slam down — but rather can remove him from harm's way just long enough to punish a foe underneath who, for example, has extended their own hurtbox with a tilt. With great timing, Wolfgeist even can float out of reach of a foe rushing in to grab or dash attack, before squashing them into pitfall as he descends on top of them. He'll find himself vulnerable, with 30 frames of cooldown if both the main and shockwave hitboxes whiff, though situationally, the player can try mitigating this by D-Smashing next to his piano. That way, if the move doesn't connect, they can try blowing Wolfgeist or his incoming assailant out of the way with the instrument's soundwaves (which, if he's blown into a mist patch, enables him to cancel out of the grounded animation early to try a different option).

A few other miscellaneous uses of note: If Wolfgeist manages to pitfall an opponent and reacts quickly, he can set up a piano move in any number of ways — summoning a Goob to spin against them at point-blank range, jab or F-Tilt to knock the foe low against the ground into prone for a jab lock combo, D-Tilt to catch them in a dust cloud as they mash out, or a shorthopped D-Air into U-Air. If the pitfalled victim has high-enough damage and Wolfgeist isn't ready to land the killing blow, he even can land two successive standards not strong enough to launch them (jab hits one and two, then F-Tilt, for instance) to guarantee Specter's Symphony is seen through. D-Smash is both strong enough to return Goobs sent spinning at Wolfgeist by foes and a good safety measure, lifting up the conductor's hitbox so the ghost minion does not strike him even if he times the move poorly.

Underneath a spotlight, foes launched vertically with D-Smash endure enough hitstun at mid-damage levels that Wolfgeist has little issue floating up underneath with U-Air; his hands' shockwave under the light also now can stun foes long enough to be a functional, albeit not premier combo starter. And, right up against the ledge, Wolfgeist's aerial hand hitbox is capable of spiking some foes to their doom if they use their mediocre or worse recoveries above the ledge. He's vulnerable to ledge attacks and aerials shorthopped onto the stage pursuing this option, but if a foe is distracted with his other constructs — like F-Smash music notes he's rained down or the threat of his falling piano — this easily can rank among Wolfgeist's most satisfying finishers.


UP SMASH - AURAL UPSWELL


A two-input Smash, Wolfgeist spins once, sweeping his now-flaming hand around in a beckoning midair circle, before casting both hands to the sky as a powerful surge of musical energy erupts from the stage beneath him, riddled with golden music notes. As an audio cameo, brief, varying snippets from the Luigi's Mansion theme blare as this eruption occurs. Wolfgeist's hand stuns foes in place as he extends it about a training stage square to either side, active between frames 13-14 and 19-20 and dealing 3-6%. The player then can repeat the input within the first 30 of the spin's 45 cooldown frames to true combo into Wolfgeist's second hit. The musical energy now deals 11-16% and vertical knockback KOing from 135-100%, quickly bursting a helpful three training stage squares above him, and even capable of being angled slightly diagonally to either side. When both hits connect, U-Smash sits just ahead of F-Smash as Wolfgeist's best-damaging Smash, and isn't far behind in terms of KO potential. That being said, Wolfgeist endures a painful 48 frames of cooldown as he vibrates momentarily within the musical surge. This renders him a sitting duck if neither hit connects, and he doesn't blow himself to safety or cancel out with a respective soundwave or mist patch's wind stream.

U-Smash becomes quite a fun move to use in tandem with some of Wolfgeist's external summons. Normally, foes will fall out of his hand sweep's stun if the player does not proceed into the musical surge, with little to no actual combo potential as Wolfgeist sits in cooldown. Used right before an outside hitbox finds its mark — a Goob's weak lingering twirl, perhaps, or keys from his piano — Wolfgeist can renew his foe's hitstun right as they're about to regain control from U-Smash's hit one. From there, he has a brief window to dart back up against them and follow through with both hits of U-Smash, having tacked on a bit more damage beforehand, and allowing the separate U-Smashes to count as two hits toward Specter's Symphony. Independently, added hitstun from an onstage spotlight also lets Wolfgeist achieve this one-and-a-half U-Smash chain if he lands the initial hand sweep underneath. Still more implausible, yet doable in the right hands, is melding these two options together: Wolfgeist can land U-Smash's hand sweep on a foe either out of a spotlight's initial stun or from its one-move hitstun enhancer, pause, hand sweep again, catch the foe with an external summons, and then finally carry out full U-Smash. He'll gain at a minimum one piano move for his efforts, and if it was a Goob that landed the penultimate hit, be well-positioned to pull off an elusive six-hit combo for bonus instrumental attacks.

Outside this fancy-smancy context, U-Smash is an effective move for sending aerial Goobs spinning uncontrollably from below. Wolfgeist's ability to angle the musical surge diagonally means he can snag both the ghost minions and foes from different vantage points. U-Smash can come in handy salvaging piano moves for which the three- or six-hit timer is about to expire, letting Wolfgeist suddenly blast a good distance upward to land that vital final hit. U-Smash also mixes nicely with Wolfgeist's Down Piano Special; whether the instrument is positioned above him on a platform or its wires are angled diagonally, the Smash's knockback can guide foes nicely into the piano's waiting tendrils. From there, Wolfgeist either can reap the reward of his instrument pummeling and throwing his foe closer to KO percentage, or have it spit them back out in their grab-release state for him to further harass.


AERIALS

NEUTRAL AIR - RAISING THE BAR (LINE)
Wolfgeist performs a straightforward twirl in place, lifting a hand as if conducting as a gold bar line — the five-line spread where all the music notes go, for those of you who never joined secondary school band — flashes around him as a visual. It's a rather quick option, coming out on frame 5 and featuring a relatively minor 20 frames of end lag, and that's if Wolfgeist doesn't land to auto-cancel out of cooldown with near instantaneousness. The twirl itself deals 9% and knockback that, at low- to mid-damage levels, will knock foes back lightly enough to keep them in range for a subsequent attack. N-Air's launching power then increases at higher damage levels, or when Wolfgeist himself has built up rage, to the point where it can serve as an adequate GTFO move, or even a KO option if the player opts to go deep offstage or close to the blast zone.

Simplistic nature aside, N-Air is far and away one of Wolfgeist's best utility moves in terms of starting and extending combos. Used out of hover, N-Air can serve Wolfgeist well in approaching, as he weaves over enemy attacks before landing with his twirl in retaliation, potentially starting a string of his own in response. Immediately after a landing N-Air, Wolfgeist may either shorthop and aim for a second aerial (N-Air, F-Air and D-Air all being serviceable options), combo into jab or D-Tilt, or try reading a defensive option with a grab or charged Smash. If a foe has been launched inward at Wolfgeist by an external construct, like a Goob or piano keys, leaping up to try catching their knockback trajectory with N-Air generally is a good option, unless the player is aware a different aerial would work better in a specific context.

N-Air also works great in tandem with both of Wolfgeist's wind hitboxes. Blown forcefully into a foe with a piano's soundwaves, Wolfgeist can find himself pushed up against his lightly-launched victim immediately after landing N-Air. This enables him to land a second N-Air with good timing before he likely lands and can transition into something like U-Tilt or U-Smash, if his foe is too slow to shield or roll. And whether he lands Up Special's wind to disorient a foe in midair or is spat up alongside a victim of Piano Down Special, the player can buffer N-Air to ensure that, if Wolfgeist reads his foe's DI correctly, he's guaranteed to land the aerial against all but the fastest targets. The primary word of caution here is for Wolfgeist to mix up his N-Air approaches, as they're not too difficult to parry if the player just lazily hovers over and throws it out again and again.


FORWARD AIR - STRIKING UP THE BAND
Oh, I know! I know! I...use F-Air. Wolfgeist reaches a hand a short distance in front of him, palm facing upward, and gradually, shakingly, raises it, as though conducting an orchestra to pick up the volume. A small spark sits in his palm as he does so, gradually increasing in size as he raises his hand until it's a ball of fire covering his whole hand upon the aerial's completion. Wolfgeist's hand takes on a multi-hit burning hitbox on frame 7, dealing four stunning hits of 2% over the next 13 frames, followed by a final stronger diagonal hit of 3%, which burns at a slightly closer range and launches diagonally with below average force. F-Air comes with 15 frames of landing lag, though Wolfgeist will auto-cancel out of the animation if he lands either within its first or last 9 frames.

Wolfgeist is able to selectively leverage part or all of F-Air's hitbox, depending on what setup he's looking to land. The full aerial is a solid enough approaching and poking tool for use early and often in neutral. An individual F-Air's multi-hits clearly don't count as individual moves for Specter's Symphony. Nevertheless, the aerial is capable of chaining into itself twice or thrice against heavier foes, those with low damage or opponents whose jumps or dodges the player has read properly after landing a first F-Air. Wolfgeist also can make his own luck in terms of increasing F-Air's efficiency by initiating the first such aerial under his spotlight. Wolfgeist's hand reaches out far enough to be safe on shield spaced properly, and a frustration for shielding foes who must learn not to drop their defenses after tanking the first several multi-hits, lest they be burnt by the final, strongest one. Of note, F-Air generally will be Wolfgeist's best follow-up in situations where he's managed to pull a victim up against a construct with his extended grab, as he breaks his grip with a frame advantage as they undergo their grab-release animation.

Conversely, the player can take advantage of Wolfgeist's great aerial mobility to glide forward or backward while F-Air is ongoing. By moving far enough away that only the flame's multi-hits land, Wolfgeist can hold his foe in the path of an external construct, or, if he hovers backward while throwing out F-Air, give himself some defense in retreating. Meanwhile, by pushing forward right at the move's end, perhaps with help from a piano soundwave, he can land just the strong hit as a modest launching tool. Landing with F-Air can prove rather sneaky in terms of setting up 50/50s, too. Timed right, Wolfgeist will throw out just the first multi-hit before auto-canceling, giving foes just a few frames to input a defensive movement or quick GTFO move. If Wolfgeist surprises them with landing F-Air in this fashion, he can chain into a grounded standard. Then, if his foe's muscle memory steers them toward an instant spot-dodge, he can shake things up by pausing for a split-second and then attacking (or timing a grab or charged Smash).


BACK AIR - FLOATING WHIRLINDA
Wolfgeist strikes a formal waltz-esque pose and spins around 360 degrees, leaning his oversized head exaggeratedly backward as he does so. His B-Air is relatively unorthodox in that Wolfgeist's head hits both a short distance behind him at first and then briefly in front of him before his 45-frame animation finishes. His head's initial backward hit comes out on frame 4, dealing 6% and low outward knockback, while the second forward hit deals 4% and a moment of hitstun, between frames 20-26. The aerial's hitbox architecture is such that, with a bit of spacing, Wolfgeist has no issue striking backward multiple times with his head, so he gradually ushers a foe back or pressures their shield as though with a backward kick. A landing B-Air auto-cancels over a minimal 7 frames, leaving Wolfgeist able to land one backward hit, before canceling out of the animation and quickly shorthopping up again to perform a successive B-Air.

Where B-Air's second hit comes in handy is in giving Wolfgeist decent, albeit momentary aerial coverage. The front-facing strike can catch foes who try crossing Wolfgeist up by air dodging or rolling in front of him as he initiates B-Air, out of a shorthop in the latter case. Then, if the front hit connects, Wolfgeist can chain into F-Air or, if close to the ground, land and punish what well could become a panic button-press from his victim. At 0%, or a mite higher against heavyweights, Wolfgeist can strike the same foe with both B-Air hits, most often by fastfalling onto them or having his piano spit him up alongside a wire grab victim so both hits connect at point-blank range (though they still count as a single hit toward a piano move).

B-Air's first hit starts pushing foes out of range of the second once Wolfgeist's foe has any real damage of note. With a piano soundwave, however, Wolfgeist can blow himself right up against his target to keep this option alive. From the side, he'll push into them as B-Air hit one knocks them lightly back, generally close enough for hit two to land, too; from there, N-Air or F-Air can become effective follow-up options. Depending on their spacing from the soundwave, foes can safely shield this on the ground. That being said, because Wolfgeist will blow past them as a cross-up, able to react not long thereafter, the foe very well might have to roll away instead of counterattack if they'd like not to be met with a quick shorthop N-Air.

UP AIR - UNKEMPT OUTBURST


Wolfgeist raises his hands angrily to his head as his normally-orderly powdered hair flies upward in messy strands, which catch on fire for good measure. Coming out on frame 5, his hair deals four rapid multi-hits of 3%, the first three of which stun foes in place while the latter deals below average vertical knockback (all counting as a single piano move hit). The entire animation lasts 39 frames, with 14 frames of landing lag that will auto-cancel during the first and last 7 frames. As with F-Air, Wolfgeist can harness his aerial mobility and hover to control how U-Air connects with a target. Here, the player is able to fastfall downward so the aerial — generally best as a juggling tool — takes on drag-down properties, which Wolfgeist can capitalize on quite extensively with a bit of preparation.

Wolfgeist will find it hard to go wrong with U-Air whenever he's pulled a foe onto prone on a drop-through platform, whether directly via grab or by way of his piano's wires. If he's quick on the uptake, he can leap up and and U-Air while his foe is down, landing at least one jab lock hit. Against prone foes on lower platforms, a higher-level combo guaranteeing Wolfgeist a piano move involves shorthopping U-Air twice, so the aerial auto-cancels after the first multi-hit and keeps them in jab lock, before launching them with U-Smash.

Of course, U-Air retains its value for normal drag-down applications, whether that's an U-Air into U-Smash combo underneath a low platform or U-Air into shorthop N-Air. Given the startup on Wolfgeist's grab, he struggles to drag foes down into his clutches with U-Air along the lines of Pikachu, though his spotlight creates a workaround in this regard. With the right timing and spacing, Wolfgeist can shorthop U-Air right as his piano is getting ready to reach out with its wires, pulling them down into range of the instrument's grab hitbox. And, though U-Air generally won't KO off the screentop until steep percentages, upward of 150%, Wolfgeist still can try bursting upward with aerial Up Special so U-Air finishes off foes who have flown too close to the sun, so to speak (perhaps a Snake that has flown up high to drop explosives down from above).


DOWN AIR - TAILSPIN
Wolfgeist lifts both arms above his head, performing his best imitation of his Goob minions as he performs a pirouette in place. His ghostly elasticity has him elongate his body and tail a noticeable distance downward as he does so, giving him a means to poke at foes through drop-through platforms out of a shorthop. Wolfgeist's tail deals five rapid hits of 2%, the first four of which stun foes in place while the last deals below average diagonal knockback. The hitboxes here take place between frames 6 and 24, with Wolfgeist dealing with a 25-frame cooldown afterward. Of note, Wolfgeist's downward momentum briefly halts during D-Air, giving him a rather limited means to mix up his recover or evade grounded attacks from above. Unless he's really boxed a foe in or flashes his spotlight, Wolfgeist generally can't chain multiple D-Airs together, on account of the higher end lag compared to Ultimate's other such spinning counterparts. Even still, the hitbox's duration means Wolfgeist can effectively catch foes out of careless rolls or air dodges in much the same fashion as B-Air.

D-Air and U-Air often work quite well in tandem with each other — Wolfgeist can drag a target down with the latter and, before they can react, buffer a shorthopped D-Air for a quick two hits, a combo he can try extending further with another U-Air, especially if his foe is at low damage. Wolfgeist endures 14 frames of landing lag with D-Air, though he generally can preempt these out of a shorthop on account of the aerial's momentum stalling. As another shared trait with U-Air, D-Air can become an effective burst option used in tandem with Wolfgeist's wind hitboxes; whether through a piano soundwave or mist patch, Wolfgeist will pull foes along in his pirouette. Blown horizontally, he can bodily relocate a target closer to the ledge before materializing his piano back around him, perhaps to spit keys from a more potent vantage point. Near a mist patch, meanwhile, Wolfgeist can trigger his wind stream after initiating D-Air, potentially catching a foe both in his pirouette and the stream's music sheets for two Specter's Symphony hits. And needless to say, pulling a foe vertically closer to the blast zone can render the threat of a falling piano all the more terrifying.

FINAL SMASH

FINAL SMASH - GHOST ORCHESTRA


Wolfgeist whips out a conductor's baton and rushes forward three-quarters of Final Destination's distance with an echoing bellow, knocking foes in his path into a cutscene. The victims can be seen in their dizzy animation in the dark on Wolfgeist's Great Stage. A spotlight shines down on them as the big red curtain opens to reveal Wolfgeist, his back to them at the helm of a full orchestra of Goobs, each toting its own instrument, including the tubas, cymbals and violins found on the Last Resort's fourth floor. Wolfgeist turns mockingly to face his victims before swishing his baton downward, prompting all the Goobs behind him to simultaneously begin playing their instruments as loud as possible. The cacophony blasts the victims off the stage and back to the battlefield, upon which they suffer 45% and knockback capable of KOing around 50%. Wolfgeist completes two contented bows upon his reappearance, clearly pleased with how this performance was received.

EXTRAS

UP TAUNT - PIANIST'S IMPULSE
Wolfgeist turns to the side and wiggles his fingers in place, as though stroking the keys of an invisible piano. If the player initiates this taunt right next to Wolfgeist's actual piano, he'll hover in front of it and play a classical tune as long as the input is held.

SIDE TAUNT - DIRTY WORK
Wolfgeist groans as he pulls both of his cuffs down his wrist, one at a time.

DOWN TAUNT - SHEET SHUFFLE
A stack of music sheets appear in Wolfgeist's arms, which he proceeds to shuffle from hand to hand, alternatively in front of and behind him, like a cartoony deck of cards.

ENTRANCE - TAKING THE STAGE
A spotlight flashes against the ground from the top blast zone, seemingly illuminating nothing at first. A split second later, Wolfgeist fades into being underneath, rolling his eyes and folding his lengthy arms to signify his regard, or lack thereof, for his competition.

VICTORY POSE #1 - PEEVED PIANIST
Wolfgeist is seen hovering at his piano — thankfully inanimate once again — playing disconcertedly, only to look over unenthusiastically as his name is called.

VICTORY POSE #2 - SOUND OF SUCCESS
Wolfgeist chuckles deviously to himself, surrounded in a mild aura of flame as he spins increasingly rapidly in place. His splash screen has him strike a stance, holding his hands in a conductor's pose as a series of flaming music notes burst away from his body and into the foreground.

VICTORY POSE #3 - BOORISH BOWS
Wolfgeist floats flanked by two of his tutu-wearing Goobs, bowing to the screen as one of his mooks follows suit. The other bows facing stupidly offscreen. Their maestro notices this after the splash screen and angrily levitate-throws an auditorium chair at the errant Goob, knocking it on its floating behind. Should've kept Wolfgeist's tempo...

VICTORY THEME - SOMBER SPECTER
Wolfgeist's wins play against the backdrop of the game over jingle from the original Luigi's Mansion, newly remixed in an orchestral style.

LOSS POSE - SNIDE SUPPORT
Wolfgeist leers as he claps slowly, with his hands stretched away from his body, as though he finds the very act of applauding repulsive.

SIX-HIT SPECTER'S SYMPHONY COMBO INDEX:
  • Grab, regular F-Throw --> instant Dash Attack --> F-Tilt --> Piano Side Special (blowing foe inward) --> sweetspot D-Smash --> Jab hits one and two --> shorthop F-Air (best on average against foes with 0-20%)
  • U-Throw --> drag-down U-Air --> D-Air --> F-Air --> returning Goob --> F-Smash (best on average against foes under 50%)
  • U-Tilt --> U-Tilt --> N-Air (50/50, if foe jumps) --> Piano Neutral Special (behind Wolfgeist, shooting slow keys outward) --> F-Air --> regular U-Air --> Up Special
  • U-Tilt --> U-Tilt --> sweetspot D-Smash (50/50, if foe air dodges down) --> D-Tilt --> outward Goob --> Piano Side Special (blowing Wolfgeist outward) --> N-Air
  • D-Tilt --> F-Air --> Down Special (initial stun) --> footstool --> jab hits one and two (in jab lock) --> grab, B-Throw --> returning Goob (on one side) --> Up Special music sheets (on the other side) (can throw into Piano Down Special wires for finisher)
  • Jab --> F-Smash (note stored in and spat inward from piano) --> Grab, up-angled F-Throw --> turnaround B-Air --> Piano Down Special --> drag-down U-Air (intercepting knockback) --> U-Smash
  • Low-angled F-Tilt --> shorthop N-Air --> shorthop N-Air (both in jab lock) --> Up Piano Special (walling off escape via outward roll, catching foe in outer shockwave) --> Down Special (initial stun) --> grab, regular F-Throw (with added hitstun) --> extended jab --> Goob (stored in and spat inward from piano)
  • Side Piano Special (behind Wolfgeist) --> B-Air --> N-Air --> fastfall to U-Tilt --> Down Special (initial stun) --> Up Special (charged underneath foe, with added hitstun) --> U-Air --> U-Air
  • Shorthop D-Air --> shorthop D-Air --> dash attack --> returning Goob --> U-Smash --> Down Special (initial stun, close to vertical blast zone) --> float up, Up Special (can alternatively attempt to land Piano Up Special out of spotlight)
  • Shorthop N-Air into prone --> jab hits one and two (in jab lock) --> Piano Neutral Special (shooting keys inward, covers outward roll and pops victim up) --> Down Special (initial stun) --> create Up Special mist patch --> trigger with D-Tilt dust cloud (with spotlight's hitstun) --> F-Air --> F-Air (can escort foes offstage for outward Piano Neutral Special to KO)
LINK TO CHANGE LOG (last updated 1/2/2021):
1. Clarified input scheme for performing Piano Special moves vs. regular Specials
2. Slightly nerfed Down Piano Special grab escape difficulty, in lieu of slightly buffed damage, knockback
3. Refreshed Wolfgeist's float with a distinct animation
4. Slightly broadened window for Wolfgeist to obtain piano moves through Specter's Symphony
5. Expanded Specter's Symphony mechanic to reward skillful play with extra piano moves
6. Spotlighted an example KO setup for Down Special
7. Clarified language in Up Tilt to reflect active frames, total duration
8. Removed outdated conceptual language in Up Smash, elaborated upon existing setup possibilities with Goobs, piano keys
9. Exaggerated Down Air animation to increase utility
10. Created index for potential six-hit Specter's Symphony combos for earning bonus piano moves


Last edited:

NeonVoid

Smash Journeyman
Joined
Dec 31, 2019
Messages
212
It's time for my second moveset for this contest! This is a real passion project of mine that I am continuing to work on as we speak, Rayman! I am working on a classic route now, as well as taunts and victory poses and I will update my post to include them later. Please let me know if you have any questions, and tell me what you think!

Here we go:

Movesets:
Cinderace
Rayman


Why Rayman?


  • Currently, Rayman is one of the most wanted fighters in Smash alongside fan-favorites like Sora and Crash Bandicoot. Rayman is a very long overdue character, ever since the infamous “Rayman in Smash 4” leak. What’s not to like about this guy? He’s limbless and already fits the criteria for a unique and original fighter. Has many popular games, including the old school Rayman 1, 2 and 3, as well as the incredibly popular Rayman Origins and Legends games (Buy Rayman Legends, it’s like, $20). Personally, Rayman is one of my favorite childhood games, and I have many memories that reside with playing Rayman 2: The Great Escape.

Additional Notes
  • In the reveal trailer, on Battlefield, Rayman will break the ice (no pun intended)
  • The Battlefield stage will have been updated and the ice pillar that enclosed Rayman will be gone and shattered
  • I will try to use images for reference on a small amount of these where I feel an image would be needed, but if you are still confused on what it would look like, let me know!
  • The first mechanic on this character is the Golden Fists from Rayman (1995) and Rayman 2: The Great Escape. The second mechanic is the Murfy assistant from Rayman Legends.
  • Rayman only has two double jumps. but like the tanooki leaf item, Rayman can glide down using his helicopter hair while slowly descending.

Mechanic: Murfy: Rayman Legends, in fact, was originally planned to be a Wii U exclusive. Because of that, players would be able to use Murphy on the gamepad to help Rayman get through enemies or to get across platforms. This eventually came to PC, Xbox 360, PS3, PS Vita, and of course, Nintendo Switch and Murfy got altered in a way that was accustomed to a PC keyboard or controller.


Moveset
Background info: So there are technically two different types of Rayman. The old school version (from games like Rayman 2 and 3, or the Raving Rabbids series) and the newer, 2D version from the games Origins and Legends. Since Rayman hasn’t been prioritized recently, i’d take that the Smash design would be based off of the newer design, but i’m still going to try to add features from all around Rayman’s History.


Jabs - These jabs would work like they do in Legends; not that complex, but depending on the situation, useful. Rayman will jab like Pikachu, but this time, with fists instead. Like Pikachu, these jabs do nearly 1.5% with each connect.


Side Tilt - Rayman will throw out his left foot in an upward motion (imagine getting kicked in your crotch). This is simple and easy, but not a good OoS (Out of Shield) option, as it comes out around frame 10. This will do around 8% damage.


Up Tilt - Rayman, instead of using a fist like usual, can actually use his helicopter hair to attack for this. Rayman will slap his hair near the direction he is facing and this will knock the opponent above him, and this is perfect for combo starters or certain kill-confirms. Image below is for reference on what helicopter hair is. This additionally is a double-hitting tilt, and does around 9% damage altogether.


Down Tilt - Rayman, like Mario, will slide one of his feet across the ground, generally causing around a 30% chance to trip the opponent like others, just a cooler animation. Likewise, this will do about 9% damage in the process.


Dash Attack - The dash would most likely be used a lot, but basically, Rayman will charge forward spinning while standing up and swinging his fists out. Somewhat like Kirby’s dash and Banjo’s side B attack, there is a lot of end lag, and you’ll be vulnerable when the attack ends. Depending on the battle, this could put you in danger if you miss. This attack will hit three times, and the order will be 3%, 4%, and 5% respectively.


Neutral Aerial - To go in detail, Rayman will do a front-flip and his hands will be directly above him, while his feet will be directly below him. Only his hands and feet will have a hitbox. This move will run similar to Palutena and Pacman’s neutral aerial in terms of animation. The feet will deal around 6% damage and the hands will deal around 8% damage. Like Palutena, this is very useful and has good reason to use as a mixup.


Forward Aerial - There isn’t too much to this move, consider it similar to Mario’s Neutral Aerial. Rayman will throw out a roundhouse kick (in this case, a round-house foot) in the direction he’s facing. Since his limbs aren’t attached to his body, this will have more range and is good mainly for keeping distance. This attack, logically, would only deal around 6% damage. This and back aerial are roughly the same, but have little to no end lag.

Back Aerial - Rayman will deliver a roundhouse foot behind him, very much like his forward aerial. This is a very quick move, and comes out as early as frame 3, and is really good for distancing yourself from the opponent. This will also deal around 6% damage.


Up Aerial - This move will have Rayman launch a fist directly above him, as he strikes a Superman pose like in Rayman Legends. The fists are really strong, and this could be a really good option for a kill-confirm. This move will do around 8% damage and serves somewhat as a weaker up smash (see below).


Down Aerial - Rayman, with his feet connected will slam then directly downward. This move also has a meteor effect when used correctly, and this will do around 9% damage.


  • All smash attacks are supposed to have really good range.

Forward Smash - Before the move is released, Rayman will wind up his fist like in the original Rayman (1995) game (or the newer 2D platformers), and release with a decent range and heavy damage. Consider Rayman to have half the range of Min Min’s dragon arm. This can do around 14% damage.

Up Smash - As I said, this would have some similarity to Rayman’s up air, but stronger. Rayman will push his fist back when charging, and will slam his fist upward when the joystick is released. Instead, the hitbox will mainly reside just above Rayman and not to the side.


Down Smash - Consider this move to be like Inkling’s down tilt, but further range and it covers his front AND back. Rayman will basically disco dance by placing one hand on the ground and doing a slide with his feet sticking outward. Only the feet will have a hitbox. This will first cover in front of the direction Rayman is facing, and then his back. This does around 8% damage with each connecting hit, and like Ganondorf’s down smash, this will drag them behind you if the first hit connects, dealing a total of around 16% damage.


Basic Grabs - Rayman will pull in the opponent using the plunger gun he used in the Rayman Raving Rabbids trilogy, and this will cover the same distance as Young Link. Rayman will basically pummel them by a repeat of headbutts, like Pikachu, for example. Does around 2% for each headbutt. Image below for “plunger gun” reference. It will work like a grapple, where the plunger IS connected to the gun.


Forward Throw - Rayman will throw the opponent forward by releasing them in a kame hame haaa like manor. This does about 7% damage.


Back Throw - Rayman, like Inkling’s back throw, will spin and toss the opponent behind him and will relatively work like Inkling. This would do about 10% damage.


Up Throw - Rayman will toss the opponent directly above his head and his helicopter hair will act as blades, as they do a good cluster of around 11% damage.


Down Throw - Like Greninja, Rayman will throw the opponent directly down, dealing about 9% damage.


  • Some specials here will most likely be tricky to pull off 100% of the time, but they will mostly show how light and versatile Rayman is.

Neutral B - White Lums (Rayman 2: The Great Escape): Similarly to Pikachu’s thunder jolts or Fox’s laser gun, Rayman can shoot out a white lum (basically a white pellet) that is good for resetting the opponent’s actions. This will deal around 7% per lum.


Side B - Lockjaw (Rayman 3: Hoodlum Havoc): This would be a really cool animation, as Rayman will use the lockjaw and thrust it forward at the opponent. This has an incredibly long range (almost like Min Min’s Megawatt), and is a double hit that runs similarly to Piranha Plant’s forward tilt. Like Min Min, only the end of the lockjaw will connect. The chain has no hitbox, so this is really risky to use because it has a lot of laggy end animation. This deals around 12% damage on the first and second hit, dealing 24% damage altogether.


Up B - Helicopter Hair: Consider this move to be a much more versatile version of King K. Rool’s Up B. Rayman can move upwards, with only his helicopter hair dealing damage, however, like King K. Rool’s propellers. The good thing is, you can cancel out of the helicopter hair to do any type of attack (aerial, special, or even an air dodge). Of course, Rayman has a select distance he can go each time, so you can’t keep cancelling out and must return to stage before using helicopter hair in a repeating manner. This does around 3% damage per hit.


Down B Gimmick #1 - Murfy Assistant (Rayman Legends): This was a mechanic I really had to think about (I don’t have much of a brain to begin with), but I thought it would be cool to have Murfy act as a Luma, in a way. Rayman can summon Murfy for many purposes. If Rayman needs to recover, Murfy will create a temporary platform. If the opponent shoots out a projectile, he will reverse it. If the opponent is holding an item (or an assist trophy/Pokeball for casual players), Murfy will completely remove it from play, provided Murfy touches the opponent prior. If the opponent isn’t holding anything, Murfy will go up and attack like a Luma would, dealing minimal damage, and possibly reversing their attacks like Mario’s cape.


Gimmick #2: Golden Fist - Rayman will get the golden fist from Rayman (1995) when pushed past 100%, but there is a catch; the golden fist will spawn in once you reach 100%. This works somewhat like King K. Rool’s crown, where you need to run up to it before the opponent does, meaning the opponent can throw them away from you. Once you get them, you can also throw them at the enemy and deal much more damage in styles that are reminiscent of the first game.


Final Smash - Beyond the Origins, Beyond the Legends! - This sounds like something Sakurai would name a final Smash, but basically, this will kind of have parts from all of the main series Rayman games. This will start with Rayman dashing forward with his shell from Rayman 2 (it looks like a pencil rocket) and will cut to a cinematic. This is when you’ll see a background of dragons and bosses fly in from Rayman Origins (2011) and Rayman Legends (2013) in a chaos-apocalyptic setting. These enemies will begin to deal damage to the opponents. The final hit will be from the Rayman mech from concept art of the unreleased game called Rayman 4. Rayman will deliver one final blow with his fist, kind of like his forward Smash. Does around 50% damage altogether. Images below in order of what goes on.

 
Last edited:

ForwardArrow

Smash Ace
Joined
Aug 17, 2011
Messages
502
To make sure nobody ends up worrying about me, I am stuck with no internet probably until Thursday, maybe Friday. We had several trees hit our power lines because of a huge storm. But I am fine, just massively inconvenienced. I will at least be able to check Smashboards on phone, but not Discord.

I meant to try and comment them today or tomorrow, but seeing as that's not happening, just wanted to say Wolfgeist is great and you all should read it, and Carrot is a lot better structured than most of Bia's other work and deserves a look. See you guys soon!
 

Bionichute

Smash Champion
Joined
Jun 30, 2012
Messages
2,151
Captain Qwark


Captain Copernicus L. Qwark is a major character in the Ratchet & Clank series, first appearing in the very first game, and making appearances in almost every game afterwards, barring some exceptions. Qwark is allegedly the greatest hero in the galaxy, having gained great fame and fortune selling stories of his heroic deeds, his most famous being when he saved Metropolis from a robotic invasion from the villainous Dr. Nefarious, his arch-nemesis. Qwark, however, is washed up, and not exactly an ideal hero when it comes to ideals.

In the first game, Qwark is actively a villain, teaming up with Chairman Drek so he can become the spokesman of Drek's new planet, thus making him millions. He was defeated by Ratchet & Clank, but returned in the second game as the primary antagonist, though you don't learn that until the end of the game. There, he manufactures the Protopet threat in the Bogon galaxy, hoping to form a market in the new galaxy. In the third game, Qwark is a more heroic figure, though still very antagonistic to our main characters, as he seizes control of the fight against Dr. Nefarious, but never does anything himself, and eventually locks himself away in a hideout out of fear. The end of the game, where he returns to fight of Nefarious, is basically the end to his arc.

From there on, Qwark's appearances are more minor, appearing during short sections of the games, usually during the intros and battle arenas, but he's now distinctly a protagonist, though still a coward. Qwark has even been playable in multiple games, sometimes with his own unique gameplay style, like in Up Your Arsenal and Secret Agent Clank, sometimes as part of co-op gimmicks, like All 4 One and Full Frontal Assault. He's played many roles over the years, a salesman, a villain, a nurse, but there's one thing Qwark will always be: A doofus.

Qwark is one of the most popular characters in the franchise, and being the greatest galactic hero of all time, it only makes sense for him to join Playstation All-stars Battle Royale.

Er, wait. Super Smash Bros. I meant Super Smash Bros.


Stats
Weight - 95
Walk Speed - 1
Run Speed - 1.5
Air Speed - 0.95
Fall Speed - 1.7

Qwark is built like a heavyweight, a heroic mass of muscle and machismo, larger than most characters and standing roughly as wide as Bowser and as tall as Ganondorf. You might think this means he's a super heavyweight, but shockingly, he's not! He falls directly into the middle of, uh, middleweight. This doesn't actually mean he's that light in-canon, it's actually a gameplay representation of Qwark really not liking getting hit. Other than that, his stats are mostly lined up with usual heavyweight stuff, meaning that, well... Qwark is at a distinct disadvantage compared to other middleweights, and especially compared to heavyweights.

His idle stance has Qwark copying his idle in the Qwark Vid-Comics from Up Your Arsenal, except transposed onto his newer design from Ratchet & Clank 2016. The rest of his animations are less cartoony than the Vid-Comics, matching up with his animations in the later multiplayer games he's featured in.


Specials
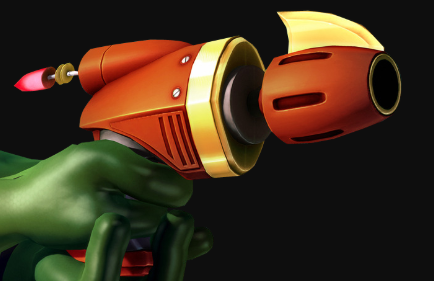
Neutral Special - My Blaster Runs Hot


The attack based on the minigame based on the fictional movie! Captain Qwark readies his signature red blaster (As seen in A Crack in Time), and fires a purple laser shot from it. The laser shot is similar in size to an uncharged Super Scope pellet, and flies at a fast speed with 3.5 Grid Blocks worth of range, but flies fast enough that its gone in only a few frames. The laser is incredibly weak, only dealing 0.5% and, well, basically no knockback of any kind. This makes it, well, pretty actively bad as a basic projectile, but you should probably guess that this isn't everything the move can do. If you hold the button down, Qwark will continue to fire the blaster, firing out four more of the purple laser shots.

Once those four shots have been fired, the gun will then fire out blue shots that are slightly larger, and after that, larger green shots, then even larger orange shots, and then finally ending with one very large red shot. This equals 17 projectiles shot throughout the attack. Once this red shot fires off, Qwark's blaster will overheat and he'll quickly fumble with it before putting it away. We're going to have to break this down shot-for-shot, so let's start with damage. The blue and green shots each add on an extra 0.5%, meaning that they deal 1% and 1.5% respectively, while orange adds on 1.5% for 3%, and the final red shot adds 7% for 10%. The purple and blue shots don't deal knockback, while the green one does flinching knockback. The orange one deals light knockback that can KO in the early 200%s, while the red shot can KO in the mid 100%s, making it decently powerful for a projectile.

The size of this is a bit harder to elaborate on in a text-based medium. The best way to describe it is that the first shot is an uncharged Super Scope pellet, but the final shot is a fully charged one, with the middle three falling between those two ends. I hope that makes sense. Anyway, the whole attack takes around 4.5 seconds to do in full, with the red hot shot having very bad ending lag as mentioned above. However, if you stop using the attack at a certain point, you will have a roughly 2 second buffer before the attack resets to the first shot, meaning that if you start firing before that, you will return to the charge that you were at when you canceled the move.

Once the red hot shot has fired and Qwark has put his blaster... somewhere... there will be a 5 second period where the move cannot be used as it needs to cool down. This is shown on Qwark's HUD as an icon with a gun and a cross over it, which vanishes when he's ready to use it again. Oh yeah, and Qwark can both move AND fire the gun in the 8 cardinal directions, making this even crazier! He can even jump and fire at the same time, but only if you have jump assigned to a button, since the precision aiming will cancel out jumping while you use it. Qwark's blaster is a major part of his gameplan, basically acting as a deterrent to keep opponents out of any kind of close range, where Qwark is the... not-strongest. Listen, it's not that he's bad at hand to hand combat, this is an ingenious strategy!


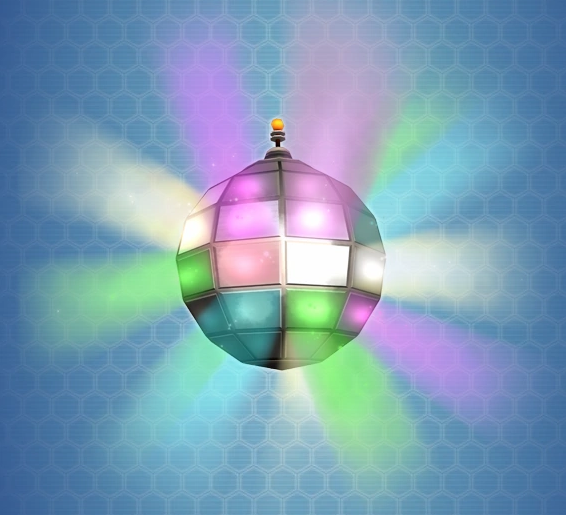
Side Special - Groovitron


Taking advantage of one of the most overused weapons in the series, Qwark quickly tosses a Groovitron out in an arc. The Groovitron is around the size of a Smart Bomb, but looks like a miniature disco ball. The arc that Qwark throws it at is low, travelling at half the height of a single Grid Block, and landing 2.5 Grid Blocks away from him. During this throw, the Groovitron is actually treated like a thrown item rather than a projectile. If it hits an opponent, it will deal 2% and very little knockback with decent hitstun, but it doesn't really need to do that. The throwing animation is slow, on the same scale as Snake's grenade toss.

If you've played the Ratchet & Clank games, you know where this is going. Once the Groovitron hits the ground, or an opponent or wall, it will float up from where it impacted, roughly 1.5 Grid Blocks high, and let out an AoE disco effect around it while letting out of a handful of songs that overrides the background track. You know, like flashing lights and stuff. This disco effect is roughly 3/4ths as large as a full sized Smart Bomb explosion, meaning it covers a fairly ridiculous amount of space. If an opponent enters this area, they will suddenly gain an uncontrollable urge... to start DANCING!

This works on every character, including Ganondorf and Ridley, and every character created for MYM. Every character has a unique dancing animation that they will perform while in the Groovitron's area of effect, Mario will perform his idle dance from Superstar Saga, Mega Man will do the robot, K. Rool will do a pirate jig, so on and so forth. Even Qwark will groove a bit if he's in the area, but he isn't affected by the Groovitron's negative effects. While an opponent is dancing, they won't be able to attack, and have considerably reduced jump height, cutting their basic jump down by half and removing their double jump, and their speed is reduced by half as well. Characters will still be dancing while performing all these actions, of course. They will also take the same knockback, but are reset to normal when hit, and if knocked out of the AoE they will be returned to normal. If the knockback is light enough, the opponent will only gain a brief grace period to try and escape, or else be thrown back into a dancing nightmare.

This only lasts as long as the opponent is in the area, though there are some limitations beyond that. The main one is that opponents need to be on the ground for the effect to activate, as it doesn't affect opponents mid jump (no easy ledge kills there, sorry). The Groovitron will also only last 15 seconds before it explodes in a puff of smoke. But opponents don't just have to avoid the area for those 15 seconds, as they can take matters into their own hands. The Groovitron can be destroyed by any attack, or by a dancing player running or jumping into it. This makes projectile characters particularly keen for clearing out a Groovitron, as they just have to line themselves up correctly and fire.

But, this does take pressure off Qwark for a moment. Just long enough for him to come up with an ingenious plan! The Groovitron is an obviously high utility move, as it allows enemies to become easy pickings to Qwark's ranged weaponry, particularly his blaster thanks to its low knockback for most of its hits. It's great at stage control as well, as Qwark can hide... uh, tactically retreat to its AoE to prevent opponents from coming near, while blasting at them. This strategy isn't always great, mostly against other ranged characters, but its fantastic for melee characters. I can't think of anything else specific, it's a large AoE that stuns opponents, its just useful in general.

Final notes: Qwark will enter an 8 second cooldown once one Groovitron explodes, with his antenna lighting up once its ready to use. If you try to use the attack while during this cooldown, Qwark will let out a quip relating to him being out of ammo, while not actually performing the attack. If a thrown Groovitron is reflected, it will not become the opponent's, and behave like normal, activating once it hits.


Up Special - Galactic Ranger Jetpack

Captain Qwark must soar like an eagle! Qwark's jetpack appears on his back, and he quickly rockets directly upwards, with him letting out a scre... heroic battle cry as it happens. This turns Qwark's entire body, every rippling muscle of it, into a hitbox, dealing 10% and upwards knockback that KOs fairly late. This isn't much of an attack, but Qwark will travel 5 Grid Blocks, making it a fairly great recovery if you're just going by distance. It also has mediocre start-up, comparable to slower end recoveries but not as bad. Of course, this isn't all, as once Qwark reaches the apex of his flight, he'll enter a Peach-esque gliding phase... except this is quite a bit different.

Like Peach's float, Qwark can move from side to side at his max air speed from where he stopped, and double tapping down will cause him to exit the float. However, unlike Peach, Qwark can hold this glide for much longer. Specifically, he can glide for 10 seconds, which is quite a long time. Of course, if Qwark is hit during this, he will be knocked out of the glide, causing him to enter special fall. While this is obviously great for camping and recovery purposes, there's an extra bit here, as Qwark can use a number of attacks from this vantage point! Specifically, he can use his specials, aerials, and even his smashes! With all this at his disposal, Qwark has a lot to work with for a full frontal aerial assault!

However, you need to keep in mind the time limit, and even more than that, the resulting cooling period. Once Qwark hits the ground from his special fall, he will have to wait 5 seconds before he can use specifically the hover again. He can use the rocket jump at any point, but it isn't as good of a recovery without it. Being in the air isn't all it's cracked up to be of course, as the time limit and limited movement options make so its very easy for an opponent to knock you out of it, so it's best to play it safe, even when firing your guns.

Also, did you know that Qwark never had a jetpack before the movie/2016 remake? I know, I think I tricked my brain into thinking he had one before hand, but he never did! It's a very seamless addition to his design.


Down Special - Quantum Deflector


Qwark quickly throws up a floating green device in front of him, which quickly lights up and emits a green force field around him. The force field is around the size of Qwark's normal shield, though perhaps larger by a small, barely noticeable amount. There are a few differences, as the Quantum Deflector won't shrink while it's out, and opponents are capable of entering the space it covers. While the shield is around him, Qwark can move around like normal, but now has a few limits placed on his moveset. He now can't use any weapon based attack, only his melee based ones... and his jetpack. Basically, he can only use USpec, Standards, DAir, NAir, and Grab/Pummel and his throws.

This massive limiter placed on Qwark is evened out by the actual function of the Quantum Deflector: It completely nullifies ANY attack that hits it! Even if the opponent attacks Qwark from inside the bubble shield, the damage will be redirected to the shield instead. And get this, it blocks out 40% damage (This is multiplied in 1v1 matches, much like how regular damage is) before it vanishes! Well, it also vanishes after 20 seconds of use, too, but the damage is more impressive. It will also passively damage anything inside the shield area for 1% every 30 frames. This makes the Quantum Deflector the perfect tool for running away in terror retreating and coming up with a new strategy, as opponents have no real reason to go near Qwark until his shield gives way. The Quantum Deflector will actually start absorbing damage as soon as it first appears (the device that Qwark uses), meaning that Qwark only has a very brief moment of vulnerability when using it. However, when it runs out, it breaks immediately, the device exploding and Qwark becoming instantly vulnerable.

However, there is another downside. The Quantum Deflector is a powerful tool, and as such, Qwark only gets 2 uses of it per stock, like Banjo's Wonder Wing. And beyond even that, each use has a 10 second cooldown period. With limited uses, Qwark will need to strategeristically figure out when to use it. The obvious application is using it when things have gone bad, but when does anything go badly for Qwark? Never, that's when. Obviously you'll want to use this to give Qwark an added edge in close quarters, as its added damage and protective aspects allow his mighty blows to hit harder and easier! Just remember to keep in mind the limits the move puts on you.


Smashes
Up Smash - Warmonger


Qwark readies his Warmonger, aiming it upwards before firing a single missile from it. The start-up of the attack is slow, as Qwark hefts the weapon over his shoulder and takes a knee. Him aiming the Warmonger is also the charging animation, and upon release, the missile launcher will... launch a missile. The missile is equivalent in size to Samus' Power Missiles, and will travel 3.5 Grid Blocks directly above Qwark before it explodes. On hit it will deal 13-23%, with heavy knockback that can KO in the mid 100%s, making it a decent kill move. The issue is that the missile itself is fairly hard to hit with, thanks to its small hitbox and there not actually being a melee hitbox to launch the opponent upwards. This means Qwark has to rely on actually hitting the opponent while in mid-air in order to fully use this to his advantage. However, he CAN aim it left and right at 45 degree angles while charging, making it not as bad. It also has pretty bad ending lag, but this is made up for by the next paragraph.

But it isn't all safe on the ground when the Warmonger is around. Once the missile explodes, whether it hits anything or not, 4 pieces of flaming shrapnel will launch from it in different arcs, two closer to where the missile was, two farther away. The inner shrapnel will fall 0.5 Grid Blocks away from where Qwark fired the Warmonger, while the outer shrapnel will end up landing 1 Grid Block away from the inner two. Once the shrapnel pieces hit the ground, they will also explode. The hitboxes on the pieces of shrapnel are roughly Capsule sized, with it expanding out slightly once they explode. The shrapnel pieces aren't strong, only dealing 3% with little knockback but high hitstun, but who are we kidding, raining down death on your enemy is just fun to do.

The Warmonger can be used while Qwark is hovering with his jetpack, and there isn't much to it. There's an animation difference where Qwark won't kneel, but it isn't particularly useful, considering the attack is an anti-air itself. It can make it easier to KO opponents, and you CAN combo from the jetpack to the Warmonger at lower percents, though it has very tight timing. The Warmonger, as mentioned before, is an anti-air, but also one of Qwark's best KO moves. Sure, it requires getting the opponent into the air, but Qwark is great at controlling the distance between him and his opponents. Throw a Groovitron out and watch your opponents jump right into your line of fire! Hopefully, at least. The shrapnel, however, instead works AS a form of stage control, giving Qwark slight defense if he whiffs the Warmonger. He can also use the shrapnel as cover for when he exits the jetpack hover, as it falls slightly faster than his own max fall speed.


Down Smash - Fusion Grenade

Qwark holds up a glowing object in his hand for the charging animation, before throwing it down at the ground upon release. Not a cheap smoke bomb this time, Qwark has instead thrown a Fusion Grenade, which explodes into blue energy around him. The start-up of the attack is light, but it has some noticeable endlag, enough that whiffing it can be trouble at high percents. The explosion's radius is also fairly small, hitting 0.4 Grid Blocks away from Qwark on either side. On hit, the explosion will deal 11-20%, with backwards knockback that KOs at around 170%. This makes it less useful as a kill move for Qwark, but it is a bit easier to hit than the Warmonger is. If you're wondering why Captain Qwark isn't hurt by the explosion, it's a well known fact that Qwark's chiseled abs are immune to explosions.

The attack might seem fairly basic on the surface, but it gets much more interesting if you use it while in jetpack mode. While in flight, instead of the bomb simply exploding at Qwark's feet, it will be thrown directly downwards as a projectile. The grenade is roughly the size of a Mega Man pellet, and falls at a fairly decent pace. Upon touching anything, it will explode, dealing the same damage, but revealing the full scope of the hitbox, being a smaller explosion in a circle, similar to Samus' bombs. The knockback of the attack is also changed to radial. This is sort of a reverse version of the Warmonger, as it is much easier to hit with, and... goes downward.

The grounded version can act as a secondary killing Smash, or other basic DSmash needs, like catching recovering opponents, but its weaker range makes it a bit of a mixed bag. The aerial version, however, lets you rain even more death on foes, with easier aiming thanks to the jetpack. This can be especially devastating off-stage, but you always need to keep in mind Qwark's jetpack fuel. Get a bit overzealous and you'll end up falling off, yourself!


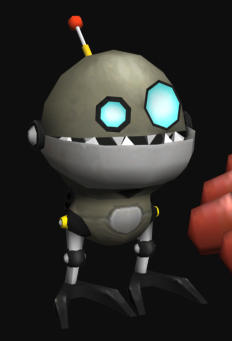
Forward Smash - Agents of Doom


Qwark prepares possibly the most 2000's weapon name in the series, holding another glowing object in his hand. This is, again, the charging animation, but on release Qwark will instead throw a red projectile down 0.5 Grid Blocks in front of him. The projectile will explode into 1 to 3 small mechanical fellas, the titular Agents of Doom. This opening is relatively quick, but doesn't have a proper hitbox attached to it, as the Agents themselves will act as the hitbox. It also has low ending lag, making it fairly easy to throw out.

For the Agents themselves, they use their 2016 design, and are roughly 3x3 of the smaller grid blocks in size, making them particularly small, standing roughly to Qwark's knees thanks to how small his legs are. The Agents are fully autonomous minions, and will run towards the nearest opponent (or anything with a hurtbox) as soon as they come within 4 Grid Blocks of range. If there isn't an opponent in range, they will stand still until there is, and will return to standing as long as there isn't anyone within their range. Once the Agents get within 1 Grid Block worth of range from the opponent, they will launch themselves at them using a rocket thruster, exploding on contact and dealing 10% with average knockback. The Agents can activate their thrusters from whatever direction they require, and once they lock on the only thing the opponent can do is shield or dodge. The Agents will fly until they either hit something or go off screen in the case of a dodge. Jumping won't help opponents, as the Agents have a slight homing ability that will basically allow them to hit as long as the opponent's hurbox is still visible.

As you might be able to sus out by now, the charging for this move doesn't affect the damage the agents cause, but rather how many of them there are, 1 for no charge, 3 for full charge. This ultimately does result in just a damage boost, a pretty massive one at that however, as Agents tend to stay clustered together - though them breaking off and attacking multiple opponents isn't unheard of. Qwark can throw down some Agents of Doom while in the jetpack, and while this doesn't have any unique properties, it allows for much sillier throwing angles. Qwark will throw the initial glowing orb down at a diagonal direction, where it will fly until it either hits something or goes off stage. On hit, it will create however many Agents the charge denotes, and you may in fact just be able to hit an opponent with all of them instantly if you manage to hit someone. The main use of the aerial version, however, is to place Agents over at a different side of the map than Qwark. Think of it as a scouting mission while Qwark prepares for the main event, and definitely not him using someone else to do his dirty work.

The Agents of Doom are great protection, as they can easily distract an opponent for a short time, taking the heat off Qwark while he does something else, like set up a Groovitron or prepare his blaster, or prepare cup of coffee, I dunno. Despite their average knockback, they can deal big damage when fully charged, though they are relatively easy to avoid if the opponent is paying attantion. The big downside is that you can only have 1 set of Agents on stage at a time. If you use the move again while any Agents are out, they will burst into non-damaging explosions, making way for the new Agents. Agents also have an unlimited time on the stage, but their AI means they won't be around for long. Make sure to use your current agents to the best of their ability before summoning in new ones.


Standards
Jab - Crouching Kitten Style

Qwark unleashes his mighty fists of justice on the enemy! Channeling days of martial arts training, Qwark does a left hook, a right hook, and then a spinning back hand for a basic three hit combo. This may sound like an average jab combo, but much like Qwark himself, it's far from it. The first two hits are lightning fast, comparable to pretty much every jab combo in the game, but the final hit takes a while to actually land, making it one of the slower jab hits in the game. As you might expect from this, the trade off is damage. The first two hits only deal 3%, with very little knockback, and the last hit dealing 7%... with slightly better knockback.

The attack really won't KO until really late, unfortunately, but obviously Qwark doesn't want to have to get his hands dirty unless he absolutely has to. But when that time comes, Qwark will rush valiantly into battle, as each hit of the attack pushes Qwark forward a small, but noticeable, distance. This allows Qwark to, among other things, use this as a decent spacer at lower percents, giving Qwark room to hit with one of his guns, or make a strategic retreat. The issue is that the final hit has pretty bad ending lag as well, meaning that if you whiff... well, you know what would happen. It can also be used to KO at very high percents, or even push yourself out of a disadvantageous position, or even push opponents into your various lingering projectiles. With the Quantum Deflector up, thanks to its defenses, this can even become a good pressuring tool.


Forward Tilt - Mighty Kick

Qwark pulls up his leg, and then uses his incredible strength to powerfully push it forward. The kick has fairly short range thanks to Qwark's, uh... "compact" legs, with it having significantly shorter range than his Jab. The attack has fairly high starting and ending lag, making it Qwark's slowest standard, though it has super armor on the start-up to make sure opponents can't knock him out of it with a weak attack. This is at least made up for with it being the strongest of his standards as well, though the actual properties of the hit are a bit strange.

On hit, the kick will deal 12% and cause opponents to take VERY shallow backwards knockback, shallow enough that it looks like they're sliding across the ground rather than actually being knocked away. It still knocks opponents decently far away, though it can only kill in the mid 200%s. Even with that low-ish knockback, the kick has a few... Qwark-ian uses. The main one is getting opponents away from him, not because Qwark doesn't like being up close to his opponents, its just part of his heroic plan he's definitely not improvising. This is your main keep-away move while on the ground, even with its bad start-up. It has high hit stun as well, so an ideal way to keep opponents away, if you have it set up, is to hit them with the kick while they're stunned by a Groovitron. The kick can also knock opponents directly off stages, giving Qwark a good chance to hit an opponent with a weapon off-stage. A more advanced technique is that you can actually use this to punish a ledge roll, but thanks to the starting lag, this is very difficult to pull off.


Down Tilt - The Q-merang

Get it? It's a boomerang, but a Q, for Qwark. It took him months to come up with it, and trademark it of course. Qwark's crouching position is... pretty bad, as you might expect from a guy who is 80% upper torso. It's similar to Bowser's in terms of how good it is at actually avoiding things, AKA not good. Notably, Qwark will keep one hand over his head, with a very noticeably worried look on his face while he's crouching. He's not scared, though, he's just... concerned.

Anyway, for the actual attack, Qwark will take the hand he's using to cover his head, and quickly throw a spinning, double bladed boomerang-esque projectile forward. The Q-merang is roughly Metal Blade sized, if slightly smaller, and will travel forward 2.5 Grid Blocks, before pausing for a few frames (with hitbox still active), and then returning back to Qwark. Qwark can move around almost immediately after the Q-merang is thrown, and it will always fling back to wherever he is. The return trip isn't a hitbox, fortunately for the opponent. The Q-merang is noticeably weak, dealing 6% with very, VERY weak knockback. This does, however, play into its main use.

While FTilt is based around getting enemies off you that are already very close, the Q-merang is based on halting approaching enemies. It's fast, and while the actual attack might be weak, it deals decent hit stun. If you can manage to hit an opponent with it while they're on the approach, then Qwark can very easily make a tactical retreat and start blasting at the enemy, or you can stun them for a moment and leave them to the mercy of your Agents of Doom. Its speed can be used to knock opponents out of their own attacks thanks to it having high-ish priority as well. This is also notable for being the only projectile-like attack Qwark can use while the Quantum Deflector is up, giving him a bit of added defense. It is absolutely not an offensive attack, however, though using it to get a quick 6% won't like, harm you that much.

Being a boomerang, the Q-merang will return to Qwark after a few frames of hovering in place. The hitbox remains active, allowing Qwark to hit opponents that could've leaped over or dodged through the attack. However, the return trip is even weaker, dealing basically flinching knockback and only 4%. This isn't great, but it can still be used for a brief diversion, letting Qwark get away or give him just enough time to finish off whatever he was planning in the first place.


Up Tilt - Gun Trick

Qwark quickly pulls out his blaster, but instead of firing it, spins it around quickly performing an "impressive" gun trick, winking to the camera as he does so. This attack is a single hitbox despite what the animation may look like, with it activating as Qwark starts to pull out his gun, and continuing as he spins it around. This is a fairly standard UTilt in terms of utility, acting mainly as a a quick anti-air, as it hits slightly diagonally above Qwark's head, and knocks opponents upwards for 8%. The hitbox itself lasts for a bit, but its angle means that it is difficult to hit shorter or crouching opponents.

This can actually combo into some of Qwark's gun attacks, most notably his NSpec, which can true combo from UTilt at lower percents. At higher percents, UTilt will instead knock opponents directly out of the range for any of NSpec's angles, but it can instead go into UAir. You can even use this to your advantage and fire a few of the weaker NSpec blasts at them in order to rev it up! The attack has a bit of ending lag as Qwark will once again put the gun... somewhere, taking a fairly decent amount of time to do, roughly the same as NSpec's endlag, as it basically uses the same animation.


Dash Attack - Heroic(?) Charge

Qwark dashes forward, shoulder first, making a brave dash towards the enemy. This is a somewhat basic charging attack, boosting Qwark's speed and momentum while it's active, similar to a Dash Attack like Ganondorf's. This has a much larger hitbox thanks to Qwark's hulking mass, which also means this gets more range than Ganon's dash as well. Basically, the hitbox takes up the entire front of Qwark as he dashes, not much else beyond that. It has decent start-up, but lasts for a bit, though the actual ending lag isn't bad.

The main interesting note is, that like most of Qwark's melee, the attack is a LOT weaker than it looks. It only deals 9%, considerably low for a Dash Attack, and has very low knockback - but this isn't without a purpose. For one, this is a good way to get opponents off of you, as while the knockback is weak, it's only unsafe at lower percents. As said, the knockback is low, so it won't be useful for killing, but it does have a decent use: Getting opponents into your Groovitron range. The knockback not only is low, but has low ending lag as well, meaning that opponents close to the Groovitron, whether they avoided it or just escaped, can be easily pushed in again. This becomes a bit of an obvious tactic if done too much, however, as the projectile based Qwark should only enter when forced to, so it can become a bit suspicious when you see him rushing into combat.

You can also follow it up with FTilt, which can allow him to knock opponents into some of his existing set-ups. This is a bit of a risky technique by itself, as neither attack is particularly powerful. You may even be able to condition the opponent into using a defensive technique when they see you rushing in, allowing you to instead follow up with something more devious. I mean, heroic. This can still become too much of an obvious move if you use it too much, however.


Aerials
Neutral Aerial - The Perfect Specimen

Qwark quickly turns towards the camera and flexes his muscles so hard that a glistening aura appears around him, damaging anyone that gets within range of him. Aside from the comical animation, this is a fairly basic NAir, with rather quick start up, though high ending lag. The range can be compared to other NAir's, most obviously to larger characters like Bowser. The attack will deal 10% with average radial knockback, average being generally much less than a standard heavyweight.

This has fairly standard applications for a NAir, it's quick so it can be used out of a short hop, and it has decent range which lets it work as a decent keepaway attack, though it isn't great as a kill move. It can also be used while the Quantum Deflector is up, but pretty much shares the same role, even if it is redundant thanks to the Deflector's ability. This attack can also be used while in jetpack mode, which actually gives it more variety of uses. For example, you can hover off the stage and use it to bounce a recovering opponent back. If you're going in for an approach, you might even be able to psych the opponent out, making them go for a defensive action against a projectile when you're REALLY going for a close range attack!

Now let's talk about how the attack actually has multiple different animations, each one a different sort of flex, with the animation set changing depending on if Qwark is facing left or right. All the animations have the same hitbox, so you don't need to worry about that. Also, if you enter landing lag while using this move (which is likely, considering that it's fairly laggy at the end), Qwark WON'T perform some form of comical pratfall like most characters - instead, he'll land perfectly and continue flexing for a few extra frames, acting as the ending lag.


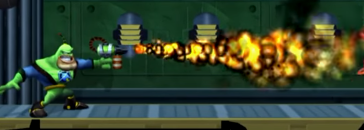
Forward Aerial - Flamethrower


Qwark pulls out the generic flamethrower weapon from his Vid-Comic adventures, and aims it at a downwards-diagonal angle, quickly shooting out a stream of flame from it. The fire reaches out 1 Grid Block of space, and is 0.2 Grid Blocks tall. These measurements are for the flame if it was going straight out, but it covers the same distance, basically. I don't need to write a chart for this, you can figure it out yourself. Anyway, the flamethrower fires out quickly, and has minimal ending lag as well - though it only comes out for a brief moment if you just press the button. HOLDING the button will have Qwark shoot the flamethrower until he either hits the ground or you release it.

It basically forms a wall of pain beneath Qwark, turning this into a really impressive approach option... though whether or not you want to approach the enemy does depend on how well Qwark is doing in the fight. If you don't want to approach foes, it can also act as a decent warding attack as well. The flamethrower will deal 5 hits of 2%, with very little launching power on the final hit. And yes, it will always only do 5 hits to an opponent at once, even if you hold it. You can cancel out of the hits by releasing it, which will put the opponent into light hitstun with flinching knockback, meaning that this is functionally Qwark's only combo attack - though, again, this is something you may not want to do.

For other uses, the flamethrower can be used in conjunction with NAir, as the flamethrower can interrupt opponents, while the NAir can deal a staggering blow. It can also be used as a light stalling tactic for when you're waiting for Qwark's various gimmicks to recharge. The big one is that this works incredibly well with NSpec, as you can go from firing shots to using the flamethrower very quickly, giving it extra defense while you charge it up. It's best to use this in small doses, mostly when you want an opponent to go away, as the added input means the opponent has a better chance of interrupting you or even dodging the final shot.


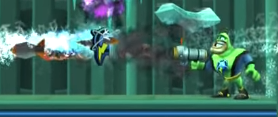
Up Aerial - Gravity Bomb


Qwark pulls out the Gravity Bomb gun, also from his Vid-Comic adventures, and aims it upwards, firing out a large purple orb with an infinity symbol on its side. Or maybe it's an eight. Anyway, this doesn't have an actual hitbox directly attached to it, with the bomb that's fired being the actual hitbox the entire time. It is also relatively quick, but not as fast as FAir or NAir, meaning it can't be used out of short hop. This is primarily an anti-air, so you think this would be a bad thing, but thanks to the properties of the bomb, it actually isn't!

The bomb is the size of a mid-charge Samus Charge Shot, and will be fired 1.5 Grid Blocks upwards, before hanging in the air and quickly falling to the ground if left alone. When the bomb hits the ground, it will bounce according to the game's physics, and automatically vanish after it hits the ground a third time, with each bounce getting progressively smaller because physics. There can only be one of the bombs on stage at a time, and it will be instantly replaced if Qwark attempts to shoot a second bomb. The bomb itself will automatically draw itself towards any opponent that comes within 3 Grid Blocks of it, at a sluggish pace, unfortunately, with its trajectory changing how it bounces if it misses.

If the bomb successfully drags itself over to an opponent, they will take 12% and average knockback that will KO in the late 100%s. This doesn't make it that great of a kill move, but it is passable. Its main use, as mentioned previously, is to be an anti-air, but with that... unique, Qwark style. Qwark can easily fire the bomb, and then leave it to home in on enemies. It doesn't have that great of a hit ratio thanks to its sluggish movement, but it can easily disrupt an opponent's plan in the air, the ground or even off the stage! But if you want it to hit a bit more often, then you'll most likely need to use Qwark's throws in order to shove them into a more easily hittable position.


Back Aerial - Missile Launcher


sorry, this is the best image you're getting

Equipping himself with the last of his Vid-Comic weapons, Qwark pulls out a missile launcher and quickly spins around, firing it out backwards. The missile is cartoony, and about the size of Samus' standard missiles. The missile travels slowly, much slower than most projectiles in the game (and that includes the Gravity Bomb mentioned above), but it also has infinite range, meaning that it will stay on stage for a LONG time.

This makes it an incredibly powerful stage control attack, as it basically prevents opponents from standing in one place for too long, or even just jumping around if placed correctly. Don't get too overzealous, because only one missile can be on stage at a time, much like the Gravity Bomb. On hit, the missile will deal 15% damage with decent knockback that KOs in the early/mid-100%s. This is extra good incentive for opponents to stay away from the missile, if they run into something so slow it's THEIR fault! Of course, there's still ways the opponent can turn this on you, so don't try to spam it TOO much. But.. maybe have one out during defensive plays, just to be safe.


Down Aerial - Intergalactic Slam

Qwark raises both of his fists, and then starts to fall downwards, slamming them against the ground as he hits it. This is basically your standard stall-then-fall type move, basically akin to Ridley's, though you can cancel out of this one at a much earlier time, as you might expect from Qwark. The ability to cancel out of the move earlier also means that the attack has less damage output, because balancing. It ultimately deals 11%, with a weaker than average downwards spike, though only if it hits opponents while in the air. This will also cancel out of it, allowing Qwark to perform a tactical retreat.

There's a secondary hitbox if Qwark lands on the ground and manages to hit someone, hitting on either side of him, with slightly distended hitboxes the width of Kirby. This is actually slightly more powerful, dealing 14% and upwards knockback that can KO in the early-mid 100%s, making it one of Qwark's strongest melee attacks. Of course, with how stall-then-falls work, you won't exactly be hitting with this too often... but you can use it to edge opponents away from you with the threat of actually dealing damage! Also, as this can be used with the Quantum Deflector on, it can be used to knock opponents away from the shield's range. Using it while Qwark's jetpack is active will automatically cancel the jetpack and make it to the ground much faster. You can use this to combo from any projectiles or attacks that don't require Qwark to be on the same level, like the Fusion Bomb or Agents of Doom. The increased falling speed also allows the Warmonger's shrapnel to cover you slightly better.


Grab Game
Grab & Pummel

Qwark reaches forward with his weird three fingered hand, in a fairly standard grab. This is comparable to something like DK's grab when it comes to range and lag, as both DK and Qwark have massive, chiseled biceps. Though obviously Qwark is much more handsome. When the opponent is grabbed, Qwark will hold them at arm's length, by the scruff of their shirt... or whatever is currently available if they aren't wearing a shirt. But nothing TOO inappropriate. Qwark doesn't usually want opponents up close, so his grab being this decent is at least something if you have no choice but to go old fashioned.

For his pummel, Qwark will perform two quick slaps to the opponent's face, ironically putting this on the slower end of the pummel speed spectrum thanks to it being a two hit. Each hit deals 2%, and while it is slower, it can still be used multiple times on opponents who have taken enough damage. It isn't anything spectacular, but it can be used to get some easy damage if you end up with an opponent in your grasp. Qwark's throws are mainly here to get the opponent away from him show off his herculean strength, so higher damage is always a plus.


Back Throw - To My Biggest Fan
Qwark quickly flicks the opponent behind him, freeing them from his grasp and leaving them in a stunned state for a moment as the animation continues. Qwark will then pull out a pen and a photograph of himself, and start to sign it, muttering "To my biggest fan, yadda yadda..." as he does so. He then quickly slaps the photograph onto the opponent's face (without ever looking at them), causing them to recoil. Qwark will then dust off his hands and return to his idle stance.

This is the second weakest of Qwark's throws, as it will barely knock the opponent away, won't KO until around 300%, and only deals 8%. The upside, however, is that it has very high hitstun on the opponent, making it incredibly safe to use. With low knockback and damage, there's a very obvious way to use this. That's right, this attack's main purpose is to push foes into the Groovitron's range, giving Qwark enough time as he needs to do... well, anything he wants, as the opponent will be left helpless for quite a bit. This is also another great stalling move, as its lengthy animation can help keep the foe in their place while Qwark recharges. If the attack is used against a wall, it will force the opponent to recover low, something predictable enough that even Qwark can see it coming!


Forward Throw - Showing Off

Qwark quickly lets go of the opponent, flexing for a moment before he performs several quick karate chops on them. The karate chops each deal 1% to the opponent, totaling to 4%. He then realizes the chops aren't working well, and performs a straight punch on them, causing another 5% and launching the opponent at a nearly horizontal angle. As the opponent is launched, Qwark slicks back his antenna and shines a smile towards the camera. This is probably Qwark's best throw from a KO perspective, as it can KO in the mid-to-late 100%s on a few characters, but like most of Qwark's melee, it isn't very good.

The attack's comparative strength means that it's one of the best ways to get opponents off of Qwark, but it has the downside of, well, being a throw. This means the opponent already has to be in your face before you can use it, but it's good when that happens. As another benefit, it can knock opponents into the Groovitron easily thanks to its very shallow knockback, or set opponents up for Qwark's blaster. You can also follow this up with BAir, instantly setting pressure on the knocked back foe while you attempt to set up something


Down Throw - Champion of the Galaxy

Qwark quickly clonks the opponent over the head with the butt of his blaster, knocking them into an automatic prone position (and dealing 2%). Qwark then takes this opportunity to pose for the camera, stepping on the opponent's prone body and striking a heroic pose, as he has vanquished the vile foe. He then walks off the opponent's body, ending up on the opposite side of where he started. This is a rather long throw animation, with Qwark's steps acting as what causes the damage, totaling to 7%, making it still rather weak.

The attack has no launching power to it, but instead locks the opponent to a prone position that lasts based on their current damage. It lasts just long enough for the attack to be safe at lower percents, and long enough for Qwark to act out a plan (or just run away) before they recover at higher percents. At higher percents, this can be used to stall the opponents while something like the Agents of Doom or the Gravity Bomb home in on them. While this isn't as good a "get off me" tool as FThrow, it is good for set-up, mostly acting as another way to keep opponents off you while you set up a Groovitron, charge your blaster, or even just prepare a normal attack.


Up Throw - The Showstopper

Qwark quickly tosses the opponent upwards a short, fixed distance. As they fall back down, Qwark quickly preps for an uppercut, giving a quick smile and wink to the camera as he does so. He unleashes the uppercut directly to the opponent's jaw as they come back down, launching them. Qwark will flex his bicep for the end lag of the attack, which is fairly short. The main gimmick of this attack is that the knockback changes based on the input on the control stick, specifically up and down. Without holding the stick in either direction, the uppercut will launch the opponent a fairly mediocre distance, KOing at around 175% or higher.

Holding down, however, will reduce the knockback considerably, though this doesn't turn it into Qwark's worst throw, as DThrow is by default worse. However, this can't kill until incredibly late, to the point that you'll only ever see this in sudden death. It does, however, have slightly longer hitstun. By holding up, the knockback will instead slightly increase from the base, not by a lot, but enough to push it into the same KO range as FThrow. It can even KO earlier if you're high enough on the stage. This has less hitstun, though. Both versions deal 10%, making it Qwark's strongest throw damage-wise.

Both these variants have distinct advantages, for example, the weaker version can be used to help hit with some of Qwark's more specialized weapons, most notably the Warmonger, as the attack ends in the perfect angle and timing to follow up with it - though the opponent comes out of hitstun a few frames after the rocket fires, meaning that this isn't a true combo. Or you can start out a combo with Qwark's NAir. The stronger version can be used to make some space between Qwark and the opponent, he even has enough time to set up a Groovitron, or you can start firing your blaster at them. There's a lot of options!


Final Smash
Believe It, Toaster Head!

With the Smash Ball in hand, Qwark uses its power to... run away! How unexpected. He enters a brief cinematic where he performs a pose and teleports away in a flash of green light. That coward, running away in the middle of a fight... or is he? Surprisingly, he isn't as his ship from Ratchet & Clank: Up Your Arsenal will quickly fly from the side of the screen, launching a volley of missiles onto the stage, marked by a dozen Q-shaped markers appearing around the stage. The missiles will aim at these locations and explode when they reach them. the missiles aren't projectiles, and will phase through anything to reach where the markers randomly appear. The explosions are the actual hitboxes, dealing 20% on contact with heavy knockback, though noticeably weaker than most Final Smashes, and range equivalent to a Bob-Omb explosion.

There are two caveats for where a missile will fire at: The first is that two markers can't be at the same location, and the marker needs to appear somewhere a player can stand on. This means that this is a beast on smaller stages like Battlefield, where the opponents are sitting ducks, but this can be completely useless on larger stages like New Pork City, as there's simply too much space for it to reliable hit opponents. Of course, this single bombing run isn't all Qwark gets - no, he makes two more runs after it, meaning that a total of 36 missiles are fired, which means that _someone_ will end up being KOed. Once the third run is finished, Qwark will teleport back to the stage, and perform a pose, while saying a quip like "Hope you got my good side! Who am I kidding, they're all my good side!".
 
Last edited:

GolisoPower

Smash Master
Joined
Sep 17, 2017
Messages
4,338
Tales have been told of the land of fire and blood, one where death is but a repeating cycle. A fate forever from the grasp of those afflicted by a horrid curse of undeath. In this land, the undeads have been corralled to an asylum to the north til the end of days. But one would be chosen to leave the asylum and venture to a land with a single goal: to end an age prolonged.

And yet, his fate would lead him elsewhere, where warriors would gather to do great battle...
 

FrozenRoy

Smash Lord
Joined
Apr 26, 2007
Messages
1,261
Location
Las Vegas, Nevada
Switch FC
SW-1325-2408-7513
Cyclone, hm? (Cyclohm bubbyboytoo bubbyboytoo )

You already fixed my main issues with Cyclohm, that being the overly long hitboxes on one of Up Special's interactions and reducing how often Cyclohm can enter his tornado in the air.

Cyclohm is a pretty solid set, which after Zeraora and even Whisper last contest is perhaps not a huge surprise, but it does throw more interactions into the mix than an average Bubby set. I personally think this was definitely the right call, particularly for this set as Cyclohm feels like it would be far too dry without the more interactive Specials as a base. Cyclohm's Specials are nicely put together, boasting both good individual and interactive uses, Zap Cannon is your Charge Shot-style threatening projectile, Side Special is a stage controlling combo starter or extender, Twister is a solid recovery and stage control trap, Soak serves as a combo-extending status effect that makes opponents not want to get close (giving you more of a chance to get the other three up).

This gives Cyclohm a good starting point, but then the interactions let you feed them into each other. Zap Cannon can be launched at Thunderbolt clouds to supercharge them on a strict timer for an even STRONGER KO option (and it's fun to launch at someone who has a cloud behind them, since if they dodge it'll hit the cloud!), you can throw everything inside of a Twister to make it an absurd hitbox or only send in bits and pieces for different effects, these all help give the Specials some depth on what otherwise might be overly basic moves and allow one to think of really good, crazy scenarios to go with them.

Most of the Standards and Aerials only interact with the cloud in a basic way, largely by moving it around, but the moves themselves make sure to have solid base uses outside of that to give them actual value. Spacer, combo starter, combo extender, zoning tool to throw in with Specials, and so on. The moveset also does a good job differentiating various movement options, for example Neutral Aerial's backwards knockback gives a different way to approach knocking the cloud around or the fact Down Aerial being one of Cyclohm's only ways to move the cloud down is on DAir + you can alter how much down you push it thanks to being a multi-hit. Link shows how hitting just a bomb around can be nice and while Cyclohm is no Rime Marz in how it takes that concept it nonetheless does a good job making moves more than just "move X construct in Y direction".

The Smashes, aside from Forward Smash, add some less simple interactions to the mix, such as Up Smash's freezing of a thundercloud to turn it into a dropping hitbox or Down Smash creating a field of arcing electricity with the thundercloud. Up Smash and Down Smash help give Cyclohm potent zoning tools for its more defensive gameplay, while Forward Smash is your hard read kill move outside of Special kill confirms (and probably good w/ them). I did feel somewhat disappointed Up Smash doesn't have some kind of Soak interaction, it feels like a missed opportunity to not have the only major ice attack in the set interact with the watery status effect. Could be something simple (more damage, or it freezes earlier into Up Smash + for a longer duration if they're Soaked or both) or more out there (a variant on the paralyzed effect, perhaps a special "frozen" effect, that increases knockback rather than damage, or something that slows them down, or something else). But it did feel like a bit of a missed opportunity. And as a minor nitpick that doesn't really affect the set's rankings, I feel like it would make more sense if F-Smash dealt slightly more damage. Doesn't have to be heavy level, but maybe 17% base so it is stronger than Down Smash? 14% just feels a bit weak for the animation + intended use.

If there was one part of the set I thought was kinda weak, it'd be the grab game. It doesn't make any notable errors, but it is pretty much as standard as you get for throws and doesn't feel like it adds all that much to the set. I wonder if more could have been done with the Soaked condition here or something? Maybe, like, a throw with an optional chargable hitbox so you have some synergy with your delayed hitbo? Think Fox/Falco's laser throws, but you can charge the laser, normally the foe would escape but with your lingering hitboxes they might not have a choice. Just throwing out random thoughts.

Overall, I would say Cyclohm is either your best or 2nd best set Bubby (I'd need to think of if I prefer it to Zeraora more), though I suspect this one will be somewhat more popular. It has a nicely defined playstyle (play a defensive or zoner game -> get some of your options prepped such as Zap Cannon charge, a Thunderbolt cloud, etc -> switch to a more offensive gear -> how it continues depends on how the offense goes), the Specials are fun to imagine, the simple standards/aerials have pointed uses that create a well designed gameplay, there's no major balance issues, it is all pretty nice. Good work!
 

plague126

Smash Cadet
Joined
Jan 11, 2020
Messages
35
In a facility in New Mexico...everything seems to be dark...no one’s there, as it’s closed down...or so it seems, until a vent cover falls down, followed by a man dressed like he’s here to steal something. “Oooooow...that hurts...but that won’t stop me, Mark!” The man gets up, before taking out a piece of paper and looking at it. “Black Mesa, huh? So this is the place...should have a lot of good loot...plus, everyone’s gone for the night-“ Mark is cut short by the voice of someone behind him. “Yo.”. Mark freezes, before turning around...****! A security guard! Ok, just play it cool, play it cool. “Uhhh, hey? What do you need?”

The guard stares at him before opening his mouth and asking a singular question.

“Can I see your passport?”
 

WeirdChillFever

Smash Hero
Joined
Jun 10, 2014
Messages
6,496
Location
Somewhere Out There
HELLO, I NEED YOUR HELP.

I AM CAP’N CUTTLEFISH AND I AM THE LEADER OF THE SQUIDBEAK SPLATOON. AS I WAS SURFING THE INTERNET, I FOUND A LINK TO “HOT NEW SINGLES IN THE AREA”
I THOUGHT THAT THE SQUID SISTERS DROPPED A NEW SPICY BEAT AND CLICKED IT.

I THINK MY IDENTITY IS STOLEN.

PLEASE CLICK THIS LINK TO HELP ME.

PS. MY CAPS ARE LOCKED, I DON’T KNOW HOW TO FIX THAT.

 
Last edited:

BKupa666

Barnacled Boss
Moderator
Joined
Aug 12, 2008
Messages
7,788
Location
Toxic Tower
CAPTAIN QWARK:
In my reading, Qwark has a rather interesting rhythm to his gameplay, where he'll frequently be punctuating the match with Neutral Special shots so as to build up to the strongest projectiles as frequently as possible. Meanwhile, the impetus grows for his opponent to move in and pin him down longer than the two-second buffer needed to keep continuity with the shots, which, if Qwark has strategically placed his Groovitron, can be easier said than done. Given the projectiles' utility, I would've liked to see more mention of them as they fit into the context of the standards — for example, how can Qwark best combo into a few quick rat-a-tat shots or a fully charged one? Or what moves lend themselves best in terms of pressuring a foe who has thrown out shield to block the shots? I do enjoy the focus on cruising around from above with Up Special and raining hellfire down onto the stage below, with the Smashes having their different situational specialties on the air versus the ground (the new trajectories for U-Smash shrapnel and the Agents of Doom providing some nice versatility).

On the flipside, I find myself wishing Down Special were tweaked in some capacity to prevent excessive stalling on Qwark's part. Conceptually, a secondary shield Qwark only can use a few times each stock is intriguing, Banjo's concept of a limited-use Special honestly is one I'd like to see utilized more. But as is, Qwark essentially can turtle up for the lion's share of any given stock, as his force field lasts 20 seconds and, unless a foe has projectiles for whittling down its 40 HP, he can just casually punish anyone who tries to attack it at melee range. There are a handful of ways this could be addressed, maybe giving the shield unlimited uses but a higher, limited amount of HP per stock, or by giving foes some way to counteract it. If they could still grab Qwark through the force field, for instance, it could set up an interesting game of chicken where he knows what approach they're likely to make, but if he fixates on punishing grab specifically, his foe could play hit-and-run with the field instead. Rounding out my set thoughts, Qwark's standards don't pop as much when compared to his Smashes, but they're certainly functional from a melee perspective, and appear to incorporate the series' weapons in a pretty encyclopedic manner (passion for a set's given series always is a plus in my book). And, as others have mentioned, the characterization is indeed A+, B-Throw in particular got a chuckle out of me, reminds me of some of the more bombastic characters from early MYMs. Qwark is certainly my favorite set of yours to date, a welcome upgrade from Lord Zedd and Sarcophacurse in any case, and with a few rough edges sanded via edits, could climb higher in my estimation.

CAP'N CUTTLEFISH:
Two captains, one comment, heh. At a broad level, I definitely enjoy how Cuttlefish's bread and butter focuses can work both for and against him, depending on how quick on the uptake the player is mid-match. C.Q. Cumber could become a great combo extender just as easily as he could launch a foe into Cuttlefish's face at a moment of vulnerability, at a time when close quarters combat might not be optimal. Similarly, the bubbles can grow into Dedede-sized threatening projectiles with damage-sponge capabilities but waylay some of Cuttlefish's more clever movement-based options, like U-Smash or some of the ink moves connecting to the Grapplink, unless he's got thermal ink in play. I like that there's nuance behind these double-edged sword constructs compared to more traditional counterparts, like self-damaging minions or traps. I can echo what some in chat have said, that the pass-through mechanic feels a little bit underexplored in comparison to C.Q. Cumber. One question that jumped out on a second read-through, how does the game's engine determine whether a projectile passes through a solid construct or opponent to hit a foe with thermal ink? Does the pass-through only happen when a projectile is guaranteed to hit its thermal-inked target, or does Cuttlefish lose the ability to shoot ink projectiles into his bubbles for the 12 seconds the thermal ink is present on a foe? Speaking of which, I'm assuming the regular ink's 12-second timer pertains to the thermal ink too, as I didn't see a separate timer specified, which also begs the question, does the thermal ink grow weaker or change in any capacity as it starts clearing up after four seconds? In any case, I could see a shorter timer, or else some way to manually control whether or not the projectiles pass through a bubble (maybe some way to apply thermal ink to a bubble itself?), creating even more intrigue, as foes are left to question whether Cuttlefish will seek to grow his bubble or move it away last-second to clear a path at his foe.

Beyond that, I'm a big fan of the toxic mist special, with the different hitboxes' varying effects and the added trap of the beaker, plus the "hiccup" effect rendering foes vulnerable if they try to disperse bubbles with stronger, laggier attacks. Cuttlefish's myriad movement options to navigate his own bubbles and position himself, and them, in comparison to his foe and C.Q. Cumber's knockback trajectory add great depth to the set, without feeling like any of the moves (F-Tilt, U-Tilt, D-Smash, Scrooge McD-Air) exist strictly to support one of those centerpieces. Cuttlefish's strengths on the ground can manifest in different ways, what with his varying options for hitting or gimping foes with U-Smash or ability to move while firing F-Smash, escaping with Up Special if need be. The trade-off in regular damage/knockback vs. ink damage on some attacks, like F-Smash or U-Throw, creates a real tactical vibe within the set. And I'm pleased with how you were able to successfully build weakness into Cuttlefish's air game by heightening the risk-reward aspect rather than straight up making his aerials useless (U-Air being a good example of this). I already thought you showed a good amount of promise last contest with Magica DeSpell, and Cuttlefish certainly blows her out of the water from a design standpoint. The writing takes some of the best aspects I would associate with a UserShadow set, in terms of command of Smash gameplay, with its own fresh spin in terms of characterization and approach. Cuttlefish is up there among my more favorite sets this contest so far, and could rise even further on my personal list with the aforementioned elaboration/tweaks addressed later on. Your work paid off on this one.
 
Last edited:
Top Bottom