
Champion of Hyrule
Smash Master
For a while now, ideas for a potential third fighter’s pass have been on a lot of people’s minds but unfortunately it seems like we probably aren’t gonna be getting one any time soon. That’s why I feel like it would be fun to make a creation thread to decide what would happen if this pass did exist after all. In this thread I’d like to decide the characters, stages, music, movesets, classic routes and spirits of six new fighters to be added to Smash Ultimate!
You’re probably thinking… “Wouldn’t that be pretty short for a creation thread?” And yes, that’s part of what’s fun about this thread! Since we don’t have much to cover, this thread will be over relatively quickly compared to other creation threads but still will have all the things people like about creation threads. This is what I dub a “mini creation thread” and I think it’ll be a unique smashboards experience. We’ll also have plenty of time to focus on each series/character we add so this will be a pretty in-depth thing. It’ll also be a great opportunity to potentially get to know some series or characters you didn’t know about before.
So do you ever want to join creation threads, but are put off because you feel like they’re too much of a time commitment? If so, or even if you’re just interested in this topic, I urge you to please join this creation thread! Job #1 will start soon.
Raven Beak (Metroid Dread) - Gunner

Character: Crash Bandicoot
![See the source image]()
Stage: N. Sanity Beach
![See the source image]()
Moveset:
Intro: Crash appears from a Time Twister portal and jumps into his fighting stance
Stance/Idle 1: His default idle animation from It’s About Time
Idle 2: Crash looks to either the left or the right
Idle 3: Crash looks to the screen and raises an eyebrow while smiling
Walk: His walk from It’s About Time
Run: His iconic run from the N. Sane Trilogy
Dash: The Crash Dash
Damage: Crash spins for a split second, in a manner similar to his death animation from the very first game
Jump: His iconic Jump and Double Jump
Crouch: His crouch from the N. Sane Trilogy
Normal Attacks
Jab: Crash's 1-2 combo from the Titans games (5%, small knockback), followed by a continuous spin attack (1% each hit), and a kick (3%, small knockback)
Forward+A: Crash turns around and does a backwards kick (7%, OK knockback).
Down+A: Crash does a slap along the ground (4%, small knockback)
Up+A: Crash lunges his legs upwards (8%, small knockback)
Aerial Attacks
Air+A: Bandi-Copter; Crash turns sideways and spins in midair (9%, OK knockback)
Air Forward+A: Crash does a spin kick similar to Coco's spin in Wrath of Cortex (5%, small knockback)
Air Back + A: Crash does a pelvic thrust and kicks behind himself with both legs (8%, small knockback)
Air Up+A: Crash does a quick spin with both arms in the air (9%, OK knockback)
Air Down+A: Crash does a Belly Flop (11% with a meteor effect, OK knockback), possibly burying opponents on the ground
Dash Attack: Crash slides along the ground (7%, small knockback)
Edge Attack: A tiny TNT crate explodes under Crash and he flops up above the edge and back onto the stage (12%, OK knockback)
Get-Up Attack: Crash does a weak spin kick with both legs (7%, small knockback)
Smash Moves
Forward+A: Bandicoot Bounce; Crash springs himself forward (11%, OK knockback) and flips into a kick (8%, OK knockback); this propels Crash very far
Up+A: Crash frantically tries to get rid of a Nitro Crate, holding it up in the air (23%, medium knockback)
Down+A: Spin Slide; Crash does a powerful spin kick along the ground (18%, medium knockback)
Grab Game
Grab: Crash grabs the opponent in the face
Pummel: Crash kisses the opponent (1%)
Forwards+Throw: Crash spins forward and throws the opponent (8%, OK knockback)
Down+Throw: Crash ducks as three boxes fall down on the opponent (3% each, OK knockback)
Back+Throw: Crash spins backwards and throws the opponent (8%, OK knockback)
Up+Throw: Crash lifts up a Crystal, and its shine pushes the opponent back (10%, OK knockback)
Special Moves
B : Spin; Crash's most iconic move. Pressing B once performs a short, quick spin that reflects projectiles (11%, OK knockback). Mashing B turns into the Death Tornado Spin (19%, medium knockback); not only is it faster, it can help Crash glide a good distance.
B + Forwards : Wumpa Ball / Fruit Bazooka; when pressing B, Crash tosses a Wumpa Fruit that goes a somewhat short distance (6%, small knockback); he can even move backwards while pressing B, and keep throwing when B is still being pressed while standing still. When holding B, Crash takes out a bazooka that fires faster and stronger fruit by pressing either shield button (10%, OK knockback); he can aim by tilting up or down.
B + Up : TNT / Arrow Crate; Crash jumps off and drops a TNT Crate, which goes off in a small area after 3 seconds (20%, medium knockback). When a TNT Crate is already present, Crash instead jumps off a metal crate with an arrow that appears for a second; the jump height is doubled. In either case, Crash can move freely after using this special.
B + Down : Aku Aku; Crash Body Slams into an Aku Aku Crate, summoning Aku Aku (who can only appear once at a time); if Aku Aku is already present, Crash simply Belly Flops (5%, small knockback). Aku Aku reduces the damage Crash takes by ½ and prevents knockback, but disappears once Crash takes one hit.
Final Smash: Missed Boxes; Crash dons a golden Aku Aku mask and Crash Dashes into two opponents (8%). The opponent is then taken into a cutscene where hundreds of TNT and Nitro Crates piled on top of each other explode, and Crash runs away (52%, devastating knockback)
Gimmicks: N/A
However, Crash does have his famous death animations:
1: Crash does the first part of his victory dance
2: Crash does the second part of his victory dance
1+2: Crash performs the final part of his victory dance
Winposes:
1: "Yeee-HAW!" Crash squats for a second, and then performs his victory animation against bosses in the very first game
2: Crash’s victory animation from It's About Time
3: Crash's post-gem collecting animation from the first game
Applause: Endless boxes fall on top of Crash
Icon: The “C” symbol from the Titans games
Boxing Ring Title: N. Sane Marsupial
Star K.O.: https://youtu.be/kADARuk5sg4?t=15
Victory Music: A shortened version of the Time Twister theme
Kirby Hat: A replica Aku Aku mask
Alternate Costumes:
IAT Crash (default)
Carbon Crash (grey)
Coco (pink)*
Cortex (yellow)
Aku Aku (brown)
Crunch (red)
Biker Crash (alternate costume)
PS1 Crash (orange)
Spirit Board:
Aku Aku & Uka Uka - Legend
Coco - Advanced
Dr. Neo Cortex - Ace
N. Gin and N. Brio - Advanced
Polar and Pura - Novice
Dingodile - Ace
Tawna - Advanced, ehnahces to Tawna (It's About Time) - Ace
Tiny Tiger - Ace
Nitros Oxide - Legend
N. Tropy and F!N. Tropy - Legend
Trophy Girls - Novice, enhances to Nitro Squad - Ace
Mr. Crumb - Novice
Rilla Roo - Novice
Ripper Roo - Advanced, enhances to Professor Roo - Ace
Iron Checkpoint Crate - Legend
Music (Remixes in Bold):
N. Sanity Beach (Crash Bandicoot)
Tawna Bonus (Crash Bandicoot)
Hog Wild (Crash Bandicoot)
Dr. Neo Cortex (Crash Bandicoot)
Snow Go/Snow Biz (Crash Bandicoot 2: Cortex Strikes Back)
Time Twister (Crash Bandicoot: Warped)
Dingodile (Crash Bandicoot: Warped)
The Future (Crash Bandicoot: Warped)
Lizards and Wizards (Crash Bandicoot: The Wrath of Cortex)
N. Sanity Beach (Crash Twinsanity)
Worm Chase (Crash Twinsanity)
Evil Twins (Crash Twinsanity)
Main Theme (Crash Bandicoot 4: It's About Time)
Food Run (Crash Bandicoot 4: It's About Time)
Deep Sea Driving (Crash Nitro Kart)
Out of Time (Crash Nitro Kart)
Koala Carnival (Crash Team Racing: Nitro Fueled)
Mii Costumes:
Dr. Neo Cortex (Crash Bandicoot) (gunner)
Aku Aku mask (Crash Bandicoot) (anyone)
Spyro hat (Spyro the Dragon) (anyone)
Tracer (Overwatch) (gunner)
Genji (Overwatch) (swordsman)
Artanis (Starcraft) (swordsman with mask)
Classic Mode: Hey Plumber Boy!
(Crash fights characters from popular games in his heyday)

Stage: N. Sanity Beach
Moveset:
Intro: Crash appears from a Time Twister portal and jumps into his fighting stance
Stance/Idle 1: His default idle animation from It’s About Time
Idle 2: Crash looks to either the left or the right
Idle 3: Crash looks to the screen and raises an eyebrow while smiling
Walk: His walk from It’s About Time
Run: His iconic run from the N. Sane Trilogy
Dash: The Crash Dash
Damage: Crash spins for a split second, in a manner similar to his death animation from the very first game
Jump: His iconic Jump and Double Jump
Crouch: His crouch from the N. Sane Trilogy
Normal Attacks
Jab: Crash's 1-2 combo from the Titans games (5%, small knockback), followed by a continuous spin attack (1% each hit), and a kick (3%, small knockback)
Forward+A: Crash turns around and does a backwards kick (7%, OK knockback).
Down+A: Crash does a slap along the ground (4%, small knockback)
Up+A: Crash lunges his legs upwards (8%, small knockback)
Aerial Attacks
Air+A: Bandi-Copter; Crash turns sideways and spins in midair (9%, OK knockback)
Air Forward+A: Crash does a spin kick similar to Coco's spin in Wrath of Cortex (5%, small knockback)
Air Back + A: Crash does a pelvic thrust and kicks behind himself with both legs (8%, small knockback)
Air Up+A: Crash does a quick spin with both arms in the air (9%, OK knockback)
Air Down+A: Crash does a Belly Flop (11% with a meteor effect, OK knockback), possibly burying opponents on the ground
Dash Attack: Crash slides along the ground (7%, small knockback)
Edge Attack: A tiny TNT crate explodes under Crash and he flops up above the edge and back onto the stage (12%, OK knockback)
Get-Up Attack: Crash does a weak spin kick with both legs (7%, small knockback)
Smash Moves
Forward+A: Bandicoot Bounce; Crash springs himself forward (11%, OK knockback) and flips into a kick (8%, OK knockback); this propels Crash very far
Up+A: Crash frantically tries to get rid of a Nitro Crate, holding it up in the air (23%, medium knockback)
Down+A: Spin Slide; Crash does a powerful spin kick along the ground (18%, medium knockback)
Grab Game
Grab: Crash grabs the opponent in the face
Pummel: Crash kisses the opponent (1%)
Forwards+Throw: Crash spins forward and throws the opponent (8%, OK knockback)
Down+Throw: Crash ducks as three boxes fall down on the opponent (3% each, OK knockback)
Back+Throw: Crash spins backwards and throws the opponent (8%, OK knockback)
Up+Throw: Crash lifts up a Crystal, and its shine pushes the opponent back (10%, OK knockback)
Special Moves
B : Spin; Crash's most iconic move. Pressing B once performs a short, quick spin that reflects projectiles (11%, OK knockback). Mashing B turns into the Death Tornado Spin (19%, medium knockback); not only is it faster, it can help Crash glide a good distance.
B + Forwards : Wumpa Ball / Fruit Bazooka; when pressing B, Crash tosses a Wumpa Fruit that goes a somewhat short distance (6%, small knockback); he can even move backwards while pressing B, and keep throwing when B is still being pressed while standing still. When holding B, Crash takes out a bazooka that fires faster and stronger fruit by pressing either shield button (10%, OK knockback); he can aim by tilting up or down.
B + Up : TNT / Arrow Crate; Crash jumps off and drops a TNT Crate, which goes off in a small area after 3 seconds (20%, medium knockback). When a TNT Crate is already present, Crash instead jumps off a metal crate with an arrow that appears for a second; the jump height is doubled. In either case, Crash can move freely after using this special.
B + Down : Aku Aku; Crash Body Slams into an Aku Aku Crate, summoning Aku Aku (who can only appear once at a time); if Aku Aku is already present, Crash simply Belly Flops (5%, small knockback). Aku Aku reduces the damage Crash takes by ½ and prevents knockback, but disappears once Crash takes one hit.
Final Smash: Missed Boxes; Crash dons a golden Aku Aku mask and Crash Dashes into two opponents (8%). The opponent is then taken into a cutscene where hundreds of TNT and Nitro Crates piled on top of each other explode, and Crash runs away (52%, devastating knockback)
Gimmicks: N/A
However, Crash does have his famous death animations:
- Whenever he falls down offscreen, his shoes fly up and fall back down
- Whenever Crash loses a Stamina Battle for good, he appears as an angel (he also plays a didgeridoo when he dies from a Final Smash)
1: Crash does the first part of his victory dance
2: Crash does the second part of his victory dance
1+2: Crash performs the final part of his victory dance
Winposes:
1: "Yeee-HAW!" Crash squats for a second, and then performs his victory animation against bosses in the very first game
2: Crash’s victory animation from It's About Time
3: Crash's post-gem collecting animation from the first game
Applause: Endless boxes fall on top of Crash
Icon: The “C” symbol from the Titans games
Boxing Ring Title: N. Sane Marsupial
Star K.O.: https://youtu.be/kADARuk5sg4?t=15
Victory Music: A shortened version of the Time Twister theme
Kirby Hat: A replica Aku Aku mask
Alternate Costumes:
IAT Crash (default)
Carbon Crash (grey)
Coco (pink)*
Cortex (yellow)
Aku Aku (brown)
Crunch (red)
Biker Crash (alternate costume)
PS1 Crash (orange)
Spirit Board:
Aku Aku & Uka Uka - Legend
Coco - Advanced
Dr. Neo Cortex - Ace
N. Gin and N. Brio - Advanced
Polar and Pura - Novice
Dingodile - Ace
Tawna - Advanced, ehnahces to Tawna (It's About Time) - Ace
Tiny Tiger - Ace
Nitros Oxide - Legend
N. Tropy and F!N. Tropy - Legend
Trophy Girls - Novice, enhances to Nitro Squad - Ace
Mr. Crumb - Novice
Rilla Roo - Novice
Ripper Roo - Advanced, enhances to Professor Roo - Ace
Iron Checkpoint Crate - Legend
Music (Remixes in Bold):
N. Sanity Beach (Crash Bandicoot)
Tawna Bonus (Crash Bandicoot)
Hog Wild (Crash Bandicoot)
Dr. Neo Cortex (Crash Bandicoot)
Snow Go/Snow Biz (Crash Bandicoot 2: Cortex Strikes Back)
Time Twister (Crash Bandicoot: Warped)
Dingodile (Crash Bandicoot: Warped)
The Future (Crash Bandicoot: Warped)
Lizards and Wizards (Crash Bandicoot: The Wrath of Cortex)
N. Sanity Beach (Crash Twinsanity)
Worm Chase (Crash Twinsanity)
Evil Twins (Crash Twinsanity)
Main Theme (Crash Bandicoot 4: It's About Time)
Food Run (Crash Bandicoot 4: It's About Time)
Deep Sea Driving (Crash Nitro Kart)
Out of Time (Crash Nitro Kart)
Koala Carnival (Crash Team Racing: Nitro Fueled)
Mii Costumes:
Dr. Neo Cortex (Crash Bandicoot) (gunner)
Aku Aku mask (Crash Bandicoot) (anyone)
Spyro hat (Spyro the Dragon) (anyone)
Tracer (Overwatch) (gunner)
Genji (Overwatch) (swordsman)
Artanis (Starcraft) (swordsman with mask)
Classic Mode: Hey Plumber Boy!
(Crash fights characters from popular games in his heyday)
- Round 1: Sonic on Green Hill Zone (Green Hill Zone) (References how Sonic was a fellow mascot rival of Mario)
- Round 2: Cloud on Midgar (Let the Battles Begin!) (References FF7's iconicness as a PS1 title)
- Round 3: Snake on Shadow Moses Island (Encounter) (References Metal Gear Solid's iconicness as a PS1 title)
- Bonus Game (References the occasional bonus level in Crash Bandicoot games)
- Round 4: Young Link on Gerudo Valley (Gerudo Valley) (References Ocarina of Time's iconicness as an N64 title)
- Round 5: Pikachu on Saffron City (Main Theme - Pokémon Red & Pokémon Blue (Melee)) (References Pokemon's massive popularity in the 90's)
- Round 6: Mario on Peach's Castle 64 (Main Theme - Super Mario 64) (References the N64's competition with the PS1)
- Final Round:
(team battle w/Mario and Sonic) (Two fellow mascots helping out another) - Credits: Time Twister - Crash Bandicoot WARPED
Character: Sora
![See the source image]()
Stage: Hollow Bastion

Moveset:
Intro: Sora appears from a save point and gets into his fighting stance
Stance/Idle 1: Sora holds his Keyblade near his right hip and looks around
Idle 2: Sora rests his Keyblade on his right shoulder for a second
Idle 3: Sora bares his teeth in the direction he's facing
Walk: His walk from the games when in combat
Jog: His run from the games when in combat
Dash: Sora rests the Keyblade on his shoulders while running
Damage: His damage animation from the games
Jump: High Jump and Doubleflight
Crouch: Crouches down on one knee with his Keyblade pointing forwards
Normal Attacks
Jab: Slapshot / Speed Slash; Sora performs a sideways uppercut with his Keyblade (2%, OK knockback), then slashes twice (2% each hit, small knockback), and follows up with a quick circular slash (3%, OK knockback)
Forward+A: Guard Break; Sora thrusts his Keyblade forward (6%, small knockback), dealing considerable shield damage
Down+A: Sliding Dash; Sora performs a slide across the ground, slightly farther than Cloud’s but takes a bit more windup (7%, OK knockback)
Up+A: Upper Slash; Sora swats his Keyblade upward (6%, OK knockback)
Aerial Attacks
Air+A: Magnet Burst; Sora briefly surrounds himself with an array of magnetic orbs that attract nearby opponents (3%). Pressing A again, if necessary, sends these orbs flying out (9%, OK knockback)
Air Forward+A: Aerial Finish; Sora performs a strong slash with slight startup lag (15%, OK knockback)
Air Back + A: Aerial Sweep; Sora slashes behind himself three times (8%, small knockback)
Air Up+A: Hurricane Winder; Sora performs three vertical moonsaults (9%, OK knockback)
Air Down+A: Diving Strike; Sora pauses for a bit before diving down and striking the ground with his Keyblade (11% with a meteor effect, OK knockback); he can slightly move to the left or right just before he dives
Dash Attack: Prism Windmill; Sora spins Keyblade in front of him, protected by a shield of light (8%, OK knockback)
Edge Attack: Last Charge; Sora lifts himself up and slams down to create a pillar of light (11%, OK knockback)
Get-up Attack: Vicinity Break; Sora sweeps the floor with his Keyblade in a 360 spin (9%, OK knockback)
Smash Attacks
Forward+A: Strike Raid; Sora throws his Keyblade forward as it spins (21%, medium knockback). This attack can be slightly angled in the direction the control stick is titled, and goes a bit further when the stick is flicked than when the attack is charged.
Up+A: Ripple Drive; Sora swings upwards and summons a barrier of light with rectangular patterns (21%, medium knockback)
Down+A: Explosion; three orbs of light surround Sora as he thrusts his Keyblade down to the ground (22%, medium knockback)
Grab Game
Grab: Sora casts Magnet and binds the opponent
Pummel: Sora headbutts the opponent with that thick skull of his (2%)
Forwards+Throw: Quick Blitz; Sora hops up and swings in a downward arc (9%, OK knockback)
Down+Throw: Fail-Safe; Sora spins once before tossing the opponent on the ground, leaving a small explosion (8%, small knockback)
Back+Throw: Merge; Sora spins around backwards before hurling the opponent in that direction (11%, OK knockback)
Up+Throw: Lunge n' Launch; Sora hops and slashes upwards to launch the opponent (10%, OK knockback)
Special Moves
B : Magic Selection; Sora can select a magic spell from his list, similar to the Hero. Once a spell is selected, it will stay on that spell until another is selected, which can be done on the fly. You can cancel the selection by pressing the Shield button.
B + Up : Airstep; Sora travels in the pointed direction at the speed of light and does a Sonic Slash when he hits an opponent (9%, OK knockback)
B + Down : Ars Arcanum; Sora charges up and unleashes a flurry of ten slashes (1.3% each hit, OK knockback), then finishes with three stronger slashes (5.2% each hit, OK knockback). The charge is canceled when the player lets go of B.
Final Smash: Ragnarok; Sora jumps up and fires 24 shots of energy that home in on every opponent on the stage (2.4% each, OK knockback)
Gimmick: Grand Magic; after pulling off successful combos, three arrows appear by Sora's HUD, one by one. Once a combo is successful with all three arrows, a command appears above Sora's icon, and pressing B will activate one of four Grand Magic spells, which are obtained by using one spell consistently. Only one Situation Command appears at a time, and that spell will appear for 20 seconds.
1: Sora wipes his nose and smiles
2: "My friends are my power!" Sora puts his hand to his chest and looks down
1+2: Sora performs performs the Funny Face Special
Winposes
1: "That's the power of the Keyblade!" Sora's first victory animation from KH1, whenever he wins a tournament in Olympus Coliseum
2: “Nothing to it!” Sora's second victory animation from KH1, whenever he wins a tournament in Olympus Coliseum
3: “Oh yeah, take that!” Sora's third victory animation from KH1, whenever he wins a tournament in Olympus Coliseum; however, at the end of this version, Sora strikes a very familiar pose
Applause: Sora claps for the opponent
Icon: The heart and crown in KH series logo
Boxing Ring Title: The Keyblade's Chosen One
Star K.O.: https://youtu.be/XgtJ3E5-I_A?t=558
Victory Music: A remix of Sora's theme
Kirby Hat: Sora's hair and necklace; Kirby can’t use Grand Magic, and Curaga is unavailable
Mii Costumes:
Riku (Swordfighter)
Kairi (Swordfighter)
Organization XIII Hood (Brawler)
Neku Sakuraba (Brawler; comes with a remix of Twister)
Club Penguin outfit (Brawler)
Spirit Board:
Sora (Kingdom Hearts III) [Fighter spirit]
Sora (Kingdom Hearts II) [Fighter spirit]
Shadow
Riku
Kairi
Naminé
Lea
Marluxia
Roxas
Xion
Aqua
Terra
Lingering Will (Enhanced form of Terra)
Ventus
Master Xehanort
Music:
Dearly Beloved (Melody of Memory Version)
Simple and Clean (Remix)
Dive to the Heart / Destati
Night of Fate
Traverse Town
Go For It!
Hollow Bastion
Hollow Bastion (Remix)
Scherzo Di Notte
The 13th Struggle (Re:Mind Version)
Castle Oblivion (Remix)
Graceful Assassin / Scythe of Petals (Remix)
Lazy Afternoons / Sinister Sundown (Remix)
Fields of Honor
Rowdy Rumble
Darkness of the Unknown
Rage Awakened
Vector to the Heavens
Critical Drive
Radiant Garden
Black Powder
Keyblade Graveyard Horizon
Wonder of Electron / No More Bugs!! (Remix)
Dream Eaters (Remix)
La Cloche
L'Impeto Oscuro
Daybreak Town Battle Theme
Master of Masters
Wave of Darkness I
Don't Think Twice / Face My Fears (Remix)
Toy Box Jam
Swingin' Free
Anti Aqua
Rise of the Union
Scala Ad Caelum
Sora Classic Mode: Corrupted Hearts Beyond Our Multiverse
Themed around the Disney universes featured in Kingdom Hearts (more specifically, their villains) without directly referencing them
Stage: Hollow Bastion
Moveset:
Intro: Sora appears from a save point and gets into his fighting stance
Stance/Idle 1: Sora holds his Keyblade near his right hip and looks around
Idle 2: Sora rests his Keyblade on his right shoulder for a second
Idle 3: Sora bares his teeth in the direction he's facing
Walk: His walk from the games when in combat
Jog: His run from the games when in combat
Dash: Sora rests the Keyblade on his shoulders while running
Damage: His damage animation from the games
Jump: High Jump and Doubleflight
Crouch: Crouches down on one knee with his Keyblade pointing forwards
Normal Attacks
Jab: Slapshot / Speed Slash; Sora performs a sideways uppercut with his Keyblade (2%, OK knockback), then slashes twice (2% each hit, small knockback), and follows up with a quick circular slash (3%, OK knockback)
Forward+A: Guard Break; Sora thrusts his Keyblade forward (6%, small knockback), dealing considerable shield damage
Down+A: Sliding Dash; Sora performs a slide across the ground, slightly farther than Cloud’s but takes a bit more windup (7%, OK knockback)
Up+A: Upper Slash; Sora swats his Keyblade upward (6%, OK knockback)
Aerial Attacks
Air+A: Magnet Burst; Sora briefly surrounds himself with an array of magnetic orbs that attract nearby opponents (3%). Pressing A again, if necessary, sends these orbs flying out (9%, OK knockback)
Air Forward+A: Aerial Finish; Sora performs a strong slash with slight startup lag (15%, OK knockback)
Air Back + A: Aerial Sweep; Sora slashes behind himself three times (8%, small knockback)
Air Up+A: Hurricane Winder; Sora performs three vertical moonsaults (9%, OK knockback)
Air Down+A: Diving Strike; Sora pauses for a bit before diving down and striking the ground with his Keyblade (11% with a meteor effect, OK knockback); he can slightly move to the left or right just before he dives
Dash Attack: Prism Windmill; Sora spins Keyblade in front of him, protected by a shield of light (8%, OK knockback)
Edge Attack: Last Charge; Sora lifts himself up and slams down to create a pillar of light (11%, OK knockback)
Get-up Attack: Vicinity Break; Sora sweeps the floor with his Keyblade in a 360 spin (9%, OK knockback)
Smash Attacks
Forward+A: Strike Raid; Sora throws his Keyblade forward as it spins (21%, medium knockback). This attack can be slightly angled in the direction the control stick is titled, and goes a bit further when the stick is flicked than when the attack is charged.
Up+A: Ripple Drive; Sora swings upwards and summons a barrier of light with rectangular patterns (21%, medium knockback)
Down+A: Explosion; three orbs of light surround Sora as he thrusts his Keyblade down to the ground (22%, medium knockback)
Grab Game
Grab: Sora casts Magnet and binds the opponent
Pummel: Sora headbutts the opponent with that thick skull of his (2%)
Forwards+Throw: Quick Blitz; Sora hops up and swings in a downward arc (9%, OK knockback)
Down+Throw: Fail-Safe; Sora spins once before tossing the opponent on the ground, leaving a small explosion (8%, small knockback)
Back+Throw: Merge; Sora spins around backwards before hurling the opponent in that direction (11%, OK knockback)
Up+Throw: Lunge n' Launch; Sora hops and slashes upwards to launch the opponent (10%, OK knockback)
Special Moves
B : Magic Selection; Sora can select a magic spell from his list, similar to the Hero. Once a spell is selected, it will stay on that spell until another is selected, which can be done on the fly. You can cancel the selection by pressing the Shield button.
- Firaga: Sora summons two rings of fire that encircle him (11%, OK knockback)
- Blizzaga: Sora shoots a spreading burst of three snowflakes that have a chance of freezing the opponent (5% each, small knockback); using this in the air has Sora shoot them diagonally downward
- Thundaga: Sora summons electricity from his Keyblade that locks on to any nearby fighters, up to four at a time (8% each, small knockback). When not locked on, each bolt forms a dome around Sora.
- Aeroga: Sora surrounds himself in a windy barrier that halves damage taken and reflects projectiles. The spell lasts for 18 seconds, and he can’t use any other spell nor use Aeroga again during this time.
- Curaga: Sora heals up to 50% taken damage, and can also heal allies in team battles by ⅓ regardless of how far away they are. This spell can only be used once per stock.
B + Up : Airstep; Sora travels in the pointed direction at the speed of light and does a Sonic Slash when he hits an opponent (9%, OK knockback)
B + Down : Ars Arcanum; Sora charges up and unleashes a flurry of ten slashes (1.3% each hit, OK knockback), then finishes with three stronger slashes (5.2% each hit, OK knockback). The charge is canceled when the player lets go of B.
Final Smash: Ragnarok; Sora jumps up and fires 24 shots of energy that home in on every opponent on the stage (2.4% each, OK knockback)
Gimmick: Grand Magic; after pulling off successful combos, three arrows appear by Sora's HUD, one by one. Once a combo is successful with all three arrows, a command appears above Sora's icon, and pressing B will activate one of four Grand Magic spells, which are obtained by using one spell consistently. Only one Situation Command appears at a time, and that spell will appear for 20 seconds.
- Firaza has Sora summon a giant fireball that travels offscreen when it doesn't hit any opponents (27%, medium knockback)
- Blizzaza has Sora summon an actual blizzard that freezes every opponent on the stage for a bit (20%, small knockback)
- Thundaza has Sora rain down a pillar of electricity in front of him (25%, medium knockback)
- Aeroza has Sora summon a tornado that circles around him, sending opponents flying (20%, far knockback)
- Whenever you use a Grand Magic tier of a spell, that spell enters a 15-second cool down period
1: Sora wipes his nose and smiles
2: "My friends are my power!" Sora puts his hand to his chest and looks down
1+2: Sora performs performs the Funny Face Special
Winposes
1: "That's the power of the Keyblade!" Sora's first victory animation from KH1, whenever he wins a tournament in Olympus Coliseum
2: “Nothing to it!” Sora's second victory animation from KH1, whenever he wins a tournament in Olympus Coliseum
3: “Oh yeah, take that!” Sora's third victory animation from KH1, whenever he wins a tournament in Olympus Coliseum; however, at the end of this version, Sora strikes a very familiar pose
Applause: Sora claps for the opponent
Icon: The heart and crown in KH series logo
Boxing Ring Title: The Keyblade's Chosen One
Star K.O.: https://youtu.be/XgtJ3E5-I_A?t=558
Victory Music: A remix of Sora's theme
Kirby Hat: Sora's hair and necklace; Kirby can’t use Grand Magic, and Curaga is unavailable
Mii Costumes:
Riku (Swordfighter)
Kairi (Swordfighter)
Organization XIII Hood (Brawler)
Neku Sakuraba (Brawler; comes with a remix of Twister)
Club Penguin outfit (Brawler)
Spirit Board:
Sora (Kingdom Hearts III) [Fighter spirit]
Sora (Kingdom Hearts II) [Fighter spirit]
Shadow
Riku
Kairi
Naminé
Lea
Marluxia
Roxas
Xion
Aqua
Terra
Lingering Will (Enhanced form of Terra)
Ventus
Master Xehanort
Music:
Dearly Beloved (Melody of Memory Version)
Simple and Clean (Remix)
Dive to the Heart / Destati
Night of Fate
Traverse Town
Go For It!
Hollow Bastion
Hollow Bastion (Remix)
Scherzo Di Notte
The 13th Struggle (Re:Mind Version)
Castle Oblivion (Remix)
Graceful Assassin / Scythe of Petals (Remix)
Lazy Afternoons / Sinister Sundown (Remix)
Fields of Honor
Rowdy Rumble
Darkness of the Unknown
Rage Awakened
Vector to the Heavens
Critical Drive
Radiant Garden
Black Powder
Keyblade Graveyard Horizon
Wonder of Electron / No More Bugs!! (Remix)
Dream Eaters (Remix)
La Cloche
L'Impeto Oscuro
Daybreak Town Battle Theme
Master of Masters
Wave of Darkness I
Don't Think Twice / Face My Fears (Remix)
Toy Box Jam
Swingin' Free
Anti Aqua
Rise of the Union
Scala Ad Caelum
Sora Classic Mode: Corrupted Hearts Beyond Our Multiverse
Themed around the Disney universes featured in Kingdom Hearts (more specifically, their villains) without directly referencing them
- Vs. tiny pink DK, tiny Mario colours Wario, and giant green (masked) male Inkling on Gamer. Song: Charge! (Wii Play)
- Vs. giant Pink K. Rool on Pirate Ship (capsized). Song: Brinstar Depths (Melee)
- Vs. B1 Bayonetta and giant Ridley on Wuhu Island (Cliff) Song: Break Through the Ice
- Vs. blue/grey Ganondorf on Colliseum. Song: Tough Guy Alert!
- Vs. Purple Yoshi and giant blue Dedede on Battlefield Wrecking Crew. Song: Gear Getaway
- Vs. black-and-red Incineroar and brown Duck Hunt X3 on Castle Siege. (cave form) Song: Id (Purpose) (Remix)
- Bonus Round
- Boss: Master Hand (and Crazy Hand) on Omega Hollow Bastion. Song: Rage Awakened
Fighter: Ryu Hayabusa
![]()
Stage: Sky City Tokyo

Moveset:
A-->AA-->AAA: Slant/Crescent/Lotus Slash. Ryu uses his basic light-light-light sword combo – a downwards swing, followed by a vertical swing, followed by a heavier downwards swing.
Forward A: Violent Wind/Gale. Ryu swings the sword twice horizontally, shouting on the second swing. (light attack while moving)
Up A: Ryu kicks his opponents into the air, based on one of his finishing moves on dismembered opponents.
Down A: Ryu uses a sliding kick, based on his slide dodge.
Forward Smash: Annihilating Demon. Ryu lunges forward, swinging the sword diagonally like when he charges a heavy attack.
Up Smash: Scarlet Dragon. Ryu swings his sword upwards, which works as a launcher attack. (light-hold heavy) At max charge, Ryu will leap up after the opponent (Azure Dragon; light-tap heavy)
Down Smash: Dragon Ring Slash. Ryu spins around, slashing his sword horizontally at head level, chest level, and finishing at his opponent’s feet if the attack is fully charged. (heavy-heavy-heavy) If it’s not charged, he’ll only use the foot attack, while if it’s partially charged, he’ll aim at the chest and feet. The blow to the head does more damage, but the blow to the feet is what sends the enemy flying.
Neutral Air: Ryu flips in midair while slashing with his sword, like his upgraded midair attack from the NES game.
Forward Air: Ryu swings his sword forward, like his regular air attack from the NES game.
Back Air: Falling Falcon. Ryu turns around, swinging his sword downwards. (running jump light attack)
Up Air: Flip Kick. Ryu flips to kick above himself; based on the flip that he does at the end of an upwards wall run.
Down Air: Helmet Splitter. Ryu stabs straight downwards, impaling whoever’s below him (air heavy attack)
Dash Attack: Piercing Wind. Ryu stabs forwards as he skids along the ground. (running heavy)
Wake-Up Attack: Crouching Crane. Ryu spins around with his sword outstretched, knocking enemies away from him. (360 motion + heavy)
Climb Attack: Ryu leaps back on stage, stabbing his sword in front of him. (this is based on what happens to whatever unfortunate enemy is standing by a ledge when you’re climbing up the wall beneath him)
------------------------------------------------------------------------------------
Grab: Ryu grabs the opponent with one hand, keeping the other on his sword.
Pummel: Ryu knees the opponent.
Forward Throw: Guillotine Throw. Ryu jumps over his opponent, grabbing them by the head before flipping to throw them a great distance.
Back Throw: Ryu stabs his sword into the enemy before flinging them behind him; based on one of his finishing moves on dismembered opponents. (along with some of the Steel on Bone attacks)
Up Throw: Izuna Drop. I feel like it has to be this. Grabbing the opponent, Ryu leaps into the air, spinning around like a drill before flipping around, falling back down, and slamming them into the ground head-first.
Down Throw: Ryu throws the opponent to the ground before disappearing in a puff of smoke. He appears above the opponent, and lands on top of them with his arms crossed as his scarf billows dramatically. I looked into his throws in Dead or Alive while trying to come up with his down throw; DOA has a much larger amount of throws than I expected, but it’s based loosely on this team throw.
------------------------------------------------------------------------------------
Up Taunt: sheathing his sword, Ryu clasps his hands together with his index fingers held up in a stock ninja pose before drawing his sword again.
Side Taunt: Ryu holds out his arm, and a falcon lands on it before flying off.
Down Taunt: Ryu places a fist on the ground, meditating. In Razor’s Edge, this gains him health, though it does nothing in Smash.
------------------------------------------------------------------------------------
B: Shuriken. A staple tool for a ninja, though this move can be charged. If it’s tapped, Ryu throws out an ordinary throwing star; it’s quick, making it easy to catch an opponent off-guard from a distance, but it barely does any damage. Holding down the button until Ryu has a faint purple aura (which doesn’t take long) and releasing it causes Ryu to throw a windmill shuriken, which is much larger, more damaging, and returns to Ryu like a boomerang. Much like in the NES game, Ryu can jump over it to make it go back and forth, though it’s tricky to do this multiple times in a row. Holding the button longer, until Ryu gains a red and orange aura, and releasing causes Ryu to throw out flames, which are much faster than the shurikens, more damaging, and can travel a longer distance before they disappear.
Up B: Wind Blades/Falcon Dive. Concentrating, Ryu glows blue before creating a tornado around himself, which launches him upwards and damages nearby enemies. Once he reaches the peak of his jump, he transitions into a Falcon Dive to launch himself forwards. He glides through the air, though he has no control over the speed of his glide, making his movement fairly predictable and leaving him open to attack. The glide can be cancelled by dodging in midair or pressing B – pressing B will cause Ryu to dash forward slightly, and if he makes contact with an opponent, he uses a command grab where he stands on the opponent’s shoulders before leaping off of them, spiking whoever he hits and getting some more horizontal distance. However, canceling it with either of these methods will put Ryu into a helpless state afterwards.
Side B: Bow. Taking a bow off of his back, Ryu fires an arrow at his opponent. If the B button is held, the angle that Ryu fires at can be changed by moving the control stick, making it effective at keeping the enemy from returning to the stage. However, it has a relatively lengthy cooldown after firing compared to the Shuriken.
Down B: Fire Wheel. Three fire balls spin around Ryu, similar to Mega Man’s Leaf Shield. Unlike Leaf Shield, this doesn’t block projectiles; however, it does much more damage than the Leaf Shield to enemies that come near Ryu. If an enemy touches a fireball, the fireball disappears, and Ryu can move while it's active. Pressing down B again while the Fire Wheel is active causes Ryu to use Art of the Inferno, which causes the fireballs to merge into a larger fireball above Ryu’s head before being flung to the ground in front of Ryu. Upon landing, or getting far enough from Ryu, they create a large explosion. The wheel will disappear after a while.
Final Smash: Art of the True Inferno. Ryu chants as fire gathers around his hands, before drawing his arms back. As he thrusts his arms forwards, a flaming serpentine dragon flies out of the flames, spinning around the stage before stopping to roar and flying straight into the air.
Alts:
1. modern bodysuit (default costume)
2. classic outfit (blue)
3. navy blue modern outfit, with the silver parts replaced with white (referencing Kasumi from Dead or Alive)
4. red classic outfit (referencing Jo Hayabusa, his father)
5. dark purple modern outfit, with the silver parts replaced with dark blue (referencing Ayane from Dead or Alive)
6. green classic outfit (not a reference to anything in particular, though many random enemies in the original game were green)
7. white modern outfit, with the silver parts replaced with red (referencing Momiji from Dead or Alive)
8. light purple purple classic outfit (referencing his sprites from the NES games)
Music:
1. Unbreakable Determination (original)
2. Unbreakable Determination (Warriors Orochi remix)
3. Chasing Him to the Very End (Ninja Gaiden arcade)
4. Last Fight (Ninja Gaiden arcade)
5. Pushing Onward (Ninja Gaiden)
6. Boss Battle (Ninja Gaiden)
7. Swift Ninja (Ninja Gaiden)
8. Overdrive (Ninja Gaiden 2)
9. Motion of the Ninja (Ninja Gaiden 2)
10. The Jungle (Ninja Gaiden 3)
11. Dinosaur (Ninja Gaiden Sigma)
12. Battle with the Dead (Ninja Gaiden Sigma)
13. Alma Awakened (Ninja Gaiden Sigma)
14. Fuga (Ninja Gaiden 2: Sigma)
15. Sense of Mission (Ninja Gaiden 2: Sigma)
16. Fighting Soul (Ninja Gaiden 2: Sigma)
17. Pursuers (Ninja Gaiden 2: Sigma)
18. The Ninja Way (Ninja Gaiden 2: Sigma)
19. Soaring Skies (Ninja Gaiden 2: Sigma)
20. A Hero Unmasked (Ninja Gaiden 3: Razor's Edge)
21. Arachnoid (Ninja Gaiden 3: Razor's Edge)
22. A Masked Curse (Ninja Gaiden 3: Razor's Edge)
23. Excelsior (Dead or Alive 2)
24. Prismatic Butterfly (Dead or Alive 3)
25. Hunter's Moon (Dead or Alive 4)
26. Purity (Dead or Alive 5)
27. DOA Colosseum (Dead or Alive 6)
Spirits:
Fighter Spirit:
Ryu Hysabusa.
Spirit Board:
Irene Lew (Support. Two Star. Zero Suit Samus.)
Robert T. Sturgeon (Support. One Star. Captain Falcon.)
Momji (Primary. Three Star. Female Corrin.)
Rachel (Support. Two Star. Bayonetta.)
Doku (Primary. Two Star. Ike.)
Genshin (Primary. Three Star. Wolf. Can be upgraded.)
Ayane (Primary. Three Star. Sheik)
Kasumi (Support. Three Star. Wii Fit Trainer. )
Jaki-Oh (Support. Four Star. Ganon)
Mii Costumes:
1. Kasumi (Dead or Alive 6) (Brawler)
2. Ayane (Dead or Alive 6) (Brawler)
3. Oda Nobunaga (Pokemon Conquest) (Swordfighter)
4. Linkle (Hyrule Warriors) (Gunner)
5. Rowan (Fire Emblem Warriors) (Swordfighter)
6. Gatekeeper (Fire Emblem: Three Houses) (Swordfighter)
Classic Mode
Old-School Difficulty (referencing games that were known for being difficult or obtuse, much like Ninja Gaiden)
1. Captain Falcon on Port Town Aero Drive (Shotgun Kiss) (referencing F-Zero GX's insanely difficult story mode)
2. Pit on Palutena's Temple (Kid Icarus Retro Medley) (Kid Icarus had a bizarre difficulty curve where the start of the game was by far the hardest part)
3. Mega Man or Dr. Wily's Castle (Quick Man Stage) (in my experience, Quick Man's stage is among the most frustrating of the old-school Mega Man stages, between the instant-death lasers and being forced to choose whether to use the boss's weakness up to survive the stage, or save the boss's weakness for the boss fight and struggle through the stage to get there)
4. Simon Belmont and Richter Belmont on Dracula's Castle (Vampire Killer) (old-school Castlevania is up there with Ninja Gaiden, Battletoads, and Ghosts 'n' Goblins in terms of infamously difficult games)
5. Marth x 3 on Arena Ferox (Shadow Dragon Medley) (the perma-death mechanic made older Fire Emblem games frustrating)
6. Ryu Hayabusa (red classic, or default classic look if you're playing as his red classic look) on Sky City Tokyo (Unbreakable Determination (remix))
Boss: Ganon (no particular reference, but I didn't want to reuse Castlevania, and I remember Zelda 1 Ganon being annoying, at the very least)

Stage: Sky City Tokyo
Moveset:
A-->AA-->AAA: Slant/Crescent/Lotus Slash. Ryu uses his basic light-light-light sword combo – a downwards swing, followed by a vertical swing, followed by a heavier downwards swing.
Forward A: Violent Wind/Gale. Ryu swings the sword twice horizontally, shouting on the second swing. (light attack while moving)
Up A: Ryu kicks his opponents into the air, based on one of his finishing moves on dismembered opponents.
Down A: Ryu uses a sliding kick, based on his slide dodge.
Forward Smash: Annihilating Demon. Ryu lunges forward, swinging the sword diagonally like when he charges a heavy attack.
Up Smash: Scarlet Dragon. Ryu swings his sword upwards, which works as a launcher attack. (light-hold heavy) At max charge, Ryu will leap up after the opponent (Azure Dragon; light-tap heavy)
Down Smash: Dragon Ring Slash. Ryu spins around, slashing his sword horizontally at head level, chest level, and finishing at his opponent’s feet if the attack is fully charged. (heavy-heavy-heavy) If it’s not charged, he’ll only use the foot attack, while if it’s partially charged, he’ll aim at the chest and feet. The blow to the head does more damage, but the blow to the feet is what sends the enemy flying.
Neutral Air: Ryu flips in midair while slashing with his sword, like his upgraded midair attack from the NES game.
Forward Air: Ryu swings his sword forward, like his regular air attack from the NES game.
Back Air: Falling Falcon. Ryu turns around, swinging his sword downwards. (running jump light attack)
Up Air: Flip Kick. Ryu flips to kick above himself; based on the flip that he does at the end of an upwards wall run.
Down Air: Helmet Splitter. Ryu stabs straight downwards, impaling whoever’s below him (air heavy attack)
Dash Attack: Piercing Wind. Ryu stabs forwards as he skids along the ground. (running heavy)
Wake-Up Attack: Crouching Crane. Ryu spins around with his sword outstretched, knocking enemies away from him. (360 motion + heavy)
Climb Attack: Ryu leaps back on stage, stabbing his sword in front of him. (this is based on what happens to whatever unfortunate enemy is standing by a ledge when you’re climbing up the wall beneath him)
------------------------------------------------------------------------------------
Grab: Ryu grabs the opponent with one hand, keeping the other on his sword.
Pummel: Ryu knees the opponent.
Forward Throw: Guillotine Throw. Ryu jumps over his opponent, grabbing them by the head before flipping to throw them a great distance.
Back Throw: Ryu stabs his sword into the enemy before flinging them behind him; based on one of his finishing moves on dismembered opponents. (along with some of the Steel on Bone attacks)
Up Throw: Izuna Drop. I feel like it has to be this. Grabbing the opponent, Ryu leaps into the air, spinning around like a drill before flipping around, falling back down, and slamming them into the ground head-first.
Down Throw: Ryu throws the opponent to the ground before disappearing in a puff of smoke. He appears above the opponent, and lands on top of them with his arms crossed as his scarf billows dramatically. I looked into his throws in Dead or Alive while trying to come up with his down throw; DOA has a much larger amount of throws than I expected, but it’s based loosely on this team throw.
------------------------------------------------------------------------------------
Up Taunt: sheathing his sword, Ryu clasps his hands together with his index fingers held up in a stock ninja pose before drawing his sword again.
Side Taunt: Ryu holds out his arm, and a falcon lands on it before flying off.
Down Taunt: Ryu places a fist on the ground, meditating. In Razor’s Edge, this gains him health, though it does nothing in Smash.
------------------------------------------------------------------------------------
B: Shuriken. A staple tool for a ninja, though this move can be charged. If it’s tapped, Ryu throws out an ordinary throwing star; it’s quick, making it easy to catch an opponent off-guard from a distance, but it barely does any damage. Holding down the button until Ryu has a faint purple aura (which doesn’t take long) and releasing it causes Ryu to throw a windmill shuriken, which is much larger, more damaging, and returns to Ryu like a boomerang. Much like in the NES game, Ryu can jump over it to make it go back and forth, though it’s tricky to do this multiple times in a row. Holding the button longer, until Ryu gains a red and orange aura, and releasing causes Ryu to throw out flames, which are much faster than the shurikens, more damaging, and can travel a longer distance before they disappear.
Up B: Wind Blades/Falcon Dive. Concentrating, Ryu glows blue before creating a tornado around himself, which launches him upwards and damages nearby enemies. Once he reaches the peak of his jump, he transitions into a Falcon Dive to launch himself forwards. He glides through the air, though he has no control over the speed of his glide, making his movement fairly predictable and leaving him open to attack. The glide can be cancelled by dodging in midair or pressing B – pressing B will cause Ryu to dash forward slightly, and if he makes contact with an opponent, he uses a command grab where he stands on the opponent’s shoulders before leaping off of them, spiking whoever he hits and getting some more horizontal distance. However, canceling it with either of these methods will put Ryu into a helpless state afterwards.
Side B: Bow. Taking a bow off of his back, Ryu fires an arrow at his opponent. If the B button is held, the angle that Ryu fires at can be changed by moving the control stick, making it effective at keeping the enemy from returning to the stage. However, it has a relatively lengthy cooldown after firing compared to the Shuriken.
Down B: Fire Wheel. Three fire balls spin around Ryu, similar to Mega Man’s Leaf Shield. Unlike Leaf Shield, this doesn’t block projectiles; however, it does much more damage than the Leaf Shield to enemies that come near Ryu. If an enemy touches a fireball, the fireball disappears, and Ryu can move while it's active. Pressing down B again while the Fire Wheel is active causes Ryu to use Art of the Inferno, which causes the fireballs to merge into a larger fireball above Ryu’s head before being flung to the ground in front of Ryu. Upon landing, or getting far enough from Ryu, they create a large explosion. The wheel will disappear after a while.
Final Smash: Art of the True Inferno. Ryu chants as fire gathers around his hands, before drawing his arms back. As he thrusts his arms forwards, a flaming serpentine dragon flies out of the flames, spinning around the stage before stopping to roar and flying straight into the air.
Alts:
1. modern bodysuit (default costume)
2. classic outfit (blue)
3. navy blue modern outfit, with the silver parts replaced with white (referencing Kasumi from Dead or Alive)
4. red classic outfit (referencing Jo Hayabusa, his father)
5. dark purple modern outfit, with the silver parts replaced with dark blue (referencing Ayane from Dead or Alive)
6. green classic outfit (not a reference to anything in particular, though many random enemies in the original game were green)
7. white modern outfit, with the silver parts replaced with red (referencing Momiji from Dead or Alive)
8. light purple purple classic outfit (referencing his sprites from the NES games)
Music:
1. Unbreakable Determination (original)
2. Unbreakable Determination (Warriors Orochi remix)
3. Chasing Him to the Very End (Ninja Gaiden arcade)
4. Last Fight (Ninja Gaiden arcade)
5. Pushing Onward (Ninja Gaiden)
6. Boss Battle (Ninja Gaiden)
7. Swift Ninja (Ninja Gaiden)
8. Overdrive (Ninja Gaiden 2)
9. Motion of the Ninja (Ninja Gaiden 2)
10. The Jungle (Ninja Gaiden 3)
11. Dinosaur (Ninja Gaiden Sigma)
12. Battle with the Dead (Ninja Gaiden Sigma)
13. Alma Awakened (Ninja Gaiden Sigma)
14. Fuga (Ninja Gaiden 2: Sigma)
15. Sense of Mission (Ninja Gaiden 2: Sigma)
16. Fighting Soul (Ninja Gaiden 2: Sigma)
17. Pursuers (Ninja Gaiden 2: Sigma)
18. The Ninja Way (Ninja Gaiden 2: Sigma)
19. Soaring Skies (Ninja Gaiden 2: Sigma)
20. A Hero Unmasked (Ninja Gaiden 3: Razor's Edge)
21. Arachnoid (Ninja Gaiden 3: Razor's Edge)
22. A Masked Curse (Ninja Gaiden 3: Razor's Edge)
23. Excelsior (Dead or Alive 2)
24. Prismatic Butterfly (Dead or Alive 3)
25. Hunter's Moon (Dead or Alive 4)
26. Purity (Dead or Alive 5)
27. DOA Colosseum (Dead or Alive 6)
Spirits:
Fighter Spirit:
Ryu Hysabusa.
Spirit Board:
Irene Lew (Support. Two Star. Zero Suit Samus.)
Robert T. Sturgeon (Support. One Star. Captain Falcon.)
Momji (Primary. Three Star. Female Corrin.)
Rachel (Support. Two Star. Bayonetta.)
Doku (Primary. Two Star. Ike.)
Genshin (Primary. Three Star. Wolf. Can be upgraded.)
Ayane (Primary. Three Star. Sheik)
Kasumi (Support. Three Star. Wii Fit Trainer. )
Jaki-Oh (Support. Four Star. Ganon)
Mii Costumes:
1. Kasumi (Dead or Alive 6) (Brawler)
2. Ayane (Dead or Alive 6) (Brawler)
3. Oda Nobunaga (Pokemon Conquest) (Swordfighter)
4. Linkle (Hyrule Warriors) (Gunner)
5. Rowan (Fire Emblem Warriors) (Swordfighter)
6. Gatekeeper (Fire Emblem: Three Houses) (Swordfighter)
Classic Mode
Old-School Difficulty (referencing games that were known for being difficult or obtuse, much like Ninja Gaiden)
1. Captain Falcon on Port Town Aero Drive (Shotgun Kiss) (referencing F-Zero GX's insanely difficult story mode)
2. Pit on Palutena's Temple (Kid Icarus Retro Medley) (Kid Icarus had a bizarre difficulty curve where the start of the game was by far the hardest part)
3. Mega Man or Dr. Wily's Castle (Quick Man Stage) (in my experience, Quick Man's stage is among the most frustrating of the old-school Mega Man stages, between the instant-death lasers and being forced to choose whether to use the boss's weakness up to survive the stage, or save the boss's weakness for the boss fight and struggle through the stage to get there)
4. Simon Belmont and Richter Belmont on Dracula's Castle (Vampire Killer) (old-school Castlevania is up there with Ninja Gaiden, Battletoads, and Ghosts 'n' Goblins in terms of infamously difficult games)
5. Marth x 3 on Arena Ferox (Shadow Dragon Medley) (the perma-death mechanic made older Fire Emblem games frustrating)
6. Ryu Hayabusa (red classic, or default classic look if you're playing as his red classic look) on Sky City Tokyo (Unbreakable Determination (remix))
Boss: Ganon (no particular reference, but I didn't want to reuse Castlevania, and I remember Zelda 1 Ganon being annoying, at the very least)
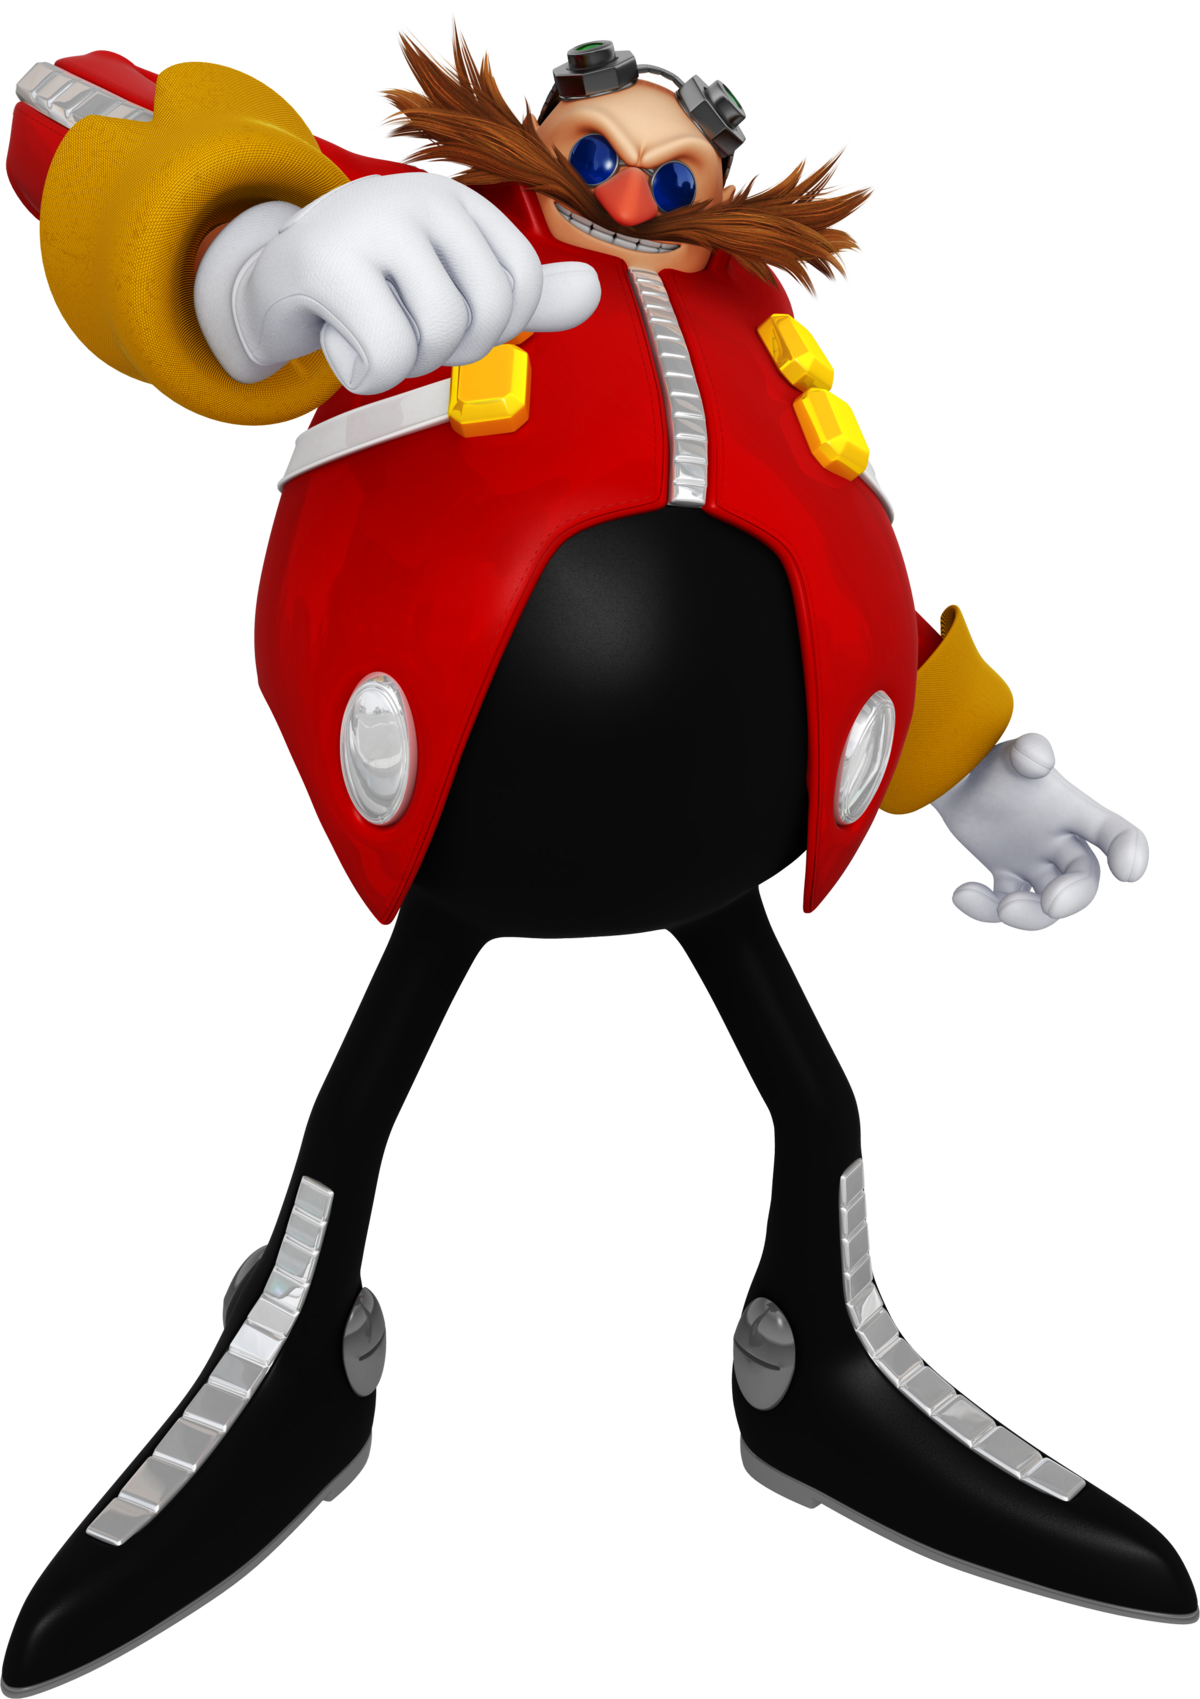
Character: Dr. Eggman
![See the source image]()
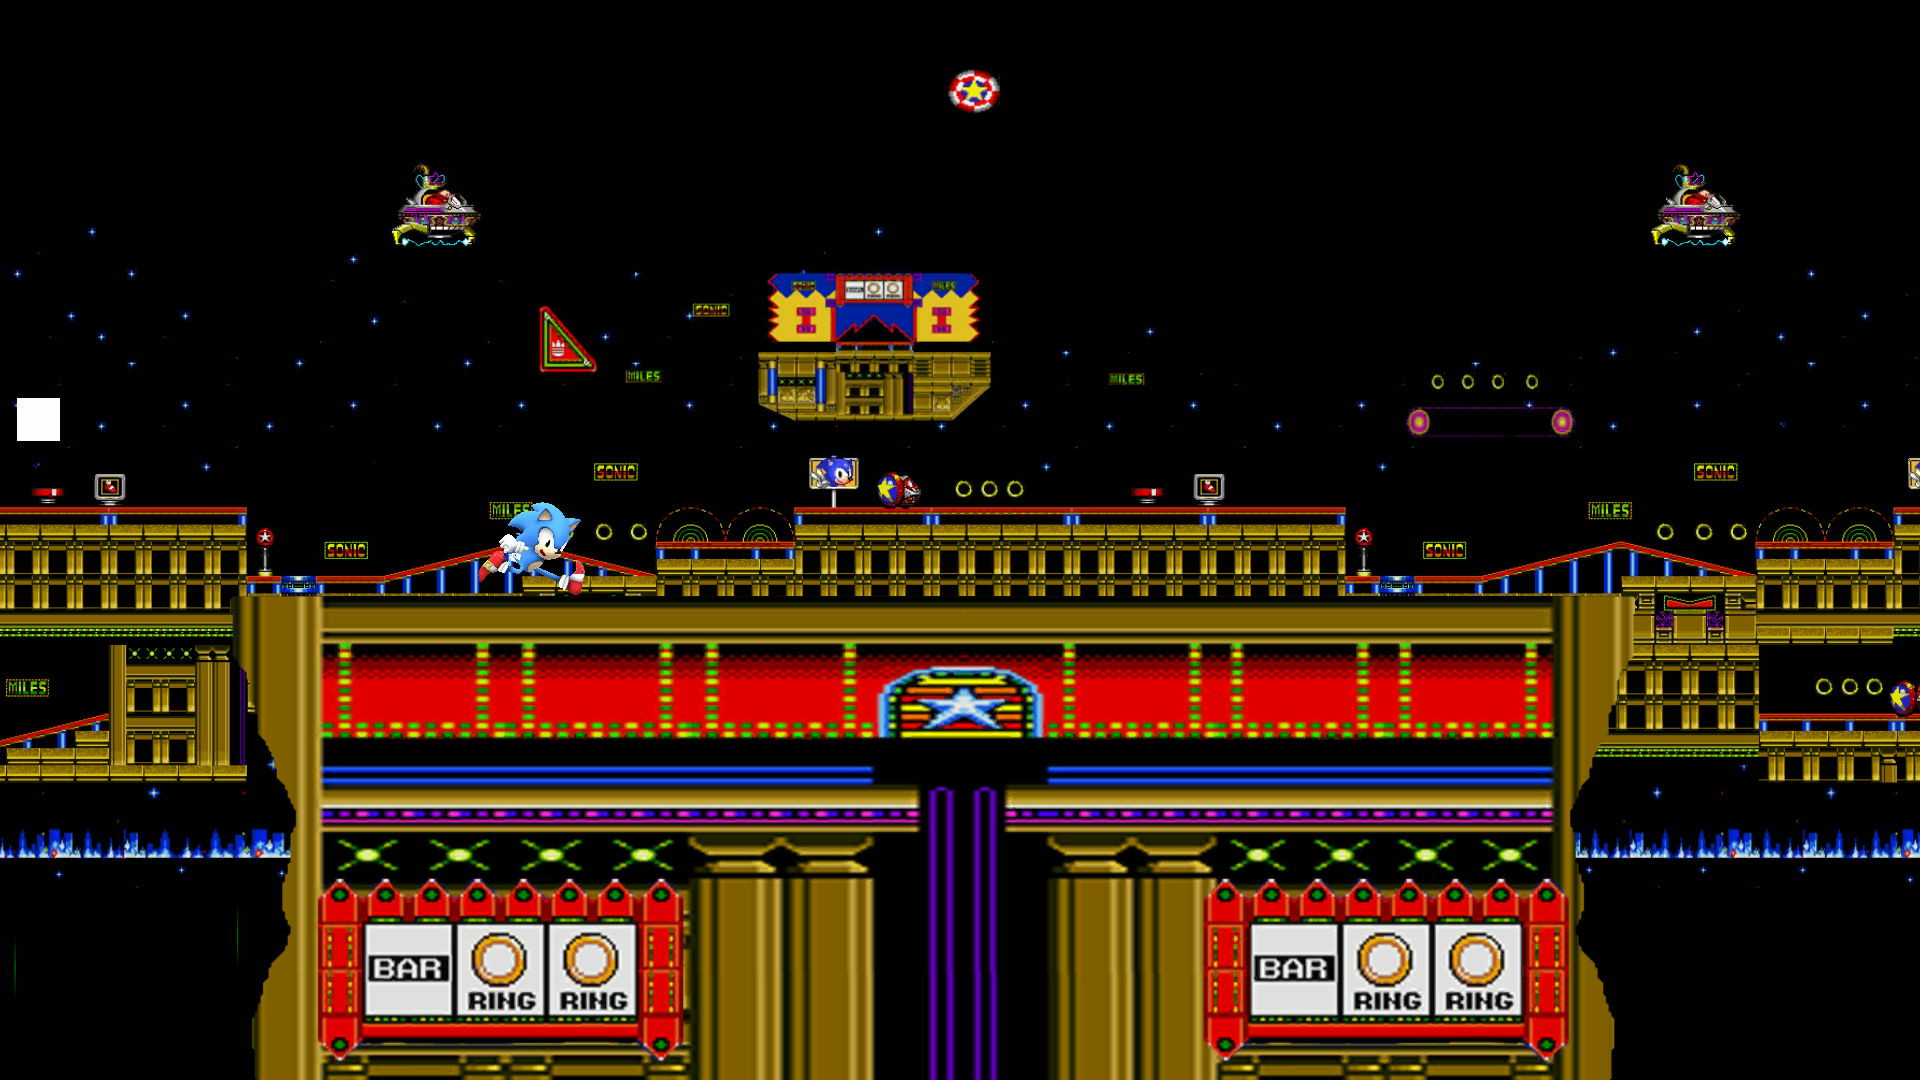
Stage: Casino Night Zone
![]()
Moveset:
Intro: Eggman’s boss intro in the classic games
Stance/Idle 1: The Egg Mobile floats close to the ground
Idle 2: Eggman chuckles
Idle 3: Eggman twirls his mustache
Walk: The Egg Mobile floats along the ground
Dash: The Egg Mobile floats along the ground while the jets fire
Damage: His damage animation from the Classic and Advance games
Jump: The Egg Mobile’s Walker legs spring out, and the jet propels Eggman slightly for the second jump
Crouch: The Walker legs rest on the ground and lower the Egg Mobile
Normal Attacks
Jab: Eggman flurries with robotic claws from the Egg Mobile (2%-3%), then finishes with an uppercut (6%, small knockback)
Forward+A: Eggman attacks with one of the bumpers from the EGG-HVC-001 (6%, OK knockback)
Down+A: Eggman sends out a boxing glove attached to a spring that sends opponents flying (11%, medium knockback)
Up+A: Eggman attacks using the pointy tail from the boss of Oil Ocean (6%, OK knockback)
Aerial Attacks
Air+A: Eggman attacks using the flippers from the final boss of Sonic CD (3% each hit, OK knockback)
Air Forward+A: Eggman fires a shot from his energy gun (7%, small knockback)
Air Back + A: Eggman drops some blue toxic water from the back of his Egg Mobile (8%, OK knockback)
Air Up+A: Eggman raise a drill from the Marble Garden boss above himself (9%, OK knockback)
Air Down+A: Eggman drops down with a spike at the bottom of the Egg Mobile (8% with a meteor effect, OK knockback)
Dash Attack: Eggman dashes forward with the Egg Walker’s legs (3% each hit, OK knockback)
Edge Attack: Eggman shoots an energy laser (7%, small knockback) and gets back up after hanging on the edge with the Egg Mobile’s robot claws
Get-Up Attack: Eggman briefly summons an Electric Shield (5%, small knockback)
Smash Attacks
Forward+A: Eggman slams the ground with a giant hammer that can bury an opponent on the ground (25%, medium knockback)
Up+A: Eggman clamps the two claws from the Casino Night Zone boss (22%, medium knockback)
Down+A: Eggman fires two fireballs from the bottom of his Egg Mobile and spins them around (15% each hit, OK knockback)
Grab Game
Grab: Eggman uses Big Arms to grab the opponent
Pummel: Eggman slowly squeezes the opponent (5%)
Forwards+Throw: Eggman tosses the opponent forward (9%, OK knockback)
Down+Throw: Eggman hovers up a bit and buries the opponent with a full-force ground slam (15%)
Back+Throw: Eggman throws the opponent behind himself (12%, OK knockback)
Up+Throw: Eggman uses the Phantom Ruby to warp the opponent to above himself (8%, small knockback)
Special Moves
B : Egg Mobile-H; Eggman unleashes a wrecking ball and slams it forward after a brief spin (29%, medium knockback) that can bury opponents on the ground and meteor Smash opponents in the air. By tilting the control stick in the opposite direction, Eggman can do a backflip and attack opponents behind him.
B + Forwards : Egg Mobile-D; Eggman rushes forward in a drill car (15%, OK knockback). The drill itself cancels out the Drill item (and can be released by pressing B again), but travels less of a distance.
B + Up : Phantom Ruby; Eggman uses the powers of the Phantom Ruby to warp in the direction the control stick is tilted; this attacks fighters in a large area (5%, OK knockback) and can either freeze opponents, reverse their controls, or inflict the flower status
B + Down : Laser from M.E.; Using the powers of the Master Emerald, Eggman fires a huge one-hit laser that goes offscreen (35%, far knockback). This attack has a 10-second cooldown between uses, and Eggman can move slowly left or right with super armor before he actually fires the laser.
Final Smash: Death Egg Robot; “Get a load of this!” Using the powers of the Phantom Ruby, Eggman summons the Death Egg Robot. Both of its arms can be controlled with either control stick, and pressing B has Eggman fire both of them towards the screen (40% each, far knockback); if opponents are at 60% or higher, they will suffer a screen K.O.
Gimmick: N/A
Taunts
1: “Yosh…” Eggman pets his Egg Mobile
2: “Time for a change of pace!” Eggman gets out of the Egg Mobile for a sec to do a “Well! What is it?” gesture
1+2: “Ohohoho!” Eggman puts his hand on his chest as he laughs
Winposes
1: “Now you know why I am the best!” Eggman mimics the bad ending from Sonic the Hedgehog
1a: “Try again, Sonic!” (Vs. Sonic)
2: The camera pans up from a capsule containing Flickies and moves up to Eggman, with Orbot and Cubot appearing briefly
3: “Yes, yes, yes!” Eggman’s victory animation from Sonic Adventure 2
Applause: Eggman mimics the good ending from Sonic the Hedgehog
Icon: The Sonic series icon
Boxing Ring Title: The Man with the Master Plan
Star K.O.: “You’ll regret thiiiis…!” “I hate that hedgehoooog…!”
Victory Music: E.G.G.M.A.N.
Kirby Hat: Eggman’s glasses and mustache
Alternate Costumes:
Dr. Eggman
Maria Robotnik (blue)
Gerald Robotnik (grey)
Eggman Nega (black)
Classic Eggman (alt)
Snively (greeen)
Pajama concept art (pink)
Eggrobo (alt 2)
Note: The Eggrobo has no voice clips
Mii Costumes:
Shadow the Hedgehog (can be used as either, Gunner or Brawler)
Beat (Jet Set Radio) (Brawler)
AiAi (Monkey Ball) (Brawler, masked)
Axel Stone (Streets of Rage) (Brawler)
Bonanza Bros. costume (masked costume, but has skin tone and colour customisation) (Gunner)
Amigo (Samba de Amigo) (Swordfighter, masked, weilds a maraca)
Spirits:
Mighty and Ray - Ace
Moto Bug - Novice, enhances to Flicky - Legend
Fang, Bean, and Bark - Novice
Eggrobo - Novice
Spikes, Rings, Springs, and Bobbins - Ace
Mephiles the Dark - Advanced
Excalibur Sonic - Legend
King Arthur - Advanced
Maria Robotnik - Novice
Wisps - Ace
Heavy and Bomb - Novice
The Deadly Six - Advanced
Metal Knuckles and the Tails Doll - Novice
Green Hill Zone - Legend
Death Egg - Legend
Music:
Green Hill Zone (New remix)
Chemical Plant Zone
Casino Night Zone
Death Egg Robot
Palmtree Panic (Present)
Stardust Speedway (Bad Future) (JP)
Big Arms
Mushroom Hill Zone
Sky Sanctuary Zone
Doomsday Zone
Unknown from M.E.
Chaos 0, 2, 4
Run Through the Speed Highway
E.G.G.M.A.N.
Supporting Me
Seaside Hill / Ocean Palace
Egg Emperor
What I'm Made Of
Right There, Ride On
Metal Scratchin'
Back 2 Back
Wrapped in Black
I Am (All of Me)
Crisis City
A New Venture
Endless Possibility
Vs. Egg Dragoon
Tropical Resort
Planet Wisp
Honeycomb Highway
The Deadly Six Theme
Sonic Mania Medley
Rogues Gallery
Hi-Spec Robo Go!
Moonlight Battlefield (Aqua Road)
Classic Mode: Enemy of my Enemy
(Eggman reluctantly teams up with Sonic to fight various villains)
Round 1: Bowser, Bowser JR (team battle w/Sonic) on Princess Peach's Castle (King Bowser - Super Mario Bros. 3)
Round 2: Giant King K Rool (team battle w/Sonic) on Pirate Ship (Gang-Plank Galleon)
Round 3: Ridley, Dark Samus (team battle w/Sonic) on Norfair (Nemesis Ridley)
Round 4: King Dedede, Meta Knight (team battle w/Sonic) on (King Dedede's Theme (Brawl))
Round 5: Wolf (team battle w/Sonic) on Venom (Star Wolf (Brawl))
Round 6: Larry, Roy, Iggy, Morton, Wendy, Lemmy, Ludwig (horde battle; team battle w/Sonic) on Windy Hill Zone (The Deadly Six Theme)
Final Round: Ganondorf (Calamity Ganon Battle - Second Form), then Ganon (Wrapped in Black) (team battle w/Sonic)
Credits: E.G.G.M.A.N.
Stage: Casino Night Zone
Moveset:
Intro: Eggman’s boss intro in the classic games
Stance/Idle 1: The Egg Mobile floats close to the ground
Idle 2: Eggman chuckles
Idle 3: Eggman twirls his mustache
Walk: The Egg Mobile floats along the ground
Dash: The Egg Mobile floats along the ground while the jets fire
Damage: His damage animation from the Classic and Advance games
Jump: The Egg Mobile’s Walker legs spring out, and the jet propels Eggman slightly for the second jump
Crouch: The Walker legs rest on the ground and lower the Egg Mobile
Normal Attacks
Jab: Eggman flurries with robotic claws from the Egg Mobile (2%-3%), then finishes with an uppercut (6%, small knockback)
Forward+A: Eggman attacks with one of the bumpers from the EGG-HVC-001 (6%, OK knockback)
Down+A: Eggman sends out a boxing glove attached to a spring that sends opponents flying (11%, medium knockback)
Up+A: Eggman attacks using the pointy tail from the boss of Oil Ocean (6%, OK knockback)
Aerial Attacks
Air+A: Eggman attacks using the flippers from the final boss of Sonic CD (3% each hit, OK knockback)
Air Forward+A: Eggman fires a shot from his energy gun (7%, small knockback)
Air Back + A: Eggman drops some blue toxic water from the back of his Egg Mobile (8%, OK knockback)
Air Up+A: Eggman raise a drill from the Marble Garden boss above himself (9%, OK knockback)
Air Down+A: Eggman drops down with a spike at the bottom of the Egg Mobile (8% with a meteor effect, OK knockback)
Dash Attack: Eggman dashes forward with the Egg Walker’s legs (3% each hit, OK knockback)
Edge Attack: Eggman shoots an energy laser (7%, small knockback) and gets back up after hanging on the edge with the Egg Mobile’s robot claws
Get-Up Attack: Eggman briefly summons an Electric Shield (5%, small knockback)
Smash Attacks
Forward+A: Eggman slams the ground with a giant hammer that can bury an opponent on the ground (25%, medium knockback)
Up+A: Eggman clamps the two claws from the Casino Night Zone boss (22%, medium knockback)
Down+A: Eggman fires two fireballs from the bottom of his Egg Mobile and spins them around (15% each hit, OK knockback)
Grab Game
Grab: Eggman uses Big Arms to grab the opponent
Pummel: Eggman slowly squeezes the opponent (5%)
Forwards+Throw: Eggman tosses the opponent forward (9%, OK knockback)
Down+Throw: Eggman hovers up a bit and buries the opponent with a full-force ground slam (15%)
Back+Throw: Eggman throws the opponent behind himself (12%, OK knockback)
Up+Throw: Eggman uses the Phantom Ruby to warp the opponent to above himself (8%, small knockback)
Special Moves
B : Egg Mobile-H; Eggman unleashes a wrecking ball and slams it forward after a brief spin (29%, medium knockback) that can bury opponents on the ground and meteor Smash opponents in the air. By tilting the control stick in the opposite direction, Eggman can do a backflip and attack opponents behind him.
B + Forwards : Egg Mobile-D; Eggman rushes forward in a drill car (15%, OK knockback). The drill itself cancels out the Drill item (and can be released by pressing B again), but travels less of a distance.
B + Up : Phantom Ruby; Eggman uses the powers of the Phantom Ruby to warp in the direction the control stick is tilted; this attacks fighters in a large area (5%, OK knockback) and can either freeze opponents, reverse their controls, or inflict the flower status
B + Down : Laser from M.E.; Using the powers of the Master Emerald, Eggman fires a huge one-hit laser that goes offscreen (35%, far knockback). This attack has a 10-second cooldown between uses, and Eggman can move slowly left or right with super armor before he actually fires the laser.
Final Smash: Death Egg Robot; “Get a load of this!” Using the powers of the Phantom Ruby, Eggman summons the Death Egg Robot. Both of its arms can be controlled with either control stick, and pressing B has Eggman fire both of them towards the screen (40% each, far knockback); if opponents are at 60% or higher, they will suffer a screen K.O.
Gimmick: N/A
Taunts
1: “Yosh…” Eggman pets his Egg Mobile
2: “Time for a change of pace!” Eggman gets out of the Egg Mobile for a sec to do a “Well! What is it?” gesture
1+2: “Ohohoho!” Eggman puts his hand on his chest as he laughs
Winposes
1: “Now you know why I am the best!” Eggman mimics the bad ending from Sonic the Hedgehog
1a: “Try again, Sonic!” (Vs. Sonic)
2: The camera pans up from a capsule containing Flickies and moves up to Eggman, with Orbot and Cubot appearing briefly
3: “Yes, yes, yes!” Eggman’s victory animation from Sonic Adventure 2
Applause: Eggman mimics the good ending from Sonic the Hedgehog
Icon: The Sonic series icon
Boxing Ring Title: The Man with the Master Plan
Star K.O.: “You’ll regret thiiiis…!” “I hate that hedgehoooog…!”
Victory Music: E.G.G.M.A.N.
Kirby Hat: Eggman’s glasses and mustache
Alternate Costumes:
Dr. Eggman
Maria Robotnik (blue)
Gerald Robotnik (grey)
Eggman Nega (black)
Classic Eggman (alt)
Snively (greeen)
Pajama concept art (pink)
Eggrobo (alt 2)
Note: The Eggrobo has no voice clips
Mii Costumes:
Shadow the Hedgehog (can be used as either, Gunner or Brawler)
Beat (Jet Set Radio) (Brawler)
AiAi (Monkey Ball) (Brawler, masked)
Axel Stone (Streets of Rage) (Brawler)
Bonanza Bros. costume (masked costume, but has skin tone and colour customisation) (Gunner)
Amigo (Samba de Amigo) (Swordfighter, masked, weilds a maraca)
Spirits:
Mighty and Ray - Ace
Moto Bug - Novice, enhances to Flicky - Legend
Fang, Bean, and Bark - Novice
Eggrobo - Novice
Spikes, Rings, Springs, and Bobbins - Ace
Mephiles the Dark - Advanced
Excalibur Sonic - Legend
King Arthur - Advanced
Maria Robotnik - Novice
Wisps - Ace
Heavy and Bomb - Novice
The Deadly Six - Advanced
Metal Knuckles and the Tails Doll - Novice
Green Hill Zone - Legend
Death Egg - Legend
Music:
Green Hill Zone (New remix)
Chemical Plant Zone
Casino Night Zone
Death Egg Robot
Palmtree Panic (Present)
Stardust Speedway (Bad Future) (JP)
Big Arms
Mushroom Hill Zone
Sky Sanctuary Zone
Doomsday Zone
Unknown from M.E.
Chaos 0, 2, 4
Run Through the Speed Highway
E.G.G.M.A.N.
Supporting Me
Seaside Hill / Ocean Palace
Egg Emperor
What I'm Made Of
Right There, Ride On
Metal Scratchin'
Back 2 Back
Wrapped in Black
I Am (All of Me)
Crisis City
A New Venture
Endless Possibility
Vs. Egg Dragoon
Tropical Resort
Planet Wisp
Honeycomb Highway
The Deadly Six Theme
Sonic Mania Medley
Rogues Gallery
Hi-Spec Robo Go!
Moonlight Battlefield (Aqua Road)
Classic Mode: Enemy of my Enemy
(Eggman reluctantly teams up with Sonic to fight various villains)
Round 1: Bowser, Bowser JR (team battle w/Sonic) on Princess Peach's Castle (King Bowser - Super Mario Bros. 3)
Round 2: Giant King K Rool (team battle w/Sonic) on Pirate Ship (Gang-Plank Galleon)
Round 3: Ridley, Dark Samus (team battle w/Sonic) on Norfair (Nemesis Ridley)
Round 4: King Dedede, Meta Knight (team battle w/Sonic) on
(King Dedede's Theme (Brawl))Round 5: Wolf (team battle w/Sonic) on Venom (Star Wolf (Brawl))
Round 6: Larry, Roy, Iggy, Morton, Wendy, Lemmy, Ludwig (horde battle; team battle w/Sonic) on Windy Hill Zone (The Deadly Six Theme)
Final Round: Ganondorf (Calamity Ganon Battle - Second Form), then Ganon (Wrapped in Black) (team battle w/Sonic)
Credits: E.G.G.M.A.N.
Character: Phoenix Wright
![]()
Stage: Courtroom

Moveset:
Intro: Nick's intro from UMvC3
Stance/Idle 1: Nick’s idle animation from UMvC3
Idle 2: Nick puts a finger up to his chin
Idle 3: Nick puts his hands on his hips in a determined fashion
Walk: His walk from UMvC3
Dash: Phoenix dashes like he's late for a case
Damage: His damage animation from UMvC3
Jump: His jump from UMvC3
Crouch: His crouch from UMvC3
Normal Attacks
Jab: Nick pulls out a stack of papers (1%), skims through them (1-2%), and then slaps the opponent with it (4%, small knockback)
Forward+A: Nick points his finger forward as an illusion of it appears (4%, small knockback)
Down+A: Nick trips and accidentally kicks the opponent twice (6%, small knockback)
Up+A: Nick points his finger diagonally upward as an illusion of it appears (4%, small)
Aerial Attacks
Air+A: Nick throws a cup of hot coffee in the air (8%, small knockback)
Air Forward+A: Nick points his finger forward as an illusion of it appears (7%, small knockback)
Air Back + A: Nick swiftly turns around and guards himself (5%, small knockback)
Air Up+A: Nick drops a cup of hot coffee, which goes flying up in the air (8%, small knockback)
Air Down+A: Nick points his finger diagonally downward as an illusion of it appears
Dash Attack: Nick stops in his tracks as a huge cloud of dust appears in front of him (9%, OK knockback)
Edge Attack: Nick sneezes as he gets back up (5%, small knockback)
Get-Up Attack: Nick shouts "I got it!" as a "!" appears (6%, small knockback)
Smash Attacks
Forward+A: Nick shouts "Objection!" as the iconic speech bubble appears (20%, medium knockback)
Up+A: Nick shouts "Hold it!" as he points above himself (16%, OK knockback)
Down+A: A giant gavel appears above Nick and buries him (5% recoil) while a shockwave appears around it (17%, OK knockback)
Grab Game
Grab: Nick grabs the opponent and looks at them curiously
Pummel: Nick shouts "Hold it!" and points at the opponent (2%)
Forwards+Throw: Maya appears and tackles the opponent (11%, OK knockback)
Down+Throw: Nick turns around and unknowingly knocks the opponent down (4%, small knockback)
Back+Throw: A dog appears and bumps into the opponent (8%, OK knockback)
Up+Throw: Maya appears and tosses the opponent into the air (7%, small knockback)
Special Moves
B : Mood Matrix; Nick uses a different special move based around the four moods on display. Each mood has a 15-second cooldown.
B + Up : Stepladder (Ladder?); Nick climbs a ladder and jumps from the top of it. When used on the ground, it can be destroyed by other fighters, causing Nick to fall off. When used in the air, it falls and destroys itself upon hitting any fighters under it (8%, small knockback)
B + Down : Magatama; Nick traps up to 5 opponents in the vicinity using Psyche Locks, and destroys them a second later (14% each, OK knockback). If there are no opponents in the vicinity, Nick takes 15% in recoil damage.
Final Smash: Ace Attorney; as Nick points his finger forward, a streak of light resembling it beams forward and traps a single opponent (5%). The opponent is then taken into a cutscene where Nick accuses them of committing a crime, which is based on his Lv. 3 Hyper Combo from UMvC3 (45%, far knockback). This instantly K.O.'s any fighter above 100%.
Gimmick: N/A
Taunts
1: "I spy...a contradiction." Nick's taunt from UMvC3
2: “Sure you’re not forgetting something?” Nick looks down and finds a random piece of evidence
1+2: “The defense is ready to present!” Nick points forward
Winposes
1: Nick's victory pose from UMvC3
2: The camera points towards Nick, who points at it in turn
3: Nick and Maya point in opposite directions
Applause: Nick sweats profusely
Icon: The glimmer in the AA logo
Boxing Ring Title: The Ace Attorney
Star K.O.: “WHY DID I AGREE TO THIIIIIS…?!”
Victory Music: https://youtu.be/SPOFjeHS_hc
Kirby Hat: Nick's hair
Alts:
Dual Destinies Phoenix (default)
Maya Fey (purple)
Miles Edgeworth (red)
Apollo Justice (red/white)
Godot (green/tan)
Athena Cykes (yellow)
Ryunosuke Naruhodo (black)
PaPa costume (alt.)
Spirits:
Phoenix Wright (Fighter Spirit)
Maya Fey (Color 2 Phoenix, ★★★)
Miles Edgeworth (Color 3 Phoenix, ★★★★)
Judge (Ace Attorney) (Color 8 King Dedede, ★)
Detective Gumshoe (Color 5 Snake and Color 3 Phoenix, ★★)
Franziska von Karma (Color 7, ★★)
Godot (Color 5 Phoenix, ★)
Apollo Justice (Color 4 Phoenix, ★★★)
Trucy Wright (Color 3 Zelda and Color 8 Phoenix, ★)
Athena Cykes (Color 6 Phoenix, default Phoenix and Color 4 Phoenix, ★★★)
Bobby Fulbright (Color 6 Kirby, ★)
Nahuyta Sahdmadhi (Palutena, ★)
Ryunosuke Naruhodo (Color 7 Phoenix and Color 6 Pikachu, ★★)
Music:
Ace Attorney Medley
Phoenix Wright ~ Objection!
Pursuit ~ Cornered
Logic and Trick
Maya Fey ~ Turnabout Sisters
The Steel Samurai
Miles Edgeworth ~ Great Revival 2013
Godot ~ The Fragrance of Dark Coffee
Pressing Pursuit ~ Caught
Apollo Justice ~ A New Chapter of Trials! 2013
Klavier Gavin ~ Guilty Love
Pursuit ~ Lying Coldly
Gumshoe ~ I can do it when it counts, pal!
Confrontation ~ Presto 2009
Pursuit ~ Wanting to Find the Truth
Phoenix Wright ~ Objection! 2013
Athena Cykes ~ Courtroom Révolutionnaire 2016
Bobby Fulbright ~ Our Secret Word is Justice!
Simon Blackquill ~ Distorted Swordsmanship
Nahyuta Sahdmadhi ~ The Last Rites Prosecutor
Ryunosuke Naruhodo ~ Prelude of an Adventure
Pursuit ~ Time for a Great Turnabout
Partners ~ The Game is Afoot!
Mii Costumes:
Steel Samurai (Swordfighter)
Gumshoe (Brawler)
Blue Badger (Mii Hat)
Tsukino (Brawler)
Plumbob (Mii Hat)
Cuddle Team Leader (Gunner) Includes The End music track
Classic Mode:
Round 1: A fight on Delfino Plaza against a horde of Inklings.
Round 2: A fight against Bowser Jr also on delfino plaza. The stage is completely covered in ink, presumably from the last fight
Round 3: A horde battle on delfino against a bunch of Snake’s and one Bowser Jr. This is supposed to represent the police catching you.
Round 4: A battle against Wolf, Ridley and Ganondorf on Unova Pokemon League. This is supposed to represent mario in prison.
Round 5: Back on delfino, you fight against phoenix in his edgeworth alt. You aren’t teamed up with mario here and items will spawn in. This is supposed to represent the investigation.
Round 6: Bonus. I just feel like right at the investigation would be a good place to put it.
Round 7: A fight against phoenix’s edgeworth alt and bowser (the obviously biased witness) on the courtroom stage
Round 8: A battle against Giga Bowser and Bowser Jr on the final destination version of courtroom
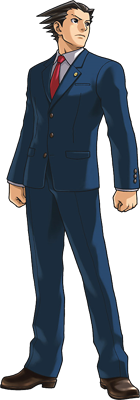
Stage: Courtroom
Moveset:
Intro: Nick's intro from UMvC3
Stance/Idle 1: Nick’s idle animation from UMvC3
Idle 2: Nick puts a finger up to his chin
Idle 3: Nick puts his hands on his hips in a determined fashion
Walk: His walk from UMvC3
Dash: Phoenix dashes like he's late for a case
Damage: His damage animation from UMvC3
Jump: His jump from UMvC3
Crouch: His crouch from UMvC3
Normal Attacks
Jab: Nick pulls out a stack of papers (1%), skims through them (1-2%), and then slaps the opponent with it (4%, small knockback)
Forward+A: Nick points his finger forward as an illusion of it appears (4%, small knockback)
Down+A: Nick trips and accidentally kicks the opponent twice (6%, small knockback)
Up+A: Nick points his finger diagonally upward as an illusion of it appears (4%, small)
Aerial Attacks
Air+A: Nick throws a cup of hot coffee in the air (8%, small knockback)
Air Forward+A: Nick points his finger forward as an illusion of it appears (7%, small knockback)
Air Back + A: Nick swiftly turns around and guards himself (5%, small knockback)
Air Up+A: Nick drops a cup of hot coffee, which goes flying up in the air (8%, small knockback)
Air Down+A: Nick points his finger diagonally downward as an illusion of it appears
Dash Attack: Nick stops in his tracks as a huge cloud of dust appears in front of him (9%, OK knockback)
Edge Attack: Nick sneezes as he gets back up (5%, small knockback)
Get-Up Attack: Nick shouts "I got it!" as a "!" appears (6%, small knockback)
Smash Attacks
Forward+A: Nick shouts "Objection!" as the iconic speech bubble appears (20%, medium knockback)
Up+A: Nick shouts "Hold it!" as he points above himself (16%, OK knockback)
Down+A: A giant gavel appears above Nick and buries him (5% recoil) while a shockwave appears around it (17%, OK knockback)
Grab Game
Grab: Nick grabs the opponent and looks at them curiously
Pummel: Nick shouts "Hold it!" and points at the opponent (2%)
Forwards+Throw: Maya appears and tackles the opponent (11%, OK knockback)
Down+Throw: Nick turns around and unknowingly knocks the opponent down (4%, small knockback)
Back+Throw: A dog appears and bumps into the opponent (8%, OK knockback)
Up+Throw: Maya appears and tosses the opponent into the air (7%, small knockback)
Special Moves
B : Mood Matrix; Nick uses a different special move based around the four moods on display. Each mood has a 15-second cooldown.
- Happiness emits a healing field that heals both Nick and any opponents in its vicinity
- Anger causes Nick to charge a huge explosion that hurts both him and any opponents in the vicinity (20% to Nick; 35% to opponents, medium knockback); only Nick is prevented from launching
- Sadness emits an aura that increases Nick's speed and attack, but decreases his defense
- Surprise makes a scary-face burst that stuns opponents in the vicinity as well as causes Nick to crumple over
B + Up : Stepladder (Ladder?); Nick climbs a ladder and jumps from the top of it. When used on the ground, it can be destroyed by other fighters, causing Nick to fall off. When used in the air, it falls and destroys itself upon hitting any fighters under it (8%, small knockback)
B + Down : Magatama; Nick traps up to 5 opponents in the vicinity using Psyche Locks, and destroys them a second later (14% each, OK knockback). If there are no opponents in the vicinity, Nick takes 15% in recoil damage.
Final Smash: Ace Attorney; as Nick points his finger forward, a streak of light resembling it beams forward and traps a single opponent (5%). The opponent is then taken into a cutscene where Nick accuses them of committing a crime, which is based on his Lv. 3 Hyper Combo from UMvC3 (45%, far knockback). This instantly K.O.'s any fighter above 100%.
Gimmick: N/A
Taunts
1: "I spy...a contradiction." Nick's taunt from UMvC3
2: “Sure you’re not forgetting something?” Nick looks down and finds a random piece of evidence
1+2: “The defense is ready to present!” Nick points forward
Winposes
1: Nick's victory pose from UMvC3
2: The camera points towards Nick, who points at it in turn
3: Nick and Maya point in opposite directions
Applause: Nick sweats profusely
Icon: The glimmer in the AA logo
Boxing Ring Title: The Ace Attorney
Star K.O.: “WHY DID I AGREE TO THIIIIIS…?!”
Victory Music: https://youtu.be/SPOFjeHS_hc
Kirby Hat: Nick's hair
Alts:
Dual Destinies Phoenix (default)
Maya Fey (purple)
Miles Edgeworth (red)
Apollo Justice (red/white)
Godot (green/tan)
Athena Cykes (yellow)
Ryunosuke Naruhodo (black)
PaPa costume (alt.)
Spirits:
Phoenix Wright (Fighter Spirit)
Maya Fey (Color 2 Phoenix, ★★★)
Miles Edgeworth (Color 3 Phoenix, ★★★★)
Judge (Ace Attorney) (Color 8 King Dedede, ★)
Detective Gumshoe (Color 5 Snake and Color 3 Phoenix, ★★)
Franziska von Karma (Color 7
, ★★)Godot (Color 5 Phoenix, ★)
Apollo Justice (Color 4 Phoenix, ★★★)
Trucy Wright (Color 3 Zelda and Color 8 Phoenix, ★)
Athena Cykes (Color 6 Phoenix, default Phoenix and Color 4 Phoenix, ★★★)
Bobby Fulbright (Color 6 Kirby, ★)
Nahuyta Sahdmadhi (Palutena, ★)
Ryunosuke Naruhodo (Color 7 Phoenix and Color 6 Pikachu, ★★)
Music:
Ace Attorney Medley
Phoenix Wright ~ Objection!
Pursuit ~ Cornered
Logic and Trick
Maya Fey ~ Turnabout Sisters
The Steel Samurai
Miles Edgeworth ~ Great Revival 2013
Godot ~ The Fragrance of Dark Coffee
Pressing Pursuit ~ Caught
Apollo Justice ~ A New Chapter of Trials! 2013
Klavier Gavin ~ Guilty Love
Pursuit ~ Lying Coldly
Gumshoe ~ I can do it when it counts, pal!
Confrontation ~ Presto 2009
Pursuit ~ Wanting to Find the Truth
Phoenix Wright ~ Objection! 2013
Athena Cykes ~ Courtroom Révolutionnaire 2016
Bobby Fulbright ~ Our Secret Word is Justice!
Simon Blackquill ~ Distorted Swordsmanship
Nahyuta Sahdmadhi ~ The Last Rites Prosecutor
Ryunosuke Naruhodo ~ Prelude of an Adventure
Pursuit ~ Time for a Great Turnabout
Partners ~ The Game is Afoot!
Mii Costumes:
Steel Samurai (Swordfighter)
Gumshoe (Brawler)
Blue Badger (Mii Hat)
Tsukino (Brawler)
Plumbob (Mii Hat)
Cuddle Team Leader (Gunner) Includes The End music track
Classic Mode:
Round 1: A fight on Delfino Plaza against a horde of Inklings.
Round 2: A fight against Bowser Jr also on delfino plaza. The stage is completely covered in ink, presumably from the last fight
Round 3: A horde battle on delfino against a bunch of Snake’s and one Bowser Jr. This is supposed to represent the police catching you.
Round 4: A battle against Wolf, Ridley and Ganondorf on Unova Pokemon League. This is supposed to represent mario in prison.
Round 5: Back on delfino, you fight against phoenix in his edgeworth alt. You aren’t teamed up with mario here and items will spawn in. This is supposed to represent the investigation.
Round 6: Bonus. I just feel like right at the investigation would be a good place to put it.
Round 7: A fight against phoenix’s edgeworth alt and bowser (the obviously biased witness) on the courtroom stage
Round 8: A battle against Giga Bowser and Bowser Jr on the final destination version of courtroom
Character: Bandana Dee
![See the source image]()
Stage:
Clash At Castle Dedede

Moveset:
His general strengths would lie in his good recovery and his ability to space out opponents. His weaknesses would be his light weight and somewhat low speed of movement and attacking.
1. Bandanna Waddle Dee (Fighter Spirit)
2. Galacta Knight (returning spirit, but didn't have a battle before - Meta Knight fight with the Galacta Knight palette, on the Final Destination version of Fountain of Dreams. Similar to Akuma, he's extremely powerful, but otherwise, it's a no-frills fight)
3. Daroach (returning spirit, but didn't have a battle before - fight against Pikachu and three Pichus on Great Cave Offensive, where lots of food spawns)
4. Masked Dedede (returning spirit, but didn't have a battle before - Dedede fight on Boxing Ring where Dedede uses a lot of Smash attacks, and once Dedede reaches a certain level of damage, hammers spawn)
5. Dark Matter (True Form) ( against Dark Meta Knight and two Mr. Game & Watches on Find Mii, where Lightning Bolts spawn)
6. Zero ( against giant white Kirby on Brinstar Depths, where Kirby has super armour - can be upgraded to...)
7. Zero Two (, no spirit battle)
8. Adeleine ( female Villager on Green Greens, where assist trophies spawn. Can be upgraded to...)
9. Adeleine and Ribbon (, no spirit battle)
10. Lololo and Lalala ( against blue Kirby and Jigglypuff with a bow, on Tomodachi Life. Wheeled crates spawn regularly)
11. President Haltmann ( fight against Wario and three small ROBs on Midgar)
12. Dark Meta Knight ( fight against Meta Knight with the Dark Meta Knight palette on Unova Pokemon League)
13. Taranza ( male Inkling fight on Gaur Plain, where only Pitfalls spawn)
14. Hyness ( Wario fight on Spear Pillar where you get three female Robins as partners)
15. Void Termina ( fight against giant Incineroar, and a giant Kirby once the Incineroar is beaten, on Final Destination. Daybreak pieces drop, and the Incineroar is heavy)
Music:
Vs. Nightmare
Factory Inspection
Ripple Red
Checker Knights
Dark Meta Knight Battle
Dedede's Royal Payback
The Greatest Warrior in the Galaxy
Meadow Breeze
Vs. Sphere Doomer
Bouncing Boss Battle
Must Dash / Reflected Laughter
Revenge of the Enemy
Sullied Grace
Lively Street
Spinning Roulette
Vagrant Counting Song of Retrospection
Dededestroyer Z
Song of Supplication
Mii costume list:
1. Susie (Kirby) - Gunner
2. Adeleine (Kirby) - Swordfighter
3. Krystal (Star Fox) - Gunner (based on her Star Fox: Assault design)
4. Officer Howard (Astral Chain) - Swordfighter
5. Cadence (Crypt of the NecroDancer) - Swordfighter (bonus music track: Gleeokenspiel, added to Zelda songs
Classic Mode:
Round 1: Dark Pit on Reset Bomb Forest (Dark Pit’s Theme)
Round 2: Marth (Color 2) (team battle w/Dark Pit) on Castle Siege (Story 5 Meeting)
Round 3: Mewtwo (team battle w/Marth) on Spear Pillar (Pokémon Red / Pokémon Blue Medley)
Round 4: Bowser (team battle w/Mewtwo) on Paper Mario (Tough Guy Alert!)
Round 5: Kirbyx12 (horde battle; team battle w/Bowser) on Green Greens (Vs. Sphere Doomer)
Final Round: Marx (team battle w/ Kirby, King Dedede, Meta Knight) (Sullied Grace)
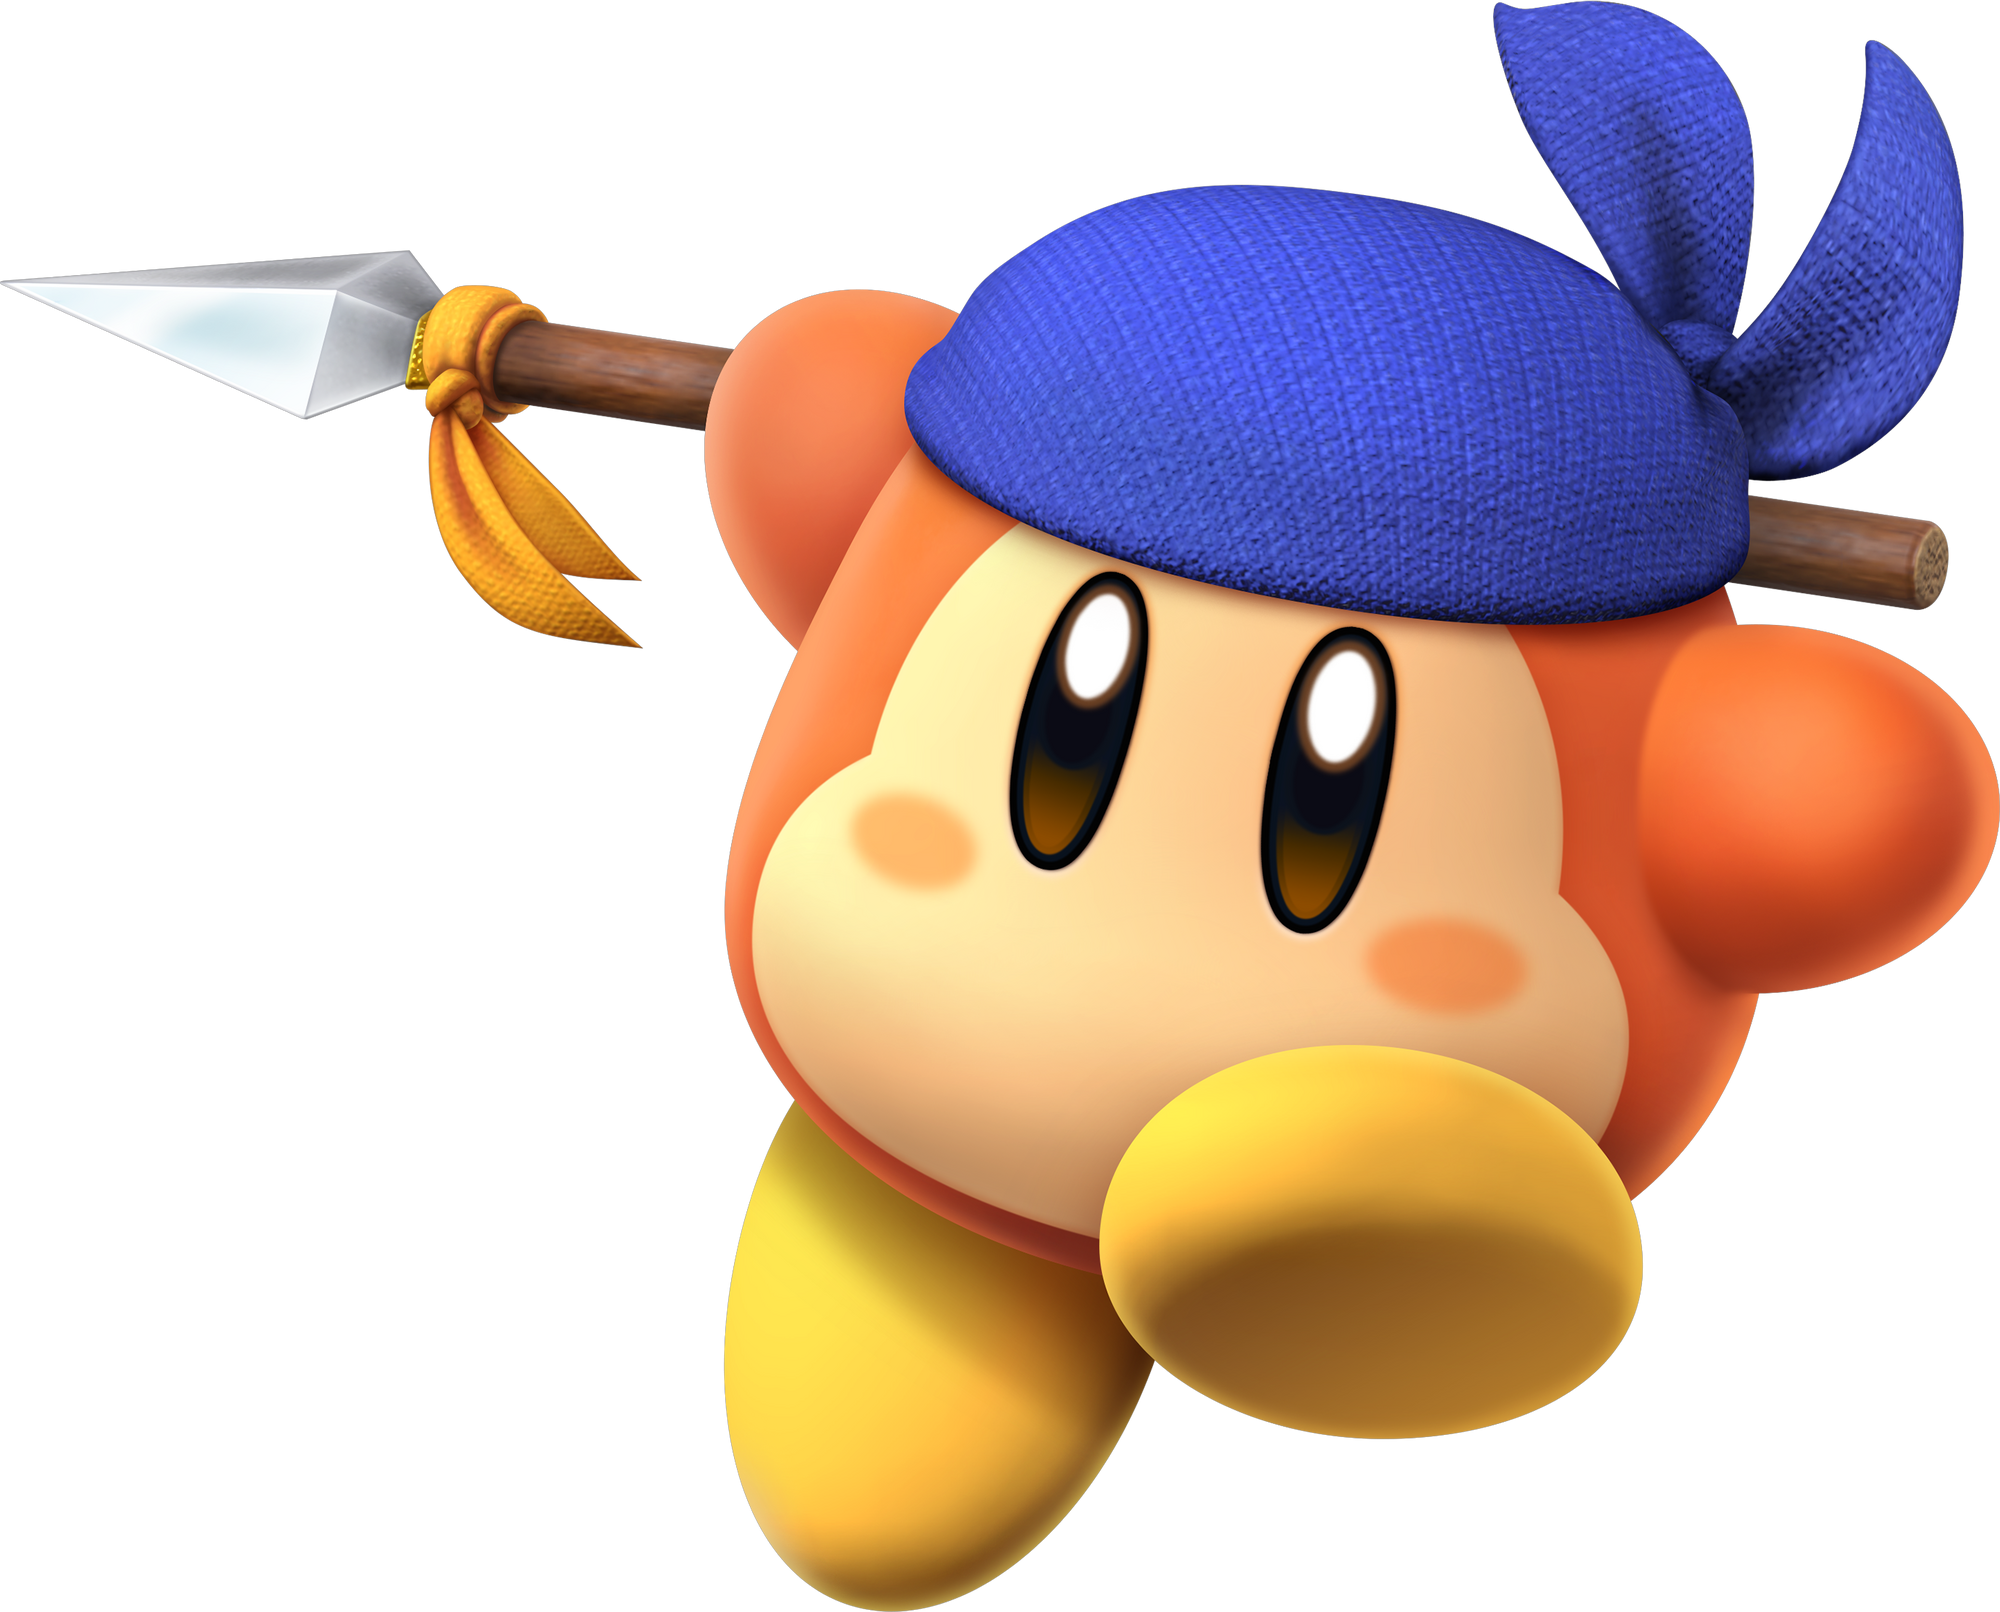
Stage:
Clash At Castle Dedede
Moveset:
His general strengths would lie in his good recovery and his ability to space out opponents. His weaknesses would be his light weight and somewhat low speed of movement and attacking.
- Normals
- Neutral attack: Spear Thrust
- Bandana Dee swings his spear forward, then unleashes a barrage of stabs for a rapid jab that ends with a single lunge forward.
- Forward tilt: Pinpoint Thrust
- Bandana Dee thrusts his spear as far forward as he can muster. Better range than other spear attacks.
- Up tilt: Skyward Thrust
- Bandana Dee thrusts his spear straight above himself.
- Down tilt: Slide
- Bandana Dee slides forward with his foot out, much like Cloud/Min Min/etc.
- Dash attack: Ground Thrust
- Bandana Dee plunges his spear into the ground in front of himself, then slides forward. Slightly laggy for a dash attack, but can knock opponents upward.
- Neutral attack: Spear Thrust
- Smash Attacks
- Forward smash: Gale Thrust
- Bandana Dee thrusts his spear forward with enough power to carry himself forward a short distance.
- Up smash
- Bandana Dee thrusts his parasol above his head and opens it. Doesn't reach far, but covers almost the entire space just above Dee's head.
- Down smash
- Bandana Dee scrapes his spear on the ground around himself, making two rotations. His weakest smash attack, but it can knock foes upward.
- Forward smash: Gale Thrust
- Aerials
- Neutral aerial: Windmill
- Bandana Dee flips upside down and twirls his spear below himself. More powerful below Bandana Dee than on his sides, and cannot attack upward.
- Forward aerial: Multispear Thrust
- Bandana Dee quickly thrusts forwards multiple times. Each thrust has a different angle, making the attack hit a wider space than others.
- Back aerial: Back Thrust
- Bandana Dee spins around in the air and thrusts his spear straight forward.
- Up aerial: Parasol Drift
- Bandana Dee opens his parasol above his head, decreasing his fall speed until he takes another action. This attack only deals damage when the parasol is initially opened.
- Down aerial: Moon Drop
- Bandana Dee spins in midair before dropping downwards spear first. Carries opponents along.
- Neutral aerial: Windmill
- Grab & Throws
- All of Bandana Waddle Dee's throws are based on the Parasol ability's "Circus Throw" attack, where one balances the victim on top of the opened parasol before using it to fling them in whatever direction.
- The exception is the down throw, which is instead based on the Parasol Twirl attack: Bandana Dee jumps up and drills the parasol into his opponent.
- Dee's throws are not his strong suit; they don't serve well as kill throws and aren't the most reliable for combos.
- Special Attacks
- Neutral special: Parasol Swing
- Bandana Dee swings his parasol forward. The attack itself isn't very strong, but it's faster than most of his other attacks, and the parasol can block attacks/negate projectiles. In addition, if B is held, Bandana Dee will hold the parasol out in front of himself after the swing and can move around with it (though he can't dash or midair jump). Bandana Dee cannot turn while holding the parasol; it must stay in the direction the attack was initially made until the parasol is put away. After the swing animation is complete, contact with the parasol will not deal damage.
- Side special: Waddle Spear Throw
- Bandana Dee throws his spear forwards. Charging the attack allows three spears to be thrown at once (Waddle Triple Throw). In midair, the attack can be performed rapidly, though with lower damage (Waddle Spear Barrage). The spears pierce through opponents, but only deal damage once per opponent.
- Up special: Waddle Copter
- Bandana Dee leaps upward and spins his spear above his head, causing him to rise upward for a time before slowly descending (during the descent, the spear’s attack speed and damage is decreased). Similar to K. Rool's Propellerpack, but it can be charged to increase the height of the initial leap and allows for greater horizontal movement at the cost of the ascent being a bit slower.
- Down special: Beam Whip
- Bandana Dee swings his spear from high to low as an electric aura covers the tip (resembling the Zap effect from Star Allies), swinging a long-range electric whip off of it. This attack is rather slow, but it reaches far and can hit high above him at the start (and even below him slightly at the very end). The beam can drag opponents along.
- Neutral special: Parasol Swing
- Final Smash: Bandana Star Blaster
- Based on the Buddy Star Blaster from Kirby Fighters 2 (which in turn was based on the Star Allies Sparkler from Star Allies). Bandana Dee signals towards the screen, and an orange-and-blue version of the Buddy Star Blaster flies from the foreground to the background in front of him. Any opponents hit by it are caught in a version of the Buddy Star Blaster cinematic (with Bandana Dee manning the Bandana Star Blaster alone).
- Bandana Waddle Dee
- No Hat
- Sailor Hat Waddle Dee
- Hardhat Waddle Dee
- Walker Waddle Dee
- Grand Dee (Gorilla)
- Halcandle Dee
- Sectra Dee
1. Bandanna Waddle Dee (Fighter Spirit)
2. Galacta Knight (returning spirit, but didn't have a battle before -
Meta Knight fight with the Galacta Knight palette, on the Final Destination version of Fountain of Dreams. Similar to Akuma, he's extremely powerful, but otherwise, it's a no-frills fight)3. Daroach (returning spirit, but didn't have a battle before -
fight against Pikachu and three Pichus on Great Cave Offensive, where lots of food spawns)4. Masked Dedede (returning spirit, but didn't have a battle before -
Dedede fight on Boxing Ring where Dedede uses a lot of Smash attacks, and once Dedede reaches a certain level of damage, hammers spawn)5. Dark Matter (True Form) (
against Dark Meta Knight and two Mr. Game & Watches on Find Mii, where Lightning Bolts spawn)6. Zero (
against giant white Kirby on Brinstar Depths, where Kirby has super armour - can be upgraded to...)7. Zero Two (
, no spirit battle)8. Adeleine (
female Villager on Green Greens, where assist trophies spawn. Can be upgraded to...)9. Adeleine and Ribbon (
, no spirit battle)10. Lololo and Lalala (
against blue Kirby and Jigglypuff with a bow, on Tomodachi Life. Wheeled crates spawn regularly)11. President Haltmann (
fight against Wario and three small ROBs on Midgar)12. Dark Meta Knight (
fight against Meta Knight with the Dark Meta Knight palette on Unova Pokemon League)13. Taranza (
male Inkling fight on Gaur Plain, where only Pitfalls spawn)14. Hyness (
Wario fight on Spear Pillar where you get three female Robins as partners)15. Void Termina (
fight against giant Incineroar, and a giant Kirby once the Incineroar is beaten, on Final Destination. Daybreak pieces drop, and the Incineroar is heavy)Music:
Vs. Nightmare
Factory Inspection
Ripple Red
Checker Knights
Dark Meta Knight Battle
Dedede's Royal Payback
The Greatest Warrior in the Galaxy
Meadow Breeze
Vs. Sphere Doomer
Bouncing Boss Battle
Must Dash / Reflected Laughter
Revenge of the Enemy
Sullied Grace
Lively Street
Spinning Roulette
Vagrant Counting Song of Retrospection
Dededestroyer Z
Song of Supplication
Mii costume list:
1. Susie (Kirby) - Gunner
2. Adeleine (Kirby) - Swordfighter
3. Krystal (Star Fox) - Gunner (based on her Star Fox: Assault design)
4. Officer Howard (Astral Chain) - Swordfighter
5. Cadence (Crypt of the NecroDancer) - Swordfighter (bonus music track: Gleeokenspiel, added to Zelda songs
Classic Mode:
Round 1: Dark Pit on Reset Bomb Forest (Dark Pit’s Theme)
Round 2: Marth (Color 2) (team battle w/Dark Pit) on Castle Siege (Story 5 Meeting)
Round 3: Mewtwo (team battle w/Marth) on Spear Pillar (Pokémon Red / Pokémon Blue Medley)
Round 4: Bowser (team battle w/Mewtwo) on Paper Mario (Tough Guy Alert!)
Round 5: Kirbyx12 (horde battle; team battle w/Bowser) on Green Greens (Vs. Sphere Doomer)
- Each Kirby, save for the last one (who’s Giant), uses a different Copy Ability for each of the Original 12
Final Round: Marx (team battle w/ Kirby, King Dedede, Meta Knight) (Sullied Grace)
Character: Master Chief
![]()
Stage: Blood Gulch
![]()
Moveset:
Neutral Special: Assault Rifle
![See the source image]()
Master Chief takes out an assault rifle and fires it forward for a few seconds. You cannot move when you use this attack. He has infinite ammo for this attack, however if you press the button five times he will have to take a second to reload.
Side Special: Shotgun
![See the source image]()
He takes out a shotgun and fires a heavy blast
Up Special: Gravity Lift
![See the source image]()
Master Chief floats upwards on a gravity lift for a couple seconds then shoots up. He's able to attack but not jump during this move.
Down Special: Plasma Grenade
![See the source image]()
He reaches below then tosses a plasma grenade up and forward. The plasma grenade is pretty much a nerfed version of the item we already have.
Final Smash: Warthog
![See the source image]()
He swings a gravity hammer forward. This leads into a cinematic where the opponent is in a desert and a warthog vehicle zooms by. The soldiers repeatedly shoot the opponents and fire a heavy turret at them.
Alts:
1. Default
2. Red armor
3. Blue armor (I think it’s kinda obvious what these last two reference
4. Black armor (a reference to the armor other spartans wear)
5. Teal armor (a reference to Cortana)
6. Gold armor (not a reference to anything in particular, just gives us more variety of colors)
7. White armor (a reference to 343 guilty spark
8. Pink armor (again just to give him some variety)
Spirits:
1. Master Chief (Fighter Spirit)
2. Terrence Hood (Dr Mario)
3. Cortana (Wii Fit Trainer)
4. Avery Johnson (Snake)
5. Miranda Keyes (Daisy
6. 343 Guilty Spark (Meta Knight)
7. Spartans (I assume when we do chief’s alts we’ll give him some based on the halo reach spartans so I’ll just put them here)
8. Ministers ( Dark Samus, Ridley, Ganondorf)
9. Covenant Army (Ridley, Ganondorf Horde battle)
10. Arbiter (Ridley)
11. Flood (Ivysaur Horde Battle)
12. Gravemind (K Rool)
Music:
Halo (Halo: Combat Evolved)
Enough Dead Heroes (Halo: Combat Evolved)
Halo - MJONIR Mix (Halo 2)
Blow Me Away (Halo 2)
Last of the Brave (Halo 3)
Behold a Pale Horse (Halo 3)
Finish the Fight (Halo 3)
Overture (Halo Reach)
Tip of the Spear (Halo Reach)
Spirit of Fire (Halo Wars)
Awakening (Halo 4)
Faithless (Halo 4)
Kamchatka (Halo 5: Guardians)
Mii Costumes
1. Arbiter (Sword)
2. Marcus Fenix (Mix)
3. Conker (Brawler)
3. Joanna Dark (Gun)
4. Fullgore (Brawler)
6. Duke Nukem (Gun)
Classic Mode: Finishing the Fight
(Master Chief fights the last characters of each game; pretty self-explanatory)
Round 1: Jigglypuff on Saffron City (Main Theme - Pokémon Red & Pokémon Blue (64))
Round 2: Game & Watch on Flat Zone 2 (Flat Zone)
Round 3: Wolf on Lylat (Star Wolf (Brawl))
Round 4: Duck Hunt on Duck Hunt (Duck Hunt Medley (for 3DS / Wii U))
Round 5: Bayonetta on Umbra Clock Tower (Let's Hit the Climax!)
Round 6: Incineroar on Boxing Ring (The Battle at the Summit!)
Final Round:
![Master Hand.png]()
![Crazy Hand.png]()
(Warthog Run)

Stage: Blood Gulch

Moveset:
Neutral Special: Assault Rifle

Master Chief takes out an assault rifle and fires it forward for a few seconds. You cannot move when you use this attack. He has infinite ammo for this attack, however if you press the button five times he will have to take a second to reload.
Side Special: Shotgun
He takes out a shotgun and fires a heavy blast
Up Special: Gravity Lift

Master Chief floats upwards on a gravity lift for a couple seconds then shoots up. He's able to attack but not jump during this move.
Down Special: Plasma Grenade

He reaches below then tosses a plasma grenade up and forward. The plasma grenade is pretty much a nerfed version of the item we already have.
Final Smash: Warthog

He swings a gravity hammer forward. This leads into a cinematic where the opponent is in a desert and a warthog vehicle zooms by. The soldiers repeatedly shoot the opponents and fire a heavy turret at them.
Alts:
1. Default
2. Red armor
3. Blue armor (I think it’s kinda obvious what these last two reference
4. Black armor (a reference to the armor other spartans wear)
5. Teal armor (a reference to Cortana)
6. Gold armor (not a reference to anything in particular, just gives us more variety of colors)
7. White armor (a reference to 343 guilty spark
8. Pink armor (again just to give him some variety)
Spirits:
1. Master Chief (Fighter Spirit)
2. Terrence Hood (Dr Mario)
3. Cortana (Wii Fit Trainer)
4. Avery Johnson (Snake)
5. Miranda Keyes (Daisy
6. 343 Guilty Spark (Meta Knight)
7. Spartans (I assume when we do chief’s alts we’ll give him some based on the halo reach spartans so I’ll just put them here)
8. Ministers ( Dark Samus, Ridley, Ganondorf)
9. Covenant Army (Ridley, Ganondorf Horde battle)
10. Arbiter (Ridley)
11. Flood (Ivysaur Horde Battle)
12. Gravemind (K Rool)
Music:
Halo (Halo: Combat Evolved)
Enough Dead Heroes (Halo: Combat Evolved)
Halo - MJONIR Mix (Halo 2)
Blow Me Away (Halo 2)
Last of the Brave (Halo 3)
Behold a Pale Horse (Halo 3)
Finish the Fight (Halo 3)
Overture (Halo Reach)
Tip of the Spear (Halo Reach)
Spirit of Fire (Halo Wars)
Awakening (Halo 4)
Faithless (Halo 4)
Kamchatka (Halo 5: Guardians)
Mii Costumes
1. Arbiter (Sword)
2. Marcus Fenix (Mix)
3. Conker (Brawler)
3. Joanna Dark (Gun)
4. Fullgore (Brawler)
6. Duke Nukem (Gun)
Classic Mode: Finishing the Fight
(Master Chief fights the last characters of each game; pretty self-explanatory)
Round 1: Jigglypuff on Saffron City (Main Theme - Pokémon Red & Pokémon Blue (64))
Round 2: Game & Watch on Flat Zone 2 (Flat Zone)
Round 3: Wolf on Lylat (Star Wolf (Brawl))
Round 4: Duck Hunt on Duck Hunt (Duck Hunt Medley (for 3DS / Wii U))
Round 5: Bayonetta on Umbra Clock Tower (Let's Hit the Climax!)
Round 6: Incineroar on Boxing Ring (The Battle at the Summit!)
Final Round:
(Warthog Run)
Last edited:


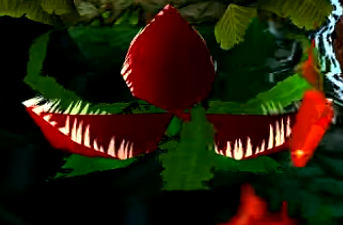
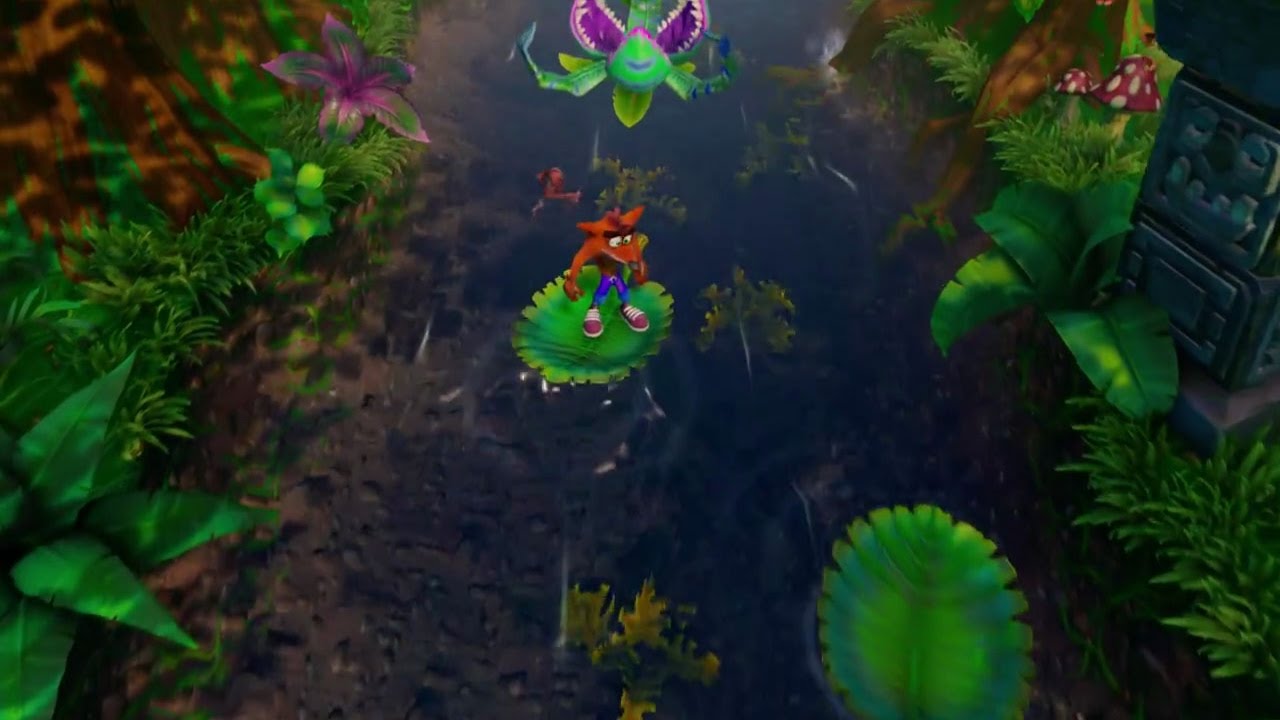

