Deflowered! A Comprehensive Guide of Infinite Knowledge!
Introduction [INT]
Pros/Cons [PnC]
The Ecosystem of the pikmin world[PECO]
Moveset analysis [MVST]
Pikmin Terrain and Pikmin Pluck Advantage [PTPPA]
The Offensive Olimar: [OO]
Approaching [APR]
Combos & Pseudo-Combos [COMBO]
Juggling [JUGL]
Getting the Kill [GTK]
Edgeguarding/Gimping [EDGMP]
Baiting & Punishing [B&P]
The Defensive Olimar:
Spacing & Stage Control [S&SC]
It's Not Camping, It's standing around! [CMPG]
Evasion Tactics [EVSN]
Tentative teams Insert [TTA]
What to know when Nolimar and Recovering: [KNO]
Off the edge and gimped? [GMP]
DI & Momentum Canceling [DIMC]
Past the basics:
Olimar Advanced techniques [OATS]
Frame Data [FD]
Introduction[INT]
This will be a compilation of anything and everything known about olimar. If you have anything you would like to add to the guide please post, and I will add it. Everyone should have a chance to chip in their two cents to make this guide better. He is a very complex character; getting everything down by myself turns to be a rough task, so there may be a thing or two I forgot to mention. This guide should help beginners get a feel for the character they want to learn, and meanwhile serve as a reference for those who play him skillfully. It is a conglomeration of the best ideas of our most respected Olimar mains here at SWF.
Pros/Cons… Why Olimar? [PnC]
Pros:
- From 0 to 60 in… 3 seconds? With a Pikmin or two stuck on your opponent during a grab combo, you can easily go from 0% to 50 or 60% and sometimes even more. This is not only practical for the obvious reasons, but also demoralizing. Imagine feeling like you’ve only been hit twice, but it’s a few seconds into the game and you’re at 50%. It’s not uncommon to have that feeling playing against Olimar.
- Crouching Olimar, Hidden Hulk. His dsmash, usmash, and fsmash as well as uthrow and bthrow are all viable kill moves at anywhere from 70% to 120% depending on which character you’re fighting and which Pikmin is doing which move. Couple that with his incredible ability to tack on percentages, and you’ve got one of the biggest powerhouses in the game in one of the smallest packages.
- The Rayman effect. Almost *all* of Olimar’s attacks are disjointed hitboxes. Every aerial except nair, every smash, all the grabs, his up + B. Olimar can therefore form effective walls with retreating fairs or uairs coming from under the stage without worrying about his progress being impeded. Most of these moves have very high priority as well, particularly the uair.
- Use that C-Stick! Olimar’s smashes are incredibly quick (Try just hitting fsmash repeatedly. You’ll almost taste the brokenness.) and have very high knockback. They are all well-ranged (except with purple Pikmin) and have very interesting uses. For instance, his usmash can be spammed through platforms making for a very tricky escape, and his fsmash can hit people hanging off edges with no danger of being punished. Also, he and Snake are the only characters with smashes that are technically projectiles (Snake’s usmash, Olimar’s everything.) The Pikmin completely separates from Olimar and any attack used on it will *not* slow Olimar down in any way, while possibly clanking with the opponent. This gives us the ability to spam quick, powerful, fairly high priority smashes like no other.
- Reach out and grab somebody! Olimar’s grab is seriously one of the best moves in the game. First: the range is ridiculous. It can grab straight through moves that otherwise would wall Olimar off, like Pit’s side + b. It can *grab people HANGING OFF THE EDGE AND BELOW IT.* It combos into itself at low percents. It can kill. It can feed the hungry and cure cancer. It can *grab people HANGING OFF THE EDGE.* And so much more. More on the grab below in its own section.
- PHEW PHEW PHEW PHEW. The sound of Skittle-themed soldiers hurtling into battle. Olimar’s side + b (Pikmin Toss) is one of the best projectiles in the game. The Pikmin will latch onto your opponent and begin to damage them, and they will have to knock them off by attacking. You can fill the air with such a volume of Pikmin that it will really throw off your enemy’s game, and that’s your opportunity to launch into one of Olimar’s extremely painful combos. More on this in its own section below.
Cons:
- YOU MUST CAN’T RECOVER! There is much talk about Olimar’s awful recovery, and unfortunately, some of it is true. When an opponent is hanging off the edge, Olimar’s up + B, the Pikmin Chain, can only knock them off. It will not grab on, however, leading to your demise. This combined with Olimar’s light weight makes him an easy target for gimps. However, we can remedy this by putting to use well Whistle Armor and having good foresight for airdodges, as well as simply attacking our opponent with our disjointed aerials, whether they are hanging off the ledge or coming out to intercept. Also, a well-aimed purple Pikmin will knock your adversary off the ledge just long enough for you to grab on, possibly stage-spiking them.
- Trouble vs. high priority low aerial moves with quick follow ups. I couldn’t think of anything funny to write for this one. Basically, when a character (Peach, Luigi, Marth) comes at us from the right angle above and in front of us, we have few options and it makes it difficult to get them off our backs. Liberal use of pivot grabs and nairs/retreating fairs can counter this to an extent, making this much less of a weakness to smarter Olimar players. :
That’s it! As you can see, Olimar really is a fantastic character with many strengths and few shortcomings. Plus, he’s just plain fun to play, and can come as a surprise to many. I highly recommend him to anybody looking to win and have a great time doing it.
The Ecosystem of the pikmin world [PECO]
As we all know, olimar is dependant on pikmin; he can’t smash or grab, and his aerials are strictly limited without them. Therefore, it is a great asset to understand the nature of these pikmin. I’ll start with the basics like the several species, and move on to more advanced knowledge of their function and being. If you don’t understand something immediately, I assure you it is covered later in the section.
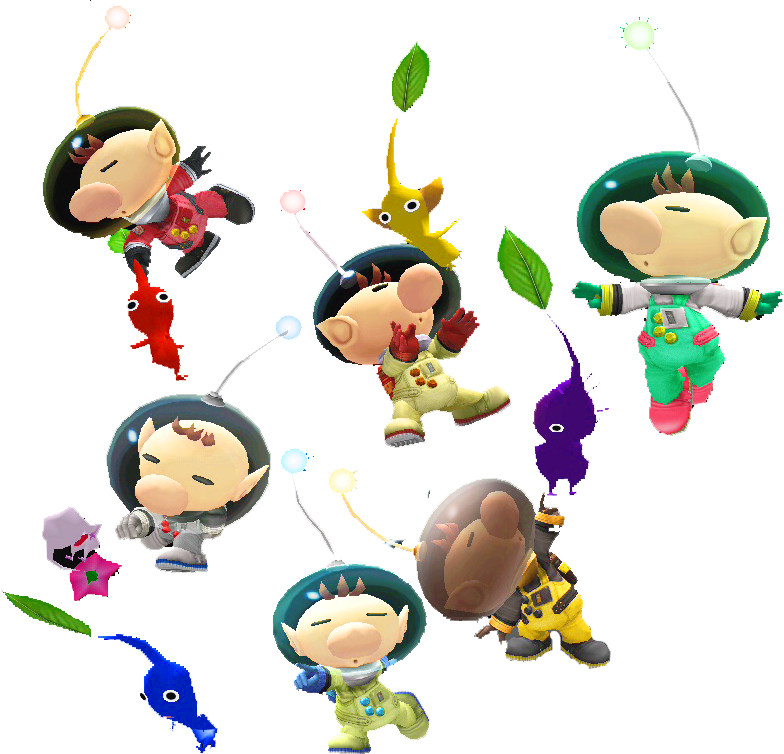
Red (Indian) Pikmin
Element: Fire
Flight Path: Small arc
Distance Covered: Far
Damage per Latch: 2%
Durability: 9%
Speed: Normal
Hierarchy Order: 1
Bio: Red pikmin are immune to fire meaning any type of fire attack like Charizard’s flamethrower or Snake’s mines will have no effect on them. They also have the best power on your aerials. A red fair is a viable kill move.
Yellow (Asian) Pikmin
Element: Electric
Flight Path: High arc
Distance covered: Medial
Damage per latch: 2%
Durability: 9%
Speed: Normal
Hierarchy Order: 2
Bio: Similar to the reds immunity to fire, yellow pikmin are completely unharmed when it comes to electrical attacks, such as Zelda’s usmash or half of Pikachu’s moveset. While some pikmin are blatantly out prioritized by attacks, this is where yellows shine. Their hit boxes are massive and thus priority becomes less of an issue. The hit boxes are vastly wider on his smashes as well. Meaning the already large hit box of usmash and fsmash are even larger (usmash horizontally fsmash vertically). You know what that means… bigger hitboxes = bigger sweet spots :D. Yellows specialize in combos due to added hit stun as well as being weaker allow you to string combos together easier. They also have a different trajectory when thrown - they slightly arc higher.
Blue (Mexican) Pikmin
Element: Water
Flight Path: Small arc
Distance Covered: Far
Damage per latch: 2%
Durability: 14%
Speed: Normal
Hierarchy Order: 3
Bio: Blue pikmin are very durable and able to survive in water. Blue specialize in throws and lucky for us their grab range, along with the whites, is one of the longest. Blues are the only pikmin that survive in water; all other colors will drown in a short time.
White (WHITEY) Pikmin
Element: Poison
Flight Path: Straight
Distance covered: Very far
Damage per latch: 6%
Durability: 4%
Speed: Fast
Hierarchy Order: 4
Bio: White pikmin don’t have stamina, priority, knockback, nothing. Like other white mammalian creatures they give up under any physical threat and turn into ghosts. However, they are good for two things: latching and grabbing. They have the highest latch damage of all pikmin… if you land one of these leeches on someone they better get it off quick because it *****. Also grabbing is good with them, but make sure to use your pummel as these suckers deal a lot of pummel damage as well. Their low knockback lets you do throw combos at higher percents than you would normally be able to. Keep track of whites in your line, they are the most expendable of your minions – pluck’em and chuck’em… you don’t want to miss a golden opportunity for a kill by accidentally smashing with a white.
Purple (Black) Pikmin
Element: Normal
Flight Path: Small arc
Distance covered: Short
Damage per hit: 6%
Durability: 15%
Speed: Slow
Hierarchy Order: 5
Bio: Grape’n’****. A misconception that Nintendo has made is that these are purple pikmin, when in fact they are black. Why? Affirmative action claims I need more black pikmin in this thread, thus I’ve re-named purple pikmin as black. From the abundance of fried chicken they consume ‘purple’ pikmin have become the heavy weights of the crew. Fatties, as they are sometimes called, can knock people when thrown (a very high priority projectile). These pikmin are just pure power. Usmash kills DDD at 82% (fresh with no DI). At low percents grabs with purple pikmin are almost instantly broken out of, though you should save any grabs with purples for uthrow kills.
Pikmin Hierarchy:
Pikmin follow a strict code. When whistled they order themselves in this fashion: Red, Yellow, Blue, White, Purple. So your first whistle in the match will automatically align the pikmin you have in that order. Say you don’t have all colors, like your starting line is WYPBB. When you whistle, you skip over reds and your line is YBBWP. Your next whistle will then be blues even if you pulled a red. It will cycle in this order for the rest of the match (even after death). A usable strategy is make it so your next whistle is purple so that if you get knocked off stage and your opponent is hugging they ledge, you have a chance to knock them off with a purple so you can tether, though this is a dated strategy, and there are many other strategies to recovering (discussed later), but use this when applicable.
Pikmin Evolution:
As of now there are no known differences between the different species of pikmin (leaf, bud and flower).
The following things have been tested and confirmed:
No variation in damage
No variation in knockback
No variation in average latch number
No variation in durability
No additional 'armor'
No healing benefits
No variation in range
No variation in return/moving/flight speed
No variation in attack lag or windup
No variation in 'elemental' attack
No variation in whistle range
Pikmin Separation Anxiety:
Pikmin are living creatures too. Yes, we may throw them around in suicidal efforts we know they can’t survive, but it’s interesting that Nintendo put this in here. In short if a pikmin cannot return to you either by itself or after a whistle it will eventually die. Not incredibly useful unless you’re god-like at mind gaming and trying to bait a de-sync (not actually do-able in-game).
*de-syncing described later
Ghost pikmin:
Through fluke occurrences, some of the pikmin in Olimar's line can be transformed into blank spaces in Olimar's line. This happens when pikmin get caught between animations, usually when clinging to a ledge after performing an aerial. These "ghosts" follow the order of the line, but do no damage and instead force Olimar to whiff his attack when they are up. To cure a ghost pikmin, you have to return to the spot where the pikmin was "ghosted" and use an attack that involves pikmin (like Usmash).
For more information, check this thread.
Pikmin terrains and Pikmin Pluck Advantage: [PTPPA]
The ratio in which pikmin come from the ground can be determined by the terrain in which you are standing on. So effectively, the amount of each kind of pikmin that you have is affected by which terrain you are on. The original guide can be read here, it goes into a bit more detail. Here is a brief guide on which pikmin come from where and the different kinds of terrain available. Credit to Cloverleaf for the design below.
Battlefield
Basic
|
25.6%
|
25.6%
|
25.6%
|12.8%|
10.3%
Battleship Halberd
Metal (platforms, starting area)
|
18.9%
|
37.7%
|
18.9%
| 9.4%|
15.1%
Basic (deck)
|
25.6%
|
25.6%
|
25.6%
|12.8%|
10.3%
Brinstar
Basic (bottom platforms and alien tubes)
|
25.6%
|
25.6%
|
25.6%
|12.8%|
10.3%
Metal (top platform)
|
18.9%
|
37.7%
|
18.9%
| 9.4%|
15.1%
Alien goop (left and right platforms)
|
18.5%
|
18.5%
|
46.3%
| 9.3%|
7.4%
Castle Siege Stages
1st, 3rd, Transformations
Basic
|
25.6%
|
25.6%
|
25.6%
|12.8%|
10.3%
2nd
Cloth (awnings)
|
40.8%
|
20.4%
|
20.4%
|10.2%|
8.2%
Brick (everything else)
|
27.8%
|
27.8%
|
13.9%
|13.9%|
16.7%
Delfino Plaza
Cloth (awnings/umbrellas)
|
40.8%
|
20.4%
|
20.4%
|10.2%|
8.2%
Grate (bottom of main platform)
|
22.2%
|
22.2%
|
22.2%
|11.1%|
22.2%
Water (canals)
|
00.0%
|
16.9%
|
67.8%
| 8.5%|
6.8%
Sand (sandy islands)
|
35.7%
|
35.7%
|
11.9%
| 4.8%|
11.9%
Basic (everything else)
|
25.6%
|
25.6%
|
25.6%
|12.8%|
10.3%
Final Destination
Basic
|
25.6%
|
25.6%
|
25.6%
|12.8%|
10.3%
Frigate Orpheon
Metal
|
18.9%
|
37.7%
|
18.9%
| 9.4%|
15.1%
Lylat Cruise
Metal
|
18.9%
|
37.7%
|
18.9%
| 9.4%|
15.1%
Pokemon Stadium 1 Stages
Normal, Fire
Basic
|
25.6%
|
25.6%
|
25.6%
|12.8%|
10.3%
Water
Water (the water)
|
00.0%
|
16.9%
|
67.8%
| 8.5%|
6.8%
Basic (everything else)
|
25.6%
|
25.6%
|
25.6%
|12.8%|
10.3%
Grass
Water (stream)
|
00.0%
|
16.9%
|
67.8%
| 8.5%|
6.8%
Basic (everything else)
|
25.6%
|
25.6%
|
25.6%
|12.8%|
10.3%
Rock
Metal (platforms)
|
18.9%
|
37.7%
|
18.9%
| 9.4%|
15.1%
Basic (everything else)
|
25.6%
|
25.6%
|
25.6%
|12.8%|
10.3%
Pokemon Stadium 2 Stages
Normal, Ground
Basic
|
25.6%
|
25.6%
|
25.6%
|12.8%|
10.3%
Electric
Metal (main platform)
|
18.9%
|
37.7%
|
18.9%
| 9.4%|
15.1%
Basic (everything else)
|
25.6%
|
25.6%
|
25.6%
|12.8%|
10.3%
Ice
Basic (edges)
|
25.6%
|
25.6%
|
25.6%
|12.8%|
10.3%
Ice (everything else)
|
18.5%
|
18.5%
|
37.0%
|18.5%|
7.4%
Flying
Grate
|
22.2%
|
22.2%
|
22.2%
|11.1%|
22.2%
Rainbow Cruise
Cloth (carpets)
|
40.8%
|
20.4%
|
20.4%
|10.2%|
8.2%
Basic (everything else)
|
25.6%
|
25.6%
|
25.6%
|12.8%|
10.3%
Smashville
Basic
|
25.6%
|
25.6%
|
25.6%
|12.8%|
10.3%
Yoshi's Island
Basic
|
25.6%
|
25.6%
|
25.6%
|12.8%|
10.3%
Moveset: [MVST]
When pikmin affected attacks are posted, the damage is in their color. All of olimar's smashes have a sweet spot and a sour spot. * Will indicate sweet spotting while no * means a sour spot.
First hit on: 4
Second hit on: 13
Ends on: 29
Description:
Olimar bobs his head down, and brings it back up forcefully.
Attributes and Application:
On the first jab, the Antenae has a hitbox that extends further than that of the helmet. It is possible to hit only with the Antenae, providing a hit of 3% with no knockback. The helmet does 2% and has light stun. On the second jab, when Olimar brings his head back up, if the opponent is in front of him it will do a full 10% damage undiminished, bringing the total possible damage to 15%. There is actually moderate knockback on the second jab, making it a great “get away from me” move. Couple that with it also being his fastest move (hitbox emerges on the 4th frame) and it’s possibly his greatest option when someone is really up on the pressure. Another nifty little fact about the jab is that on the second part, he actually hits behind him. Knockback is minimal and it only does 5% damage, but anyone trying to roll behind you on jab will get surprised and you’ll be able to GTFO.
Hits on: 9
Ends on: 37
Description:
Olimar drop kicks his opponent without fear or remorse.
Attributes and Application:
This move moves Olimar forward a little bit. There is a laggy get-up time afterward and for only 6% and it’s too much knockback and lag to use in combos, but not enough to ever kill until close to 175% or so on light characters. It is only truly useful when you are out of Pikmin or they are still coming back to you, and your opponent is playing just out of jab range. It is just quick enough to surprise someone, and can be useful for mixups in Olimar dittos. Otherwise, it is just made obsolete by the other tilts, jab, and the dash attack.
Hits on: 6
Ends on: 29
Description:
Olimar inchworms at them. There’s really no other way to describe it.
Attributes and Application:
This move, like ftilt, moves Olimar forward quite a ways. It is much more useful than ftilt in that respect because Olimar drops to the floor and can slide under projectiles. It’s no Snake-crawl, but it’ll do. The helmet has a hitbox with light knockback that does 6%, and the antenna hits for 2% with no knockback. The light knockback allows for an opponent to be “carried” in some cases like in this video:
http://www.youtube.com/watch?v=gS1g3ILZUU8
The greatest application of the dtilt, however, is to out-prioritize attacks that would otherwise cause trouble. For instance, Luigi’s tornado. It has trouble stopping fully-charged projectiles such as Lucario’s aura sphere, though. It is worth noting that around 70%-80% it is Olimar’s best pop-up move for a uair combo, and even at low percents can combo into a dsmash or usmash, although there are other moves that would suit the purpose better.
First hit on: 6
Second hit on: 12
Third hit on: 18
Fourth hit on: 24
Fifth hit on: 30
Sixth hit on: 36
Seventh hit on: 42
Eighth hit on: 48
Ends on: 72
(Ends on 39 if the attack misses)
Description:
Olimar extends his arms into a T and leaps gracefully into the air, twirling in infinite circles and hurling those who would oppose him with the strength of 10 Grinches, plus two.
Attributes and Application:
The Up Tilt is probably Olimar’s most useful tilt. It hits many times, ending in more than enough knockback to get some breathing room at low percents. It is an even better spotdodge punisher than the jab, and has shield-poking potential. The knockback isn’t so high that it loses combo potential, as it leads well into nair/uair. This move has deceivingly great priority, and therefore is one of Olimar’s only options against Peach’s floating dair approach as well as a good counter for Fox’s drill approaches. The priority at the tip of the jump is enough to outprioritize Wolf's fsmash. It also has the interesting property of jumping over some down-tilts and dsmashes. It is a safe bet out of a spotdodge; it works like R.O.B’s dsmash in that it is difficult to punish. Personally, I prefer the mobility of a short-hop nair, but this IS quicker and by default a better option in some situations.
First hit on: 8
Second hit on: 16
Ends on: 45
(Ends on 34 if the attack misses)
Description:
Olimar moves with extreme speed, elegance, and balance and does a cartwheel to knock down any opposing foes in his fiery rage.
Attributes and Application:
Dash attack is decent at best. There are many better options than to dash attack, though keep it in mind to mix things up. It’s a mediocre combo set-up and the damage isn’t quite worth the risk. This move leaves olimar very open.
*
15-
13-
15-
9-
18
12-
9-
11-
6-
13
*Charged
21-
18-
21-
12-
25
Charged
16-
12-
15-
8-
18
Hits on: 11
Pikmin's hitbox lasts till: 47
Ends on: 39
Can charge until: 68
Description:
Olimar points. Pikmin dives. Enemy feels the pain.
Attributes and Application:
The fsmash is one of Olimar’s best moves. It takes full advantage of his range and speed. The Pikmin that leaps forth will barely have touched the ground before Olimar is able to send the next one out. It has too many good things to write in paragraph form, so here’s a SparkNotes version:
- Powerful knockback, especially with red Pikmin. Will kill as early as 100%.
- Long-lasting hitbox when the Pikmin falls down, will hit spotdodgers! After the Pikmin stops moving forward, however, the sweetspot is over and the move will do less damage and knockback.
- When the Pikmin falls, anyone hanging off an edge will be hit. This also holds true for people standing beneath you and you’re on a platform, if they’re tall enough. Remember, after the Pikmin stops moving forward, the sweetspot is over and the move will do less damage and knockback.
- Excellent move for spacing. Fairs/Pikmin Tosses/Fsmashes can keep people at bay all day long. Retreating fair -> fsmash is too good.
- Great combo starter at low percents. An fsmash will lock someone there so you can rush in for a grab, dash attack, usmash, or even just use another fsmash. Almost every ground move and dthrow will lead into this well.
- This will protect you from projectiles. Any Pikmin flying OR walking back to you will eat the Aura Sphere, Charge Shot or what have you.
- Can lock up against a wall. See this video: http://www.youtube.com/watch?v=bwL3MR7E2dE
*
13-
11-
12-
6-
15
10-
8-
9-
4-
12
*Charged
18-
11-
16-
8-
21
Charged
14-
15-
12-
5-
16
**Double Sweet spot values = pikmin sweet spot value -1%
Hits on: 10
Ends on: 38
Can charge until: 68
Description:
Olimar looks to the ground and points hardcore to both sides of him, knowing he is protected by his loyal soldiers. What a ******.
Attributes and Application:
Dsmash is another excellent kill move. It is great for when you are up close and personal with someone, and works amazingly coming out of your own spotdodge as well as for punishing their spotdodge or roll. You can spam these, but that’s only good up-close; fsmash is far better for spacing. There is a sweetspot with the dsmash where you will actually do double the damage, get the elemental effects of both Pikmin, and send them very far in one direction. It's worth noting that the dsmash is the only move that the purple Pikmin has the same range as all the others.
*
15-
14-
15-
9-
16
12-
10-
11-
5-
13
*Charged
21-
19-
21-
12-
22
Charged
16-
14-
15-
9-
18
Hits on: 8
Endson: 32
Can charge until: 68
Description:
Olimar points to the sky and, seeing this, a valiant Pikmin is filled with uncontrolled rage and unbridled fury… before hopping upward, not very menacingly. When the opponent is hit with this move, that raw emotion is transferred into him and he rockets skyward.
Attributes and Application:
This is probably your most reliable kill move. It’s quick, powerful enough to kill the lightest characters as early as 70% with a purple, and has decent priority. Further adding to the power of the usmash is the fact that there is actually a horizontal hitbox about the distance of another Olimar. As with the other smashes, the smash is strongest right when the Pikmin leaps. Other excellent applications of the usmash are after a dthrow. Dthrow -> usmash -> uair is a legitimate combo on much of the cast from 0%. It's also a great move to use versus people that like to airdodge at you, because it'll hit if they airdodge high with the lingering hitbox, and it'll hit of course if they airdodge late. Try waiting until they hit the ground, as in this video:
http://www.youtube.com/watch?v=VEWVGiLCLcI
Use usmash a lot.
Neutral air (really?)(12%)
First hit on: 7
Second hit on: 14
Third hit on: 21
Fourth hit on: 28
Fifth hit on: 35
Sixth hit on: 42
Landing Lag: 16
Ends on: 66
(Ends on 41 if the attack misses)
Description:
Copypasta from utilt, except in the air and you can move around. If you look closely in the movie Twister, you can see Olimar in the middle of the tornado doing this move.
Attributes and Application:
Nair is a great, underused move. It has high priority and stays out for a long time. That makes it a great move to follow up a shorthop latch or fair, whether they go high or stay low. It starts combos and ends combos. It is an EXCELLENT followup on large characters if they airdodge a uair. You can uair at them (you’re basically invincible) and if they airdodge, bang nair suck them in. Broken. If you are above MK when he nados, you can knock him out of it using this move and this move alone. This is also your best bet when you’re coming at somebody’s shield from above. It’s similar to GnW’s turtle in that it will poke shields. When using that technique, consider this (and consider this anyway!): NAIR COMBOS INTO USMASH/DSMASH ON ONE CONDITION. You have to make sure you hit the ground before the “knockback” hit comes out. The best way to do this is to start your nair the right distance away from the ground and fastfall immediately afterward. You may break through their attack/shield or punish their spotdodge. If so, they’re yours with a kill move of your choice. It's worth noting that if you're in the air and being pressured hard and catch them in a nair, an Up + B is a good followup to really win that space you need.
Forward air 15-12-13-5-14
Hits on: 7
Ends on: 42
Landing Lag: 15
Description:
Olimar grabs a Pikmin and swings him at his opponent, starting just above his head and ending slightly below and behind. Said Pikmin magically floats to the back of the line.
Attributes and Application:
Fair is a goodie. It’s hard to even say where this move’s best use is. It forms one of the basic dthrow combos, dthrow -> fair. At 0%, that can be followed up by many a move depending on the other character. A shorthop latch(optional) -> fair is excellent for spacing, even moreso when followed with an fsmash. It is fairly powerful knockback-wise with red and purple Pikmin, and since most do not expect Olimar to edgeguard very aggressively, a fair can be an effective way to end a stock early. A quick way to get back on the stage when an opponent is coming to edgeguard is to Pikmin chain -> quickly hit A -> quickly ledgehop fair. It’s easy to catch your opponent off-guard here due to Pikmin chain’s quick suction to the stage from great distances.
First hit on: 8
Second hit on: 15
Third hit on: 22
Fourth hit on: 29
Fifth hit on: 36
Sixth hit on: 43
Seventh hit on: 50
Landing Lag: 30
Ends on: 70
(Ends on 34 if attack misses)
1 frame less on yellows and whites and only go through 6 frame intervals
Description:
Olimar whips out a Pikmin and holds it straight up, where it devours all life. If you hit the ground while the Pikmin is doing the devouring, Olimar will do a little cute butt-bounce. It’s my favorite taunt.
Attributes and Application:
First and foremost, the Uair has amazing priority and ability to hit people out of dairs, or any aerial coming from above for that matter. GnW key? No problem. MK above you? He’s not hitting you till he gets back on the side. (The only thing you have to watch out for on moves like Kirby’s dair is that you don’t jump into them too fast, it’ll hit you on the other side of uair.) It is multi-hit as all hell, which makes it great for when somebody is on a platform above you. They can spotdodge, shield, or drop through and uair will suck them up or poke them. If you’re falling at the same speed, this move beats airdodge and if not, you still have nair for after. Uair's incredible priority and disjointyness makes it amazing for ledgehops to get them off you, and can hit through almost every stage. On Lylat, it can go through the whole thing anywhere you can reach and hit them through it.
On certain characters, uair combos into uair, like this. Dthrow -> usmash -> uair -> uair -> possible Up + B. Mucho damage. Uair is fun times and should always be used if your opponent is above you, whether you bait an airdodge first or not.
Hits on: 10
Ends on: 48
Landing Lag: 15
Description:
Fair but backwards and worse.
Attributes and Application:
Bair basically has the same uses as Fair. It's going to be used for spacing and such with fsmash and grabs or even a dtilt if you're feeling so inclined. The only thing you have to watch out for is that it won't cancel immediately upon hitting the ground, so there is a liiitle bit of lag. It's good for keeping your fair undecayed (RAR into a bair every once in a while instead of fairing, it has a good vertical sweep too, starting below and moving up - Blackwaltz) and is perhaps put to best use in just a basic scramble when you're trying to land a hit and both players are dodging everything. I also use bair when somebody lands behind me with a laggy move hitting my shield. It's faster than a fsmash or turnaround grab.
Hits on: 9
Hitbox Ends on: 16
Ends on: 51
Landing Lag 30
Description:
Olimar quickly extends a Pikmin straight below him before flipping back to right-side-up.
Attributes and Application:
Dair spikes. It has a sweetspot right before Olimar right as he performs the move that sends the opponent careening downward. I don't recommend leaping out and trying to spike people though due to Olimar's easily-gimped nature and how many recoveries in the game attack for the player. If the sweetspot is not hit, there is another bit of time and place where the opposing player will be sent out and upwards pretty far; it's not rare to kill with this around low-100s with a Purple. It then has ANOTHER moment where it will result in a "flub." Dair is probably put to better use if used sparingly in situations such as using the lingering hitbox to do a SHdair to a spotdodge-happy player (and you land with no lag!) or spiking through the edges of stages on a recovering player while staying safe. Dair pretty much sucks to use when falling onto someone and you have much better options in the form of your whistle, nair, or basically anything else.
Plucks Pikmin on: 3
Ends on: 9
(Lasts until 13 on cave terrain)
Description: Olimar summons his beastly minions from the underworld and they fly out from the ground and land behind their leader to follow, serve and protect him.
Attributes and Application: This move is vital, but kind of silly. You pull pikmin from the ground to use them. It’s simple as that. On your first pluck you can cancel the pluck straight into an attack (with the same pikmin); however, you can cancel the pluck with a smash attack or a dash. It takes less than a second for olimar to pluck all six pikmin, but it’s advisable to train yourself to stop at six. When watching videos I normally stop as soon as I see them over-pluck, it’s kind of a sign of an un-skilled olimar. Lastly, make sure you keep at least a few pikmin
Hits on: 9
Ends on: 25
-Pikmin stays latched for 260 frames after latched, decreasing by one frame for each percentage of damage on the opponent, with a minimum of 60 frames. The pikmin deals a latch hit every 30 frames.
Description: Peew Peew Peew Peew Peew Peew Peew Peew GAME!
Attributes and Application: This is one of olimar’s greatest utility. Pikmin toss is both a great pressuring offensive weapon and good defensive weapon. Pikmin toss stops all projectiles including fully charged shots. Pikmin toss can also gimp certain characters like Ike when he uses quick draw, or can be used to make recovery more difficult such as when pikachu uses skullbash. If you’ew not attacking or maneuvering around (for spacing) you should be throwing pikmin. A mistake that some make is to throw lots of pikmin in the beginning and then slowly stop. Just make sure to keep plucking and chucking when nothing else is going on.
Hits on: 12
Ends on: 70
(If used in the air, Olimar will flip upside down after 60 frames. After this there are 32 frames of landing lag the next time he hits the ground.)
Description: Olimar’s pikmin attach themselves head to toe as he throws them in a whip like manner.
Attributes and Application: The bane of olimar becoming top tier, yet an effective offensive move. Technical applications of this move are described later in detail; however, the range you get on this is insane. It’s great for ledge guarding and finishing off combos. It’s also a nice surprise move when your opponents are just out of reach. This move is also olimar’s only means of recovery. This move will tether the edge and allow him to hang from his pikmin chain for a set amount of time before he snaps up. You can auto snap yourself by pressing A. This is good for edge hogging. Additionally when someone is trying to gimp you by edge hogging if you hit them with this move at the characters center of gravity (just try to hit them in general) if can stage spike. This move also has a small hop in which you can use to recover if someone his holding the ledge.
Super Armor starts on: 2
Super Armor lasts through: 16
Ends on: 20
Description: Olimar summons his minions with a roaring ‘toot toot’ that bellows through the entire arena. The sound is so piercing that it manually hacks brawl into reducing all knockback to zero when used.
Attributes and Application: Originally, this move was used to re-order your pikmin (see pikmin hierarchy), but upon further investigation, this move has super armor. Here on the olimar forums it’s called WAC, for Whistle Armor Cancel, though not sure what exactly it is cancelling I like to believe it’s reference to cancelling knockback. Anyways, if you get hit while you whistle, no knockback will be received. This move is vital to olimar’s survival. It’s a combo breaker and can also be used to stop ledge guarding. Since WAC’ing was discovered, some of olimar’s more difficult match-ups have become in his favor due to the fact that whistling their gimp tactics has become quite easy. L2W
Forward throw: 6-7-13-6-7
Hits on: 4
Ends on: 31
Description: Olimar sends the next pikmin in line forward to grab the opponent. The pikmin pulls the opponent back in then spins as it throw the opponent forward.
Attributes and Application: Not good in terms of combo’ing or getting the kill. It’s more used for opponent placement, or to get them away from you
Hits on: 7
Ends on: 35
Description: Olimar sends the next pikmin in line forward to grab the opponent. The pikmin pulls the opponent back in the fall backward while throwing the opponent back.
Attributes and Application: Great kill move with blues, keep this in you pocket. Though olimars throws are easy to DI, make sure you have an unstale’d bthrow up your sleeve
Hits on: 27
Ends on: 41
Description: Olimar sends the next pikmin in line forward to grab the opponent. The pikmin pulls the opponent back and then leaps spinning the opponent upside down and slamming him head first into the ground.
Attributes and Application: Purple uthrows kill, but I wouldn’t save uthrows. Instead, use them for an occasional combo. Uthrow to uair = easy damage.
Hits on: 15
Ends on: 35
Description: Olimar sends the next pikmin in line forward to grab the opponent. The pikmin pulls the opponent back, lays the opponent on the grabs and then slams itself into the opponent.
Attributes and Application: You main combo move, this throw has low knockback and is perfect for setting up the grab combos oliamr is known for. With these you can take opponents from 0-60 easily. Grab combos will be listed later in the guide
Here is another table organizing the pikmin with moves:
Code:
		Red	Blue	Yellow	White	Purple	Olimar
N-air							12
F-air		15	13	12	5	14
D-air		16	14	12	8	14
U-air		24	22	16	9	22
B-air		13	13	12	5	13

F-tilt							6
D-tilt							6-2
U-tilt							11

F-throw		6	13	7	6	7
D-throw		9	12	8	6	8
U-throw		9	12	11	6	11
B-throw		7	14	9	7	9
Throw hit	2	2	2	4	2

F-smash		15	15	13	9	18
F-smash H	12	11	9	6	13
F-smash C	21	21	18	12	25
F-smash CH	16	15	12	8	18
D-smash		13	12	11	6	15
D-smash H	10	9	8	4	12
D-smash C	18	16	11	8	21
D-smash CH	14	12	15	5	16
U-smash		15	15	14	9	16
U-smash H	12	11	10	5	13
U-smash C	21	21	19	12	22
U-smash CH	16	15	14	9	18

Jab 1							2-3
Jab 2							10
Latch		2/hit	2/hit	2/hit	6/hit	6
U-B     	7	6	6	6	8
Running							11
The Offensive Olimar: [OO]
While many think olimar is defensive spammy camper, he has a powerhouse offensive game. This section will highlight the attributes of the offensive side of olimar as well as shed light on tactics that all olimars should incorporate in their play.
Approaching [APR]
Approaching with olimar is all about spacing. For those who just enetered the competitive scene for brawl; think a slower more powerful marth, for those who have been around since melee, think Roy. The better side is, you’re small and hard to hit. Thus an offensive olimar can sneak past an opponents attacks and wreck havok. How is this done?
Don’t get grabbed D:
For starters you’ll want to get grab combos down. Listed below I have made a d-throw flow chart (help from blackwaltz) to show you what olimar can chain from a single down throw. Down throw combos should be your primary damage racker from 0% and any grab could easily get you 0-60 if not 0-80 depending on character weight and size.
Knowing when to get the grab can be important. Yes, olimar has one of the sickest grabs in the game; however, olimar does NOT have grab armor and CAN’T grab people out of the air (ever try cypher grabbing a snake?). There shouldn’t be a time where you are doing nothing but going for grabs, but there are points in which you can just stand and spam grabs knowing your opponent doesn’t know how to get around it or better, can’t get around it. Retreating pivot grabs are a good way to get your grab, though you can try to pull a Chu-dat and just walk up and grab someone too. There’s plenty room for error when getting a grab for olimar, practice will give you a better in-sight into when to grab, and which combo to use.
Spacing approaches
Other ways to approach with olimar are with nairs, fairs, bairs, dairs, dsmash, and usmash; each with a different strategy in mind.
Starting with fair and bair, learning the max range will go a long way when playing an offensive olimar. Hitting with just the tip of the attack will help you avoid priority issues, but also set you up for combos. Keep in mind, fair and bair are also a KO moves. If you’re trying to combo with fair, the safest approach is to fair and land behind your opponents (this is to avoid shield grabbing) or to fair and then retreat before you land.
On to his nair. Nair is a low knockback multi-hit move meaning you’re going to get extra priority and combo-ability.
The basic uses nair is to combo it into a smash by landing before it’s finished (land cancelling). This will be discussed in the combo section. Beyond that, you can approach with nair. It’s not the best option in some match-ups, but it’s great to mix things up.
Getting down to dair. From the aggressive olimar stand point it has two uses: to spike and for mindgames. Spiking is relatively obvious…. but your risk-reward ratio makes it a bit to dicey to go for a lot of times. Friendlies are a great time to test it out, though if you’re not comfortable or good at spiking, don’t go for it. The sweet spot on olimar’s dair is very finicky, and often your dair will send your opponent outwards. At high percents this will still kill, so keep it in mind for the next part. Dair is full of mindgames, and it is all-to-often underused. Dair is good to punish spot dodging as well as a fun mix-up move. Where you would normally want to fair or fsmash, insert a SH dair and wazzah! They are ready to be combo’d. Ever play those people who just spot dodge *****, or perhaps you’re becoming a bit predictable with your approaches, dair is your answer. The hit box on dair will outlast the invincibility on most characters spot dodge. *Problem fixed*
What is left is your smashes… and they are relatively straight forward… You rush your opponent and c-stick right? Now you’re getting the hang of olimar! To make this more effective is to understand the range of your upsmash. It not only goes up a long way but **** it goes out far too. A purple usmash extends roughly an olimar and ¼’s distance in front of olimar (for size reference sake). Laughing at your broken upsmash while your opponents die around 80-90 is perfectly fine and advisable. As for approaching with dsmash, I’ll say one thing: you really shouldn’t, but you can. Approaching with dsmash comes straight down to rushing your opponent, spot dodging their attack and dsmashing thereafter.
Now that we understand how to play oliamr offensively, let’s look at how to string things together.
Combos & Pseudo-Combos [COMBO]
Named combos:
Zori combo: the zori combo is stringing several dilts into either a: utilt, downsmash, or upsmash. Ironically, it’s super effective! Note: the amount of dtilts you can use is variant on the falling speed of the character, you can get out of it with DI and jumping quickly so it’s advisable to string 1-2 dtilts and then attacking
Fino combo: purple pikmin toss to fair. True combo, and useful to adding priority to your fair since the purple pikmin hits the opponent into your fair.
Ken Combo: Olimar has the ability to ken combo, but only if your opponent is super dumb. For those who don’t know the ken combo is fair into dair. In brawl this requires anticipation of your opponents recovery to land the dair.
Nair combos: When you land cancel nair you have several options. For damage racking you can uptilt, jab, or pivot grab (character dependant). For KO’ing you can landcancel a nair into an upsmash or downsmash. On lighter characters, it’s advisable to upsmash all the time, since they can DI up enough to dodge your downsmash. Nair also combos into itself at low percents, and can combo into an upair and pikmin chain.
Advanced Nair combos: Land cancelled nairs can be stringed into multiple moves, combining those listed above. These are all character dependant and work better on heavier characters at low percents. For abbreviations I’ve labeled it an LCN
LCN-Jab(x2)-grab
LCN-Jab(x2)-fsmash(tiped)-grab
LCN-dtilt-pivot grab
LCN-dtilt-upsmash-nair/uair-pikmin chain
LCN-footstool-dair-DJ-fair/bair
LCN-footstool-dair-DJ-nair/uair-pikmin chain
*footstool dair is more effective since the footstool leaves your opponent un-able to move where as a SH dair can be gotten out of…. But it’s also impossibly hard to get the footstool*
Fair combos: fair can combo into grabs as well into more fairs (on floatier characters). Fair can also combo into a nair, uair, or pikmin chain if your opponent jumps right afterwards.
Downthrow Combo’s:
Perhaps one of the most useful tools to racking damage are his dthrow combos. Dthrow has relatively low knockback, and really sets up for aerial or smash follow-ups. These just deal the pain to your opponents. While it’s not an IC 0-death throw, your opponents should still be aware of getting grabbed as a grab with a good olimar easily goes 0-60% if not more. So here’s a run down of some of the more popular dthrow combos. There are a few I intentionally left out for they aren’t as effective or can be gotten out of too easily.
Dthrow – Fair: Works best at lower percents. Seems simple enough, but some characters can float or jump out if you hesitate a bit. As soon as you dthrow you should jump towards your opponent and fair immediately, otherwise they can jump / aerial dodge out of it. If your opponent is floaty you can either fair again, use a nair, uair, or pikmin chain. This is all depending on how they move and whether they jump. If they’re heavier then you should try and opt for a re-grab to repeat any of these dthrow combos
Dthrow – Nair: Works best near mid-high percents (depending on opponent). You’re allowed a little more comfort room with this move. The nair lasts a lot longer and will allow you to punish you opponent’s reaction better. Nair sets up to a DJ uair or even a pikmin chain. If you’re fighting a fast falling or big character at low %’s dthrow to a SH-land cancelled Nair, you can usmash – uair, utilt – (whatever works best… nair fair uair…), or you can even pivot grab them if performed correctly. From there you can strand another throw combo!
Dthrow – Dair: Works at very low percents, and is more of an anticipated throw combo. Works best on fast fallers. This is a good way to punish people who you know will aerial dodge or try to land back on the ground. It’s not a highly recommended throw combo, the other aerials work better and more often.
Dthrow – Fsmash: Work best at 0 and on non-light floaty characters (works on heavy floaty characters). This combo is an easy way to get a re-grab at 0 or incredibly low %’s. Purple pikmin will screw you over with the fsmash, so watch your line… though (since hopefully you only try this at zero) you should know your line at these times.
Dthrow – Pivot Grab: Another anticipation maneuver but it is super effective! Just another grab – grab set up, nothing in particular worth mentioning.
D/Uthrow – Pikmin Chain: It’s more or less the campy olimar’s answer to ending a throw combo. It particularly set you up for another grab, or anything at all really, but it’s free damage, so use it If you want to.
Dthrow – dtilt: Best at low %’s on mid-fast falling characters. If they’re really fast falling you can nail 2-3 consecutive dtilt’s before they can do anything. Normally I’ll use 1-2 and then usmash – uair/pikmin chain. It’s fun to keep in mind.
Dthrow – dthrow: Yes, this move “combo’s” into itself several times on the fast fallers, and sever times on the mid-weights. This is a slightly better option over dtilting because as long as you know what you’re doing, you’re guaranteed the damage.
Juggling: [JUGL]
One of the beauties of olimar is his juggling ability. Pop someone up in the air and prepare to stay there for a while. One tactic for juggling is to use uair and nair in succession. If your opponent dodges the uair, they will get hit by the nair, otherwise they’re back up in the air from your uair. Additionally, your upsmash works wonders on keeping people in the air. It’s quick, it’s fast, and it’s powerful; so even at low percents you will be shooting them upwards to get juggled.
Getting the Kill: [GTK]
Think about it this way. You can blue bthrow, purple uthrow, usmash (yellows and whites can hold you back), dsmash (sweet spots are nice too), fsmash (red/blue/purple….yellow), fair (not white), dair, and a tipped tether. Those are all kill moves, and staling some of them is not a big issue. Not only do these move have good killing power, but they have amazing range too.
Playing olimar you shouldn’t have to worry a whole lot about stale moves. Just throw some pikmin or use one of your other kill moves readily available. If you want to be a powerhouse olimar though, save your usmash so you can kill your opponents in the 80’s.
Edge guarding/Gimping [EDGMP]
Olimar has quite a few options when edge-guarding and/or gimping his foes. Though some may have too much risk, it never hurts to try it.
On stage edge guarding: This is the safest way to edge guard, as you don’t have to worry about getting gimped. In many cases this is throwing your expendable minions off stage and hitting your opponent. When you knock an opponent off stage, it’s always good to throw pikmin. Regardless if you hit or not, it’s just another obstacle for you opponent to deal with. Most characters can’t afford to use an aerial to knock them off since they must recovery first. In other words, free damage. Tossing pikmin also yields advantages to some characters such as luigi, ike, pikachu, and ness. These characters have recovery in which having a latch pikmin can gimp their recovery, thus forcing them to use, more or less, the same approach every time.
Another on stage edge guarding tool is your fsmash. The hit box on it lasts long enough to hit plankers or people just trying to get on the stage from the side. For instance, say the stage is lylat, say Falco wants to just land on stage instead of sweet spotting the ledge. Your fsmash will cover the area he wants to land in, while keeping you a safe distance away.
Off stage edge guarding: This type has a high risk high reward. On one side, you can kill people with fairs, or even spike them, at stupid low percents. On the other hand, you’re putting yourself open to gimps. In my opinion, off stage ledge guarding should be used sparingly, more as a surprise attack. If you practice your on stage ledge guarding and get good at it, people won’t see a SH f/dair coming. Fair is definitely more recommended since it’s easier to space with, and getting a spike with dair can be tricky since the sweet spot on it is so finicky. If you want to try and spike people, try to do it if they are recovering vertically, and only against a recovery you know you can spike them out of. Note: Yes you can spike mk out of his shuttle loop…. Should you do it in tournament? Probably not. It’s your judgment on offstage edge guarding.
Baiting & Punishing [B&P]
This is the last section of the offensive olimar, and it’s all about mindgames. Baiting any punish comes from just about every aspect of your opponents movment, being able to predict it, and using a counter strategy to punish them for it. As mentioned before, you can punish rolls, but that’s not really baiting and punishing, more your opponent being dumb (unless they’re lucario  ). Anyways, such applications of baiting and punishing is the simplistic use of throwing your pikmin, and using the lag from your opponents attack to sweep in and hit them. In this instance you knew they wanted the pikmin off, and would have to use an attack to do so. As soon as you see that attack come out you punish the cool down lag. Another instance of baiting and punishing is when you SH blank aerials, meaning you jump towards your opponent and space an attack just out of both your ranges in hopes of being able to predict a favorable reaction by them. Often times people will just run into your attack. If you intentionally space it so that it doesn’t hit, they might be baiting your attack and going in to punish; however, since you spaced outside their range, they end up running into it by accident. This works on just about everyone, but know that some people will just sit there and do nothing. You’re either being too predictable with your baiting, or your just not good at it XD.
The Defensive Olimar:
Spacing & Stage Control [S&SC]
The most important area in olimar’s game is spacing and stage control. But how do you do it? The best way to keep stage control is just to keep grounded and pitching your tent building a defensive layer around yourself. As soon as your popped up in the air, you’ve lost stage control, and it can be hard to get back. When you have stage control, you’re opponent should always be on the outs. This meaning that they should always be pressured by pikmin tosses, smashes and grabs. The less they’re able to get inside your wall, the better job you’re doing in keeping stage control.
). Anyways, such applications of baiting and punishing is the simplistic use of throwing your pikmin, and using the lag from your opponents attack to sweep in and hit them. In this instance you knew they wanted the pikmin off, and would have to use an attack to do so. As soon as you see that attack come out you punish the cool down lag. Another instance of baiting and punishing is when you SH blank aerials, meaning you jump towards your opponent and space an attack just out of both your ranges in hopes of being able to predict a favorable reaction by them. Often times people will just run into your attack. If you intentionally space it so that it doesn’t hit, they might be baiting your attack and going in to punish; however, since you spaced outside their range, they end up running into it by accident. This works on just about everyone, but know that some people will just sit there and do nothing. You’re either being too predictable with your baiting, or your just not good at it XD.
The Defensive Olimar:
Spacing & Stage Control [S&SC]
The most important area in olimar’s game is spacing and stage control. But how do you do it? The best way to keep stage control is just to keep grounded and pitching your tent building a defensive layer around yourself. As soon as your popped up in the air, you’ve lost stage control, and it can be hard to get back. When you have stage control, you’re opponent should always be on the outs. This meaning that they should always be pressured by pikmin tosses, smashes and grabs. The less they’re able to get inside your wall, the better job you’re doing in keeping stage control.
Where to control the stage is important based on character. Fighting a high priority aerial *****? Best option is to keep your stage control under platforms. Some characters will make you want to keep stage control on the ground, while some make you want to keep it in the air. Knowing your match-ups will help in this area, and I would like to refer you to my Q&A thread if you have any questions on how to keep stage control on specific characters.
For the most part, you want to keep yourself in the center of the stage the majority of the match. With the exception of the run and camp method which puts you to the side of the stage. The reason you want to stay centered is that there is a less chance of you being gimped / forced off the ledge. After studying the mk match-up with affinity, I noticed that meta knight goal in the match-up is to pressure to the ledge. Why is that? They have learned that once olimar is to the edge of the stage, his options are severely limited. Want to pivot grab? You can’t, there’s not enough room, and many of other options are gone at the edge.
Stay in the middle.
As for spacing, it takes practice to get good spacing. Priority doesn’t matter in a game of spacing. Knowing this, once you learn to space, some of olimar’s bad match-ups aren’t that bad.
Things to learn to space with: fsmash – knowing the max range of your fsmash can go a long way. Tipped fsmashes (weak hitbox) sets up for grabs and grabs lead into combos. Olimar’s fsmash is so ridiculously long and fast, that even if a character can smack one away, there’s another one coming before they can do anything. Most people don’t even think of using attacks a quarter of the stage away when trying to approach olimar (unless they’re pressuring). Using your fsmash to space them and keep them out forces them to be put in situations that are less than favorable to them sometimes.
Fair – spaced fair > peach. Getting that out of the way, it’s just like marth. You can’t blindly rush people with fairs and expect them to get *****. No, you have to space your fairs. Again, taking olimar’s stupid hitboxes, if you space your fairs, you should be hitting your opponent over them hitting you, even if you don’t have the priority. Yellows are the best to space fairs with since the hitboxes on yellow aerials is broken.
Usmash – spacing with usmash? Yeah…. If you ever notice, olimar’s usmash goes a long way. It hits people at distances they don’t expect the hitbox to reach. I find charging a usmash is **** when edge guarding, since people under-anticipate the rage and size of olimar’s usmash. Also knowing how far inFRONT the hit box is **** sexy. I saw a vid of Andy G playing a pit, and his red pikmin usmash when through his Angel Ring (his sideB). It’s worth knowing.
Uair – it’s not hard to say space with uair…. Cause uair covers the entire screen. After doing some testing, the vertical hitbox of uair stretches from roughly the bottom platform of BF to just about the top. WTFH4X right? Spacing a uair makes juggling with olimar so good. Even if they aerial dodge the uair, and their aerial dodge isn’t eaten up by uair, they can’t do anything in time for olimar to use a nair unless their aerial speed is quicker than yours.
It's Not Camping, It's standing around. [CMPG]
The Camp. Pitch a tent and start making marshmallows, cause you’re about to camp. Why camp with olimar? Cause he was built with some pretty **** good camping skills (eagle scout for sure). Camping entails everything I mentioned above and putting it together. You should be throwing pikmin… a lot of pikmin. If you’re not sure you’re throwing enough pikmin, here are some tips:
1) Do you have 5 with you at this moment?
2) Are you not doing anything?
3) Do your pikmin have flowers on them?
If you answered yes to one of these questions, you should be throwing more pikmin. Once your opponent moves out of pikmin fire range, you should be spacing them with smashes and aerials… and grabs! Like I said, your goal should be to create a layer, or a wall of pikmin around yourself.
Evasion Tactics [EVSN] Being the hypocrite right now, I will say don’t use olimar’s roll. Personally I can’t stop using it, but I’m getting better. Rolling works at low to mid levels of play, past that you’re asking to get *****.
Your 4 best options of evasion are aerial dodges, whistles, spot dodges, and running.
Aerial dodge vs Whistle: This has been debated since whistle armor was ever known about, and it’s really a judgment call. People can bait aerial dodges a lot easier since they last longer and have lag, while whistles are half the time, but you take damage. When you KNOW you can aerial dodge, do it. But if there’s uncertainty, and you think they’re baiting it, hold out for the whistle. When I’m recovering, I almost always go for the whistle cause it makes you less vulnerable.
As for close combat on the ground spot doding and running is straightforward. When you think your opponent is going to attack, spot dodge and punish. If you’re being pressured by you opponent, run away and try to balance yourself to re-gain stage control.
What to know when Nolimar and Recovering: [KNO]
However you may have gotten here, you’re now nolimar, or in other words olimar with no pikmin. Solimar is not a legit term, and thus will be frown upon when used (scrub status). On to actually playing nolimar, unless you’re under the absurd idea that you’re going to win w/o pikmin, the main objective is to pluck pikmin. Here are the strategies to get out of the nolimar stage, and back into grape’n’**** mode.
While being attacked: if you’re nolimar in the middle of the combo, you best chances are to either DI out, or try to nair them. If they’re pressuring you on the ground, dtilt is a good option due to its absurd priority and decent knock back. Jab is also a good option; however, it lacks to range dtilt has. Given the chance to use jab you should, I just personally prefer dtilt.
If they’re away: simply put, Now! Pluck pikmin immediately. As soon as you employ your GTFO strategy, you should be plucking pikmin.
When they’re advancing: Olimar plucking pikmin is a giant red sign that says “Hey, I’m vunerable” take advantage of your opponent’s mentality and pluck cancel smash your opponent. As discussed in the AT section you can smash right out of a pikmin pluck. If they’re at low percent… pluck cancel a grab and just wail on them for making you go nolimar.
Things to note: There are two characters that I know of that can make you go nolimar from spawn. Sonic and G&W. Sonic can spring right below you forcing you up in the air and wearing out your invincible frames. G&W can do the same with his upair. There’s little you can do at this point other than get grounded and pluck pikmin, just be aware that these nolimar strategies DO exist and WILL be employed by these characters.
Off the edge and gimped? [GMP]
The difference in mentality of an expert and good olimar is comes from the answer to What is Olimar’s greatest weakness?
Recovery, believe it or not, comes to a far second (behind priority). Here I will explain the tips and tricks to surviving olimar’s terribad recovery
DI + Momentum cancel:
Perhaps one of the most vital things to learn in brawl is how to DI properly and momentum cancel. Msatering this should make olimar consistently live to 160-180+ I’ll start with the most common form of DI, then talk about SDI, and move on to DI and then momentum canceling.
DI: Directional Influence – just as it sounds you can control the direction you move. This is as simple as holding the control stick in the direction you want to move in.
SDI: Smash DI- smash DI is batting your cstick in a direction to influence your direction of movement. This can only be done during the hitstun of your opponent, meaning when your opponent hits you.
Uses: Say you’re hit by a multihit move like pikachu’s dsmash, snakes nair, G&W’s turtle or pit’s fsmash. Depending on the hit you can SDI and DI into the attack to avoid taking the full attack or you have to SDI away and DI out of the attack. The former holds true for snakes nair, where you will end up behind snake before the killing hitbox comes out, while the later is true for pikachu’s dsmash. Getting hit by both parts of Tlink’s fsmash should rarely happen if you SDI right.
DI + Momentum cancel: When you’re hit, your goal is to DI perpendicular to the trajectory you’re being sent. This is called momentum bending. Go to practice mode, get olimar on cpu and set to 150% and control and DK. Have DK uthrow olimar (goes straight up). Now hold the control stick left and have DK uthrow again. You trajectory should left drastically. This helps you live a lot longer.
One goal as an olimar main is to DI to the top corner of the screen. This is the longest possible spot you can be before being KO’d. Also, being this high you can float back to the stage rather than have to worry about someone grabbing the ledge and gimping you.
On top of this you can cancel your momentum by Fast Falling your fastest aerial. For olimar this is uair. The easiest way to fast fall the uair is to c-stick up and then slam down on the control stick as soon as it’s out.
Combining all these together, you can easily last an extra 40-50% Getting a kill move hit can be hard on olimar, and if you’re able to survive that one vital moment when they can, you’re given a tremendous advantage.
Tentative Teams insert [TTA]
Olimar’s Role In Doubles:
Most good teams have some type of cool team combo / gimmick that gives them the edge over just any other team. G&W’s will fill their bucket with their teammate’s projectile and then unleash a deadly ko move, while psi twins will use the same idea but to recover themselves. Luigi has a gimmick, which we all know is his shoryuken, which requires a grab-set up. Olimar, on the other hand, has quite possibly the best team gimmick in the game. It requires little team set-up, and completely annihilates other teams. This gimmick is olimar’s purple pikmin upsmash.
As silly as it may sound at first, you may not realize how stale your usmash gets before someone is in ko range. We use it to combo, to juggle, and by the time we’re ready to ko, a purple pikmin isn’t always next in line when we’re at that precise moment where usmash is the best option. I will say this now and stand by it: Teams with Olimar should ENTIRELY REVOLVE around his purple pikmin usmash. Let me outline the function and basics of team play, and then I will show you how to utilize olimar’s upsmash into play.
Team structures:
The most basic form of teams play, and this is placement. In singles, a lot of matches can be determined by how well you space yourself; however, in teams it’s all about zoning. There are four zones on a stage, and that’s basically character placement
_1_2_3_4_
Image the above is FD, and the numbers represent characters in play. For explanation purposes I will now reference “O” as olimar “X” for an opponent and “Y” for your teammate (or for a standard your team).
Team formation 1:
_X_Y_Y_X_
This is the most prominent formation in teams play. It is important that you are able to hold this position. This position has it so that your partner’s back is facing your back, and you’re fighting your opponents on the outside. While difficult to maintain, it is the strongest team formation. Here is where you get a lot of team combos and effort. In short, you’re disrupting your opponent’s team function by splitting them up (often times why people call doubles two 1v1s). The team on the side will most of the time win in this situation (assuming equal skill in both teams).
Now, an important part of teams play is to switch playing different characters. Mainly due to your opponent learning your teammates play style, but it’s also good to switch to get un-expected hits. Being able to switch between the two will score a lot of extra hits that normally wouldn’t happen. This is most effective in this formation since you’re right next to your partner, and it just requires that you switch sides and keep fighting.
This formation is most effective at the beginning of the match, or when your opponents are at low percents.
Team formation 2:
_Y_X_Y_X_
This is the more common team formation. No matter how hard you try to hold the first one, it inevitably will reach here. The important factor of this team formation is to have the opponents with the higher percent on the left (or right… it goes both ways) and the opponent with the lower percent in the middle… usually best when one of them just spawns, otherwise it doesn’t matter a whole lot. The reasoning behind this is so that when you knock the one with the high percent off stage, you can ravage team combo the other one.
Example:
_Y_X__Y__ -X
At this point you are going to keep the opponent that is still on stage under pressure. Why not go gimp / edge guard the other person? Like I said, an Olimar team’s function is “purple upsmash”. Needless to say, it’s going to take time for them to recover. Use this time to team combo the other person. When you go to edge guard the other teammate, the opponent on stage is going to go help them. Regardless of what your teammate might do, they will find a way out and go help them. By helping them this often times means hitting you away from the edge, which then often times results in your, or your teammate dying. So play it safe and just double-team them until his partner comes back.
The best formation for double-teaming the partner is usually going to be
_Y_X_O___ -X
The reason for this is when he finally gets back on stage olimar has the most options to just poke him away again, whether it be an f-smash or a grab… ect.
Team formation 3:
_X_X_Y_Y_
This is pretty standard in terms of starting a match, but it’s not going to happen often. When it does the person on the inside should try to finagle into the X’s zone and then go to team formation 1 or 2.
~~~~On to actual olimar function in doubles~~~~
Team formation 2 is MOST effective in teams with olimar, because it strengthens the team gimmick of his purple up-smash. As for olimar’s placement it SHOULD look like this
_X_Y_X_O_
In most match-ups it should look like this. The exception is time where you’re playing a mk who is in zone 3 and you’re at a low percent, where the unfortunate outcome of dash grab release to dtilt gimp is a likely scenario you want to avoid. Disregarding such occurrences, this is the strongest formation for olimar as it makes your team gimmick very abuse-able.
Your teammate, unfortunately, will be doing most of the work. His job is to rack up damage on both characters. Olimar’s function is to avoid using up smash, tank stock, avoid contact in general, and upsmash people when they hit a high percent. Let me walk through that a bit more slowly.
Avoid using upsmash: This is THE MOST IMPORTANT part of olimar teams play. Using your upsmash at any other time but for killing is a wasted asset. Here’s why his upsmash is so **** important. Un-stale, it will kill most of the cast at 80-90% given moderate DI. The best part of teams play with olimar is that your options for pulling off an upsmash (even against those such as peach and luigi who make it hard) become exponentially easier. Most people won’t see it coming. Olimar is quick in terms of sneaking under people and just tappin’ that c-stick. Most people have an idea of what you’re about to do, but un-like in singles, they have less time to react to it. This makes perfect, or even really good DI near impossible (assuming you team is keeping the pressure on them at all times). So moderate to good DI at best, and you will still be killing them at 80-90% This isn’t a fun fact, more of a guarantee. If you save your upsmash you WILL be killing them retardedly early (earlier than in singles). Note, it takes a very conscious effort to not use your usmash (especially after playing singles for so long), so it’s good to practice this in teams.
Tank stock / avoid contact: Putting olimar in either zone 1 or 4 will give him the best options to tank stock. You teammate should be doing his work to aggravating the other team into attacking mostly him. To make sure they focus on your teammate you should play super gay olimar and make them gtfo. The goal is to build a perfect defense around the edge of the stage so there is less **** coming your way. This is also helped by your teammate randomly coming in and hitting the person who is attacking the opponent putting pressure on you. You teammate is also vitally important for doing this in order for you to not be tempted to use your usmash. So in short you should be playing very defensively around your ledge so that you hold stocks. Since your teammate is the primary damage builder, he will also be the primary damage taker, and will more likely need 4 stocks to complete his job.
Note: For your team gimmick to work, you need at least one purple pikmin at all times. Tanking the edge is good because if there’s ever a time where you’re fight free you can farm purples (oh lawd I actually found a use for it…. //wrist)
Up smash: Olimar upsmash is one of the most ridiculous moves in brawl, and it’s more ridiculous in teams. The purple pikmin usmash has tremendous range, tremendous power, and tremendous spam-ability (it’s freaking quick). For your gimmick to work you just have to keep an eye at your opponents percent, and as soon as it tints a reddish color run and usmash away. Point to the sky until your arms hurt. Killing at such ridiculous percents causes something that most smashers can’t help. It gets them angry, and they lose their cool. After that you’ve won. They will play reckless and target you playing really poorly. Sometimes they will forget your teammate is there, which now it’s his turn to come in for the easy hits. This works at more low levels of bracket, but it’s still nice to understand. Watching DSF play M2K at whobo, you see that even the best players can lose their cool, so just be mindful.
~~~~~~~~~~~~~~~~~~~~~~~~~~~~~~~~~~~~~~~~~~~~~~~
Teammates: Another big factor in olimar teams play is his partner. You need a partner that can help you fluidly execute your upsmash / keep it fresh. There are two types of functionalities in characters that will help an olimar team:
Crowd Control: These characters are built for being able to take upon two characters at once. They work great because they can keep both people occupied, and off olimar.
Strong crowd control characters: G&W, DDD, R.O.B. Toon link
Middle crowd control characters: Pikachu, Wario, Marth
Weak crowd control characters: Diddy, Luigi, Lucario, ZZS
Aerial *****s: These character protect olimar where he is weak. The air. While olimar has a decent aerial game, having a partner that can shut out your opponents aerial game (or at least go even with it) is just another advantage on saving that upsmash.
Strong aerial ***** characters: G&W, Luigi, Marth, Peach, Pit, R.O.B. Wario
Middle aerial ***** characters: DDD, Lucario, Shawnik, Toon link, Yoshi
Weak aerial ***** characters: Jiggs
Appear in both: G&W, DDD, R.O.B. Toon link, Marth, Luigi, Lucario
G&W: While G&W can’t bucket pikmin (although admittedly sweet if oil panic latched onto someone and continued to do damage until they got it off) He’s stilla pretty good teammate. He can ***** around with nairs and bairs and keep both opponents at bay. He can also really pressure people in the air. Overall he keeps your olimar safe. An issue with most game and watch mains is they don’t understand the concept of oli-grab + smash, since they usually hit both people. If you find a G&W that can space well, good for you. Another issue with G&W is that they don’t really care where you are, and will team attack you a lot. Their entire play style in singles revolves around aerial spam everything that moves, which could work into your opponents advantage. Again, this is a generalization… and you may find a G&W who is good in teams practice and what not. He also detracts from your team gimmick in that he will cstick away at them and try to kill them, when the primary focus should be on you killing them. All in all he’s a pretty good teammate, and if you can find a G&W main that you can mesh well with, I’d go for it
DDD: DDD is a powerhouse, he tanks stocks just by being a fat penguin. He’s got the attributes that you want in a teammate. The only issue with DDD is that he is a huge combo target. Any team with an mk puts your team at risk because they can just nado ***** away, and there’s not much you can do about it. Good thing about ddd is that he has lots of combo potential as well. He can easily dthrow someone to you to usmash ect. Again, not quite the tip top of teammates, but he’s still a good choice for teams.
R.O.B: While carrying the same combo target as DDD, I feel rob is one of the strongest matches to olimar. If R.O.B can do any thing, it’s crowd control. He’s easily the best at it. Rob can, and will, take on two teammates at the same time for the duration of the match. Be mindful of helping him when he’s being double teamed, but rob is one of the best matches for olimar. Rob also has a VERY SLOW uthrow, which you can see coming for a mile away. You can use this to an advantage of usmashing them right as rob comes down. It’s a good un-escapable set-up for olimar, and incredibly easy to space. Olimar is good with rob because he covers R.O.B’s weak-spot (underneath him) with a powerful ground game.
Too… ****ing A: Yes, I will say that gay is also another great match for olimar <.< his spam and aerial prowess are buffed in team play, and he can hold his own in double teamed situations. One of the added bonuses (for gay) is that he doesn’t have to worry about killing anymore. This is good because his usmash and utilt, which are normally saved as kill moves at 150% (LOL), are great “combo” moves. They can easily be spammed now, since the primary strategy is purple usmash. I currently team with a gay main right now; one of his favorite things is usmash locking DDD to 70% lol.
Marth: I would put marth around G&W and DDD, but not quite Gay and R.O.B. Marth is overally really good for olimar. He has the air down. You have his bad match-ups taken care of, and he has yours. It’s all good on paper, I just haven’t seen a good olimarth team, and so I don’t have much in experence to say about it. The only warning I can give is to make sure he can space well, so when you grab someone and he charges his fsmash that he doesn’t hit the opponent and tipper you. If someone wants to send me a vid of a good olimarth team, or give your exp with it, that’d be cool.
Luigi: Luigi is undoubtedly on par with R.O.B and gay, if not a smidge above. On top of olimar’s gimmick, luigi’s gimmick is super buffed. Olimar has a ridiculous grab, combine that set-up with luigi’s shoryuken, and DAYUM. For extra fun you can piranha plant glitch it, and shoryuken during olimar’s uthrow for even earlier ko’s (still in testing). Luigi also covers olimar in the air well, and olimar covers luigi on the ground well. The only problem with the oliluigi team is that you both get gimped. We’ve dealt with that in singles, but it’s worse in doubles… just be prepared.
Lucario: Lucario is another meh, I don’t know much but would like to. Just know in theory he should be a good partner. Especially if you’re tanking stocks, and he has to share a stock. That should buff his power right? I should probably look that up. Lol.
~~~~~~~~~~~~~~~~~~~~~~~~~~~~~~~~~~~~~~~~~~~~~~~
Stages: Low ceilings / anything that give your upsmash / ability to save it an advantage
Ban: Stages like japes with super high ceilings
~~~~~~~~~~~~~~~~~~~~~~~~~~~~~~~~~~~~~~~~~~~~~~~
Last tips with olimar in teams:
GTFO: Tell your partner to just stay away from you in general. Team attacking is very frustrating, and with olimar’s ginormous hitboxes you will hit him a lot if he doesn’t space himself away from your cstick. For a general outline tell him to give you 1/3 – 1/4 of the stage on the ground and never be directly above you. With that you should be good.
Pikmin toss: Don’t use it as much, use it to bait people away from your partner or to snipe people with whites ect. You should have a feel for how your pikmin toss, just be mindful to whistle them off if they hit your partner. Note: you should tell your partner not to hit off the pikmin unless you intentionally make a plan to stall a hitbox with pikmin. It should be your job to whistle them off him and save him the grief of worrying about it. The exception to this rule is if there is a white attached to your opponent, or your teammate is already at a stupid high percent and there is one latched onto an opponent at the same time (the pikmin on your teammate will naturally fall off after a couple hits).
Past the basics: Olimar Advanced techniques [OATS]
* JC Usmash OoS -
A general technique, but worth mentioning due to its incredible importance and the unique way it affects Olimar. This technique can make many matchups easier by turning formerly unpunishable moves into punishable moves.
To perform, just press up while shielding, jump, and immediately hit the "attack" button. If you have tap jump on, this is just "Up+A" while in shield. If you have tap jump off, it would be more like "Up+X, A" (X is a "Jump" command and A is an "attack" command on the standard controller setup). You can tilt your shield up and just press "X+A", which may make it easier to perform with tap jump off.
When Olimar takes a single hit on his shield, he can no longer be damaged by the same hit. If the Usmash starts while the attack is still out, the pikmin still takes the hit when its hurtbox is brought out. If the pikmin survives the hit, it "rockets" because it was hit during the initial "charging" period. It's also incredibly quick, so it may just be able to punish a move without rocketing.
* Whistle Bouncing (B-Reversal) -
Input a whistle in the direction you're facing, then press in the opposite direction within four frames. The easiest way to do this would be to press 321 on the control stick (or Forward-Down, Down, Back-Down), pressing the "Special" button on the 3 (or Forward-Down) input. Used mostly for aerial mindgames, can also be used at an edge as a quick way of getting under semi-permeable platforms.
* Wavebouncing Whistle -
You combine a turnaround B with a Whistle bounce to produce a boost forward. Assuming that you're in the air floating in the opposite direction you're facing, you would press 123 (or Back-Down, Down, Forward-Down) and press the "Special" button on the 1 (or Back-Down), all within four frames. Basically, Olimar will turn around (the turnaround B) and immediately whistle bounce back the way he was originally facing. When done correctly, Olimar will seem to do a sharp jump from drifting backward to drifting forward, seemingly without changing the direction he's facing.
* Instant Return - (taken from
this post)
Instant Return is using the boost from Olimar's UpB to both pop above the stage and tether the ledge at the same time. This causes Olimar to fall down to the stage, being pulled by the tether. When his feet hit the ground, the tether disappears and Olimar is able to perform any actions immediately. This can surprise a lot of opponents that are coming in to pressure you at the ledge, only to run into a grab or realize that they didn't make it in time as you escape safely. In order to perform it, pull away from the ledge by holding back and slightly down. Wait a slight moment and then immediately hit diagonally up/forward and B. You have to wait a moment so that you don't just whiff the UpB and are helpless as you float above the stage. You'll for the most part have to mess around with it for awhile before you're able to do it consistently. It's probably Olimar's most difficult AT to get down.
* Tarzaning -
Exactly what it sounds like. Tarzaning is the act of using the momentum when swinging down on a Pikmin Tether and keeping this momentum when canceling the tether to glide through the air. Tarzaning is only applicable on a few stages (Delfino, Brinstar and Halberd are the only ones that are currently legal. It has been reported that successful Tarzans have been made on stages such as Smashville, but no proof has been seen as of yet. Similar to to Instant Return, using Tarzan at the correct times gives Olimar another option for returning to the stage from the ledge. There are two forms of this technique, the Full-Tarzan and the Half-Tarzan (which is the more effective of the two).
In order to Tarzan, you will want to tether to the stage at roughly stage height, as far as you can from the stage to get the most length on the chain. As Olimar swings downward, press down on the control stick to break the chain just as he starts to travel past the ledge and gain height on the swing. This will cause Olimar to continue traveling through the air and you'll still have your second jump. How you use your second jump will depend on if your wanting to go for the full or half Tarzan variant. It's important to note that performing a Tarzan when you have tap jump on is much more difficult than otherwise. If it's on, it's easy to accidently use your second jump while performing Pikmin Chain, making the technique impossible to perform.
- Full Tarzan -
In order to complete a Full-Tarzan, glide through the air a bit before you use your second jump. After jumping, you'll continue to glide towards the other ledge of the stage. When you start to fall, Pikmin Chain to the other ledge. Remember that you always have to tether towards the right for the left ledge and left for the right ledge. This means, even if you're under the stage with the left ledge to the left of you, you don't want to tether to the left, as your chain will not attach to anything. The game registers which direction the ledge is facing, not which direction the ledge is from Olimar. Full Tarzans are mostly for flashy purposes, and don't have very many applicable uses over the options Olimar already has (especially when Half-Tarzan is put into the equation).
- Half-Tarzan -
To perform a Half-Tarzan, gain more height before breaking the line and jump more immediately. You'll end up popping through the stage instead of having to go to the other end. Can often catch the opponent off guard, allowing you to regain your ground safely. You may have to use your UpB to get the last bit of height, but since you'll be so close to the ground afterwards, there won't be any bonus landing lag from it.
* Rosa Parks- (taken from
this post)
Also referred to as its technical term, BACKADABUS. When landing, if you perform an aerial within five frames before landing, the aerial will be canceled without the hitbox. Why would you want to do that, you ask?
Because the Pikmin up from his seat before the bus door opens and loses his seat D:. Good for when that unwanted guy's next up and you wanna send him to the back. Doesn't have any more landing lag than if you hadn't used an aerial at all and can catch the opponent off guard if they're watching your line.
* Attack while holding items -
- Smashes -
When you pick up an item, so long as you are still holding attack, you can perform smashes with the C-stick. I advise you start learning to play with R set to attack as this affects the Diddy match-up, and possibly others such as R.O.B. As long as you keep your finger on the R button, you can pikmin spam and smash spam as much as you want. The only thing you can do anymore is grab, but you can toss the banana or gyro at any time and grab them, so it really hurts their game.
- Aerials -
Aerials can be used if input during the buffer period of certain special moves or immediately after using one. For Olimar, it only works during whistle (DownB). This can also be used to re-press the "attack" button for using smashes without having to release the held item or just to perform an aerial.
* Tether meteor cancel -
Your tether has semi momentum altering properties and can be shot out almost immediately after hitlag. For this reason, Olimar can survive spikes and ridiculously high percents. I’ve been told that the tether meteor cancel doesn’t always work, but I’ve been spiked at over 200% by an ICs and still survived. This theory is that since your pikmin sometimes get desynced from you that the tether cancel won’t work all the time. Thus far I haven’t seen any issues with it.
* Locks -
- Jab Lock -
If your opponent is against the wall, you can repeatedly tap A and they can’t get out until ~60. Additionally, the antenna on Olimar’s jab has a small hitbox, and you can perform a jab lock when people are laying on the ground and you hit them with this hitbox, walk forward a little and then hit them with it again. I have never seen it performed by Olimars in game, but it is do-able. In my opinion there are much better and less technical options.
- Fsmash lock -
If your opponent is against the wall, you can lock them in a manner similar to a jab lock by hitting with the weak hitbox of Fsmash. This works with any color except purple (must be tossed instead, due to knockback and range of purple fsmash).
- Purple Pikmin lock -
Similar to jab locking in that it’s equally situational as it is impossible to pull off mid match. Just like jab locking you can purple pikmin toss characters against a wall to about 60 (assuming you ONLY have purple pikmin) and you can hit them and carry them across stage with good aim. As you can see, not only do you need only purple pikmin (rare) but you need to have good timing and aim too, making this another impractical AT. However, if you’re Fsmash locking someone against a wall, and a purple comes up, know that you can toss it to keep them locked. This also can help for any other wall combos.
* Stutter stepping -
Stutter stepping is when you dash one direction and then immediately C-stick the other direction. The result is you slide backwards just a bit while performing your Fsmash. It’s not much distance, but it can help you space your Fsmash by increasing the already huge range.
* Pluck ATs
- Pluck cancelling (PC) -
Pluck cancelling is when you dash one direction and then pluck and dash another direction, or dash one direction pluck and jump in the opposite direction. It’s main use it to speed the **** out of your Olimar. It’s effective, it works, and your opponent won’t know what to do against your speedy ****** with enormous hit boxes.
- Smash pluck cancelling -
When you have no pikmin in your line, pluck and input a smash immediately. The attack will interrupt the "pikmin spawn" animation. There is no frame advantage or anything, but it is usable as a GTFO option after spawning or when pressured with no pikmin.
- Ledge plucking -
If you pluck as you run off a ledge, a pikmin will spawn without the full pluck animation occurring. Usually just a flashy move.
* SHAD’ing -
Short Hop Aerial Dodging is what SHAD stands for, and it could be the difference between hitting someone and being hit. To perform you aerial dodge straight into the ground and input a command during your aerial dodge. SHAD’ing abuses Brawls buffer system. When you input a command during the aerial dodge you will perform it on the exact frame you’re able to. Note: your aerial dodge must not finish before hitting the ground, if your aerial dodge ends before hitting the ground it does nothing.
* Hilt’s tether tricksy -
I’m not really sure what to call this, but it’s hella mind games. When you tether the ledge, immediately press down, and then tether again. The dis-advantage of this is that you lose 1/3 tethers you have. Also, don’t use this against characters that will likely make you tether again. It’s really fun to do, easy to perform, and looks really flashy.
* Pivot walking -
This is not at all useful unless you want to get in some pro-status taunting or mindgames. To pivot walk, hold down attack (which ever button you have it to), walk in one direction, and tap the c-stick diagonally backwards and up. Olimar will pivot while moving in the same direction. This looks much like the dance peanuts character do. If your opponent is being stupid and just camping the ledge, I like to start pivot walking because it’s humiliating and leaves you completely vulnerable to be attacked.
* Pikmin Rocket -
When an opponent hits a pikmin while it is being charged for a smash, the pikmin will launch in a very strange angle with a greatly increased hitbox.
* Pikmin bombing -
Relatively useless… mainly because it’s only do-able on green greens (which is banned in some areas). When you throw pikmin on the blocks on Green Greens, they stick in continue is hurdling animation until someone runs into them. When someone touches them, they latch themselves onto them. This gets more interesting when you throw it on a bomb block as if your opponent touches the pikmin on the bomb block, it will explode.
* Ledge pulling: An old tactic that never gets old. Basically, after the invincibility frames wear off, you can grab someone off the edge. The characters you can do this to are Mario, Donkey Kong, Kirby, Pikachu, Game&Watch, Luigi, Meta Knight, Squirtle, Ivysaur, Charizard, Ice Climbers (if both are clinging it will pull off Popo), Ness, Olimar, Jigglypuff, and Lucas.
Moar Frame data! [FD]
For extra information of Frame data, I’ll refer you to this thread:
http://www.smashboards.com/showthread.php?t=225377
Credits: [CRED]
Well, I didn’t come up with this all on my own. As mentioned before, this is everything that all the brightest olimar mains have figured out put into a single guide. So here I’d like to give credit where credit is due.
First off, A Special Thanks too: Andy G whom wrote the beautiful pro’s and cons section, as well as a majority of the moveset.
Also another special thanks to -Hilt- who continues to ravage with olimar research, most notably the pikmin pluck % ratios as well as frame data.
Other people who contributed to the guide in some form or another: NC-Echo, Projectiled, Kyas, DanGR, dmauro, Jaded link, Twintail, Shrinkray, Kaos Olimar Weroup, Shanus, Hai I’m Fearless, and many others ^_^
Also a thanks to the pikachu forums for the formatting inspiration in their guide "generating a win"
Hope you Enjoyed the Guide!
Guide Updates: May 6th - massive info added
July 4th - Tentative teams play guide added
~Fino
TFL;DR
How to win as olimar:
1. Throw more pikmanz
2. Pivot Grab moar
3. Learn to WAC
4. Dun get grabbed D:
5. Don't play homolimar
If all else fails...
6. CP marf