
D
Deleted member
Guest
Ballad of Gales: A Guide to Blowing Away the Competition with Toon Link
NOTE: THIS GUIDE IS STILL EARLY ON IN PROGRESS. Don't expect much yet. This guide is going to be updated more over time.
Index:
-About Toon Link
-Toon Link in The Legend of Zelda
-Toon Link in Smash 4
-Why to Pick Toon Link
-Pros and Cons
-Toon Link in Smash 4
-Why to Pick Toon Link
-Pros and Cons
-Moveset Analysis
-Basic Attacks (jab and dash attack)
-Tilts (f-tilt, u-tilt, d-tilt)
-Smashes (f-smash, u-smash, d-smash)
-Aerials (n-air, f-air, b-air, u-air, d-air)
-Zair/Tether
-Specials (arrow, boomerang, spin attack, bomb)
-Throws (f-throw, b-throw, u-throw, d-throw)
-Custom Moves
-Miscellaneous (pummel, ledge attack, get-up attack)
-Resources and Useful (Toon) Links-Tilts (f-tilt, u-tilt, d-tilt)
-Smashes (f-smash, u-smash, d-smash)
-Aerials (n-air, f-air, b-air, u-air, d-air)
-Zair/Tether
-Specials (arrow, boomerang, spin attack, bomb)
-Throws (f-throw, b-throw, u-throw, d-throw)
-Custom Moves
-Miscellaneous (pummel, ledge attack, get-up attack)
-Update History
-Credits
About Toon Link
Toon Link in The Legend of Zelda
The story of Toon Link in the The Legend of Zelda started a few centuries after the Hero of Time defeated the evil Ganondorf, who was sealed once and for all by Zelda and the 6 sages. They tell the tale about the legend of a boy who saved the world from darkness. However, after defeating the evil Ganondorf the boy travels back to his childhood, not being around for the reappearance of evil, as was the fate of the kingdom of Hyrule. Toon Link's adventure starts after his sister, Aryll, was kidnapped one day from their home on Outset Island by a giant bird. After the events of Wind Waker, Toon Link later goes on to appear in Phantom Hourglass, where he tries to rescue Tetra, who was taken by the Ghost Ship. While the Toon Link in Smash Bros. doesn't appear in any other Legend of Zelda games, his cartoony design is used in Four Swords, Four Swords Adventures, The Minish Cap, and Spirit Tracks.
Toon Link in Smash 4
In Smash 4, Toon Link must play a baiting game involving patiently learning what habits and approaches the opponent has so he can appropriately punish, which is made easier by his arsenal which forces the opponent to play evasively. The main goal lies in getting the opponent frustrated from having difficulty dealing with projectiles. While Toon Link is mainly a zoning-based character, he needs a good balance of keep-away, spacing, and a general sense of when to go in. An advantage he has is that he's a great momentum based character, and can easily rack up percent and apply pressure that's hard for opponents to get past. His main disadvantage is dealing with pressure and potentially getting out-camped by a few characters.That said, although Toon Link's best option is generally to use his projectiles and space to try to avoid damage while racking up damage to set up a kill, it is not always the safest option. Some characters have the ability to reflect projectiles as well as easily approach him by power shielding, which can easily set up to racking up enough pressure damage to set Toon Link up for a kill. As good as Toon Link is at camping, he also has quite the close combat game, being able to well-space a lot of aerial attacks as well as having the ability to connect many of hits together using only his sword. This usually helps when having to deal with characters that rush him down, as well as against characters that may have the ability to spam him back. The thing to keep in mind is when to shift gears from spacing with projectiles to quickly approaching with his sword to cover all areas of the ground game.
Why to Pick Toon Link
Toon Link is probably one of the most versatile characters in this game, being able to utilize his three projectiles as well as his hookshot for both mid-range spacing and grabbing, and his sword for close combat. Toon Link is also great at pressuring opponents into having limited options on where to go, such as by covering the ground with a projectile then covering the opponent's jump space with another. His stage control and zoning are also some of the best in the game. Pros
+ Three very good projectiles+ Excels at taking stage control
+ Can easily rack up damage
+ Can out-camp almost everyone
+ Has a z-air, which is a great poking and spacing tool with little landing lag
+ Good running speed, and has the tools to slow down faster characters
+ Two recoveries with spin attack and the tether, giving more options to recover with
+ Good ability to combo with bombs, the boomerang, and u-tilt
+ Difficult to combo due to being light and floaty
+ Great grab range
+ Has a kill throw
+ His Hylian shield can protect against a lot of projectiles just by very slowly walking forward, crouching, or standing around
Cons
- Light and easy to KO- No moves with a hitbox that comes out before frame 6
- Bad at taking back stage control once it's been lost
- Loses to approaches like dash shield, mainly because his grab is slow
- Has a terrible and generally useless d-air
- Loses the camping fight to a few characters
- Grab has a lot of ending lag and is very punishable if it misses
- Aerials have a lot of landing lag, and are unsafe on shield
- Can't efficiently deal with direct pressure and/or rush down
- Gets gimped relatively easy
- Has trouble landing the kill while racking up damage and increasing the opponent's rage
Moveset Analysis
(Warning: Image-heavy)
Note: Knockback is tested on Mario, and will be different for other characters.
(Warning: Image-heavy)
Note: Knockback is tested on Mario, and will be different for other characters.
Basic Attacks
Jab
![]()
Hit 1
![]()
Hit 2
![]()
Hit 3
Description: Toon Link swipes forward twice, then stabs for the third hit.
First hit damage: 3%, 2%, 2%, 2%, 2%, 1%, 1%, 1%, 1%, 1%
First two hits damage: 5%, 4%, 4%, 4%, 3%, 3%, 3%, 3%, 3%, 3%
All hits damage: 9%, 8%, 7%, 7%, 7%, 7%, 7%, 7%, 7%, 7%
First hit knockback: 3 ft. Has set knockback.
First two hits knockback: 3 ft. at 0%, 6 ft. at 100%
All hits knockback: 19 ft. at 0%, 45 ft. at 100%
Frame data: Jab 1 hits on frame 6 and lasts until frame 7, jab 2 hits on frame 6 and lasts until frame 7, and jab 3 hits on frame 6 and lasts until frame 10.
Summary: Due to there being more hitstun in Smash 4, jabs are much more useful. Connecting with all three hits is now all but guaranteed, save for a few exceptional scenarios (e.g. light and floaty characters on high percents, especially if they were slightly off the ground in the first place), and using the first or second jab to combo into something else entirely has become a much more viable option rather than just a mix-up. Note that comboing out of the first jab is best and this becomes much safer if they are on a higher percent or if they get jabbed when they were slightly off the ground as your jab will safely combo into an u-tilt or f-tilt (but not a d-tilt as it hits too low). Jab is not only Toon's fastest grounded option, but it is also one of the safest grounded options on shield as it doesn't lack very much in terms of range when compared to his other grounded options, it has comparatively low cool down lag, and it caries with it the threat of further quick jabs which would interrupt many OoS (out of shield) options. The jabs are a useful tool for beating spotdodges and rolls on reaction due to how quickly they come out and also due to the fact that combined, they manage to put out multiple hitboxes over a short period of time rather than a single hitbox for an instant, meaning that your timing for the punish doesn't have to be perfect. A single jab can often be thrown out if you ever find yourself in a tight spot as a mix-up to shielding or evading as often it will clash with the move that was about to hit you or even come out first and hit the opponent if they overestimated how laggy your previous option was or if they tried to grab you (as there is no grab armor in Smash 4).
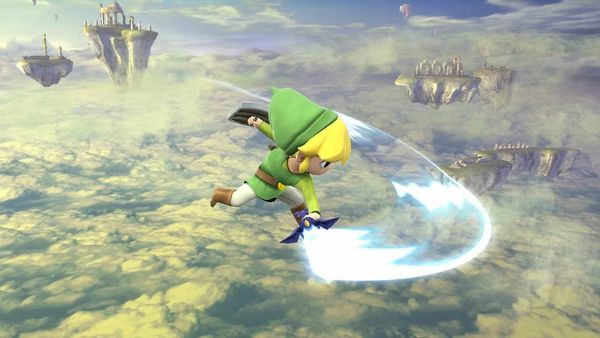
Dash Attack
![]()
Description: Toon Link lunges forward with his sword and slashes.
Sweetspot damage: 8%, 7%, 6%, 6%, 5%, 5%, 4%, 4%, 4%, 4%
Sourspot damage: 6%, 5%, 5%, 4%, 4%, 3%, 3%, 3%, 3%, 3%
Sweetspot knockback: 19 ft. at 0%, 52 ft. at 100%
Sourspot knockback: 19 ft. at 0%, 45 ft. at 100%
Frame data: Hits from frames 9 to 11.
Summary: Dash attack comes out relatively quickly, but the duration is long. This simply means that it can be punished more easily than your other options should you miss. Dash attack no longer hits the opponent horizontally as it did in Brawl so it can't be used to set up gimps. It also won't be killing anyone as it is lacking in power. Furthermore, due to it's relatively long cool down lag, it's not going to be leading into any combos. How then can this move be used? Well while the dash attack doesn't combo into anything, it still puts the opponent in the air where you can force and punish airdodge attempts or cover their landings. Combined with Toon's quick dash and run, it also covers landings very well in a game where this can be taken advantage of very easily, which in turn resets the situation, forcing them to try to land again. It should also be noted that as a quick lunging offensive, it covers a lot of ground very quickly, though a dash into n-air is not far off.
Hit 1
Hit 2
Hit 3
Description: Toon Link swipes forward twice, then stabs for the third hit.
First hit damage: 3%, 2%, 2%, 2%, 2%, 1%, 1%, 1%, 1%, 1%
First two hits damage: 5%, 4%, 4%, 4%, 3%, 3%, 3%, 3%, 3%, 3%
All hits damage: 9%, 8%, 7%, 7%, 7%, 7%, 7%, 7%, 7%, 7%
First hit knockback: 3 ft. Has set knockback.
First two hits knockback: 3 ft. at 0%, 6 ft. at 100%
All hits knockback: 19 ft. at 0%, 45 ft. at 100%
Frame data: Jab 1 hits on frame 6 and lasts until frame 7, jab 2 hits on frame 6 and lasts until frame 7, and jab 3 hits on frame 6 and lasts until frame 10.
Summary: Due to there being more hitstun in Smash 4, jabs are much more useful. Connecting with all three hits is now all but guaranteed, save for a few exceptional scenarios (e.g. light and floaty characters on high percents, especially if they were slightly off the ground in the first place), and using the first or second jab to combo into something else entirely has become a much more viable option rather than just a mix-up. Note that comboing out of the first jab is best and this becomes much safer if they are on a higher percent or if they get jabbed when they were slightly off the ground as your jab will safely combo into an u-tilt or f-tilt (but not a d-tilt as it hits too low). Jab is not only Toon's fastest grounded option, but it is also one of the safest grounded options on shield as it doesn't lack very much in terms of range when compared to his other grounded options, it has comparatively low cool down lag, and it caries with it the threat of further quick jabs which would interrupt many OoS (out of shield) options. The jabs are a useful tool for beating spotdodges and rolls on reaction due to how quickly they come out and also due to the fact that combined, they manage to put out multiple hitboxes over a short period of time rather than a single hitbox for an instant, meaning that your timing for the punish doesn't have to be perfect. A single jab can often be thrown out if you ever find yourself in a tight spot as a mix-up to shielding or evading as often it will clash with the move that was about to hit you or even come out first and hit the opponent if they overestimated how laggy your previous option was or if they tried to grab you (as there is no grab armor in Smash 4).
Dash Attack

Description: Toon Link lunges forward with his sword and slashes.
Sweetspot damage: 8%, 7%, 6%, 6%, 5%, 5%, 4%, 4%, 4%, 4%
Sourspot damage: 6%, 5%, 5%, 4%, 4%, 3%, 3%, 3%, 3%, 3%
Sweetspot knockback: 19 ft. at 0%, 52 ft. at 100%
Sourspot knockback: 19 ft. at 0%, 45 ft. at 100%
Frame data: Hits from frames 9 to 11.
Summary: Dash attack comes out relatively quickly, but the duration is long. This simply means that it can be punished more easily than your other options should you miss. Dash attack no longer hits the opponent horizontally as it did in Brawl so it can't be used to set up gimps. It also won't be killing anyone as it is lacking in power. Furthermore, due to it's relatively long cool down lag, it's not going to be leading into any combos. How then can this move be used? Well while the dash attack doesn't combo into anything, it still puts the opponent in the air where you can force and punish airdodge attempts or cover their landings. Combined with Toon's quick dash and run, it also covers landings very well in a game where this can be taken advantage of very easily, which in turn resets the situation, forcing them to try to land again. It should also be noted that as a quick lunging offensive, it covers a lot of ground very quickly, though a dash into n-air is not far off.
Tilts
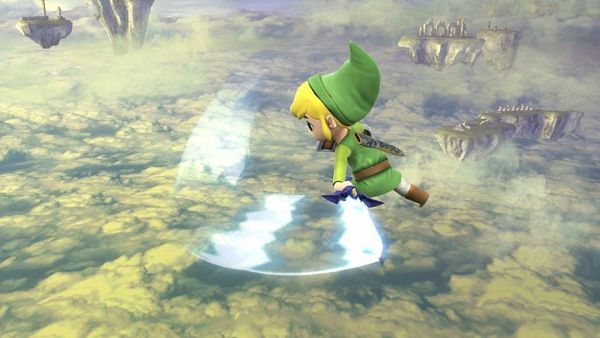
F-tilt
![]()
Description: Toon Link swings his sword over his head, then brings it straight down.
Damage: 9%, 8%, 7%, 6%, 6%, 5%, 5%, 5%, 5%, 4%
Knockback: 6 ft. at 0%, 49 ft. at 100%
Frame data: Hits on frame 9 and lasts until frame 13.
Summary: F-tilt has really made an attempt to be useful in Smash 4. While it doesn't hit opponents who are behind you anymore, it still covers a large area above, diagonally forwards, and directly in front of you, which means that it remains an interesting anti-air option. As a tool for catching landings it has come a long way, as it can now be used immediately after a dash pivot, essentially allowing you to use it backwards immediately out of a run. F-tilt can be useful when used near the edge of the stage. Due to its horizontal knockback, hitting opponents with f-tilt will often lead to their death if they were hit while trying to double jump back on stage from the ledge or foolishly trying to re-grab the ledge after being trumped. There are two distinctive hitboxes that you can connect with when using f-tilt; one of them hits a bit harder and sends opponents at a much more horizontal angle, and it seems to be located closer the Toon's hand, while the other, located toward the tip, will hit less horizontally. When using the latter as an anti air tool, you can often follow up the f-tilt with a dash attack if you're quick.
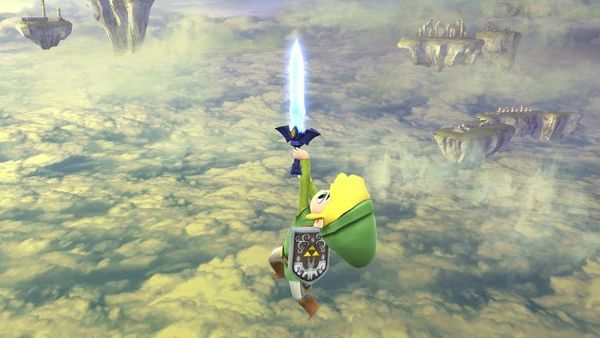
U-tilt
![]()
Description: Toon Link quickly swipes his sword over his head once in a semicircle.
Damage: 5%, 4%, 4%, 3%, 3%, 3%, 3%, 2%, 2%, 2%
Knockback: 6 ft. at 0%, 45 ft. at 100%
Frame data: Hits on frame 8 and lasts until frame 12.
Summary: U-tilt is no longer a potential kill move, but it remains an excellent low percent combo starter and meat grinder as it combos into itself. One of the bigger nerfs to it was that it now does half the damage that it used to. What this means is that you'll want to make sure that you don't end the combo by using an u-tilt. Before the opponent gets out of range, you'll want to use almost any other quick move, such as an u-smash, n-air, u-air in some cases, or b-air, etc. If you notice that your opponent is silly enough to be trying to escape your u-tilt combo with airdodge, this will allow you to finish the combo with pretty much anything you want, including f-smash. On characters who don't have a fast fall speed, options like f-smash will still connect even if the airdodge causes you to miss an u-tilt, so it can be done on reaction. Note that on heavier characters or especially on characters with fast fall speeds, U-tilt won't combo into itself at very low percents as it can be shielded. Just tack on a bit of damage first for these characters and then put them in the meat grinder along with everyone else.
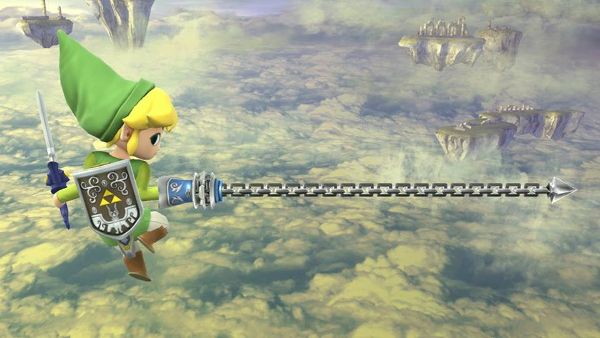
D-tilt
![]()
Description: Toon Link ducks and sweeps the ground in front of him with his sword.
Damage: 7%, 6%, 5%, 5%, 5%, 4%, 4%, 4%, 3%, 3%
Knockback: 6 ft. at 0%, 29 ft. at 100%
Frame data: Hits on frame 9 and lasts until frame 10.
Summary: Something that a lot of people are unaware of is that d-tilt actually has a weak semi-spike effect when used on an opponent who is at lower percents. The knockback trajectory for this move actually changes with the amount of knockback that it inflicts. So if the opponent is on low to medium percents, d-tilt won't hit very far but it will hit them diagonally down (the effect on fast fallers is more pronounced). This is because of the 'Sakurai Angle', a property that some moves have, including Toon's n-air and f-air for example. All this means is that you can use it on someone who is near the edge and potentially gimp them if you manage to snipe their double jump and stage spike them (remember, people can't grab the ledge if they have been hit recently, so sniping double jumps used off-stage near the ledge will almost always lead into stage spike scenarios).
D-tilt is somewhere between a jab and an f-tilt in many respects. It has the range and general horizontal trajectory of an f-tilt, while its speed, in terms of how quick it comes out and how much end lag there is, is closer to that of a jab. What it lacks that the f-tilt has is a hitbox that covers a decent area, which can make it more difficult to hit with. Like f-tilt, d-tilt doesn't directly lead into any combos or anything, but unlike f-tilt, d-tilt has a high chance of tripping the opponent at low percents and a trip can be combo'd out of with e.g. a dash attack or a grab. On paper, then, d-tilt is one of Toon's best grounded moves. It was good in Brawl too, but Toon wasn't really able to use close quarters combat moves to much effect in Brawl. This is a new game however, and Toon's CQC is much more viable, meaning that d-tilt should be seriously re-examined as a potential go-to move.
Description: Toon Link swings his sword over his head, then brings it straight down.
Damage: 9%, 8%, 7%, 6%, 6%, 5%, 5%, 5%, 5%, 4%
Knockback: 6 ft. at 0%, 49 ft. at 100%
Frame data: Hits on frame 9 and lasts until frame 13.
Summary: F-tilt has really made an attempt to be useful in Smash 4. While it doesn't hit opponents who are behind you anymore, it still covers a large area above, diagonally forwards, and directly in front of you, which means that it remains an interesting anti-air option. As a tool for catching landings it has come a long way, as it can now be used immediately after a dash pivot, essentially allowing you to use it backwards immediately out of a run. F-tilt can be useful when used near the edge of the stage. Due to its horizontal knockback, hitting opponents with f-tilt will often lead to their death if they were hit while trying to double jump back on stage from the ledge or foolishly trying to re-grab the ledge after being trumped. There are two distinctive hitboxes that you can connect with when using f-tilt; one of them hits a bit harder and sends opponents at a much more horizontal angle, and it seems to be located closer the Toon's hand, while the other, located toward the tip, will hit less horizontally. When using the latter as an anti air tool, you can often follow up the f-tilt with a dash attack if you're quick.
U-tilt
Description: Toon Link quickly swipes his sword over his head once in a semicircle.
Damage: 5%, 4%, 4%, 3%, 3%, 3%, 3%, 2%, 2%, 2%
Knockback: 6 ft. at 0%, 45 ft. at 100%
Frame data: Hits on frame 8 and lasts until frame 12.
Summary: U-tilt is no longer a potential kill move, but it remains an excellent low percent combo starter and meat grinder as it combos into itself. One of the bigger nerfs to it was that it now does half the damage that it used to. What this means is that you'll want to make sure that you don't end the combo by using an u-tilt. Before the opponent gets out of range, you'll want to use almost any other quick move, such as an u-smash, n-air, u-air in some cases, or b-air, etc. If you notice that your opponent is silly enough to be trying to escape your u-tilt combo with airdodge, this will allow you to finish the combo with pretty much anything you want, including f-smash. On characters who don't have a fast fall speed, options like f-smash will still connect even if the airdodge causes you to miss an u-tilt, so it can be done on reaction. Note that on heavier characters or especially on characters with fast fall speeds, U-tilt won't combo into itself at very low percents as it can be shielded. Just tack on a bit of damage first for these characters and then put them in the meat grinder along with everyone else.
D-tilt
Description: Toon Link ducks and sweeps the ground in front of him with his sword.
Damage: 7%, 6%, 5%, 5%, 5%, 4%, 4%, 4%, 3%, 3%
Knockback: 6 ft. at 0%, 29 ft. at 100%
Frame data: Hits on frame 9 and lasts until frame 10.
Summary: Something that a lot of people are unaware of is that d-tilt actually has a weak semi-spike effect when used on an opponent who is at lower percents. The knockback trajectory for this move actually changes with the amount of knockback that it inflicts. So if the opponent is on low to medium percents, d-tilt won't hit very far but it will hit them diagonally down (the effect on fast fallers is more pronounced). This is because of the 'Sakurai Angle', a property that some moves have, including Toon's n-air and f-air for example. All this means is that you can use it on someone who is near the edge and potentially gimp them if you manage to snipe their double jump and stage spike them (remember, people can't grab the ledge if they have been hit recently, so sniping double jumps used off-stage near the ledge will almost always lead into stage spike scenarios).
D-tilt is somewhere between a jab and an f-tilt in many respects. It has the range and general horizontal trajectory of an f-tilt, while its speed, in terms of how quick it comes out and how much end lag there is, is closer to that of a jab. What it lacks that the f-tilt has is a hitbox that covers a decent area, which can make it more difficult to hit with. Like f-tilt, d-tilt doesn't directly lead into any combos or anything, but unlike f-tilt, d-tilt has a high chance of tripping the opponent at low percents and a trip can be combo'd out of with e.g. a dash attack or a grab. On paper, then, d-tilt is one of Toon's best grounded moves. It was good in Brawl too, but Toon wasn't really able to use close quarters combat moves to much effect in Brawl. This is a new game however, and Toon's CQC is much more viable, meaning that d-tilt should be seriously re-examined as a potential go-to move.
Smashes
F-smash
![]()
Hit 1
![]()
Hit 2
Description: Toon Link grasps his sword with both hands and swings it at a downward angle, then swings it in an upward motion for a final blow. The second hit can be delayed.
First hit damage, uncharged: 10%, 9%, 8%, 7%, 7%, 6%, 6%, 5%, 5%, 5%
Both hits damage, uncharged: 22%, 19%, 17%, 16%, 15%, 13%, 12%, 12%, 11%, 11%
First hit damage, fully charged: 14%, 12%, 11%, 10%, 10%, 9%, 8%, 8%, 7%, 7%
Both hits damage, fully charged: 30%, 27%, 24%, 22%, 21%, 19%, 18%, 17%, 16%, 15%
First hit knockback: 9 ft. at 0%, 9 ft. at 100%
Both hits knockback: 29 ft. at 0%,134 ft. at 100%
Frame data: First f-smash hits on frame 15 and lasts until frame 17, second f-smash hits on frame 12 and lasts until frame 14.
Summary: F-smash was improved in Smash 4 as it is now much more reliable. Having said this, the two hits will not combo into each other on a character that is on a high enough percent or on a light and floaty character who is at mid-percent or higher, as the first hit of f-smash doesn't have set knockback (which is just to say that like most moves the opponent will get hit further the higher their percent is). At low percents against a heavy character or a fast faller, the second hit can be shielded if your input isn't perfect, otherwise, thankfully, it will always connect. With this in mind, f-smash is only a reliable kill move when used against the heavier or faster falling characters. As it is, it will often kill characters at just under the same percent as u-smash, anyway, unless used at the edge of the stage.
What f-smash really excels in is stacking on a heap of damage. Damage racking can be hard for Toon; you can use bomb+z-air+n-air +u-tilt, or you can use a f-smash.
The range on f-smash is also to be noted, being our second longest-reaching grounded move, second only to grab. When used with a stutter step, it even out-ranges Toon's grab. When combined with foxtrots as well, a stutter step f-smash becomes a very mobile tool that is able to cover a lot of ground and then rack up big damage, making it perfect for punishing.
A lot can be said about f-smash on shield. If spaced properly you can typically get away with using the first hit on it due to the large shield push, but if it's too close up, you can and should get punished. Even so, many people tend to want to play it safe just in case you're one of those people that use the second hit regardless of whether you hit their shield or not. Don't be one of those people. Even if you're at the edge, the second hit won't knock them off the edge in Smash 4. In a situation where you hit their shield with the first hit of f-smash and they are too far away to punish you for it, it's best to try to follow whatever evasive manoeuvre the opponent takes after they think it's safe, as the typical response to this situation will be to try and reset the situation.
U-smash
![]()
Description: Toon Link swings his sword above his head in a semicircle, similar to u-tilt.
Uncharged sweetspot damage: 13%, 12%, 11%, 10%, 9%, 9%, 8%, 8%, 7%, 7%
Uncharged sourspot damage: 10%, 9%, 8%, 7%, 7%, 6%, 6%, 5%, 5%, 5%
Charged sweetspot damage: 19%, 16%, 15%, 14%, 13%, 12%, 11%, 10%, 10%, 9%
Charged sourspot damage: 14%, 12%, 11%, 10%, 10%, 9%, 8%, 8%, 7%, 7%
Knockback: 13 ft. at 0%, 88 ft. at 100%
Frame data: Hits on frame 11 and lasts until frame 17.
Summary: U-smash is still one of Toon Link's best kill moves. One common misconception about it is that it no longer has a weaker hitbox behind Toon. In fact, it's more that the weaker hitbox has been moved so that it's further toward the latter half of the move than it was before, such that if someone is right next to you and standing behind you, the stronger hitbox will still hit. U-smash doesn't have much range in front, but it can be used directly out of dash/run or shield, and Toon is quite fast on the ground. In order to land it, then, you'll have to either dash in to punish a laggy move, Dash in and predict a roll or tech-roll backwards, Dash in and shield to force your opponent to use a poorly spaced move on your shield, Dash in to cover their landing (especially onto platforms), or take advantage of some other advantageous situation such as if you see that they are about to get hit by the returning boomerang. Just be aware that heavier fast falling characters don't die that easily when hit vertically.
D-smash
![]()
First hit
![]()
Second hit
Description: Toon Link sweeps the ground in front of himself then behind himself with his sword.
Uncharged: 13%, 12%, 11%, 10%, 9%, 8%, 8%, 7%, 7%, 7%
Fully charged: 19%, 16%, 15%, 14%, 13%, 12%, 11%, 10%, 10%, 9%
Knockback: 42 ft. at 0%, 111 ft. at 100%
First hit knockback: 42 ft. Has set knockback.
Frame data: First hit of d-smash lasts from frames 9 to 10, second hit of d-smash lasts from frames 17-18 of the move.
Summary: While d-smash may hit the fastest of Toon's smashes (hitting on frame 9, with only the jab and u-tilt being faster grounded options), it is also the weakest and most easily punished of all our smashes. It can be good as a quick move with decent range/damage so long as you know it will connect. D-smash was used for gimping in Brawl; it's different in Smash 4, however At low percents, d-smash will hit more horizontally, just as it did in Brawl, but the knockback has been decreased. At higher percents, the knockback trajectory is diagonal leaning towards the horizontal as opposed to being much more vertical as it was in Brawl, which is better for getting the opponent off-stage and potentially setting up a gimp.
The two hits of d-smash don't connect as well as they did in Brawl, meaning you can make the second hit miss much easier. This is better for gimping as the first hit has set knockback (meaning that it will send people the same distance regardless of their percent) and hits slightly diagonally downwards; the only problem is that characters in Smash 4 have better recoveries and the knockback on the first hit has been slightly reduced. The rage effect actually helps in this regard, though, as it will actually increase the knockback of the first hit of d-smash even though it has set knockback. This means that, if you are at a high percent, it will hit them noticeably further, which is better for gimps.
You can force the second hit to miss by using d-smash up close while walking forwards on thinner characters, or you can use it out of the slide you get from a dash turn which works on most characters. If you do a quick dash dance then do the dash turn, you can do a dash turn without having to run too far away in the opposite direction first; in fact it can be used when standing up against an edge. Simply initiate a dash away from the edge, immediately dash back toward the edge (the single dash dance) and hold it for slightly longer, then hold back away from the edge again which will put you into the dash turn, at which point you can continue holding in that direction for a moment to gain some momentum before using d-smash. There are two other methods used to force the second hit to miss which will work on any character. Use d-smash while facing upwards on a slanted surface, or have something like your bomb interrupt the d-smash as soon as the first hit connects.
Hit 1
Hit 2
Description: Toon Link grasps his sword with both hands and swings it at a downward angle, then swings it in an upward motion for a final blow. The second hit can be delayed.
First hit damage, uncharged: 10%, 9%, 8%, 7%, 7%, 6%, 6%, 5%, 5%, 5%
Both hits damage, uncharged: 22%, 19%, 17%, 16%, 15%, 13%, 12%, 12%, 11%, 11%
First hit damage, fully charged: 14%, 12%, 11%, 10%, 10%, 9%, 8%, 8%, 7%, 7%
Both hits damage, fully charged: 30%, 27%, 24%, 22%, 21%, 19%, 18%, 17%, 16%, 15%
First hit knockback: 9 ft. at 0%, 9 ft. at 100%
Both hits knockback: 29 ft. at 0%,134 ft. at 100%
Frame data: First f-smash hits on frame 15 and lasts until frame 17, second f-smash hits on frame 12 and lasts until frame 14.
Summary: F-smash was improved in Smash 4 as it is now much more reliable. Having said this, the two hits will not combo into each other on a character that is on a high enough percent or on a light and floaty character who is at mid-percent or higher, as the first hit of f-smash doesn't have set knockback (which is just to say that like most moves the opponent will get hit further the higher their percent is). At low percents against a heavy character or a fast faller, the second hit can be shielded if your input isn't perfect, otherwise, thankfully, it will always connect. With this in mind, f-smash is only a reliable kill move when used against the heavier or faster falling characters. As it is, it will often kill characters at just under the same percent as u-smash, anyway, unless used at the edge of the stage.
What f-smash really excels in is stacking on a heap of damage. Damage racking can be hard for Toon; you can use bomb+z-air+n-air +u-tilt, or you can use a f-smash.
The range on f-smash is also to be noted, being our second longest-reaching grounded move, second only to grab. When used with a stutter step, it even out-ranges Toon's grab. When combined with foxtrots as well, a stutter step f-smash becomes a very mobile tool that is able to cover a lot of ground and then rack up big damage, making it perfect for punishing.
A lot can be said about f-smash on shield. If spaced properly you can typically get away with using the first hit on it due to the large shield push, but if it's too close up, you can and should get punished. Even so, many people tend to want to play it safe just in case you're one of those people that use the second hit regardless of whether you hit their shield or not. Don't be one of those people. Even if you're at the edge, the second hit won't knock them off the edge in Smash 4. In a situation where you hit their shield with the first hit of f-smash and they are too far away to punish you for it, it's best to try to follow whatever evasive manoeuvre the opponent takes after they think it's safe, as the typical response to this situation will be to try and reset the situation.
U-smash
Description: Toon Link swings his sword above his head in a semicircle, similar to u-tilt.
Uncharged sweetspot damage: 13%, 12%, 11%, 10%, 9%, 9%, 8%, 8%, 7%, 7%
Uncharged sourspot damage: 10%, 9%, 8%, 7%, 7%, 6%, 6%, 5%, 5%, 5%
Charged sweetspot damage: 19%, 16%, 15%, 14%, 13%, 12%, 11%, 10%, 10%, 9%
Charged sourspot damage: 14%, 12%, 11%, 10%, 10%, 9%, 8%, 8%, 7%, 7%
Knockback: 13 ft. at 0%, 88 ft. at 100%
Frame data: Hits on frame 11 and lasts until frame 17.
Summary: U-smash is still one of Toon Link's best kill moves. One common misconception about it is that it no longer has a weaker hitbox behind Toon. In fact, it's more that the weaker hitbox has been moved so that it's further toward the latter half of the move than it was before, such that if someone is right next to you and standing behind you, the stronger hitbox will still hit. U-smash doesn't have much range in front, but it can be used directly out of dash/run or shield, and Toon is quite fast on the ground. In order to land it, then, you'll have to either dash in to punish a laggy move, Dash in and predict a roll or tech-roll backwards, Dash in and shield to force your opponent to use a poorly spaced move on your shield, Dash in to cover their landing (especially onto platforms), or take advantage of some other advantageous situation such as if you see that they are about to get hit by the returning boomerang. Just be aware that heavier fast falling characters don't die that easily when hit vertically.
D-smash
First hit
Second hit
Description: Toon Link sweeps the ground in front of himself then behind himself with his sword.
Uncharged: 13%, 12%, 11%, 10%, 9%, 8%, 8%, 7%, 7%, 7%
Fully charged: 19%, 16%, 15%, 14%, 13%, 12%, 11%, 10%, 10%, 9%
Knockback: 42 ft. at 0%, 111 ft. at 100%
First hit knockback: 42 ft. Has set knockback.
Frame data: First hit of d-smash lasts from frames 9 to 10, second hit of d-smash lasts from frames 17-18 of the move.
Summary: While d-smash may hit the fastest of Toon's smashes (hitting on frame 9, with only the jab and u-tilt being faster grounded options), it is also the weakest and most easily punished of all our smashes. It can be good as a quick move with decent range/damage so long as you know it will connect. D-smash was used for gimping in Brawl; it's different in Smash 4, however At low percents, d-smash will hit more horizontally, just as it did in Brawl, but the knockback has been decreased. At higher percents, the knockback trajectory is diagonal leaning towards the horizontal as opposed to being much more vertical as it was in Brawl, which is better for getting the opponent off-stage and potentially setting up a gimp.
The two hits of d-smash don't connect as well as they did in Brawl, meaning you can make the second hit miss much easier. This is better for gimping as the first hit has set knockback (meaning that it will send people the same distance regardless of their percent) and hits slightly diagonally downwards; the only problem is that characters in Smash 4 have better recoveries and the knockback on the first hit has been slightly reduced. The rage effect actually helps in this regard, though, as it will actually increase the knockback of the first hit of d-smash even though it has set knockback. This means that, if you are at a high percent, it will hit them noticeably further, which is better for gimps.
You can force the second hit to miss by using d-smash up close while walking forwards on thinner characters, or you can use it out of the slide you get from a dash turn which works on most characters. If you do a quick dash dance then do the dash turn, you can do a dash turn without having to run too far away in the opposite direction first; in fact it can be used when standing up against an edge. Simply initiate a dash away from the edge, immediately dash back toward the edge (the single dash dance) and hold it for slightly longer, then hold back away from the edge again which will put you into the dash turn, at which point you can continue holding in that direction for a moment to gain some momentum before using d-smash. There are two other methods used to force the second hit to miss which will work on any character. Use d-smash while facing upwards on a slanted surface, or have something like your bomb interrupt the d-smash as soon as the first hit connects.
Aerials
N-air
![]()
Hit 1
![]()
Hit 2
Description: Toon Link quickly slashes his sword on both sides of his body in the air.
First hit damage: 8%, 7%, 6%, 6%, 5%, 5%, 4%, 4%, 4%, 4%
Second hit damage: 7%, 6%, 5%, 5%, 5%, 4%, 4%, 4%, 3%, 3%
First hit knockback: 3 ft. at 0%, 39 ft. at 100%
Second hit knockback: 3 ft. at 0%, 32 ft. at 100%
Frame data: First hit of n-air lasts from frames 6 to 7, second hit of n-air lasts from frames 12 to 14 of the move. Has 12 frames of landing lag.
Summary: N-air is Toon Link's fastest aerial, coming out on frame 6, giving it a variety of uses. Though the range on each hit is less than the range on Toon Link's jab, it can also be used as a quick aerial spacing tool. This is especially true when n-air is fast fallen out of a bomb fakeout, which also allows you to follow up with a bomb afterwards. N-air is also good for situations like attacking an opponent that successfully air dodged Toon Link's u-air. Off-stage, n-air is great for gimping opponents, especially if there isn't time to wait for f-air to come out. It's also one of the best aerials to use if you need to catch a bomb with an aerial because of its quick animation, and it's also good for catching bombs if you're worried about messing up a z catch. Another thing n-air is good for is it can sometimes help break Toon Link out of combos.
Because of its low ending lag along with having the least landing lag of any of Toon Link's aerials, it's generally his least punishable aerial. Thanks to its speed, n-air is also a surprisingly good tool for racking up damage with combos, such as with z-air > n-air, bomb n-air, etc. N-air can also cause the opponent to trip when used close enough to the ground, which can lead to a grab, and at lower percents it can lead to a u-tilt (which may or may not have to be perfect pivoted). Add its speed and decent range, and it can be a good landing tool.
F-air
![]()
Description: Toon Link swings his sword in front of himself and slams the opponent with his sword.
Damage: 13%, 11%, 10%, 10%, 9%, 8%, 8%, 7%, 7%, 6%
Knockback: 13 ft. at 0%, 85 ft. at 100%
Frame data: Hits on frame 14 and lasts until frame 15. Has 18 frames of landing lag.
Summary: F-air is one of Toon Link's best aerials. Its range in front makes up for what range n-air lacks, it is one of his strongest aerials, and most importantly, it has the quickest animation overall. This does not mean that it comes out the quickest; in fact, it is one of the slowest aerials to come out (14 frames), but once its hitbox has gone, you can act almost immediately after it which cannot be said for any of the other aerials when not cancelled by landing. F-air also has the best shield knockback out of all our horizontal aerials, which combined with the fact that it has by far the least cool-down lag, makes it the safest aerial on shield.
Due to its laggy start-up, however, f-air should be started from a position of relative safety so it is not interrupted before it can come out. It is best used then by way of minor assumptions and predictions. For example, throwing a bomb down, then if it looks like it will connect, using f-air where the opponent should be if the bomb connects. Another example is seeing that the opponent tends to dash in to close the distance after X happens. Instead of doing something like jumping away to pull a bomb, you could short hop forwards and throw a f-air out because if the opponent dashes in, they will be at this exact point by the time f-air comes out so iit will be well-spaced. If it hits, that's great; if it doesn't, f-air has such low end lag that it shouldn't matter and the opponent will at least be put on notice that they can't just dash in without fear.
Unlike n-air, you can do a short hop f-air and still double jump afterwards if you need to escape. Just note that due to the new buffering system, if you want to do a short hop f-air then immediately double jump n-air or airdodge or anything, you must wait until the double jump actually comes out before doing any other input; otherwise the double jump input will be overridden. This is just to say, do your other input slightly later, and don't try to buffer it with the double jump. If however you do want to land after a SH Fair, there's no point in landing with the Fair landing lag. You're better off either doing a Nair (even though the hitbox won't come out on a flat surface) so that you go through the lesser Nair landing lag, or you may as well use a special; though optimally, if you have one, you can throw a bomb.
F-air is amazing off-stage with its great range and kill power, allowing you to score very early kills. When used off-stage you can also guarantee that you'll be starting the f-air from a place of relative safety. Also, due to its low cool-down, you can catch people out of airdodge with something like n-air if they try to avoid the f-air.
B-air
![]()
Description: Toon Link swings his sword behind himself.
Damage: 11%, 10%, 9%, 8%, 7%, 7%, 6%, 6%, 6%, 5%
Knockback: 6 ft. at 0%, 75 ft. at 100%
Frame data: Hits on frame 7 and lasts until frame 9. Has 17 frames of landing lag.
Summary: B-air is basically the complimentary counterpart to f-air in many respects. Where f-air comes out slowly and has almost no ending lag, b-air comes out quickly and has ending lag for days. This greatly affects how it's used. The most notable thing about b-air is its enormous horizontal range. It has the largest horizontal range out of all of Toon Link's aerials (not including z-air). The animation for b-air doesn't come close to doing it justice. If you wanted to know where the missing hitboxes for n-air went, they can be found on b-air. To give you an idea, its horizontal range is roughly equal to a d-smash, if not slightly larger. With that well-noted, b-air should be used as a retreating spacing tool. It won't combo into anything and the long ending lag will leave you vulnerable if you stick around. However, as an option to be pulled out in a tight spot, with its great range and quick start-up, if used while moving away from the opponent, it is brilliant. B-air doesn't get any early kills, but it is a notable kill move at high percents.
U-air
![]()
Description: Toon Link stabs the air above himself and stays in that position for a short period of time.
First part damage: 14%, 12%, 11%, 10%, 10%, 9%, 8%, 8%, 7%, 7%
Second part damage: 11%, 10%, 9%, 8%, 7%, 7%, 6%, 6%, 6%, 5%
First part knockback: 6 ft. at 0%, 78 ft. at 100%
Second part knockback: 6 ft. at 0%, 55 ft. at 100%
Frame data: Hits on frame 11 and lasts until frame 40. Has 21 frames of landing lag.
Summary: U-air is one of Toon Link's best kill moves. It has high knockback in and of itself, and when used high up out of a double jump it can kill very early. Its long lasting hitbox combined with Toon Link's great overall mobility, along with bombs and the boomerang to combo into a u-air out of or pressure opponents into airdodges, means that landing it is not that difficult, either. Throwing bombs down and assuming that they will send the opponent up towards you is a great way to get u-air to hit for a kill, and it flows naturally out of the spam game. Having said this, it should not be used to fish for kills on opponents with high aerial mobility unless they were recently in hitstun. Putting them in this position is not difficult and can be accomplished by anything from a u-throw to a u-tilt or even a dash attack; it doesn't matter, really. If the opponent was recently in hitstun this stops them from gaining any momentum in any direction, making their aerial mobility becomes useless to avoid you. Since they will be unable to fast fall until they start to fall back down again, this means that their airdodge becomes useless as well. The point is, you don't need to combo into u-air in order for it to be unavoidable in many situations, and the hitstun in Smash 4 will often be enough, anyway. Also, it's common for an opponent to double jump to avoid the u-air. Forcing the opponent to use their double jump is good as long as you take advantage of their now limited options, and conditioning the opponent into thinking that they can always just double jump to avoid you can be used against them to win a game by capitalising on their habit when it counts.
When u-air is not killing, it is great for juggling the opponent when mixed up with bombs and fast falling into grounded options. It does a good amount of damage and obviously ensures that the opponent stays in the air where they won't be able to regain a lost double jump. Often when attempting to beat out airdodges you will have to fast fall the u-air, and this must be done by hitting fast fall after you've used u-air even if you had already fast falled before using u-air. Again though, it must be stressed that u-air should be used sparingly even for juggling purposes on opponents with high aerial mobility. It is a much wiser choice to simply cover their landing than to throw out a u-air for them to avoid and give them the ground to land on freely while you're stuck in the u-air animation. Landing is much less safe in smash 4 than it was in Brawl; you would do well to take advantage of that.
D-air
![]()
Description: Toon Link holds his sword underneath himself and dives downwards.
Spike damage: 16%, 14%, 13%, 12%, 11%, 10%, 9%, 9%, 8%, 8%
Non-spike damage: 12%, 11%, 10%, 9%, 8%, 7%, 7%, 6%, 6%, 6%
Spike knockback: 9 ft. at 0%, 55 ft. at 100%
Non-spike knockback: 13 ft. at 0%, 82 ft. at 100%
Frame data: Hits on frame 17 and lasts until frame 64. Has 40 frames of landing lag.
Summary: D-air is not a move that you should be using often. However, this isn't to say that the move is completely useless. Its amazing priority and damage makes it a great punish against most characters if they're being too aggressive careless about attacking you from below in the air. Other than this, going for a spike with d-air when an opponent is above the stage is generally not a good idea since d-air has so much landing lag that the opponent can tech the spike and still have time to punish you. Trying to d-air the opponent when they're on the stage is even worse since d-air is going to be harder to land, and it will make you even more likely to end up punished. D-airing off-stage will just make you plummet to your death even if the d-air hits unless you manage to successfully manuever yourself back to the stage after d-air connects (which is impossible most of the time because TL's mobility is still too limited after d-air connects). It can also be used out of a bomb fakeout, but this will be explained in more detail later.
There's still one other place where the move can be used: when the opponent has lost their invincibility on the ledge. D-airing at the very edge of the stage while above an opponent without invincibility, when done correctly, will hit the opponent, resulting in a spike, while Toon Link will stay on the stage. Since ledge re-grabs no longer have invincibility in Smash 4, this makes a d-air spike on an opponent on the ledge much easier to land. Another thing is that, if you ledge trump and opponent and they re-grab the ledge, since they have no invincibility and grabbing the ledge leaves them temporarily unable to move, this leaves them completely open to getting spiked.
Other than that, the spike on d-air generally will not help you unless you're holding a bomb. With a bomb, d-air instantly becomes more useful for off-stage spikes as long as you time it right. This is because, when done correctly, the bomb will blow up before you fall to your death, stopping the d-air and allowing you to attempt to get back to the stage.
In order to do this, you have to re-catch a bomb with d-air using a bomb fake-out, and
the fuse has to be short enough that it will blow up before you hit the bottom blast zone, but long enough so dair can still actually hit before the bomb blows up.
Hit 1
Hit 2
Description: Toon Link quickly slashes his sword on both sides of his body in the air.
First hit damage: 8%, 7%, 6%, 6%, 5%, 5%, 4%, 4%, 4%, 4%
Second hit damage: 7%, 6%, 5%, 5%, 5%, 4%, 4%, 4%, 3%, 3%
First hit knockback: 3 ft. at 0%, 39 ft. at 100%
Second hit knockback: 3 ft. at 0%, 32 ft. at 100%
Frame data: First hit of n-air lasts from frames 6 to 7, second hit of n-air lasts from frames 12 to 14 of the move. Has 12 frames of landing lag.
Summary: N-air is Toon Link's fastest aerial, coming out on frame 6, giving it a variety of uses. Though the range on each hit is less than the range on Toon Link's jab, it can also be used as a quick aerial spacing tool. This is especially true when n-air is fast fallen out of a bomb fakeout, which also allows you to follow up with a bomb afterwards. N-air is also good for situations like attacking an opponent that successfully air dodged Toon Link's u-air. Off-stage, n-air is great for gimping opponents, especially if there isn't time to wait for f-air to come out. It's also one of the best aerials to use if you need to catch a bomb with an aerial because of its quick animation, and it's also good for catching bombs if you're worried about messing up a z catch. Another thing n-air is good for is it can sometimes help break Toon Link out of combos.
Because of its low ending lag along with having the least landing lag of any of Toon Link's aerials, it's generally his least punishable aerial. Thanks to its speed, n-air is also a surprisingly good tool for racking up damage with combos, such as with z-air > n-air, bomb n-air, etc. N-air can also cause the opponent to trip when used close enough to the ground, which can lead to a grab, and at lower percents it can lead to a u-tilt (which may or may not have to be perfect pivoted). Add its speed and decent range, and it can be a good landing tool.
F-air

Description: Toon Link swings his sword in front of himself and slams the opponent with his sword.
Damage: 13%, 11%, 10%, 10%, 9%, 8%, 8%, 7%, 7%, 6%
Knockback: 13 ft. at 0%, 85 ft. at 100%
Frame data: Hits on frame 14 and lasts until frame 15. Has 18 frames of landing lag.
Summary: F-air is one of Toon Link's best aerials. Its range in front makes up for what range n-air lacks, it is one of his strongest aerials, and most importantly, it has the quickest animation overall. This does not mean that it comes out the quickest; in fact, it is one of the slowest aerials to come out (14 frames), but once its hitbox has gone, you can act almost immediately after it which cannot be said for any of the other aerials when not cancelled by landing. F-air also has the best shield knockback out of all our horizontal aerials, which combined with the fact that it has by far the least cool-down lag, makes it the safest aerial on shield.
Due to its laggy start-up, however, f-air should be started from a position of relative safety so it is not interrupted before it can come out. It is best used then by way of minor assumptions and predictions. For example, throwing a bomb down, then if it looks like it will connect, using f-air where the opponent should be if the bomb connects. Another example is seeing that the opponent tends to dash in to close the distance after X happens. Instead of doing something like jumping away to pull a bomb, you could short hop forwards and throw a f-air out because if the opponent dashes in, they will be at this exact point by the time f-air comes out so iit will be well-spaced. If it hits, that's great; if it doesn't, f-air has such low end lag that it shouldn't matter and the opponent will at least be put on notice that they can't just dash in without fear.
Unlike n-air, you can do a short hop f-air and still double jump afterwards if you need to escape. Just note that due to the new buffering system, if you want to do a short hop f-air then immediately double jump n-air or airdodge or anything, you must wait until the double jump actually comes out before doing any other input; otherwise the double jump input will be overridden. This is just to say, do your other input slightly later, and don't try to buffer it with the double jump. If however you do want to land after a SH Fair, there's no point in landing with the Fair landing lag. You're better off either doing a Nair (even though the hitbox won't come out on a flat surface) so that you go through the lesser Nair landing lag, or you may as well use a special; though optimally, if you have one, you can throw a bomb.
F-air is amazing off-stage with its great range and kill power, allowing you to score very early kills. When used off-stage you can also guarantee that you'll be starting the f-air from a place of relative safety. Also, due to its low cool-down, you can catch people out of airdodge with something like n-air if they try to avoid the f-air.
B-air

Description: Toon Link swings his sword behind himself.
Damage: 11%, 10%, 9%, 8%, 7%, 7%, 6%, 6%, 6%, 5%
Knockback: 6 ft. at 0%, 75 ft. at 100%
Frame data: Hits on frame 7 and lasts until frame 9. Has 17 frames of landing lag.
Summary: B-air is basically the complimentary counterpart to f-air in many respects. Where f-air comes out slowly and has almost no ending lag, b-air comes out quickly and has ending lag for days. This greatly affects how it's used. The most notable thing about b-air is its enormous horizontal range. It has the largest horizontal range out of all of Toon Link's aerials (not including z-air). The animation for b-air doesn't come close to doing it justice. If you wanted to know where the missing hitboxes for n-air went, they can be found on b-air. To give you an idea, its horizontal range is roughly equal to a d-smash, if not slightly larger. With that well-noted, b-air should be used as a retreating spacing tool. It won't combo into anything and the long ending lag will leave you vulnerable if you stick around. However, as an option to be pulled out in a tight spot, with its great range and quick start-up, if used while moving away from the opponent, it is brilliant. B-air doesn't get any early kills, but it is a notable kill move at high percents.
U-air
Description: Toon Link stabs the air above himself and stays in that position for a short period of time.
First part damage: 14%, 12%, 11%, 10%, 10%, 9%, 8%, 8%, 7%, 7%
Second part damage: 11%, 10%, 9%, 8%, 7%, 7%, 6%, 6%, 6%, 5%
First part knockback: 6 ft. at 0%, 78 ft. at 100%
Second part knockback: 6 ft. at 0%, 55 ft. at 100%
Frame data: Hits on frame 11 and lasts until frame 40. Has 21 frames of landing lag.
Summary: U-air is one of Toon Link's best kill moves. It has high knockback in and of itself, and when used high up out of a double jump it can kill very early. Its long lasting hitbox combined with Toon Link's great overall mobility, along with bombs and the boomerang to combo into a u-air out of or pressure opponents into airdodges, means that landing it is not that difficult, either. Throwing bombs down and assuming that they will send the opponent up towards you is a great way to get u-air to hit for a kill, and it flows naturally out of the spam game. Having said this, it should not be used to fish for kills on opponents with high aerial mobility unless they were recently in hitstun. Putting them in this position is not difficult and can be accomplished by anything from a u-throw to a u-tilt or even a dash attack; it doesn't matter, really. If the opponent was recently in hitstun this stops them from gaining any momentum in any direction, making their aerial mobility becomes useless to avoid you. Since they will be unable to fast fall until they start to fall back down again, this means that their airdodge becomes useless as well. The point is, you don't need to combo into u-air in order for it to be unavoidable in many situations, and the hitstun in Smash 4 will often be enough, anyway. Also, it's common for an opponent to double jump to avoid the u-air. Forcing the opponent to use their double jump is good as long as you take advantage of their now limited options, and conditioning the opponent into thinking that they can always just double jump to avoid you can be used against them to win a game by capitalising on their habit when it counts.
When u-air is not killing, it is great for juggling the opponent when mixed up with bombs and fast falling into grounded options. It does a good amount of damage and obviously ensures that the opponent stays in the air where they won't be able to regain a lost double jump. Often when attempting to beat out airdodges you will have to fast fall the u-air, and this must be done by hitting fast fall after you've used u-air even if you had already fast falled before using u-air. Again though, it must be stressed that u-air should be used sparingly even for juggling purposes on opponents with high aerial mobility. It is a much wiser choice to simply cover their landing than to throw out a u-air for them to avoid and give them the ground to land on freely while you're stuck in the u-air animation. Landing is much less safe in smash 4 than it was in Brawl; you would do well to take advantage of that.
D-air

Description: Toon Link holds his sword underneath himself and dives downwards.
Spike damage: 16%, 14%, 13%, 12%, 11%, 10%, 9%, 9%, 8%, 8%
Non-spike damage: 12%, 11%, 10%, 9%, 8%, 7%, 7%, 6%, 6%, 6%
Spike knockback: 9 ft. at 0%, 55 ft. at 100%
Non-spike knockback: 13 ft. at 0%, 82 ft. at 100%
Frame data: Hits on frame 17 and lasts until frame 64. Has 40 frames of landing lag.
Summary: D-air is not a move that you should be using often. However, this isn't to say that the move is completely useless. Its amazing priority and damage makes it a great punish against most characters if they're being too aggressive careless about attacking you from below in the air. Other than this, going for a spike with d-air when an opponent is above the stage is generally not a good idea since d-air has so much landing lag that the opponent can tech the spike and still have time to punish you. Trying to d-air the opponent when they're on the stage is even worse since d-air is going to be harder to land, and it will make you even more likely to end up punished. D-airing off-stage will just make you plummet to your death even if the d-air hits unless you manage to successfully manuever yourself back to the stage after d-air connects (which is impossible most of the time because TL's mobility is still too limited after d-air connects). It can also be used out of a bomb fakeout, but this will be explained in more detail later.
There's still one other place where the move can be used: when the opponent has lost their invincibility on the ledge. D-airing at the very edge of the stage while above an opponent without invincibility, when done correctly, will hit the opponent, resulting in a spike, while Toon Link will stay on the stage. Since ledge re-grabs no longer have invincibility in Smash 4, this makes a d-air spike on an opponent on the ledge much easier to land. Another thing is that, if you ledge trump and opponent and they re-grab the ledge, since they have no invincibility and grabbing the ledge leaves them temporarily unable to move, this leaves them completely open to getting spiked.
Other than that, the spike on d-air generally will not help you unless you're holding a bomb. With a bomb, d-air instantly becomes more useful for off-stage spikes as long as you time it right. This is because, when done correctly, the bomb will blow up before you fall to your death, stopping the d-air and allowing you to attempt to get back to the stage.
In order to do this, you have to re-catch a bomb with d-air using a bomb fake-out, and
the fuse has to be short enough that it will blow up before you hit the bottom blast zone, but long enough so dair can still actually hit before the bomb blows up.
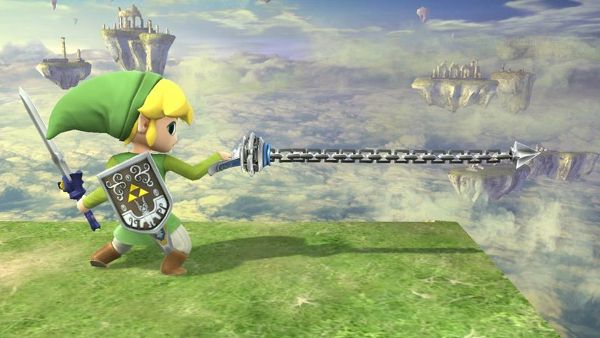
Z-air/Tether
Z-air
![]()
Description: Toon Link extends his hookshot in front of himself to attack over a long range.
Damage: 4%, 3%, 3%, 3%, 2%, 2%, 2%, 2%, 2%, 2%
Knockback: 9 ft. at 0%, 16 ft. at 100%
Summary: Zair is primarily used as a spacing and combo starting tool. If you're using it for spacing, you want to time it so that it fully extends just before you land so that you can immediately begin to cancel the move. Used in this way it can be an effective poking tool by hitting the opponent with the tip to take full advantage of the disjoint. Zair does have some landing lag (8 frames) and it doesn't do very much shield-stun, which means it will not be safe on shield if you land right in front of the opponent. You also typically don't want to airdodge then cancel the airdodge with Zair except under certain circumstances, e.g. if you need to Zair while holding the Bomb or you intend to 'edge cancel' the lag. This is because the airdodge landing lag will be transferred over to the Zair such that if you land at any point during the entire Zair animation, you will have to go through the heavy landing lag of the airdodge. Because of this, you will want to use Zair by only pressing the grab button, but doing this sometimes has strange and unwanted effects. For example if you jump and use an aerial or a special or throw a bomb, then before doing anything else you want to use a Zair, you're going to have some difficulty. For each action you perform, there will come a point in that action's animation in which you can cancel any of the remaining animation by doing another action; this is known as the First Actionable Frame (FAF). The problem with just hitting grab to use Zair is that if you do it at or after the FAF but before the entire animation has ended, Toon will airdodge instead. This airdodge can of course be cancelled with a Zair, but then you have the issues referred to earlier. Typically then you will be using Zair out of empty SH's or while landing after an empty DJ such that there were no actions used before the Zair. A similar problem occurs if you want to use Zair after being hit. When you get hit your character will enter hitstun in which you cannot do any actions at all; actions can be inputted just before hitstun ends in order to buffer them such that they are performed as soon as hitstun ends. But if you try to buffer a Zair out of hitstun, you'll just get an airdodge, meaning that if you want to use Zair after being hit, you want to make sure that hitstun has ended. Note that the opposite occurs when you are holding a Bomb however. If you get hit while holding a bomb and you input a grab just before hitstun has ended you will buffer a Zair while holding the Bomb. To use the Zair for combos you need to use it as you're drifting forwards and have it hit as you're landing, and hit the opponent up closer than you would for spacing purposes. Then depending on what you want to combo into, you may need to wait a small amount of time to input the Dash forwards. Zair used in this way can be used to combo into pretty much anything depending on a range of factors. It has a small amount of growth knockback, meaning that it will combo into different things, including potentially Fair at higher percents.
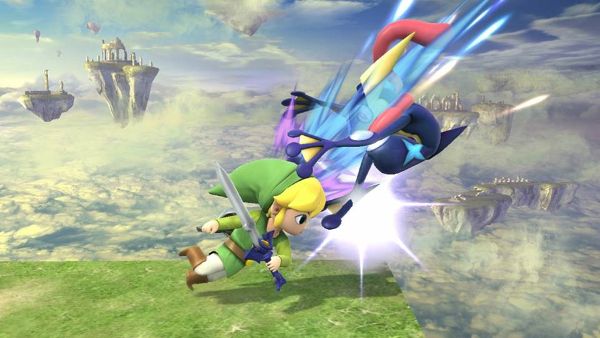
Tether
![]()
Successful tether
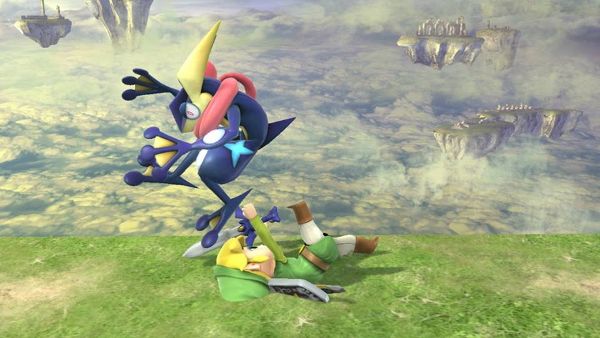
![]()
Missed tether
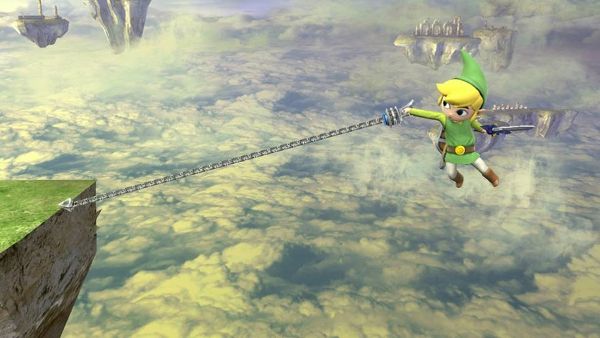
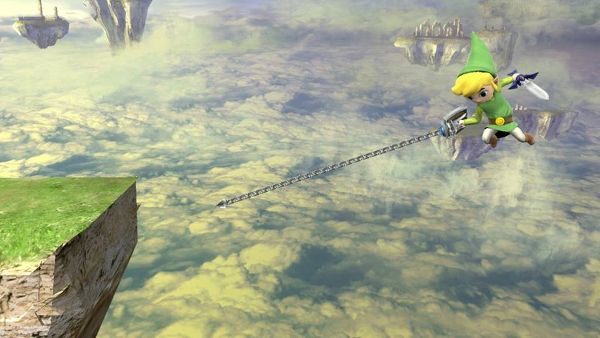
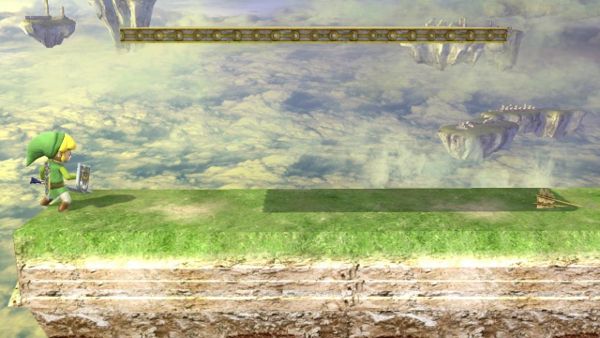
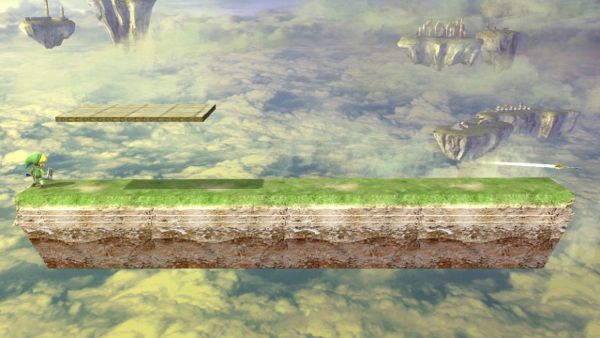
Description: Toon Link extends his tether to snap on to a ledge.
Summary: Tethering to the ledge is the preferred method of recovery for a few reasons. It is quicker than using Up-special to snap to the ledge, leaving less time for the opponent to gimp you. It also allows you to do any action from the ledge immediately, unlike grabbing the ledge in any other way. You can tether the ledge while holding a Bomb by airdodging first, which is super useful for recovery purposes or if you just want to Z-drop a Bomb out of your ledge jump. It is because of the property that allows you to act immediately on the ledge that the Tether Trump is possible. For further details look up Tether Trumping in the AT thread. Note also that because you can act immediately on the ledge from a tether, ledge options can be buffered, often accidentally if you don't know what to do. For example if you hit the grab button to reel in the tether and you're not quick enough it will buffer a ledge attack. In order to reel in the tether without buffering any ledge options then, the best way to do this is to hit up on the joystick (with tap-jump off). Tethering is clearly a valuable asset then, but there are a few things you need to be aware of in order to avoid failing a tether attempt which could cost you your stock. For a full write-up on this, check out this thread http://smashboards.com/threads/ledge-availability-and-why-tether-sometimes-doesnt-work.384628/. A few of these, as indicated, can be avoided by always deliberately airdodging then canceling that airdodge with a tether. For others it will simply be a matter of waiting a bit longer than you'd like before going for the tether. Before reeling in the tether, you can cancel it, usually done almost immediately, by hitting down on the joystick. This is usually used to trick opponents who intended to punish the tether. If you hit down lightly this will cancel the tether without fast falling, and when used after the swing towards the stage, it can be used for the purposes of recovering under the stage to the other side, assuming you still have your DJ.
Description: Toon Link extends his hookshot in front of himself to attack over a long range.
Damage: 4%, 3%, 3%, 3%, 2%, 2%, 2%, 2%, 2%, 2%
Knockback: 9 ft. at 0%, 16 ft. at 100%
Summary: Zair is primarily used as a spacing and combo starting tool. If you're using it for spacing, you want to time it so that it fully extends just before you land so that you can immediately begin to cancel the move. Used in this way it can be an effective poking tool by hitting the opponent with the tip to take full advantage of the disjoint. Zair does have some landing lag (8 frames) and it doesn't do very much shield-stun, which means it will not be safe on shield if you land right in front of the opponent. You also typically don't want to airdodge then cancel the airdodge with Zair except under certain circumstances, e.g. if you need to Zair while holding the Bomb or you intend to 'edge cancel' the lag. This is because the airdodge landing lag will be transferred over to the Zair such that if you land at any point during the entire Zair animation, you will have to go through the heavy landing lag of the airdodge. Because of this, you will want to use Zair by only pressing the grab button, but doing this sometimes has strange and unwanted effects. For example if you jump and use an aerial or a special or throw a bomb, then before doing anything else you want to use a Zair, you're going to have some difficulty. For each action you perform, there will come a point in that action's animation in which you can cancel any of the remaining animation by doing another action; this is known as the First Actionable Frame (FAF). The problem with just hitting grab to use Zair is that if you do it at or after the FAF but before the entire animation has ended, Toon will airdodge instead. This airdodge can of course be cancelled with a Zair, but then you have the issues referred to earlier. Typically then you will be using Zair out of empty SH's or while landing after an empty DJ such that there were no actions used before the Zair. A similar problem occurs if you want to use Zair after being hit. When you get hit your character will enter hitstun in which you cannot do any actions at all; actions can be inputted just before hitstun ends in order to buffer them such that they are performed as soon as hitstun ends. But if you try to buffer a Zair out of hitstun, you'll just get an airdodge, meaning that if you want to use Zair after being hit, you want to make sure that hitstun has ended. Note that the opposite occurs when you are holding a Bomb however. If you get hit while holding a bomb and you input a grab just before hitstun has ended you will buffer a Zair while holding the Bomb. To use the Zair for combos you need to use it as you're drifting forwards and have it hit as you're landing, and hit the opponent up closer than you would for spacing purposes. Then depending on what you want to combo into, you may need to wait a small amount of time to input the Dash forwards. Zair used in this way can be used to combo into pretty much anything depending on a range of factors. It has a small amount of growth knockback, meaning that it will combo into different things, including potentially Fair at higher percents.
Tether
Successful tether
Missed tether
Description: Toon Link extends his tether to snap on to a ledge.
Summary: Tethering to the ledge is the preferred method of recovery for a few reasons. It is quicker than using Up-special to snap to the ledge, leaving less time for the opponent to gimp you. It also allows you to do any action from the ledge immediately, unlike grabbing the ledge in any other way. You can tether the ledge while holding a Bomb by airdodging first, which is super useful for recovery purposes or if you just want to Z-drop a Bomb out of your ledge jump. It is because of the property that allows you to act immediately on the ledge that the Tether Trump is possible. For further details look up Tether Trumping in the AT thread. Note also that because you can act immediately on the ledge from a tether, ledge options can be buffered, often accidentally if you don't know what to do. For example if you hit the grab button to reel in the tether and you're not quick enough it will buffer a ledge attack. In order to reel in the tether without buffering any ledge options then, the best way to do this is to hit up on the joystick (with tap-jump off). Tethering is clearly a valuable asset then, but there are a few things you need to be aware of in order to avoid failing a tether attempt which could cost you your stock. For a full write-up on this, check out this thread http://smashboards.com/threads/ledge-availability-and-why-tether-sometimes-doesnt-work.384628/. A few of these, as indicated, can be avoided by always deliberately airdodging then canceling that airdodge with a tether. For others it will simply be a matter of waiting a bit longer than you'd like before going for the tether. Before reeling in the tether, you can cancel it, usually done almost immediately, by hitting down on the joystick. This is usually used to trick opponents who intended to punish the tether. If you hit down lightly this will cancel the tether without fast falling, and when used after the swing towards the stage, it can be used for the purposes of recovering under the stage to the other side, assuming you still have your DJ.
Specials
Arrow
![]()
Bow
![]()
Uncharged arrow
![]()
Fully charged arrow
In-game description: Fire an arrow with your bow. Charge it up for more power and range.
Uncharged damage: 4%, 3%, 3%, 3%, 2%, 2%, 2%, 2%, 2%, 2%
Charged damage: 12%, 11%, 10%, 9%, 8%, 7%, 7%, 6%, 6%, 6%
Uncharged knockback: 0 ft. at 0%, 3 ft. at 100%
Charged knockback: 0 ft. at 0%, 13 ft. at 100%
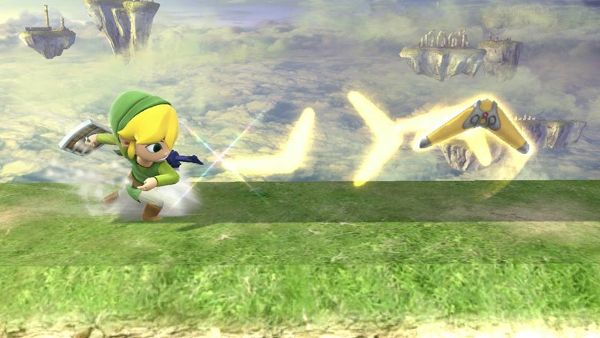
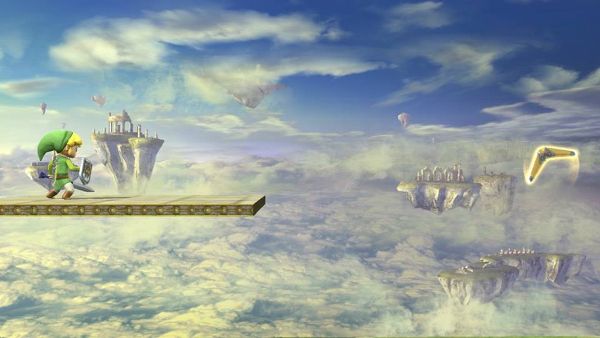
Boomerang
![]()
Boomerang toss
![]()
Max distance
In-game description: Deals damage on its way out and on its way back. Can be thrown diagonally.
Outward damage: 8%, 7%, 6%, 6%, 5%, 5%, 4%, 4%, 4%, 4%
Before return damage: 5%, 4%, 4%, 3%, 3%, 3%, 3%, 2%, 2%, 2%
Return damage: 3%, 2%, 2%, 2%, 2%, 1%, 1%, 1%, 1%, 1%
Outward knockback: 9 ft. at 0%, 26 ft. at 100%
Before return knockback: 6 ft. at 0%, 19 ft. at 100%
Return knockback: 9 ft. at 0%, 9 ft. at 100%
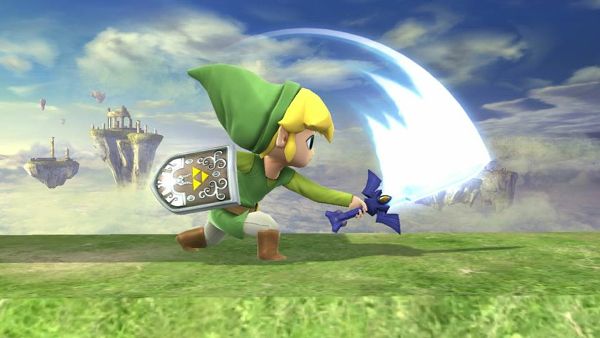
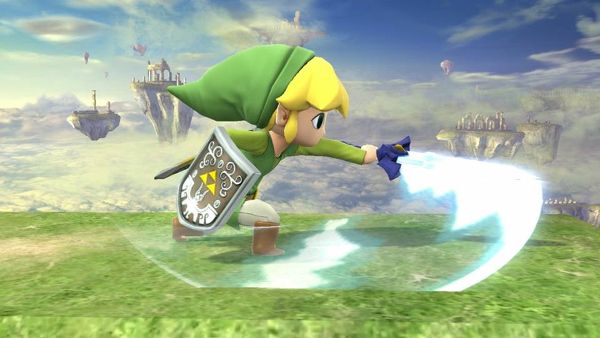
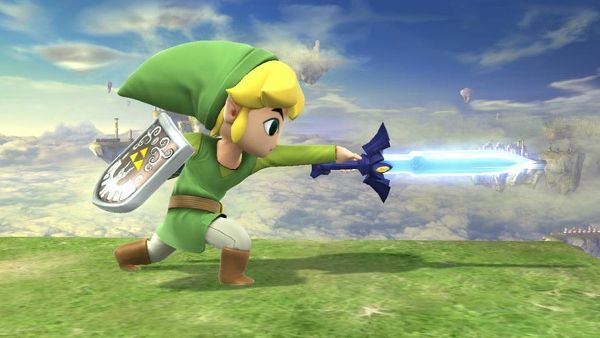
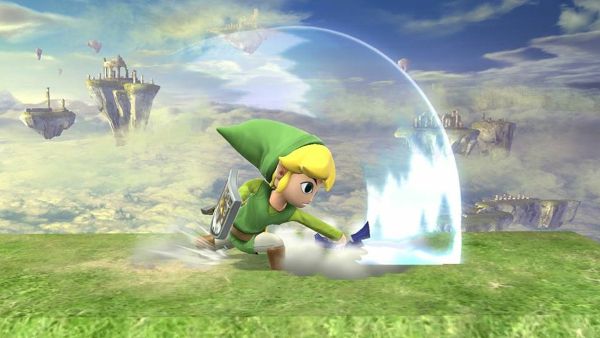
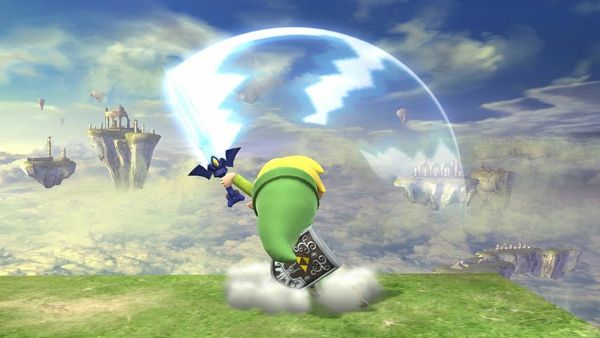
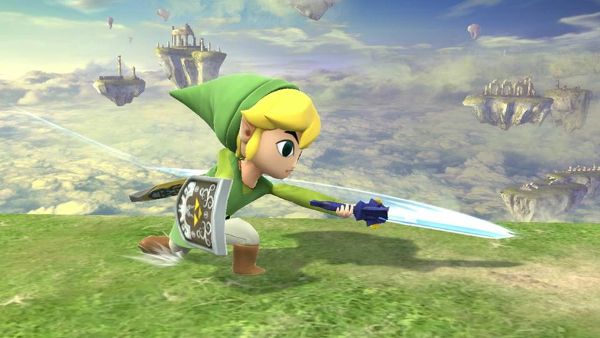
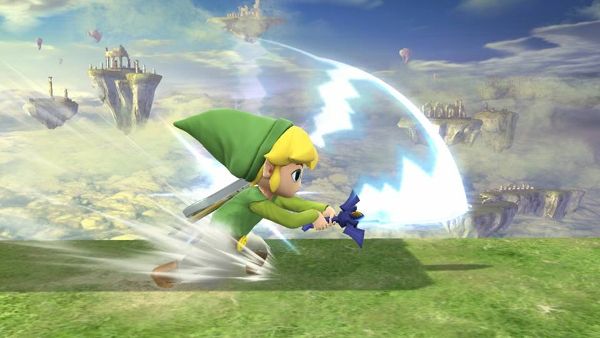
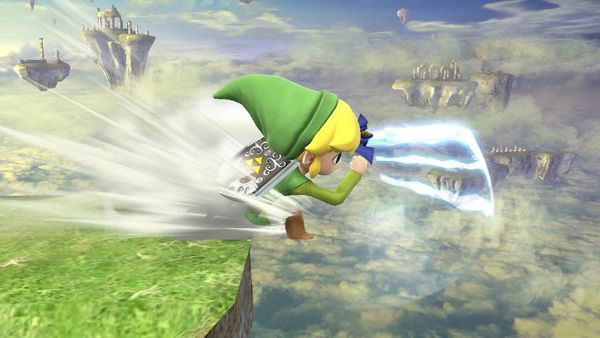
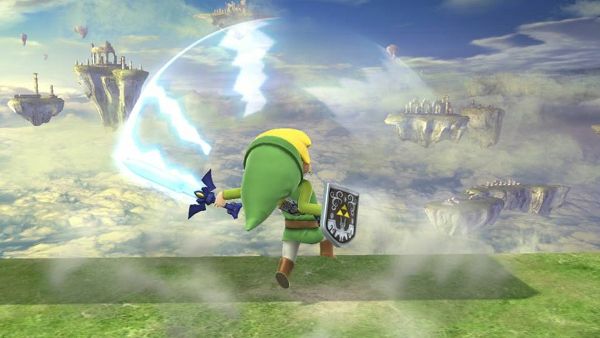
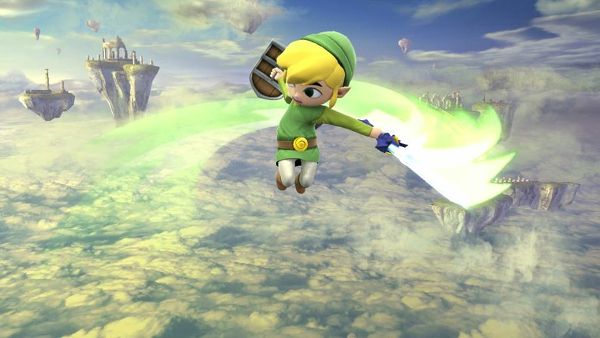
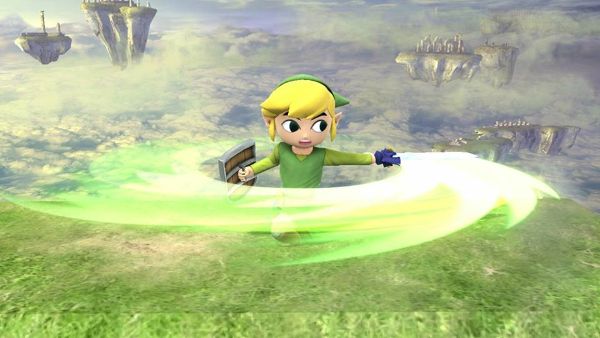
Spin Attack
![]()
Aerial
![]()
Grounded
In-game description: Spin with your sword. Can hit opponents more than once and can be charged.
Aerial damage: 14%, 12%, 11%, 10%, 10%, 9%, 8%, 8%, 7%, 7%
Grounded damage, uncharged: 12%, 11%, 10%, 9%, 8%, 7%, 7%, 6%, 6%, 6%
Grounded damage, charged: 20%, 17%, 16%, 14%, 13%, 12%, 11%, 11%, 10%, 10%
Aerial knockback: 52 ft. at 0%, 98 ft. at 100%
Grounded knockback: 52 ft. at 0%, 91 ft. at 100%
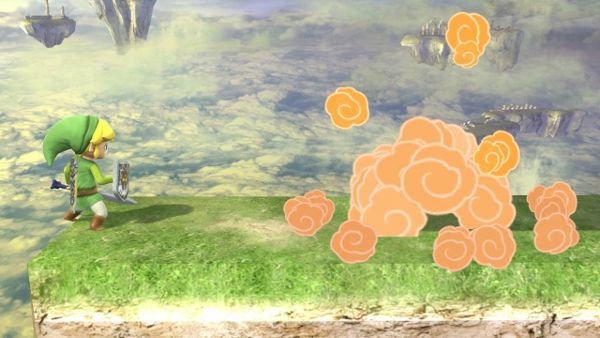
Bomb
![]()
Bomb pull
![]()
Bomb explosion
In-game description: Pull out a throwable bomb. It'll explode after a while or when it hits something.
Direct hit damage: 4%. Doesn't stale.
Direct hit knockback: 6 ft. at 0%, 22 ft. at 100%
Bow
Uncharged arrow
Fully charged arrow
In-game description: Fire an arrow with your bow. Charge it up for more power and range.
Uncharged damage: 4%, 3%, 3%, 3%, 2%, 2%, 2%, 2%, 2%, 2%
Charged damage: 12%, 11%, 10%, 9%, 8%, 7%, 7%, 6%, 6%, 6%
Uncharged knockback: 0 ft. at 0%, 3 ft. at 100%
Charged knockback: 0 ft. at 0%, 13 ft. at 100%
Boomerang
Boomerang toss
Max distance
In-game description: Deals damage on its way out and on its way back. Can be thrown diagonally.
Outward damage: 8%, 7%, 6%, 6%, 5%, 5%, 4%, 4%, 4%, 4%
Before return damage: 5%, 4%, 4%, 3%, 3%, 3%, 3%, 2%, 2%, 2%
Return damage: 3%, 2%, 2%, 2%, 2%, 1%, 1%, 1%, 1%, 1%
Outward knockback: 9 ft. at 0%, 26 ft. at 100%
Before return knockback: 6 ft. at 0%, 19 ft. at 100%
Return knockback: 9 ft. at 0%, 9 ft. at 100%
Spin Attack
Aerial
Grounded
In-game description: Spin with your sword. Can hit opponents more than once and can be charged.
Aerial damage: 14%, 12%, 11%, 10%, 10%, 9%, 8%, 8%, 7%, 7%
Grounded damage, uncharged: 12%, 11%, 10%, 9%, 8%, 7%, 7%, 6%, 6%, 6%
Grounded damage, charged: 20%, 17%, 16%, 14%, 13%, 12%, 11%, 11%, 10%, 10%
Aerial knockback: 52 ft. at 0%, 98 ft. at 100%
Grounded knockback: 52 ft. at 0%, 91 ft. at 100%
Bomb

Bomb pull
Bomb explosion
In-game description: Pull out a throwable bomb. It'll explode after a while or when it hits something.
Direct hit damage: 4%. Doesn't stale.
Direct hit knockback: 6 ft. at 0%, 22 ft. at 100%
Throws
Grab
![]()
Frame Data: Normal grab starts on frame 12 and lasts until frame 18, dash grab starts on frame 14 and lasts until frame 20, and pivot grab starts on frame 15 and lasts until frame 21.
F-throw
![]()
Damage: 7%, 6%, 5%, 5%, 5%, 4%, 4%, 4%, 3%, 3%
Knockback: 16 ft. at 0%, 49 ft. at 100%
B-throw
![]()
Damage: 7%, 6%, 5%, 5%, 5%, 4%, 4%, 4%, 3%, 3%
Knockback: 19 ft. at 0%, 78 ft. at 100%
U-throw
![]()
Damage: 7%, 6%, 5%, 5%, 5%, 4%, 4%, 4%, 3%, 3%
Knockback: 13 ft. at 0%, 49 ft. at 100%
D-throw
![]()
Damage: 7%, 6%, 5%, 5%, 5%, 4%, 4%, 4%, 3%, 3%
Knockback: 19 ft. at 0%, 49 ft. at 100%
Frame Data: Normal grab starts on frame 12 and lasts until frame 18, dash grab starts on frame 14 and lasts until frame 20, and pivot grab starts on frame 15 and lasts until frame 21.
F-throw
Damage: 7%, 6%, 5%, 5%, 5%, 4%, 4%, 4%, 3%, 3%
Knockback: 16 ft. at 0%, 49 ft. at 100%
B-throw
Damage: 7%, 6%, 5%, 5%, 5%, 4%, 4%, 4%, 3%, 3%
Knockback: 19 ft. at 0%, 78 ft. at 100%
U-throw
Damage: 7%, 6%, 5%, 5%, 5%, 4%, 4%, 4%, 3%, 3%
Knockback: 13 ft. at 0%, 49 ft. at 100%
D-throw
Damage: 7%, 6%, 5%, 5%, 5%, 4%, 4%, 4%, 3%, 3%
Knockback: 19 ft. at 0%, 49 ft. at 100%
Custom Moves
Fire Arrow
![]()
Uncharged
![]()
Fully charged
In-game description: "Sets fire to the ground where the arrow lands, but the range is reduced."
Arrow damage: 2%, 1%, 1%, 1%, 1%, 1%, 1%, 1%, 1%, 1%
Ground hitbox damage: 6%, 5%, 5%, 4%, 4%, 3%, 3%, 3%, 3%, 3%
Arrow knockback: 0 ft. at 0%, 0 ft. at 100%
Ground hitbox knockback: 13 ft. at 0%, 29 ft. at 100%
Summary: Since the fire arrows leave a hitbox on the ground in front of Toon Link, this allows him to get other projectiles out while having the ground in front of himself covered. Because of this, it's probably best to pair the fire arrows with custom moves that can be fired over a long range. Combine long-ranged projectiles with the ground being covered by the fire arrows, and the opponent's approach options will be left more limited and easier to punish.
This isn't to say that the fire arrows are only good for camping, however. Once the opponent has approached, the fire arrows take on a very different and more aggressive role. They make an excellent tool for starting combos, particularly fire arrow to f-air or u-air. This is especially good at higher %s where it can lead to a kill. Some ways to start this up include placing a fire arrow where you predict the opponent will land, and placing a fire arrow on the ledge.
Overall, the fire arrows make a great edge guarding tool. When used on the edge, their lasting hitbox can severely limit the options of an opponent hanging on the ledge, since they're forced into jumping or rolling. This makes them much easier to read, which in turn makes it easier to knock them off-stage with f-air if they jump, or b-throw if they roll. Repeatedly reading well can lead to a lot of damage getting racked up on the opponent and even a kill.
Piercing Arrow
![]()
Uncharged
![]()
Fully charged
In-game description: "Fire a piercing arrow at high speed. Does less damage than normal arrows."
Uncharged damage: 1%, 0%, 0%, 0%, 0%, 0%, 0%, 0%, 0%, 0%
Charged damage: 6%, 5%, 5%, 4%, 4%, 3%, 3%, 3%, 3%, 3%
Uncharged knockback: 0 ft. at 0%, 0 ft. at 100%
Charged knockback: 0 ft. at 0%, 0 ft. at 100%
Floating Boomerang
![]()
Floating boomerang toss
![]()
Max distance
In-game description: "Throw a boomerang that's slow to return. It'll vanish if it hits anything on its way back."
Damage: 4%, 3%, 3%, 3%, 2%, 2%, 2%, 2%, 2%, 2%
Knockback: 0 ft. at 0%, 3 ft. at 100%
High-Speed Boomerang
![]()
High-speed boomerang toss
![]()
Max distance
In-game description: "Throw a high-speed boomerang that passes through fighters. Deals less damage than normal."
Outward damage: 3%, 2%, 2%, 2%, 2%, 1%, 1%, 1%, 1%, 1%
Return damage: 1%, 0%, 0%, 0%, 0%, 0%, 0%, 0%, 0%, 0%
Outward knockback: 13 ft. at 0%, 19 ft. at 100%
Return Knockback: 3 ft. at 0%, 3 ft. at 100%
Sliding Spin Attack
![]()
Aerial
![]()
Grounded
In-game description: "Slide forward while spinning. If used in the air, you'll move more sideways than up."
Damage: 10%, 9%, 8%, 7%, 7%, 6%, 6%, 5%, 5%, 5%
Aerial knockback: 59 ft. at 0%, 101 ft. at 100%
Grounded knockback: 19 ft. at 0%, 59 ft. at 100%
Flying Spin Attack
![]()
Aerial
![]()
Grounded
In-game description: "A spin attack that ends in an upward slash, sending both you and the slashee into the air."
Aerial damage: 14%, 12%, 11%, 10%, 10%, 9%, 8%, 8%, 7%, 7%
Grounded damage, uncharged: 14%, 12%, 11%, 10%, 10%, 9%, 8%, 8%, 7%, 7%
Grounded damage, charged: 23%, 20%, 18%, 17%, 16%, 14%, 12%, 12%, 11%, 11%
Aerial knockback: 59 ft. at 0%, 101 ft. at 100%
Grounded knockback: 59 ft. at 0%, 98 ft. at 100%
Time Bomb
![]()
In-game description: "The bomb explodes only when its fuse runs out. Does less damage but launches foes."
Damage: 1%. Doesn't stale.
Knockback: 36 ft. at 0%, 68 ft. at 100%
Short-Fuse Bomb
![]()
![]()
Explosion
In-game description: "A powerful bomb with a very short fuse. The explosion sends fighters flying upward."
Direct hit damage: 10%. Doesn't stale.
Direct hit knockback: 13 ft. at 0%, 65 ft. at 100%
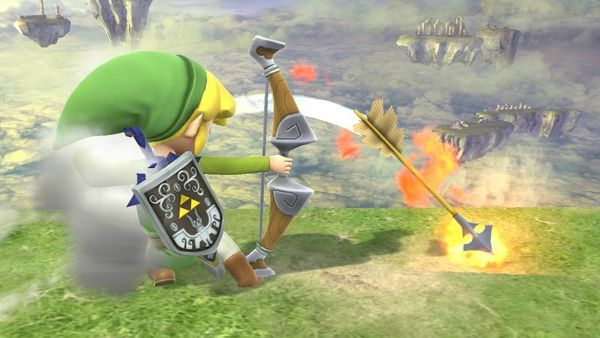
Uncharged
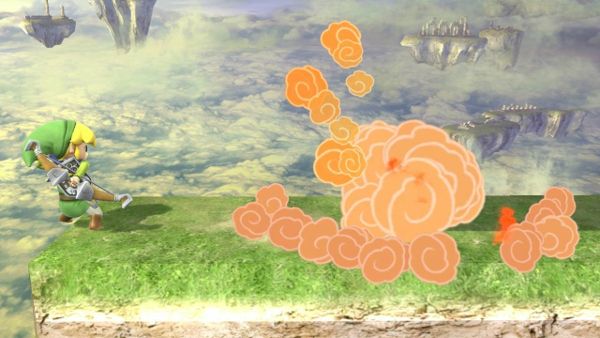
Fully charged
In-game description: "Sets fire to the ground where the arrow lands, but the range is reduced."
Arrow damage: 2%, 1%, 1%, 1%, 1%, 1%, 1%, 1%, 1%, 1%
Ground hitbox damage: 6%, 5%, 5%, 4%, 4%, 3%, 3%, 3%, 3%, 3%
Arrow knockback: 0 ft. at 0%, 0 ft. at 100%
Ground hitbox knockback: 13 ft. at 0%, 29 ft. at 100%
Summary: Since the fire arrows leave a hitbox on the ground in front of Toon Link, this allows him to get other projectiles out while having the ground in front of himself covered. Because of this, it's probably best to pair the fire arrows with custom moves that can be fired over a long range. Combine long-ranged projectiles with the ground being covered by the fire arrows, and the opponent's approach options will be left more limited and easier to punish.
This isn't to say that the fire arrows are only good for camping, however. Once the opponent has approached, the fire arrows take on a very different and more aggressive role. They make an excellent tool for starting combos, particularly fire arrow to f-air or u-air. This is especially good at higher %s where it can lead to a kill. Some ways to start this up include placing a fire arrow where you predict the opponent will land, and placing a fire arrow on the ledge.
Overall, the fire arrows make a great edge guarding tool. When used on the edge, their lasting hitbox can severely limit the options of an opponent hanging on the ledge, since they're forced into jumping or rolling. This makes them much easier to read, which in turn makes it easier to knock them off-stage with f-air if they jump, or b-throw if they roll. Repeatedly reading well can lead to a lot of damage getting racked up on the opponent and even a kill.
Piercing Arrow
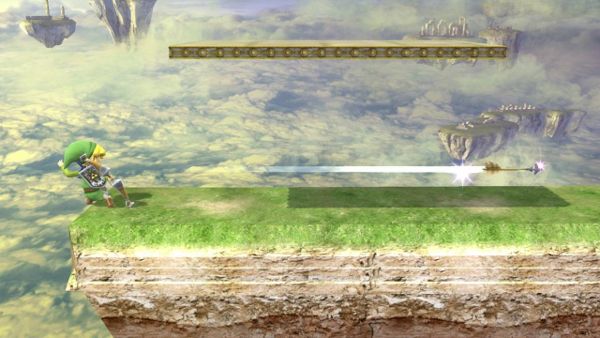
Uncharged
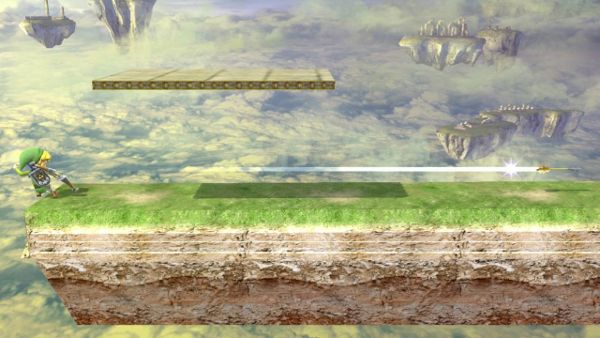
Fully charged
In-game description: "Fire a piercing arrow at high speed. Does less damage than normal arrows."
Uncharged damage: 1%, 0%, 0%, 0%, 0%, 0%, 0%, 0%, 0%, 0%
Charged damage: 6%, 5%, 5%, 4%, 4%, 3%, 3%, 3%, 3%, 3%
Uncharged knockback: 0 ft. at 0%, 0 ft. at 100%
Charged knockback: 0 ft. at 0%, 0 ft. at 100%
Floating Boomerang
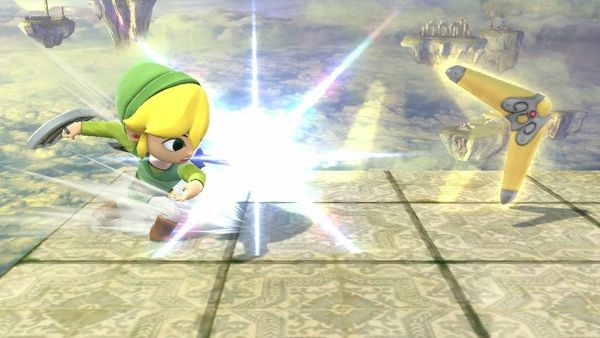
Floating boomerang toss
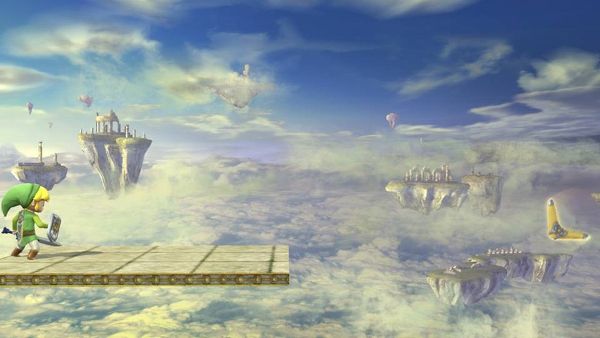
Max distance
In-game description: "Throw a boomerang that's slow to return. It'll vanish if it hits anything on its way back."
Damage: 4%, 3%, 3%, 3%, 2%, 2%, 2%, 2%, 2%, 2%
Knockback: 0 ft. at 0%, 3 ft. at 100%
High-Speed Boomerang
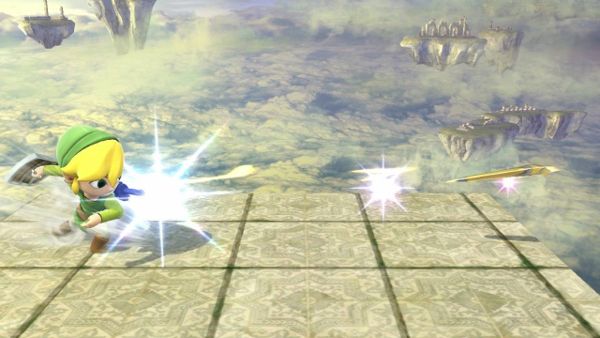
High-speed boomerang toss
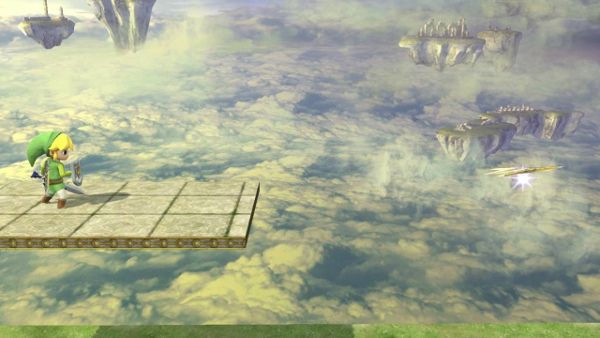
Max distance
In-game description: "Throw a high-speed boomerang that passes through fighters. Deals less damage than normal."
Outward damage: 3%, 2%, 2%, 2%, 2%, 1%, 1%, 1%, 1%, 1%
Return damage: 1%, 0%, 0%, 0%, 0%, 0%, 0%, 0%, 0%, 0%
Outward knockback: 13 ft. at 0%, 19 ft. at 100%
Return Knockback: 3 ft. at 0%, 3 ft. at 100%
Sliding Spin Attack
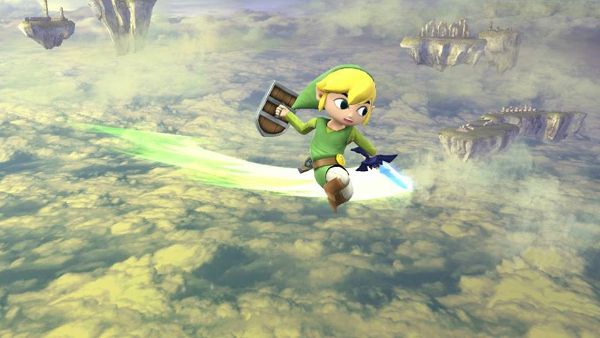
Aerial
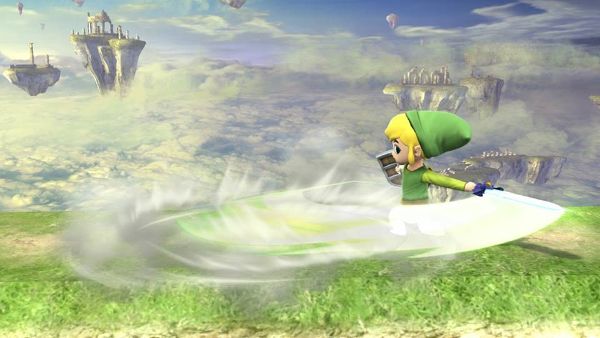
Grounded
In-game description: "Slide forward while spinning. If used in the air, you'll move more sideways than up."
Damage: 10%, 9%, 8%, 7%, 7%, 6%, 6%, 5%, 5%, 5%
Aerial knockback: 59 ft. at 0%, 101 ft. at 100%
Grounded knockback: 19 ft. at 0%, 59 ft. at 100%
Flying Spin Attack
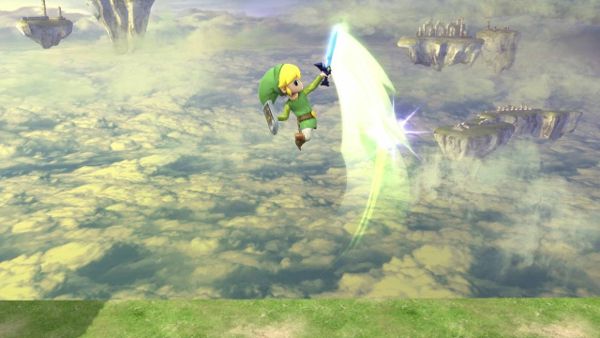
Aerial
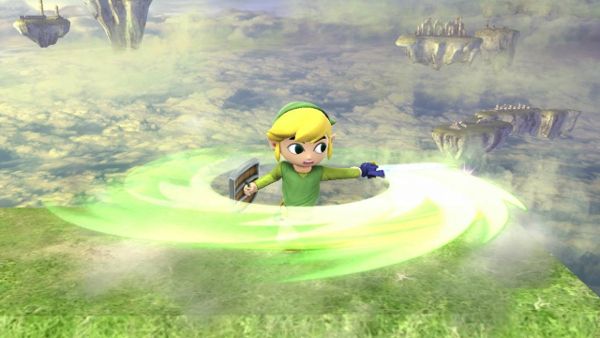
Grounded
In-game description: "A spin attack that ends in an upward slash, sending both you and the slashee into the air."
Aerial damage: 14%, 12%, 11%, 10%, 10%, 9%, 8%, 8%, 7%, 7%
Grounded damage, uncharged: 14%, 12%, 11%, 10%, 10%, 9%, 8%, 8%, 7%, 7%
Grounded damage, charged: 23%, 20%, 18%, 17%, 16%, 14%, 12%, 12%, 11%, 11%
Aerial knockback: 59 ft. at 0%, 101 ft. at 100%
Grounded knockback: 59 ft. at 0%, 98 ft. at 100%
Time Bomb
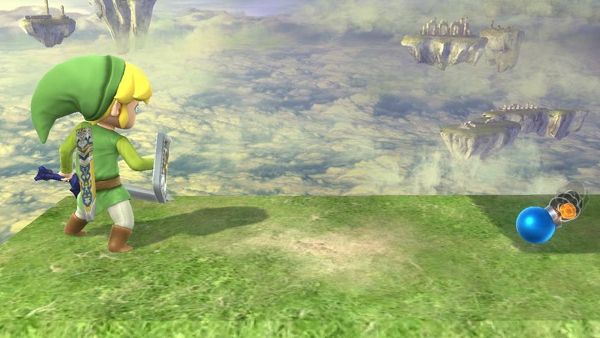
In-game description: "The bomb explodes only when its fuse runs out. Does less damage but launches foes."
Damage: 1%. Doesn't stale.
Knockback: 36 ft. at 0%, 68 ft. at 100%
Short-Fuse Bomb
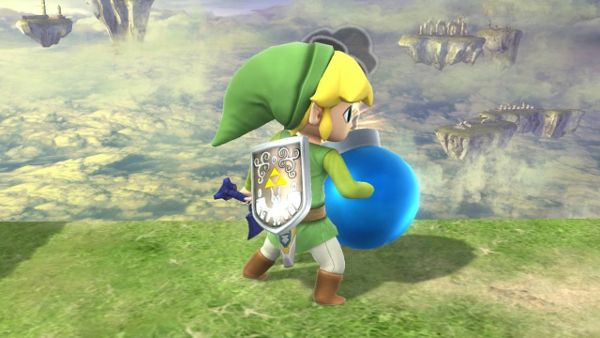
Explosion
In-game description: "A powerful bomb with a very short fuse. The explosion sends fighters flying upward."
Direct hit damage: 10%. Doesn't stale.
Direct hit knockback: 13 ft. at 0%, 65 ft. at 100%
Miscellaneous
Pummel
![]()
Damage: 2%, 1%, 1%, 1%, 1%, 1%, 1%, 1%, 1%, 1%
Frame data: Comes out on frame 9.
Ledge Attack
![]()
Damage: 7%, 6%, 5%, 5%, 5%, 4%, 4%, 4%, 3%, 3%
Knockback: 22 ft. at 0%, 32 ft. at 100%
Get-Up Attack
![]()
Hit 1
![]()
Hit 2
Damage: 7%, 6%, 5%, 5%, 5%, 4%, 4%, 4%, 3%, 3%
Knockback: 22 ft. at 0%, 42 ft. at 100%
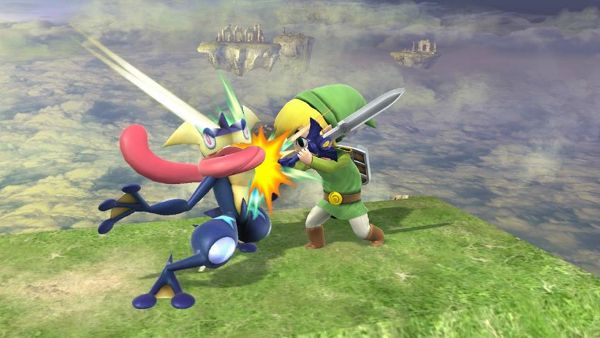
Damage: 2%, 1%, 1%, 1%, 1%, 1%, 1%, 1%, 1%, 1%
Frame data: Comes out on frame 9.
Ledge Attack
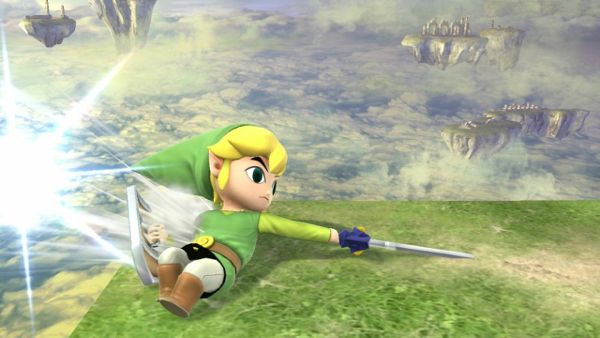
Damage: 7%, 6%, 5%, 5%, 5%, 4%, 4%, 4%, 3%, 3%
Knockback: 22 ft. at 0%, 32 ft. at 100%
Get-Up Attack
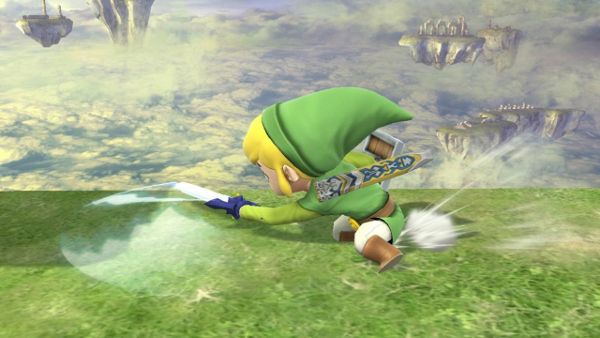
Hit 1
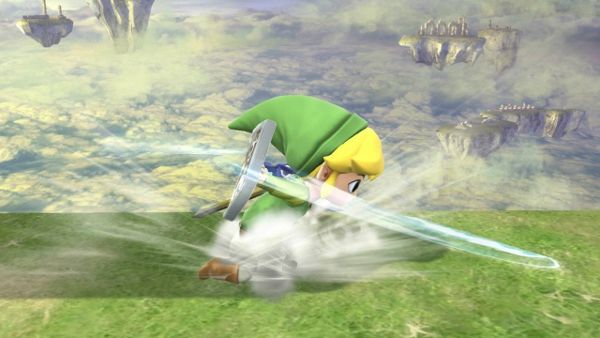
Hit 2
Damage: 7%, 6%, 5%, 5%, 5%, 4%, 4%, 4%, 3%, 3%
Knockback: 22 ft. at 0%, 42 ft. at 100%
Resources and Useful (Toon) Links
List of Toon Link's ATs
Match-up guides
Q&A thread
Frame data for all characters
Update History
Jan. 23, 2015- Posted
Jan. 25, 2015- Added summary information for jab, dash attack, and tilts.
Jan. 27, 2015- Added summaries and pictures for f-smash, u-smash, and d-smash, and added descriptions for the tilts.
Jan. 28, 2015- Added "Toon Link in Smash 4" and "Why to Pick Toon Link" sections.
Feb. 10, 2015- Added damage for the aerials, and summaries for f-air, b-air, and d-air.
Feb. 20, 2015- Added pictures, move descriptions, and summaries for moves that didn't have them. Also added frame data.
Mar. 4, 2015- Added summary information for n-air.
Apr. 9, 2015- Added all move sections, moves, and move pictures not added yet. Also added damage output for f-tilt, u-tilt, and the dash attack, and added frame data for grab.
Apr. 11, 2015- Added damage for all of the default specials, throws, miscellaneous moves, and u-smash.
Apr. 12, 2015- Added damage for all of the custom moves.
Apr. 14, 2015- Added summary information for the fire arrow, added knockback for every move, and in-game descriptions for specials and custom moves.
Aug. 29, 2015- Added summary information for z-air and tether.
Mar. 20, 2016- Added changes made to Toon in the 1.1.4 patch.
Credits
Thanks to Cam~ for suggesting the idea of making this guide.
Thanks to Cyrene for helping out with writing, editing, and move damage.
Thanks to Fox is Openly Deceptive for helping out with writing, the move summaries, and adding stuff into the guide when I've been unable to.
Thanks to Jash for help with getting the screenshots used for the moves in this guide, the “About Toon Link in The Legend of Zelda” section, and helping with the move summaries.
Thanks to Zan- for help with the pros and cons.
Thanks to TLMSheikant for help with the custom moves.
Last edited by a moderator:
 GL for the rest of the guide