Greninjuts-Two

A Beginner to Intermediate Guide to playing Greninja in Smash Ultimate – Written by Ludi (Colorado Greninja main)
My Twitter - www.twitter.com/ludiloco
Greninja Discord - https://discordapp.com/invite/V9hnnSp
My Twitter - www.twitter.com/ludiloco
Greninja Discord - https://discordapp.com/invite/V9hnnSp
TABLE OF CONTENTS:
I. Overview
II. Moveset and Where to Apply Moves
III. Movement
IV. Bread and Butter Combos/Damage Values
V. Moveset Damage Values
VI. Greninja’s Matchups
VII. Notable Greninja Players and Where to Find Them
VIII. Closing Notes/About the Author
FOREWORD:
Welcome! This guide is dedicated to anyone who is interested in picking up one of the most fun and rewarding characters in Smash: Greninja!
Greninja spent the majority of Smash 4’s lifespan hovering just below the threshold of viability and relevancy. Though several top representatives of the character had strong results, it was never quite enough to convince the scene of the character’s true power. The character boasted a blistering mobility kit that was one of the best in the game, a deep and diverse combo tree that was a delight for lab monsters, and one of the most unique kits for baiting and punishing foes.
While these things haven’t changed in the transition to Ultimate, the perception of the character has. Top players from all around the world have weighed in on how much better Greninja is in Ultimate. With many eyes on the character now, it’s inevitable that many new players will pick him up, but will run into many obstacles along the way. Greninja is not a character that can be used recklessly, nor is his kit immediately conducive to most playstyles.
By writing this guide it is my hope to ease some of those difficulties, provide answers for beginner Greninja players, and to make a case for Greninja being one of the strongest threats in the Ultimate metagame. Keep in mind, as this is a beginner to intermediate guide, I will be going over some general Smash terminology that you may not need explained if you are a more experienced player. Feel free to skip over these explanations as you see fit.
Note - Due to Smashboards' 20 file limit, I was not able to include pictures for every move. Here is a link to the original Google Doc, with all pictures and original formatting included. Enjoy!
https://docs.google.com/document/d/1iDBXSR4oyRpyswnvOD1LpVrD2BdAI7lD6HL3l5aLJ00
I. Overview
Greninja in Smash 4 was a character who didn’t neatly fall into typical archetypes. While he boasted one of the the best overall mobility kits in the game, his frame data left a lot to be desired when it came to speed. Since his moves were medium-to-large commitments in almost every scenario, Greninja chose to use his blistering speed to play a more bait-and-punish style, instead of pure rushdown. His goal in a lot of matchups was to use his long-range projectile Water Shuriken (Neutral B) to make opponents approach him. Once they had done so, Greninja could poke at them with his midrange tools and try to set up a combo starter. Greninja had one of the most diverse and deep combo trees in Smash 4, and a player that could utilize and execute his combos properly could often find themselves featured in combo and highlight videos. He also sported one of the best recoveries (and swiss army knives) in the game: Hydro Pump. The move served as a lighter version of Quick Attack (Pikachu/Pichu’s up special), allowing him to move in two different angles and providing nearly endless possibilities and mixups. This move could also be used offensively to mess with opposing recoveries, as it uses a water box that can push opponents and deal damage. All of these things combined to create a character who was truly unique.
You should consider playing Greninja if:
- You love fast characters and using movement to create openings
- You want to play a fan-favorite character with fun (and fun to watch) combos
- You’re looking for a character who is tougher to pick up but immensely rewarding
- You shy away from playing over-represented characters and want to help contribute to a character’s meta
- You want to be part of a great character community
- You love Greninja or Pokémon!
You may struggle with Greninja if:
- You rely a lot on shielding and using out of shield (oos) options as punishes
- You struggle to control very fast characters
- You struggle to use recoveries without a hitbox
In the following section, I will be going over Greninja’s moveset and explaining what each move is best used for. I will be going over which moves Greninja should be using in neutral, advantage, and disadvantage state. Here is a quick layman’s definition for each of these stages (feel free to skip this if you already know!):
Neutral: The state in which most of the game is played. Both players are on the stage, and neither has an advantage over the other. The goal is to find an opening on your opponent, land a hit, and transition the game into advantage state.
Advantage: When you have successfully scored a hit on your opponent and put them into a bad position. The goal is to continue to pressure and damage your opponent before they manage to reset to neutral. When your opponent has taken enough damage, the goal of advantage state is to knock them past a blast zone and take their stock.
Disadvantage: When your opponent has successfully scored a hit on you and put you in a bad position. Your goal is to return to the stage and reset to neutral while minimizing the damage you take from this exchange.
II. Moveset and where to apply moves
Neutral Tools
As stated, Greninja’s neutral relies a lot on his fantastic mobility. In the case of most characters, this would mean approaching their opponent is a cinch and a fundamental part of their overall gameplan. Although Greninja has had many of his approach options buffed (improved), most of them are still fairly linear. This means he wants to play bait and punish, approaching his opponent with a feint, and when the opponent contests his feint he punishes them for it. An important tool for Greninja’s bait and punish playstyle is his exceptional long-range projectile, water shuriken.
Water Shuriken (Or WS - Neutral B)
Water Shuriken is a long-range projectile that is useful for poking opponents and dealing damage when they are across the stage, trying to make you approach. These throwing stars can be used in quick succession, are annoying for many characters to deal with, and force a good portion of the cast to approach Greninja. When using this move, you can tap the B button to throw the smallest (and fastest) shuriken, hold the button down to charge up a Full Charged Water Shuriken (FCWS) which will release automatically, or release the button anywhere in between to throw a medium-sized shuriken. Good players will use a healthy dose of these to harass their opponents and deal damage from afar.
Movement tech – There are a few interesting movement techniques that can be implemented with water shuriken.
I. B Reverse/Turnaround Shuriken – When facing one direction, you can toss a B reverse (or turnaround) shuriken by pressing the b button and immediately pressing the opposite direction on the analog stick. You will reverse your momentum and turn around while throwing a shuriken. This is very useful while running away but still wanting to apply pressure, or for shifting your aerial momentum to mix up your opponent. This can be done while grounded, in the air, or out of a dash.
II. Shuriken Stall – When throwing a shuriken while airborne, Greninja will perform a small hop that will stop his momentum and can trip up opponents waiting to punish your landing. This can give you a little more time to plan around the options they’re covering. Note that this stall only applies to the first shuriken you throw each time you are airborne and throwing additional shurikens will make you fall normally.
Full Charged Water Shuriken (FCWS)
FCWS turns WS from a small poking projectile into a multi-hit move and combo tool. It travels the shortest distance of any shuriken variant and takes the longest to come out, but it is the strongest shuriken and the only variant that can be followed up on reliably. It can also poke through shields if they are damaged. FCWS holds the opponent inside of it for a while, allowing Greninja to run up behind it and follow up with another move. At higher percentages, FCWS can also kill, and can be used offstage to edgeguard low recoveries. At long range, FCWS can be fairly safe to throw out, and it is also a fantastic landing trap if your opponent chooses to not reset to ledge. Even if they do reset to ledge, FCWS can hit below the ledge (if they run out of ledge invincibility) and knock them off if they aren’t using a low-hanging character.
As the distance closes between Greninja and his opponent, the game shifts to mid-range play. At this range, shurikens are not always safe and it’s best for Greninja to change his gameplay. These are the tools most effective at mid-range in neutral.
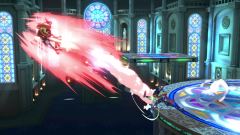
Forward Aerial (Fair or F-air)
Greninja unleashes one of his trusty water kunai, swinging at the air in front of him. The range on this attack is quite good, and this combined with the ability to fast fall and auto cancel it makes it exceptional at mid-range zoning. At max range, the move is safe on shields, but against characters without ranged attacks and out of shield options, you don’t really have to be that strict with your spacing. As long as you’re not jumping into shields with the move, it’s very difficult to punish on block. Fair is very powerful and can take stocks as early as 90% around the ledge. The timing on a short-hop fast fall Fair can be a little tricky at first, but with proper timing it is an essential tool. A good Greninja should be using this move frequently in neutral. It is also a fantastic move for edge guarding, though it does require some precision.
Dash Attack (DA)
Greninja rushes forward with a sweeping kick. This attack can be used to punish landings and whiffs (missed attacks) in neutral, to bait shield grabs with its good range and low cooldown, and to cross up shields (attack a shield but end up behind it). It is arguably Greninja’s best combo tool and has guaranteed follow-ups at most percentages. Greninja remains very low to the ground while using this move, making him able to slide under a lot of attacks. This move, while very much improved, is still somewhat predictable and linear as an approach option. Greninja players should be cautious using it, and mostly use it to punish badly spaced moves and poor landings from opponents.
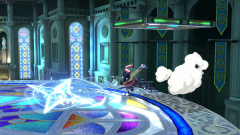
Neutral Aerial (Nair or N-air)
Greninja summons forth a pulse of water that surrounds him. Nair is one of Greninja’s most reliable tools for pressure and starting combos. While the move was already good in its smash 4 iteration, in Ultimate its landing lag was cut from 12 frames to 7. When coupled with Greninja’s frame 3 jab, landing on an opponent’s shield with nair and then initiating jab is faster than the opponent is able to perform an out of shield punish (nair is safe on shield!). You can also use this move to cross up shields. It is most effective when pairing it with a fast fall. To perform a fast fall nair properly, input the A button at the apex of Greninja’s short hop and then immediately hit down on the analog stick. The hitbox should end just as you are landing and the move should auto cancel properly. While nair is a decent approach option, keep in mind that you are still highly susceptible to being anti-aired or whiff punished yourself. When landed, the rewards from Nair are what make the move worth going for. It can combo into many moves at low % when landing the sweet spot (hitting with the early/center part of the hitbox) and can set up into kills with the sour spot at later % (hitting with the late/edge part of the hitbox). Some practice is necessary to get down the timing for landing a sweet or sour spot consistently, so don’t get discouraged. Neutral air does carry a slight disjoint and can often beat out moves with lower range.
Forward Tilt (F-Tilt)
F tilt was not an especially useful move in Smash 4, but it had decent range and was an okay poke that could be used while retreating. In Ultimate, with the new dash system, it can be used as an approach, a retreat, or just a safe poke on shields. It also had its knockback buffed and is a fairly low commitment option that can score a kill at the ledge around 150%. Greninja kicks out his leg fully extended, which provides the best range out of all of Greninja’s grounded moves. Try to implement it into your neutral to swat away opponents approaching on the ground.
Back Air (Bair)
The fastest of Greninja’s aerials, coming out on frame 5, Greninja’s back air unleashes a flurry of three kicks, dealing decent damage and knockback. This is a quick and effective follow up move, as well as a decent air-to-air/anti-air move. It is especially effective when coupled with a Reverse Aerial Rush (RAR), meaning you run forward and quickly turn around before jumping and continuing to approach with a back air. RAR back air is a reliable follow-up for a lot of Greninja’s moves and can set up very well into another back air or sometimes a shadow sneak read for an early kill. Bair is also probably Greninja’s best move for stage spiking, as the kicks come out very fast and don’t leave a lot of indication for when a tech input is required. It can also be used at high % when teching is no longer an option, and can kill off the sides fairly early if you catch someone deep offstage with it.
Dash Grab/Pivot Grab
Coupled with Greninja’s awesome movement speed, dash grab becomes a very quick and reliable punish with solid range. Greninja also sports one of the largest pivot grabs in the game, which is incredibly useful for whiff punishing and outranging stubbier opponents up close. To perform a pivot grab, you must run forward and then turn around and instantly grab.
When all else fails, Greninja will need to make the fight up close and personal. While this is not Greninja’s strongest position, he does possess a variety of tools to help him get opposing characters off of him and reset the distance that he likes. Here are the best tools to be using in this scenario
Jab
Coming out on frame 3, Greninja has one of the best jabs in the game. It is very quick, deals decent damage, has solid range, and gets other players out of your face so that you may resume your movement. Greninja’s jab can be ended in two ways: a one-two-three gentleman combo, or a rapid jab with a finisher. To execute the gentleman, you can tap the A button three times slowly and in rhythm with the animations, but a far easier way is to tap A to perform the first jab, and then hold the button to have the other two come out. As long as the first jab connects, you will always perform the last two simply by holding down the button. To perform the rapid jab, tap the A button quickly after landing the first jab. The rapid jab ultimately does more damage, but if you hold the opponent in it for too long you risk them falling out and punishing you. In most situations, you’ll want to default to the gentleman combo, but at the ledge, going for the rapid jab can be a nice way to tack on more damage since if they fall out they’ll likely end up offstage. Jab can also be used to reset (lock in place) an opponent who misses a tech on the ground. You can use up to two jabs to extend the lock, then finish the punish with a powerful forward smash! When setting up a jab lock, jab 1 is an excellent option to check if they missed the tech. If the tech was not missed using only jab 1 still gives you enough time to tech chase the opponent.
Down Tilt (D tilt)
Greninja sweeps his arm under the opponent, popping them up into the air for follow-ups. D tilt has always been one of Greninja’s best moves. It comes out quick, is relatively safe to throw out on block, and leads into Greninja’s best kill confirms. It is also one of Greninja’s best options out of dash in this game, as the sudden change in his momentum confuses a lot of opponents into potentially dropping their guard. In Ultimate, d tilt can confirm into up smash around 90% on most characters and for a while afterwards, which is a fairly easy kill confirm. It can also start confirming into forward air around 110%. At low percents, d tilt is a solid poke and combo starter that can lead into RAR bair.
Up Tilt (U Tilt)
Greninja swings his tongue scarf up and over his head, smacking any character that tries to land right above him, launching them upwards for follow-ups. Up tilt is Greninja’s most disjointed move, which means the entirety of his tongue does not have a hurtbox during the animation. It also sports a fantastic vertical reach and hits Greninja’s sides as well. As a result, this move Is one of Greninja’s best and least committal anti-airs. You can use this move to call out players who like to jump a lot in close quarters, and it can be used out of dash to run under opponents and pop them back up. Up tilt is another great combo starter and can lead into up air at almost any % (including when it will kill). Up tilt is also how Greninja begins his famous up tilt-drag down up air loops.
Forward Smash (F Smash)
Greninja swings a water kunai in front of him. F smash is a reliable quick move to punish an opponent’s whiffed attacks. The move has decent range and knockback, and is useful out of dash to beat poor landings and badly spaced attacks. This attack is also often used out of a pivot to step out of an opponent’s range and lash back when they miss. However, it does have a dead zone between the blade streak and Greninja’s body, and can miss if the opponent is too close.
If these tools are used properly during Greninja’s neutral, a hit should be scored and Greninja will shift into his fantastic advantage state. While the opponent is above Greninja or offstage, you can see his kit truly shine.
Advantage State Tools
Up Air (U Air)
A slender upward drill kick, Greninja’s up air is perhaps his best juggling tool. While performing this move, Greninja’s feet do not have a hurtbox, meaning you can challenge an opponent who likes to cover themselves with attacks while above you and still win the exchange. Because Greninja’s legs still carry a hurtbox, this does not work against moves with a long disjoint. Up air can combo into itself at lower percents, can be comboed into from dash attack, and can be used as a drag-down multi hit to set up jab locks and resets. Up air is a fantastic move for pressuring opponents from below, and coupled with Greninja’s high jumps, you can almost reach the top blast zone with up air most stages. Feel free to use up air liberally while in advantage.
Up Smash (U Smash)
Up smash was a fantastic move in Smash 4, and still is in Ultimate. Greninja uses both of his water kunai to split the air directly above his head. This move actually is a two-hit move, with the first hit being a sour spot that should connect into the second, stronger hit which launches the opponent upwards. It is not always the most consistent move, and opponents can be sent in strange directions or have the second hit not connect properly. When it does work, which is most of the time, Greninja’s up smash is perhaps his most effective kill move. It is also a fantastic move for chasing down landings, and due to the sideways range it covers, you don’t have to be that precise to hit your opponent. You can combo into up smash from down tilt, nair (sweet spot at low %, sour spot at high %), and dash attack at lower %. Use this move to cover bad landings and score early kills by guarding the stage.
Edgeguarding
While Greninja’s edge guard game in smash 4 was very committal and often dangerous, there have been a few changes that have turned him into one of the best edge guarding characters in the game. The end lag on all of his aerials was cut in half, which was a universal change, but allows him to use his aerials offstage much more safely. Though we already discussed them, back air and forward air are incredibly useful tools while offstage. Here are some other useful tools for edge guarding:
Shadow Sneak (Side B)
Shadow sneak has always been one of the more unique moves in Greninja’s kit. Onstage, it is horribly telegraphed due to the moving shadow in front of him, but offstage is another story entirely. No shadow appears when used offstage and the only sign that Greninja is about to perform it is a slight decrease in his air speed. Therefore, shadow sneak is a great surprise option to catch opponents off guard in places where it’s typically difficult for Greninja to reach. Since air dodging offstage is now often a fatal choice, it’s harder for opponents to dodge shadow sneak offstage, allowing Greninja to score early kills (the move can kill as early as 30%). Shadow sneak can also be used as a callout while in advantage state, but can be a bit tricky to use.
Finally, the move does have utility as a horizontal recovery move. The goal is to get Greninja closer to the ledge, so he can hydro pump and make it back every time. It can also be used to surprise opponents waiting at the ledge, hitting them away and stuffing their edgeguard attempt. Be careful though – once the opponent begins to expect this, they can easily charge a smash attack and take a stock from you. Use Shadow Sneak as an aggressive recovery only as a mixup.
(Note – Shadow Sneak will automatically target your opponent, but you can manually input a reverse kick by pointing the analog stick in the opposite direction as you appear. However, the automatic targeting will try to hit whatever is closest regardless of your input.)
Important: Greninja no longer has the ability to cancel hitstun with shadow sneak. This means that mashing side b while in combos/multi hit moves will only ensure you get punished harder. Please do not attempt to get out of combos with it!
Substitute (Down B)
A bit more of a niche move, Substitute received a lot of buffs in Ultimate that gave it a lot more utility. While performing this move, Greninja strikes a pose. If he’s attacked during this time, he disappears, leaving a substitute doll or log in his place. During this time, you may input any of 8 directions (UDLR + diagonals) and Greninja will appear with a flying kick moving in that direction. During this kick, the opponent enters slow down frames, which ensures that the kick will connect more consistently than it did in Smash 4. Greninja is also intangible, meaning that he cannot be hurt until the flying kick finishes. This move carries very rewarding knockback and can be used to surprise opponents who aren’t cautious about the hitboxes they’re throwing out.
The downward variants of the kick can be used to spike opponents offstage which is very effective when used to counter recovery moves with a hitbox. Another common use of substitute is to counter slow-moving projectiles and punish the user very hard (e.g. Lloid rocket, Holy cross, etc). Be careful when using this move – though it does carry high reward, if the opponent anticipates it and chooses not to attack you, it is possible for them to punish you very hard. As such, substitute should be used mostly from a position of advantage – when the opponent has no choice but to put out a hitbox – or as a hard read. Finally, Substitute can be used when recovering as a last resort to prevent an attack from hitting you.
Down Smash (D Smash)
Greninja sweeps his water kunai on both sides. Down smash is a handy move out of dash to punish bad landings, and since it hits below the ledge it is especially useful in punishing ledge regrabs and two-frames (if timed right, it can hit people below the ledge before they have a chance to grab it). It can also be used to punish cornered opponents for rolling around Greninja. The rear hitbox of the move is stronger than the front, so try to hit with that side if possible.
If you play your cards right in neutral but still find yourself on the losing end of an exchange, these are the tools you’ll want to use most frequently to mitigate the damage taken and reset yourself to the stage as soon as possible.
Disadvantage State Tools
While Greninja doesn’t have any moves that cover him that effectively when trying to get back to the stage, he still carries a few options that allow for an easier time. His double jump is the third highest in the game and can most often be used to escape from inexperienced players’ follow ups. You should also be mixing in directional air dodges when necessary. When these tools fail Greninja still has some options left at his disposal.
Down Air (Dair)
Greninja tucks his arms in and quickly drops straight down. If he lands on something below him (character, shield) he will perform a pogo kick and bounce off of them. This attack is relatively safe against shields but carries a lot of landing lag. For this reason, it’s important to use sparingly, or else your opponent can simply move out of the way and punish you for attempting it. If the attack connects, it can combo into back air or forward air depending on which side of your opponent you landed on (they will always fly away from the side you land on). The initial hitbox of this move spikes, and the late hitbox sends out at an angle. Using this move is incredibly risky offstage, and if you miss, you most likely will drop to your death. If you use it offstage, you must be certain that the move will hit. My most common usage for down air is to put out a quick hitbox and challenge someone aggressively pursuing me from below. This way, if I hit them, I’m able to get some damage and possibly follow up, and if I miss, I simply fall to the stage and reset neutral or even open a small window of advantage state for myself. Overall, down air is a risky move but can still be applied in several situations to varying degrees of success.
NOTE - Please do not develop a habit of using down air when above opponents. It a risky move and should only be used as a mixup very occasionally. It is Greninja's easiest move to punish and you will lose stocks for using it frequently.
Before I get into my final section of Greninja’s moveset, here is a breakdown of his throws.
Forward Throw (F Throw)
Greninja’s forward throw is a decent tool for throwing opponents into a tech situation at low % and getting them offstage. At very high percentages it can kill at the ledge (around 150%).
Back Throw (B Throw)
Back throw is potentially the least useful move in Greninja’s kit. It is primarily for stage control and is a decent move to throw opponents offstage. It can kill at extremely high %, but never before up throw or f throw will finish the job.
Up Throw (U Throw)
Greninja’s best combo throw in Smash 4, up throw is still a useful move for placing opponents into the air above Greninja. Since Greninja best covers the space directly above him, this move should often be used when you get grabs. It can still combo into up air at middle percentages, but loses its combo ability much earlier than it did in Smash 4. Up throw is also a useful kill throw at very high percentages, and can kill earlier than forward throw depending on your position.
Down Throw (D Throw)
Down throw was useful in Smash 4 for setting up 50/50s into Fair and Bair. Its usefulness was neutered a bit in Ultimate, but it can still be used to set up into bair or fair at higher percentages depending on the opponent’s DI. DIing down and in can make it tricky for Greninja to find a follow up, but also may make a follow up true at later percentages. This move does not combo into anything at low percentages.
Pummel (Press A while holding opponent)
Greninja’s pummel got a big buff in Ultimate. In Smash 4 it was very slow and gave opponents more time to mash out of the grab, but his sped-up pummels are a necessary part of Greninja’s grab game in Ultimate. If you grab an opponent, pummeling is free damage and should be used liberally.
And finally, we come to the last section of Greninja’s kit. This move is useful in all three stages of the game and is one of the most defining moves that Greninja carries.
Hydro Pump (Up B)
Greninja moves in any two directions you input, spraying water in the opposite direction. Unlike Quick Attack (Pikachu/Pichu), Hydro Pump can be used in only one direction and you will still get the full distance. However, being able to go two directions provides a fantastic amount of mixup ability. While it is primarily used as Greninja’s recovery, it has a multitude of offensive and defensive uses.
Offensive Use
Hydro pump does not carry a hitbox in the traditional sense. When people first glance at Greninja, his up b not having a hitbox is often a flaw they point out in the character. However, what hydro pump does have is arguably better. As Greninja moves he sprays water away from the direction he’s moving. This water deals damage, but also has a push effect similar to Mario’s FLUDD. This can be used to spray airborne opponents to screw up their spacing, and can also be used offstage to spray linear recoveries with water. If done correctly, you may end up pushing someone too far away to recover, or you can line them up for a big hit as they slowly drop to ledge in free fall. Hydro pump can also be used in neutral to push away slower characters who struggle to get in. It’s annoying to deal with and deals a small amount of damage.
Defensive Use
Hydro pump is a great tool to escape disadvantage when used properly. Since you can go two directions, there are a lot of mixups you can use to your advantage. Just when an opponent thinks they have you cornered, you can hydro pump past them and reset neutral. Or, you can fake one direction and go another. These angles can be very hard to punish on reaction; the opponent has to predict where you’re going for any substantial punish.
Recovery
Of course, hydro pump’s primary function is still to let Greninja recover. It has quite a bit of distance to it, so you can often make it back from the bottom blast zone or fairly deep offstage. While it is simple to just go straight one direction and cover a lot of distance, it’s very important to mix up your angles so you can go around potential edge guards. Recovering high is also an important mixup, letting you pump past your opponent and take the stage back very quickly. Recovering high is handy when someone commits to an offstage edgeguard. Make sure you practice various angles, especially those that let you snap the ledge.
Note: It is possible to bounce off the ledge if hydro pump is angled directly into it. You are vulnerable during this bounce. If this happens, continue to hold the analog stick into the ledge and you will grab it on the way down. If you do not input a direction, Greninja will fall past the ledge and be unable to recover.
III. Movement
“A Greninja is only as good as his movement” – Venia
Perhaps the most daunting part of learning Greninja is getting used to his movement. Greninja is one of the fastest characters in the game and can be difficult to control for newcomers. In the following section, I will discuss Greninja’s many movement options and how to use them effectively.
Dashing
Greninja boasts the 7th fastest dash in Ultimate, allowing him to move across the stage quickly while grounded. With the changes to dashing in Ultimate’s engine, this also means that he has access to all of his grounded attacks out of a dash. This technique opens up new possibilities and allows Greninja to go on the offensive much better than in Smash 4. While dashing, Greninja also crouches a bit lower to the ground. This can be useful against opponents attempting to stuff Greninja’s aerial pressure and against opponents landing with hitboxes, as you are often too low to the ground to be hit and can punish them for trying.
Initial Dash/Foxtrot
By using Greninja’s initial dash (simply tap the analog stick in any direction and then immediately release), you can perform a technique known as a foxtrot. To foxtrot, simply move the analog stick back and forth in rhythm with Greninja’s initial dash duration. It may take some practice to time properly, but if Greninja is dashing back and forth with no delay, you are inputting it correctly. Foxtrot is useful to move in and out of an opponent’s range and keep your approach ambiguous. If the opponent does not know when you are going to approach, it is likely that they will miss their punish. Like dash dancing in other Smash games, the goal of foxtrotting is to bait these reactions and use Greninja’s speed to move in for a punish when they miss.
Walking
An underutilized option by most, Greninja’s walk is the 4th fastest in Ultimate and is a great way to get around without committing to a dash. Walking is an effective mix-up because not only do you have access to quicker attacks than while dashing, but you can change the pace of the game and possibly throw off an unexpecting opponent. Walking can also be very useful at close range, as it allows you to use more precise spacing. Be sure to implement walking into your movement when possible.
Crouching/Crawling
Greninja’s crouch is another often-overlooked tool. While using it, he is too low for many attacks to connect properly. Since Greninja has immediate access to down tilt while in crouch, it can be a fantastic option for ducking under a hitbox and punishing the opponent with a down tilt combo. As it would seem, crawling can be useful for crouching under hitboxes and approaching or retreating so while doing so.
Jump/Double Jump
Greninja has one of the highest jumps in Ultimate. His full hop and double jump combined allow him to almost reach the top blast zone on many stages. His short hop is still as high as several characters’ full hops, which allows him to whiff punish opponents by jumping over their moves and countering with his own. Greninja’s high jumps are also a great tool for relieving grounded pressure from opponents, and jumping out of shield is often the best option for him to escape and reset the situation. When hit into the air, double jumping is often Greninja’s best option at escaping a follow-up. Greninja's good recovery means he relies less on his double jump while recovering, but it's still a good idea to conserve his jump when possible.
Shield/Parry
While shield is not a movement option per se, it is important to understand Greninja’s usage of shield (or lack thereof). Greninja is unique in that shielding is arguably his worst position, and he would much rather use his strong mobility to work around attacks than to block and punish them. Since his shield grab doesn’t come out until frame 10 (about three frames slower than average), it can be tough for him to retaliate against opponents attacking his shield with any low-cooldown moves. Therefore, Greninja’s best out of shield option is often to jump and escape the pressure. Of course, shielding is a vital part of playing Smash and it’s absolutely better to block an attack than to be hit by one, but Greninja opts to use movement over blocking when possible.
When using shield, parrying is your best option to get a guaranteed punish. However, at this point parrying is fairly undeveloped and can be risky to rely on. Proceed if you are skilled at it, otherwise use caution.
Wall Cling/Jump
On stages with walls, Greninja can stick to the wall as a recovery mix-up. To execute this, simply hold towards a wall. Greninja will hang on to the wall, allowing you to stall your recovery for a few moments to avoid certain edge guards. To let go, press away from the wall or press a jump button. By pressing away, you will perform a small wall jump that does not have much vertical distance but does conserve your double jump for later use. By pressing the jump button, you will use your double jump, but this can be used to attack an opponent at the ledge with back air or return to the stage quickly. Finally, you can press up to jump off the wall much higher but still retain your double jump.
Once you’ve adjusted to the frog’s dynamic mobility, your next logical step will be to work on his combo game. At first glance, Greninja’s combos are mostly two-hit, but with a bit of practice and creativity you can create incredibly long strings.
IV. Bread and Butter Combos + Damage Values
Here is a table of the combos you should be able to pull off when landing a move with Greninja. Note that I am not including every single possible combo for the sake of time and space. feel free to lab around with his moves and create your own strings! The combo with the best damage for each move at each percent range has been highlighted.
NEUTRAL AIR
Low % (These all use the sweet spot! Tested around 10%):
Nair -> Jab (21.6%+, more if rapid jab is used)
Nair -> F Smash (28%)
Nair -> F tilt (19.9%)
Nair -> Dash Attack -> Up Smash (32.4%)
Nair -> Grab (Nothing is true after the throw but this can be good for mixups) (?%)
Nair -> D Tilt -> F Tilt (24.7%)
Mid % (will specify sweet/sour! Tested around 50%):
Sweet Nair -> RAR Bair (22.9%)
Sour Nair - > RAR Bair (18.9%)
Sweet Nair -> Up Smash (36%)
Sweet Nair -> Fair (27.4%)
Sweet Nair -> Running Up Tilt - > Up Air (28%)
Sweet Nair - > Running Up Tilt -> Drag down Up Air -> Jab Reset/Tech Chase (?%)
Sour Nair -> F Tilt (14.8%)
Sour Nair -> F Smash (24%)
High % (will specify sweet/sour! Tested around 90%):
Sweet Nair -> Fair (28%) KO CONFIRM!
Sour Nair -> Fair (21.4%) KO CONFIRM!
Sour Nair -> Up Smash (30%) KO CONFIRM!
Sour Nair -> RAR Bair (18.9%) CAN KO
DOWN TILT
Low % (Around 10%):
D Tilt -> Jab (13.2+%)
D Tilt -> F Tilt (13.5%)
D Tilt -> F Smash (21.6%)
D Tilt -> Grab (Similar to Nair -> Grab) (?%)
D Tilt -> Dash Attack -> Up Smash (42%)
D Tilt - > Dash Attack - > RAR Bair (28.2%)
Mid % (Around 50%):
D Tilt -> RAR Bair (16.5%)
D Tilt -> Up Smash (27.6%)
High % (Around 90%):
D tilt -> Up Smash (27.6%) KO CONFIRM!
Very High % (Around 120%):
D tilt -> Bair (18.6%) CAN KO
D Tilt -> Fair (21.6%) KO CONFIRM!
D Tilt -> Up Air (16.2%) KO CONFIRM (around 150%)
DASH ATTACK
Low %:
Dash Attack -> Up Smash (32.4%)
Dash Attack -> RAR Bair (21.3%)
Mid %:
Dash Attack -> Up Air (19.2%)
Dash Attack -> Drag Down Up Air -> Jab Reset/Tech Chase
Dash Attack -> RAR Bair (21.3%)
Dash Attack -> Fair (23.8%)
High %:
Dash Attack -> Up Air (21%) CAN KO (DI DEPENDENT)
Dash Attack -> Fair can work but is incredibly air tight.
UP TILT
Low %:
Up Tilt -> Up Tilt -> Up Smash (Heavies/Fast Fallers only) (33.6%)
Up Tilt -> Up Smash (28.2%)
Up Tilt -> Nair (16.6%)
Up Tilt -> Bair (17.1%)
Mid %:
Up Tilt -> Up Air (15%)
Up Tilt -> Drag down up air -> Jab reset/tech chase
Up Tilt -> Bair (19.2%)
Up Tilt -> Nair (16.2%)
High %:
Up Tilt -> Up Air (15%) CAN KO
FULL CHARGED SHURIKEN
Low %:
FCWS -> Up Smash (39.6%)
FCWS -> RAR Bair (28.5%) Sets up edge guards!
FCWS -> Nair -> Up smash (50.8%!)
FCWS -> Up Tilt -> Bair (36%)
Mid %:
FCWS -> RAR Bair (28.5%)
FCWS -> Fair (33.6%)
FCWS -> Shadow sneak (28.8%) CAN KO
FCWS -> Up Air (21.5%)
UP THROW
Mid %:
Up throw -> up air (15.6%)
Can also be used for drag down up air, but is much harder.
FORWARD AIR
Low %:
Fair -> Dash Attack - > Up Smash (46.6%)
Fair -> Grab (Nothing true after grab)
Fair -> Dash Attack -> Fair (38.1%)
Fair -> Dash Attack -> RAR Bair (37.6%)
Fair has no true combos after low %.
UP AIR
Low %:
Up Air -> Up Air -> Up Air (30.9%ish, all hits may not connect)
DOWN AIR
Mid/High % (Around 70%):
Sour Dair -> Fair (26.4%) CAN KO
Sour Dair -> Bair (16.8%) CAN KO
Very High %:
Sweet Dair -> Nair (21.3%) CAN KO
Sweet Dair -> Fair (24.9%) KO CONFIRM
At extremely high % Sweet Dair can combo into a drag down up air or just an up air to kill, but this is mostly for style as your opponents shouldn’t be living that long.
V. Moveset Damage Values (When fresh)
GROUNDED NORMALS
Jab (Gentleman) – 8.4%
Jab (Rapid) – 10.8+%
Forward Tilt – 8.7%
Down Tilt – 4.8%
Up Tilt – 5.4%
Dash Attack – 9.6%
SMASH ATTACKS
Forward Smash (Uncharged) – 16.8%
Forward Smash (Full Charge) – 23.5%
Up smash (Uncharged) – 22.8%
Up Smash (Full Charge) – 31.9%
Down Smash (Uncharged, front hit) – 13.3%
Down Smash (Fully Charged, front hit) – 21.8%
Down Smash (Uncharged, Back hit) – 15.6%
Down Smash (Fully charged, back hit) - 18.4%
SPECIALS
Shuriken (uncharged) – 3.6%
Shuriken (medium charge) – 9.9%
Shuriken (full charge) – 16.8%
Shadow sneak (Front hit) – 12.0%
Shadow sneak (Back hit) – 14.4%
Hydro pump – 2.4% per hit
Substitute (Up and down) – 15.6%
Substitute (Left and right) – 13.2%
Substitute (Diagonal) – 14.4%
THROWS
Forward Throw – 9.6%
Back Throw – 10.8%
Up Throw – 6.0%
Down Throw – 6.0%
Pummel – 1.2% per hit
AERIALS
Neutral Air (Sweetspot) – 13.2%
Neutral Air (Sourspot) – 6.1%
Forward Air – 16.8%
Back Air – 11.7%
Down Air (Sweetspot) – 9.6%
Down Air (Sourspot) – 9.6%
Up Air (Full connection) – 9.6%
VI. Greninja’s Matchups
As of now this section is mostly a placeholder. Greninja’s matchup spread in the current Ultimate metagame is being labbed out, and nothing is concrete yet. I will come back and update this section as more is discovered.
Greninja has traditionally struggled with characters that can rush him down and force his shield, then abuse his poor out of shield options and outbox him up close with superior frame data. On the opposite end of the spectrum, opponents--like Sonic--that could outspeed Greninja were hard for him to punish. Characters that could easily stuff his aerial pressure could also be troublesome for the frog. Some of Greninja’s notable tougher matchups in Smash 4 consisted of Sonic, Sheik, Diddy Kong, and Fox. It is unknown currently if these matchups are as tough as they were, since these characters did face some nerfs and Greninja is a much better character.
VII. Notable Greninja Players and Where to Find Them
This is a list of notable Ultimate Greninja players across the world. Note that not every high level Greninja main will be included for the sake of time and space. I highly suggest watching them and analyzing their movement, combos, and how they play matchups!
Venia (New York, USA)
Color: Silver
Playstyle: Aggressive bait & punish, flashy
Streams: www.twitch.tv/houseof3000
VODs: https://www.youtube.com/user/HouseOf3000
https://www.youtube.com/user/VideoGameBootCamp
Stroder (Arizona, USA)
Color: Varies (often pink, green)
Playstyle: Bait & punish
Streams: https://www.twitch.tv/strodead
https://www.twitch.tv/sakgamingtv
VODs: https://www.youtube.com/channel/UCMa2bhhBvQeOS3WjpOROteg
https://www.youtube.com/user/2GoodGaming
Lea (Japan)
Color: Black
Playstyle: Fundamentals
Streams: https://www.twitch.tv/shi_gaming
VODs: https://www.youtube.com/channel/UCpu15uRsvI2opP78cdslj3A
https://www.youtube.com/user/2GoodGaming
https://www.youtube.com/channel/UCboBHyQcGwbbgVbtExOh-kw/videos
iStudying (Netherlands)
Color: Default/Purple
Playstyle: Patient, Bait & Punish
Streams: https://www.twitch.tv/istudying
VODs: https://www.youtube.com/channel/UC3oWDWY-XfgvMnU5Rfg8Ozg
Akashic (Florida, USA)
Color: Default
Playstyle: Aggressive bait & punish
Streams: https://www.twitch.tv/equinoxsmash
VODs: https://www.youtube.com/channel/UCzN_b0x5lzXNNjdwM2RxLmw
https://www.youtube.com/channel/UC_dkX2_MJZeiYZImFN8AOvg
Additional Amphibians (if you get through those 5 and want more Greninja footage, check out these fantastic frogs!):
- Eclipse (Texas, USA)
- Dr. Copter (Tennessee, USA)
- Ludi (Colorado, USA)
")
- Starman (Wisconsin, USA)
- Elu Tran (New Jersey, USA)
- Jarvis (Georgia, USA)
- BT-Mac (Indiana/Wisconsin, USA)
- Lawliet (Florida, USA)
And I’m sure I’m forgetting more! Please let me know if there’s anyone else I need to include.
VIII. Closing Notes/About the Author
In conclusion, Greninja is a character that requires much time to be effective but offers near endless rewards for those who are persistent and practice properly. I hope you find this guide helpful in your journey towards learning the character. For any questions, feel free to reach out on any of my social media platforms and I will be happy to help you!
My tag is Ludi, I am a member of the crews COSBALS and FS. I have been playing Greninja for about 4 years now and picked him up shortly after I decided to start going to tournaments. My major inspirations to play the character came from Amsa (yes, that Amsa!) around 2015, iStudying shortly after, and I’ve been continually inspired by Venia’s play ever since! I started going to tournaments in late 2014, shortly after Smash 4 came out. I originated in central Michigan, but moved out to Denver, Colorado in March 2016. Since moving out to Colorado I’ve consistently been a high level player in the Denver scene, making the power rankings 5 times and being ranked as high as #5 in Colorado mid 2018.
Feel free to reach out to me on any of my social media platforms (I am most active on twitter and discord) with any questions or suggestions!:
Facebook: Zack Volkert (Ludi)
Twitter: www.twitter.com/ludiloco
Discord: Ludi #7328
Youtube: https://www.youtube.com/channel/UCxigveXukDHbFHMhfZN4NsA
Join the frog army and join the Greninja Discord today!
https://discordapp.com/invite/V9hnnSp
Special Thanks on this guide:
Dunsparce (editing and info)
Cyrus (info)
Bibarel (info)
Reverb (pinning in the discord/info)
And the rest of the Greninja discord!
All my Greninja inspirations! Keep rocking the frog!