
Player-4
See you in 25 years
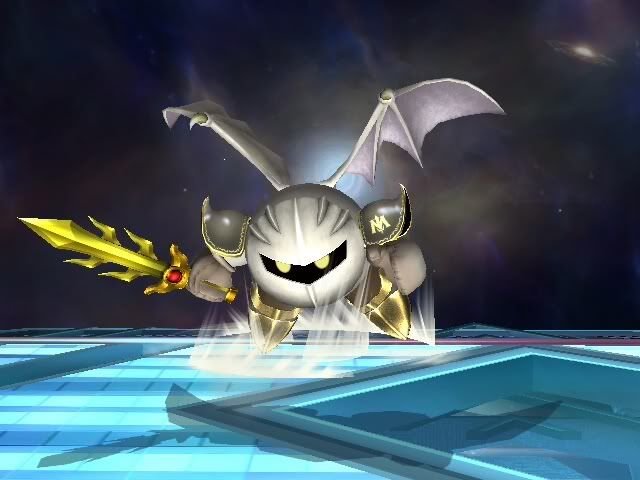
Meta Knight Unmasked: A Dimensional Guide to Meta Knight

This guide is about 70% done, keep tight for the final info coming from Orion, Doom, and myself.
Hey everyone! Welcome to the Dimensional Guide to MK! Since our last guide hasn’t been updated since early ’09, the MK boards (along with myself), feel it’s time for an update. So that’s just what we’re here to do.
Now before I begin, I have to confess, a lot of my ideas are coming from the Pikachu Guide, but lets face it, they did an amazing job and to let such a good and effective style not be put to use more than once would be a waste! Besides, using someone’s style is the highest form of flattery
") .
. This Guide will hopefully teach you guys how to use Meta Knight to a higher degree then just the basics. It will cover the entire move list, frame data, and just about every aspect of Meta Knight. I, along with everyone who’s been around on SWF, use abbreviations for moves, an example: SHFFFair (Short Hop Fast Fall Forward air), I will use the whole term when first introducing it, but from then on I’ll use abbreviations, so try to keep up!
I’m not here to bore you, I’m here to help you advance your skills as a Meta Knight player! So sit back, relax, grab a bite to eat, and give me your attention! *FYI You can enlarge the pictures simply by clicking on them.*
Let’s begin, shall we?
Table of Contents:
If you would like to skip ahead or revisit a section, simply press "Control+F" on your keyboard and type in the 4 letter code found beside the topic you would like to view.
I. Victory is my destiny! [VIMD]
Little Bit of Background Info [LBBI]
Meta Knight In Super Smash Bros. Brawl [MKSB]
Why Should I Choose Meta Knight? [WCMK]
Strengths and Weaknesses [STWK]
Meta Knight In Super Smash Bros. Brawl [MKSB]
Why Should I Choose Meta Knight? [WCMK]
Strengths and Weaknesses [STWK]
II. Move Set Breakdown [MSBD]
Ground Moves [GRMV]
Aerial Moves [ARMV]
Special Moves [SPMV]
Grabs and Throws [GRTH]
Defensive Moves [DFMV]
Ledge Options [LDOP]
Aerial Moves [ARMV]
Special Moves [SPMV]
Grabs and Throws [GRTH]
Defensive Moves [DFMV]
Ledge Options [LDOP]
III. Offensive Style [OFST] coming soon!
IV. Defense Style [DFST] coming soon!
V. How to Kill [HTKL]
VI. Getting Your *** Back: Recovery [GYAB]
DI and Momentum Canceling [DIMC] coming soon!
Getting Back to the Stage [GBTS]
Getting Back to the Stage [GBTS]
VII. Stage Choice [STGC] coming soon!
VIII. Credits [CRDT] coming soon!
Victory Is My Destiny! [VIMD]
Little Bit of Background Info [LBBI]:
"Meta Knight (or Sir Meta Knight) is a major character in the Kirby series appearing in most of the games, manga, as well as the anime. What makes Meta Knight both mysterious and fascinating is his likeness to Kirby himself. His mysterious nature and popularity has led to him playing more of a playable character and less of a "friend or foe" character in many of the newer games. Kirby and Meta Knight are bitter rivals depending on what he does in the games. His true relation to Kirby has yet to be revealed. His intentions are often unknown (as he constantly switches from the role of a hero to a villain), but what is known is that he is the leader of the Meta-Knights, an army of soldiers, and owns a large battleship called the Halberd which may accompany him into the heat of battle. Though Meta Knight first appeared in Kirby's Adventure in 1993, his name was not known in the U.S. until Kirby's Avalanche was released in 1995." – Kirby Wiki
Meta Knight In Super Smash Bros. Brawl [MKSB]:
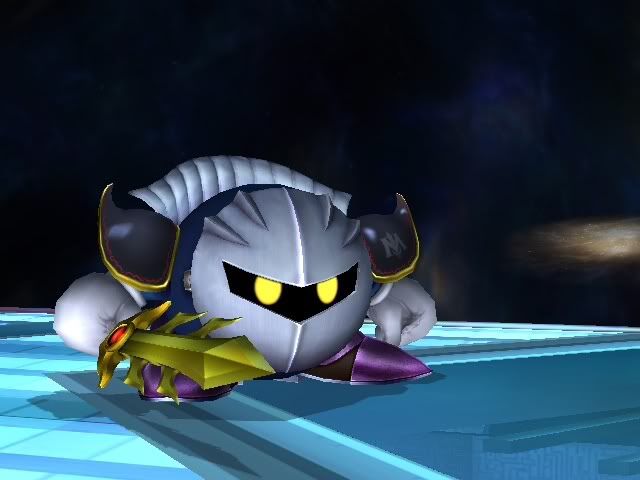
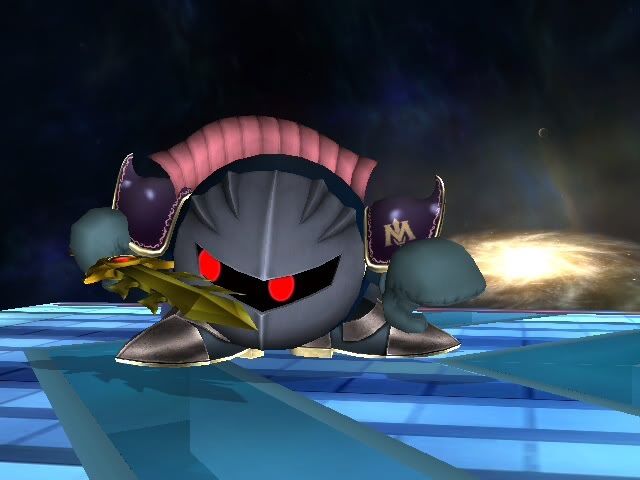
"Meta Knight is one of the playable fighters in Super Smash Bros. Brawl, and was the first new playable character confirmed for the game. Here he is a fast but light character and can jump up to five times like Kirby using his wings. He can also glide and fights using his sword Galaxia. Some of his moves may have been based on his actions in the games. For instance, his Standard Special Move bares the same name as the colorful tornado that Meta Knight can summon in many games; Mach Tornado. Also, his Side Special Move bares a resemblance to Sword Drill, a move that Kirby can use if he has the Master ability, which he gains if he inhales Meta Knight's sword in Kirby and the Amazing Mirror, and his Up Special resembles Wing Kirby's Shuttle Loop maneuver when he is nearby enemies. His Up Grab move also resembles Ninja Kirby's Air Drop, and his Down Grab is very similar to Suplex Kirby's Fury stomp. Not only do the moves sound similar, but they also function nearly identically, a damaging charge in which you are nearly invincible. Meta Knight is considered the best character in the game mainly because he has no disadvantageous match-
Meta Knight in Super Smash Bros. Brawl
ups, only good ones or neutral ones." - Kirby Wiki
Why Should I Choose Meta Knight? [WCMK]
For starters, he’s the best in the game, and there is no argument about this either. MK’s frame advantage is also the best out of the entire cast. He is very fast, and one of the few characters that is rewarded for playing aggressive. He is very well rounded, with good KO potential, recovery, and damage building. Along with being a small target and avoiding hits easily, MK is a ball of pure bad***.
Strengths and Weaknesses [STWK]:
Most people think MK is the perfect character, having no flaws, this is a common misconception. Just like every character, MK has his weaknesses. Though, like everyone else, he has his strengths, and those strengths are what make him the best in the game.
MK's Strengths:
- Fast running speed
- Very little lag, making him hard to punish
- Punishes opponents easily
- Fast KO moves
- Best character in the game
- Best recovery in the game
- Has no bad matchups
- Small target
- Has great setups and the best gimping game
- Transcendent priority
- Great stage control
- Best ledge play in the game
- Best airdodge in the game
MK's Weaknesses:
- Lightweight
- Small shield
- Slow horizontal aerial mobility
- No projectile
- Moves do average damage
- Lots of multihit (SDIable) moves
- Has trouble killing against good DI
- Next to useless crouch
- All special moves put him in a free-fall
- Can be air released to free attacks
- People have the most match up experience against him
Move Set Breakdown [MSBD]
Knowing MK’s move set and how to properly use it is the first step to playing MK, or any character for that matter. One very important note about MK is that his normal sword moves, minus Glide Attack, have transcendent priority. What does this mean? It means MK’s moves never clank with your opponents, they go through them. Assuming you have proper spacing, MK should almost always win the spacing battle. This is an incredible tool to have, but it does have one draw back. Every other character in the game, minus Ike’s sword moves, can be used to cancel out projectiles and other attacks. Therefore you should take advantage of MK’s Glide Attack when the opportunity arrives. His Glide Attack can be a very effective way to stop incoming projectiles and attacks, if you happen to be gliding toward them and can’t get out of the way in time.
Each move will appear in the guide like this:
Name of Move
Short Description of Move
Max (Fresh) Damage / Min (Stale) Damage
Frame Data: Startup frames / Active hitbox frames / IF frames (if applicable) / Cool down frames
Aerial frames (if applicable): Auto-cancel frames / Landing lag frames
Range (Poor, Fair, Good, Great)
Summary
How to perform
*Note: All frame data has been taken from Hotgarbage’s Frame Data thread, to learn more frame data then what's given in this Guide, visit his thread.
Ground Moves [GRMV]
Jab

MK makes furious swiping motions that cover his body in a ball of sword swings. “Hyiiyhaa!”
Max damage: 2% / Min damage 1%
Startup: 1-6 / Active: 7-30 (rotates from front to back) / Cool down: 31-40
Range: Poor
Max damage: 2% / Min damage 1%
Startup: 1-6 / Active: 7-30 (rotates from front to back) / Cool down: 31-40
Range: Poor
Summary: It’s one of MK’s worst moves, but it’s not completely useless. If you find yourself using this move by accident, you can use its final animations to pull out a Down Smash, Forward Tilt or buffered Up-B. However, do not use this thinking it’s a free set up to Dsmash, Ftilt, or Up-B.
This Move can also be used to jab lock an opponent if they miss a tech or if you get a good footstool in. Overall, Jab is a bad move and shouldn’t be used in competitive play very often, this is where Ftilt comes into play.
How to perform: Press or hold the A button.
Forward Tilt (Ftilt) | Spacing Tool | Combo Starter
MK makes three swiping motions in front of him: first, close to the ground, second, midrange, third, up towards the sky.
Max damage: 4%, 3%, 5% (12% total) / Min damage: 3%, 2%, 4% (9% total)
Startup: 1-2 / Active: First hit 3-4, Second hit 6-7, Third hit 9-10 / Cool down: 11-40
Range: Great
Max damage: 4%, 3%, 5% (12% total) / Min damage: 3%, 2%, 4% (9% total)
Startup: 1-2 / Active: First hit 3-4, Second hit 6-7, Third hit 9-10 / Cool down: 11-40
Range: Great
Summary: Ftilt is one of MK’s best moves in his arsenal. It has incredible speed and range, along with the ability to control how many time it hits. With this you can use the first two hits to combo into another move, not to mention it's safe on shield.
However, doing all three hits on shield is very punishable, so restraining to only two is smart and safe, but if you are guaranteed the third hit then by all means use it. F-tilt is great for racking up damage and starting up combos, but watch out, good opponents can sometimes SDI (Smash Directional Influence) this move if they read it, and they’ll punish you for it.
How to perform: Hold slightly forward on the control stick and press A. You determine how many hits Ftilt does, depending on how many times you press A.
Down Tilt (Dtilt) | Spacing Tool | Combo Starter

MK makes a jab like trusting motion, very low across the ground at the opponents feet.
Max damage: 4-7% / Min damage: 1-3%
Startup: 1-2 / Active: 3-4 / Cool down: 5-15
Range: Great
Max damage: 4-7% / Min damage: 1-3%
Startup: 1-2 / Active: 3-4 / Cool down: 5-15
Range: Great
Summary: Dtilt along with Ftilt are the core of MK’s ground game. It has incredible range, beating even Marth’s Dtilt by a few pixels. It’s very good for starting combos at low-mid percent. It “combos” nicely into many moves such as itself, Ftilt, Dsmash, Dash Attack, and Grabs. It has a tripping rate of 30% making trips lead into free grabs.
This move is also nice up against a wall, pinning your opponent there for a decent amount of time earning free damage while refreshing your move set. The damage it does depends on how close you are to your opponent, the closer you are the more damage it does, but using this move near the tip is usually the best way of using it.
How to perform: Hold down on the control stick and press A or C-stick down.
Up Tilt (Utilt) | Combo Starter | Combo Finisher | KO Move

Our little bat makes a stabbing motion towards the sky, thrusting his sword above his head.
Max damage: 7-8% / Min damage: 2-3%
Startup: 1-7 / Active: 8-18 / Cool down: 19-35
Range: Good
Summary: Utilt isn’t a move you’ll find yourself using very often, but it is by no means a move you should forget about. It’s actually a good KO move and beats a lot of vertical approaches very easily, and example would be how it beats Sonic and G&W's (and more) Dair.Max damage: 7-8% / Min damage: 2-3%
Startup: 1-7 / Active: 8-18 / Cool down: 19-35
Range: Good
If you find your opponent at kill percents ,and above you, go for the Utilt! But you must sweet spot it in order to kill. This move has a weird hit box, and hits all around MK, so essentially you can hit your opponent even if he’s beside you and not above you, though they must be close for this to happen.
If you land this move at low percents it combos into Up-B or you can start to juggle an opponent with Tornado or by read their landing. Now how does this combo finish you ask? Out of Dash Attack at low-mid percents this can be used as a follow up, but there are much better moves to follow up with out of Dash Attack that we’ll address later.
How to perform: Hold up on the control stick and press A or C-stick up. This is much easier to do with tap jump OFF. Otherwise, it’s like Ftilt where you need to slightly press the control stick in the right direction.
Dash Attack | Combo Starter | Punishing Move
MK makes a sliding motion as if sliding into home plate out of a run.
Max damage: 8% / Min damage: 4%
Startup: 1-4 / Active: 5-11 / Cool down: 12-31
Range: Good
Max damage: 8% / Min damage: 4%
Startup: 1-4 / Active: 5-11 / Cool down: 12-31
Range: Good
Summary: Ahhh good ol’ Dash Attack. Not another move you’ll find yourself using very often but it is indeed good. At low and mid percents it is a GREAT combo starter, setting itself up for a Neutral Air, with this you should be pulling off a free 27%.
This move combos into many other moves as well, such as: Up Air, Shuttle Loop (Up-B), Up Smash, Utilt, and the aforementioned Neutral Air. However, this move should not be spammed since it is easily shield grabbed. This move does not have transcendent priority and will clank with other moves.
How to perform: While running, press A or C-stick down.
Down Smash (Dsmash) | Punishing Move | GTFO Move | KO Move

Swinging his sword first in front and then behind him, this move sweeps low across the ground.
Max damage: 11% (front), 13% (back) / Min damage: 5% (front), 6% (back) / Fully charged: 16% (front), 19% (back)
Startup: 1-4 / Active: 5-6 (front), 10-11 (back) / Cool down: 12-34
Range: Good
Max damage: 11% (front), 13% (back) / Min damage: 5% (front), 6% (back) / Fully charged: 16% (front), 19% (back)
Startup: 1-4 / Active: 5-6 (front), 10-11 (back) / Cool down: 12-34
Range: Good
Summary: The ever spammable Dsmash. It’s infamous for being one of those “cheap” moves in MK’s move set but for good reason. It has very good KO potential, but its selling point is its speed. With the front hit hitting on frame 5, it’s very easy to sneak in quick kills at high percents. This move sends the foe horizontal and kills at a fair percent, usually around 115-120% and as low as 95% on the edge of stages coupled with bad DI, against other MKs.
A major note about Dsmash is where its power lies, and where that is is at the tips of the sword, and the strongest hit of all is on the hit behind MK, at the tip. Hits from the front rarely kill, but if you catch your opponent off guard it can kill due to poor DI.
If you find yourself in a tight spot, don’t be afraid to slam that C-stick down to get your opponent off of you. Its speed and damage makes it a great move for getting your opponent off your back. This move also has the cooldown frames to make it spammable, if you don’t hit with it, follow up with another Dsmash right after it. Chances are you can catch your opponent off guard, and by doing so, killing them at low percents. Be smart with this tool, you don’t want to become too predictable with it.
How to perform: Press down on the control stick and A at the same time, or simply press C-stick (without directing the control stick) down while grounded. Press down and hold A at the same time to charge. *
Forward Smash (Fsmash) | Bait Move | KO Move
MK brings his sword across his by like throwing a frisbee. “HMPH!”
Max damage: 14% / Min damage: 6% / Fully charged: 20%
Startup: 1-23 / Active: 24-25 / Cool down: 26-41
Range: Great
Max damage: 14% / Min damage: 6% / Fully charged: 20%
Startup: 1-23 / Active: 24-25 / Cool down: 26-41
Range: Great
Summary: Fsmash… Where do I being? It’s probably my favorite move with Meta Knight, but that’s just me. This move has very good potential, and if you’ve ever watched Tear Bear, you’ll notice the amount it’s used. Fsmash is great for baiting your opponent. Let me elaborate.
When keeping your distance you can charge Fsmashes to bait your opponent into doing something dumb. Many times I have had people run into it blindly expecting to punish my charge, just to get hit with MKs strongest move. If they try to wait out your attack and punish your ending lag they must have perfect reaction time to pull it off, otherwise you can poke them with a Dtilt and follow up from there.
One tactic Tear Bear and myself use is retreating Fsmashes. This is where you walk away and C-stick the opposite direction, doing a semi-pivot Fsmash. This can easily catch your opponent of guard, and it is a semi-good spacing tool. There are also pivot charge Fsmashes for more technical MKs, which is like combining the charge with the walk away pivot.
This move has many uses, and it great in the MK ditto. However, keep in mind this move can be punished. So it’s not smart to try the charge tactic against characters with projectiles, it’s just a free hit for them. Spaced Fsmash spam against those on the ledge can also be unnerving and hard for your opponent to combat.
This move is also disjointed, meaning that it hits not only in front of Meta Knight, it also hits slighty above him and around his body, making it viable to hit people trying to punish MK by coming down on him. This move launches at an upward horizontal angle, and is a great KO move when it connects. Never count it out.
How to perform: Press forward and A at the same time, or press C-stick forward (without directing the control stick) while grounded. Press forward and hold A at the same time to charge.*
Up Smash (Usmash) | Combo Finisher | Semi-KO move

Meta Knight makes 3 fast swinging motions over his head.
Max damage: 3%, 2%, 4%, (9% total) / Min damage: 1%, 1%, 2% (4% total) / Fully charged: 13%
Startup: 1-7 / Active: 8-9, 12-13, 17-18 / Cool down: 19-49
Range: Fair
Max damage: 3%, 2%, 4%, (9% total) / Min damage: 1%, 1%, 2% (4% total) / Fully charged: 13%
Startup: 1-7 / Active: 8-9, 12-13, 17-18 / Cool down: 19-49
Range: Fair
Summary: Usmash, along with Jab, is a move I never find myself using or utilizing. This is a move you really don’t need to concern yourself with. It can finish off of a Dash Attack but that’s really only where it combos and there are better options for that (Nair comes to mind).
From what Orion has told me, it stales itself simply because it’s a three hit move, making its KO potential very minute. Though, if you happen to catch someone with the final hit (without the first two hits hitting) at a decent percent then it could KO well enough, but the cases where you would ever use the move are rare.
It can however be used as a mind game, by running toward your foe and throwing out an Usmash out of your run. It can potentially hit because it has 3 hits you can punish a spot dodger on your run, on the other hand, Tornado ensures this so it's the obvious and better option. So in every case where you could use Usmash you’ll find it’s outclassed by another move MK has. Use it sparingly.
How to perform: Press up and A at the same time, or press C-stick up (without directing the control stick) while grounded. Press up and hold A at the same time to charge.*
*Note: Simply pressing the C-stick without moving the control stick will perform a smash. On top of that a C-stick smash is faster than pressing A and a direction on the control stick at the same time.
Aerial Moves [ARMV]
Neutral Air (Nair) | Combo Breaker | Combo Finisher | KO move
MK curls up into a ball, bringing his around him, while making somersaulting in mid air. Yeah, it’s pretty legit.
Max damage: 7% first hit, 12-13% second hit (19-20% with all hits) / Min damage: 10% (all hits)
Startup: 1-2 / Active: 3-4 (strong hit), 5-25 (weak hit) / Aerial Cool down: 26-31
Auto-cancels on: 25 / Landing lag: 15
Range: Fair
Max damage: 7% first hit, 12-13% second hit (19-20% with all hits) / Min damage: 10% (all hits)
Startup: 1-2 / Active: 3-4 (strong hit), 5-25 (weak hit) / Aerial Cool down: 26-31
Auto-cancels on: 25 / Landing lag: 15
Range: Fair
Summary: Nair is another of MK’s best moves. It’s fast and strong, thus finding a spot in his more overused moves. It's a great move, dealing roughly 20% per fresh Nair! You can come from above, below, or the sides of your opponent. It hits all over MK’s body, and does great knock back on the initial hit making it a good KO move.
With its speed it can be used to break combos and get you out of sticky situations in the air.
You can “invincinair” from the ledge which means if you drop down from the ledge and perform a buffered Nair then your body will be invincible for a short time, allowing you to earn vital hits that could otherwise be challenged.
Nair out of shield is also really good when your opponent pressures your shield with a laggy move. If it isn't laggy Nair OoS can be punished so be careful when selecting your OoS option.
After a Dash Attack a Short Hop Nair (SHNair) can easily be performed making it a good combo finisher. A more common and widely known combo finisher would be a Nair after an Up Air string, I will go into more detail in the Up Air section.
It also finishes up a Glide attack at low percents, dealing up to 32% from just two moves! Learn to Nair out of shield (OoS), it’s incredibly good if people come down on your shield or pressuring your shield a lot. Nair is an awesome move, use it and utilize it.
How to perform: After jumping or while airborne, press A.
Up Air (Uair) | Combo Breaker | Combo Starter | Semi-KO move
Meta makes a single slash above his head towards the sky.
Max damage: 6% / Min damage: 3%
Startup: 1 / Active: 2-3 / Aerial Cool down: 4-13
Auto-cancels on: 21 / Landing lag: 12
Range: Good
Max damage: 6% / Min damage: 3%
Startup: 1 / Active: 2-3 / Aerial Cool down: 4-13
Auto-cancels on: 21 / Landing lag: 12
Range: Good
Summary: Ahhh the Uair, another of MK’s incredibly fast moves. It hit in just TWO frames making it virtually instant. He can perform THREE complete Uairs in just ONE short hop, pretty amazing. This tool is great for starting your combos and stopping your opponents. Find yourself in a Lucario Fair string? DI it and throw out a Uair and you'll get out of it!
Uair combos directly into itself, making it possible to pull off up to 3-4 Uairs in a row, then it can be finished by any number of moves, such as: Nair, Fair, Bair, Shuttle Loop, and Tornado. The most common combos involving Uair are Glide Attack > Uair x3 > Nair/Shuttle loop/Tornado. Though the Glide attack is not needed to get this started. If you can work your opponent into the air early you can pull off a quick Uair string to Nair/SL/Tornado.
Unless you are comboing with Uair, it’s best to fall with your Uairs, this makes them near unpunishable from above. When recovering from below the stage it’s best to do rising/hovering Uairs to ward off people who would try to contest you. Though people who would try to contest MK off stage are pretty rare.
As a KO move, Uair isn’t all that bad, though it’s used so much that it stales fast and usually never KOs, but if you find it fresh and your opponent is above you at a good percent, you will find yourself KO-ing with it. It’s best chance of KO is high, close to the top blast zone.
How to perform: Press the control stick up and press A while airborne, or press the C-stick up while in the air.
Down Air (Dair) | Gimping Tool | Spacing Tool | Camping Tool | Semi-KO Move

MK makes a slashing motion like Uair, but this time below him and towards the ground.
Max damage: 7-9% (9% when tipped) / Min damage: 3-4%
Startup: 1-3 / Active: 4-5 / Aerial Cool down: 6-25
Auto-cancels on: 24 / Landing lag: 15
Range: Good-Great
Summary: It’s noted in the old guide that sweet-spotting this move is near insignificant. This is not true. The best way to gimp someone off stage IS by sweet-spotting Dair. In doing so you will do more damage and more knock back horizontally down, in which putting your opponent in a bad and a most likely unrecoverable position. Max damage: 7-9% (9% when tipped) / Min damage: 3-4%
Startup: 1-3 / Active: 4-5 / Aerial Cool down: 6-25
Auto-cancels on: 24 / Landing lag: 15
Range: Good-Great
On stage this is a great tool to space your opponent with from above and puts them in a tough situation, Dair camping, as it’s called. This consists of doing rising Dairs (pressing jump as you Dair) at varying heights. This style of play can shut down most of the casts options and is also the most effective way in dealing with Ice Climbers.
Dair OoS is a very very safe move and should usually be your option out of shield. It's much safer then Nair and gets people off your back. Learn how to perfect this.
This move also has good knock back at high percents and can net you a kill from time to time. Dair OoS is a lot like Nair OoS, though not as good, yet at the same time still very good. Use it.
How to perform: Press the control stick down and press A while airborne, or press the C-stick down while in the air.
Forward Air (Fair) | Spacing Tool | Camping Tool
Our friend makes three quick swinging motions in front of himself in the air.
Max damage: 3%, 3%, 4% (10% total) / Min damage: 1%, 1%, 2% (4% total)
Startup: 1-5 / Active: 6-7, 10-11, 13-14 / Aerial Cool down: 15-39
Auto-cancels on: 21 / Landing lag: 15
Range: Good
Max damage: 3%, 3%, 4% (10% total) / Min damage: 1%, 1%, 2% (4% total)
Startup: 1-5 / Active: 6-7, 10-11, 13-14 / Aerial Cool down: 15-39
Auto-cancels on: 21 / Landing lag: 15
Range: Good
Summary: Fair is a great spacing tool to have and to use with MK. You can approach with it, camp with it, wall with it, and even KO with it to some degree. Spacing with it is done by tipping with the very tips of Fair, just enough to hit your opponent while keeping yourself safe.
However, if you don’t space it properly, Fair is easily punished on block and can get you grabbed.
How to camp with it: do a variation of Shot Hop and Full Hop Fast Fall Fairs to put up a pseudo wall, you can also cut down on being punished by immediately Dtilting once you land. Mix it up!
How to perform: Press the control stick forward and press A while airborne, or press the C-stick forward while in the air.
Back Air (Bair) | Semi-Spacing Tool | Semi-KO Move
Like Fair, MK makes three swinging motions, only this time behind him in the air.
Max damage: 3%, 3%, 4% (10% total) / Min damage: 1%, 1%, 2% (4% total)
Startup: 1-6 / Active: 7-8, 13-14, 20-21 / Aerial Cool down: 22-45
Autocancels on: 23 / Landing lag: 12
Range: Good
Max damage: 3%, 3%, 4% (10% total) / Min damage: 1%, 1%, 2% (4% total)
Startup: 1-6 / Active: 7-8, 13-14, 20-21 / Aerial Cool down: 22-45
Autocancels on: 23 / Landing lag: 12
Range: Good
Summary: It’s not one of MK’s better moves or more used moves, but unlike Usmash and Jab, Bair has uses. You can cancel the up to the second hit into the ground and buffer turnaround Ftilt, or stay where you are and Dsmash. This is a nifty way to set up into Dsmash kills. Otherwise this move is outclassed by its faster counter part, Fair.
Another note, Bair does have more range than Fair, but Bair does not have as safe landing options like Fair does. Bairs hitbox, however, stays out longer, and kills earlier. Note: since you rarely use Bair with MK, it’s usually fresh. A good option for Bair is to use it if you feel your opponent will airdodge. If they don’t they still get hit, however many times the Bair will last longer than their airdodge and they will get hit with the last killing blow.
Refrain from using it, but don’t feel bad if you do, it has its niches. Since it’s almost never used and can work as an alright KO move, it’s best catching your opponent of guard.
How to perform: Press the control stick back and press A while airborne, or press the C-stick back while in the air.
Glide Attack | Combo Starter | KO Move
MK makes a large slash in front of him after gliding.
Max damage: 12% / Min damage: 10%
Startup: 1-4 / Hits on: 5 / Aerial Cool down: N/A
Autocancels on: N/A / Landing lag: Either 2 or 4
Range: Great
Max damage: 12% / Min damage: 10%
Startup: 1-4 / Hits on: 5 / Aerial Cool down: N/A
Autocancels on: N/A / Landing lag: Either 2 or 4
Range: Great
Summary: Glide attack is a great move but is easily shield grabbed on block when not spaced,. However, when it is spaced just right it is unpunishable, even on block. It has disjointed range and hits deceptively far. It KOs early enough, usually a little higher percent then when Dsmash KOs.
At low percents it combos into Nair or Uair strings. Be smart with this move.
How to perform: Press A after gliding.
How to glide: After MK's second jump, hold the jump button.
Special Moves [SPMV]
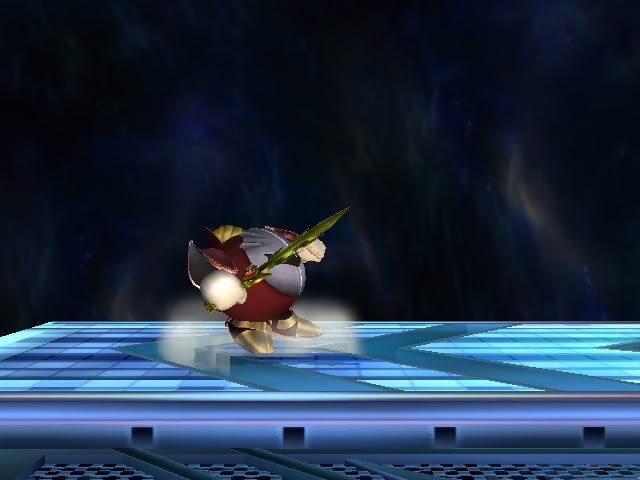
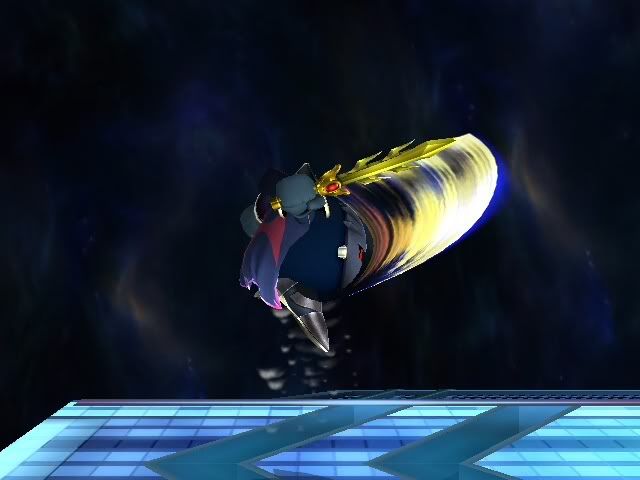
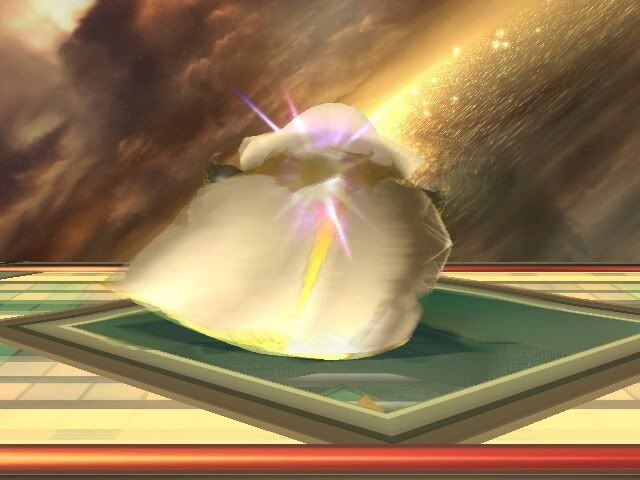
Mach Tornado (Tornado/Nado/B)| Combo Finisher | Recovery Tool
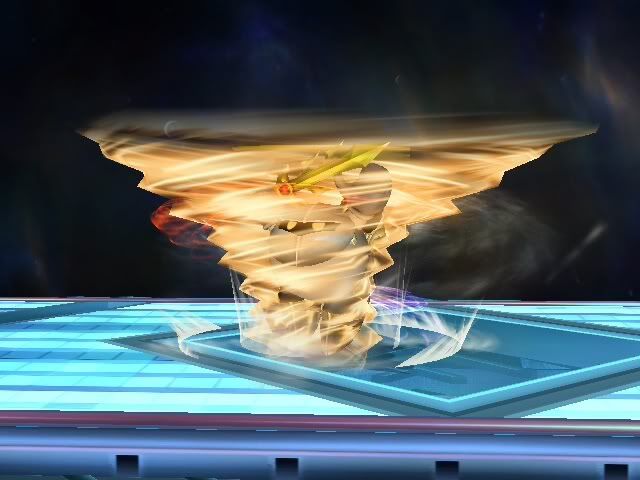
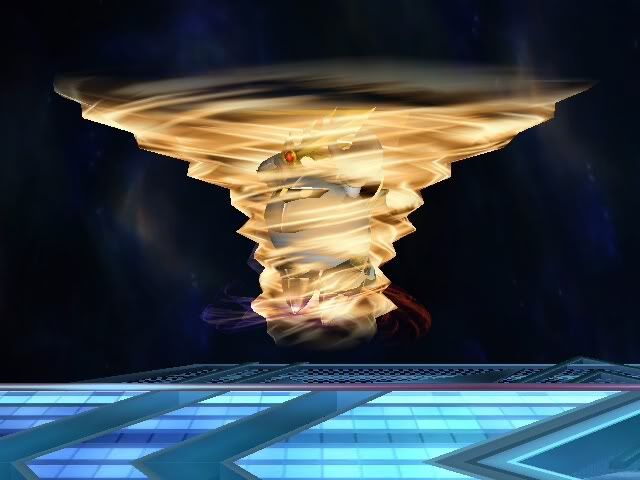
MK start ups by spinning around, engulfing himself in an orange twister.
Max damage: 1-19%, 3% (22% total) / Min damage: Depends on hits
Startup: 1-11 / Active: 12-58 / Cool down: 59-88 [minimum time frame breakdown]
Startup: 1-11 / Active: 12-104 / Cool down: 105-134 [maximum time frame breakdown]
“Cool down: this is interesting. Cool down will ALWAYS be 29 frames. Landing lag adjusts to this. So if your Nado ends in midair and you free fall for 10 frames your landing lag will be 19 frames. The botched up landing is 30 frames.” –Hotgarbage Max damage: 1-19%, 3% (22% total) / Min damage: Depends on hits
Startup: 1-11 / Active: 12-58 / Cool down: 59-88 [minimum time frame breakdown]
Startup: 1-11 / Active: 12-104 / Cool down: 105-134 [maximum time frame breakdown]
Range: Great
Summary: Tornado the *****nado. It’s so spammable and so good. It eats shields, it does an average of 10% per nado, and pokes people out of their shields. It out prioritizes ALMOST everything, and its huge hit box makes it hard to escape. It constantly hits and sucks the opponent it, making it hard to get out of, and nearly impossible for fatties like Dedede and DK.However, lighter characters like ZSS and Jigglypuff are hard to keep in Nado, simply because of their weight. It’s just an exceptional move all-round, use it, but be smart with it.
Good players will punish blind and bad Tornadoes, I mean it’s not completely full proof. Keep in mind a lot of high priority projectiles will cancel it and damage you, Falco’s lasers and Diddy’s bananas are a common remedy for Nado, though on the flip side low priority projectiles like Peach’s turnips and Mario’s fire balls are eaten up by Tornado. Tornado also gains priority the more you press B, so keep that in mind.
Finally, Nado is a nice combo finishing net to scoop up your foe with, you can Down Throw to Nado, Uair String to Nado, Glide Attack to Nado, and much much more. In actuality, Nado can follow up almost any move.
It should also be noted that in air Tornado has loads more priority than grounded Nado. With that being said, even if you don’t want to leave the ground, it’s best to pick your Nado up off the ground enough to get that priority boost, otherwise it’s easily clanked or beaten. You can even Nado out of shield if you feel like it, though you have better options.
Finally, Tornado is a great recovery option. Being far from the stage you can recover horizontal ground very fast and safely.
How to perform: Press B either in the air or on the ground. The more you press B the longer Tornado say out and the more priority you gain.
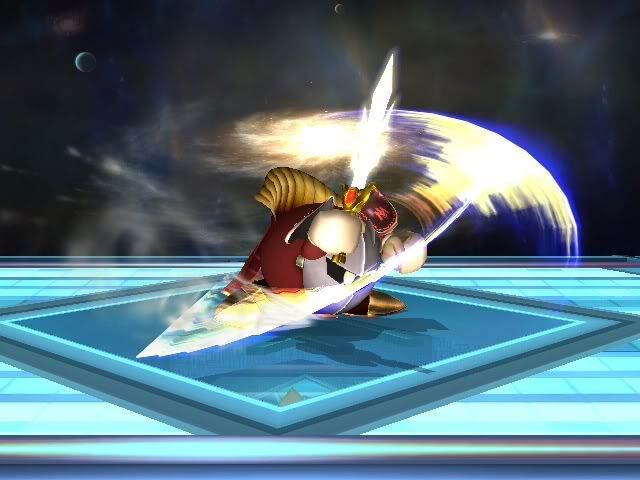
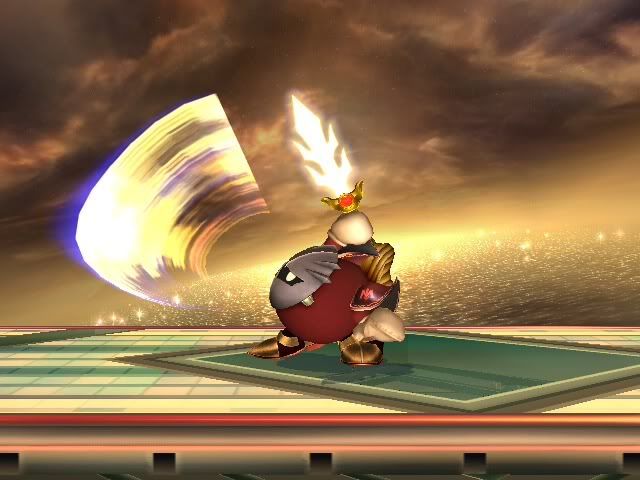
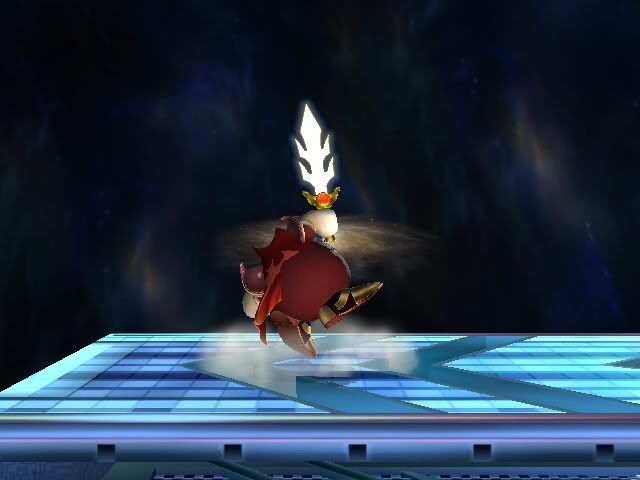
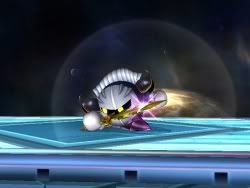
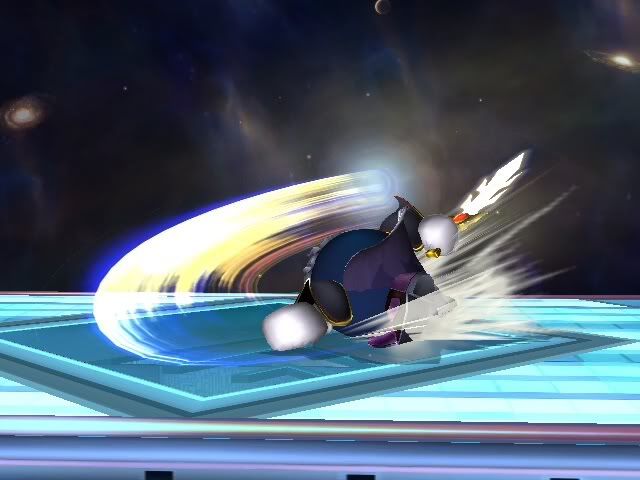
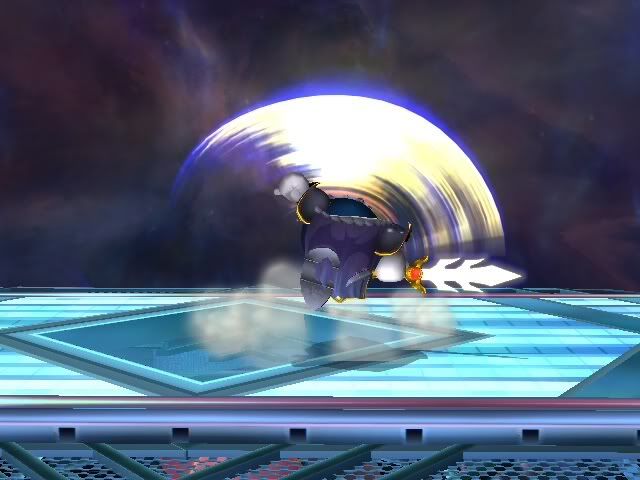
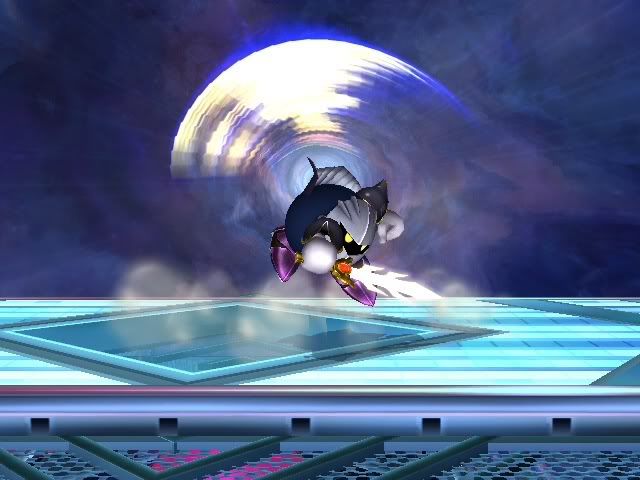
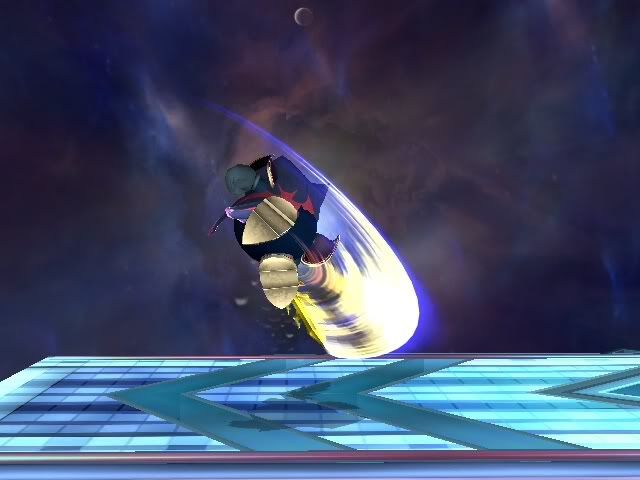
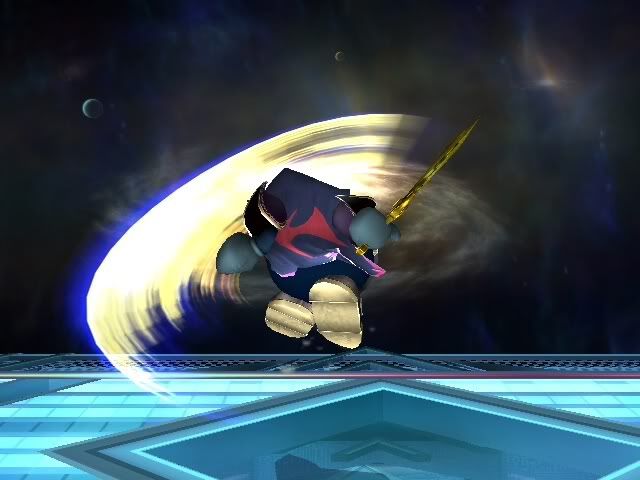
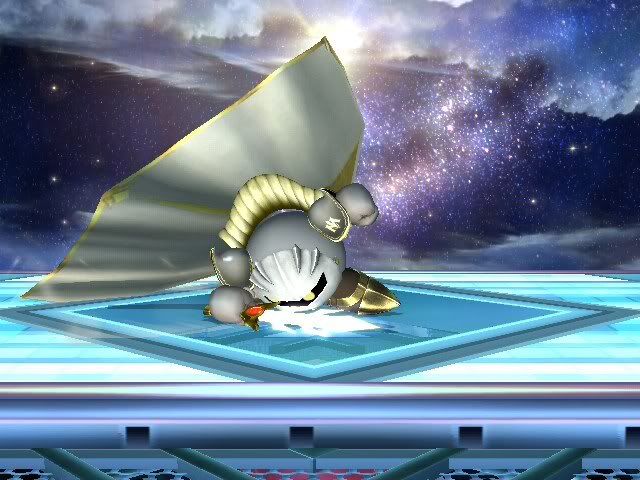
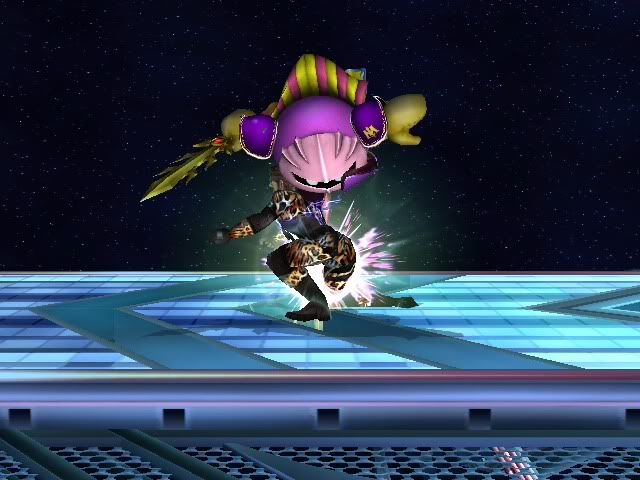
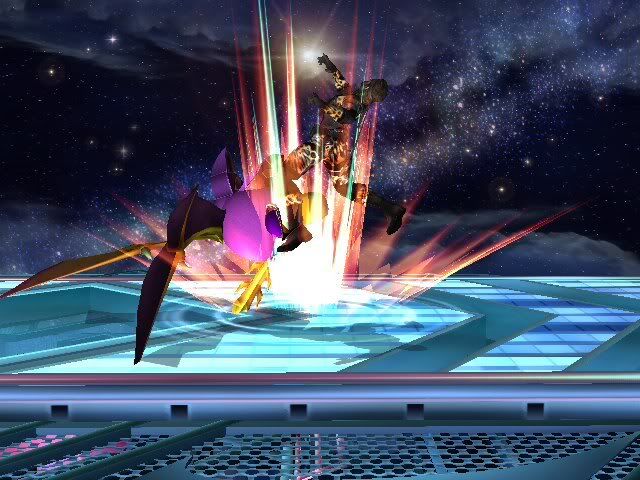
Shuttle Loop (SL/Up-B) | Gimping Tool | Recovery Tool | KO Move
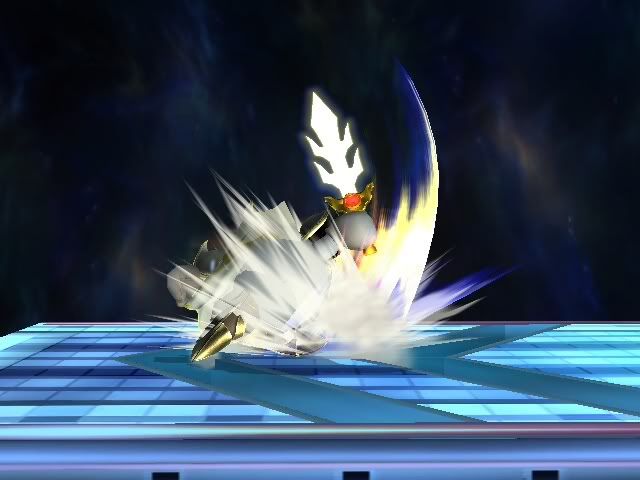
Meta Knight thrusts himself up like an uppercutting rocket and does a complete aerial somersault that ends in a glide. “HUAH!”
Max damage: 9% (strong) 6% (weak) / Min damage: 4% (strong) 2% (weak) [Grounded and Aerial]
Startup: 1-7 / Invincible: 5-8 / Active: 8-13 (strong hit) 22-31 (weak hit) [Grounded]
Startup: 1-7 / Active: 8-14 (strong hit) 15-36 (weak hit) [Aerial]
Range: Great
Summary: Best move in the game. No question about it. It has invincibility frames when grounded, so it eats through moves coming its way, it can vertically KOs at decent percents, and it can be used to get people off of your shield by SLing OoS.Max damage: 9% (strong) 6% (weak) / Min damage: 4% (strong) 2% (weak) [Grounded and Aerial]
Startup: 1-7 / Invincible: 5-8 / Active: 8-13 (strong hit) 22-31 (weak hit) [Grounded]
Startup: 1-7 / Active: 8-14 (strong hit) 15-36 (weak hit) [Aerial]
Range: Great
In air it can kill at 0%, it has that much knock back to gimp characters with bad recovery or completely KO them if they’re close enough to the blast zone. It stage spike kills as low as 8%. Usually on stages like Smashville or Battlefield it will KO from the edge of the stage, at 60% and higher, against people with average DI.
Its range is pure amazing, which makes it hard to describe just how good its range is. It completely changes things around in match ups like against Game and Watch and Snake where MK can just Up-B OoS against GW’s Bair (turtle), and it can easily gimp Snake while he recovers with Up-B. Shuttle Loop can turn the match in your favor or bring you back from a losing situation in a matter of seconds just because of how early it can kill.
Funny thing is, I haven’t even mentioned its recovery viability yet. It’s very easy to auto-hug the ledge with SL and it’s so quick and strong that it’s very hard to edge guard. Another nifty feature about SL is that it auto-cancels, so if you are underneath the stage you can reverse SL onto the stage and cancel it immediately into another move, Mew2King likes to run out of it, others like to do another instant Shuttle Loop.
The moves you can do from canceled Up-B are everything MK has; Ftilt, Nado, Dsmash, and SL are the most common and most viable options. Something else about his Grounded SL, if you slam down and B at the apex of SL you’ll perform a fast fall that is near unpunishable; test it out and see the difference between FF’d SL cancel and just plain SL cancel (to perform the cancel simply press B after doing SL).
Another note I forgot to mention is that after you Up-B and stay in the animation MK will glide until he either hits the ground, a wall, or the blast zone. Out of this glide you can Glide Attack simply by pressing A. However, keep in mind if you Glide attack or cancel your SL from anywhere that's not close enough to the ground, you will free-fall until you hit the ground.
This move is nothing short of amazing, it’s MK’s best move and the best move in the entire game of Super Smash Bothers Brawl. Make sure you use it to it's full potential.
How to perform: Press up then B while grounded or in the air.
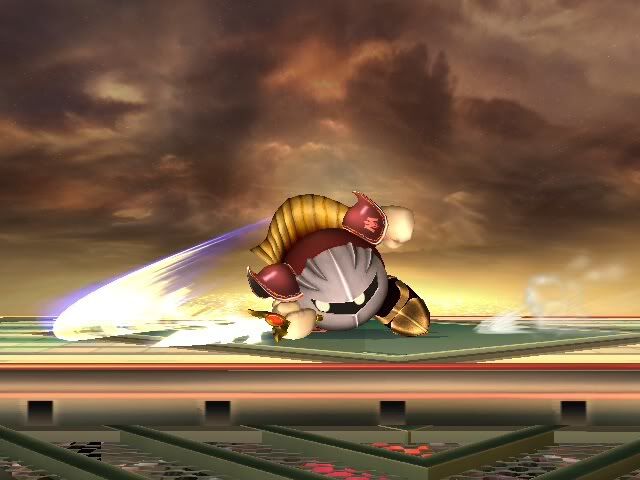
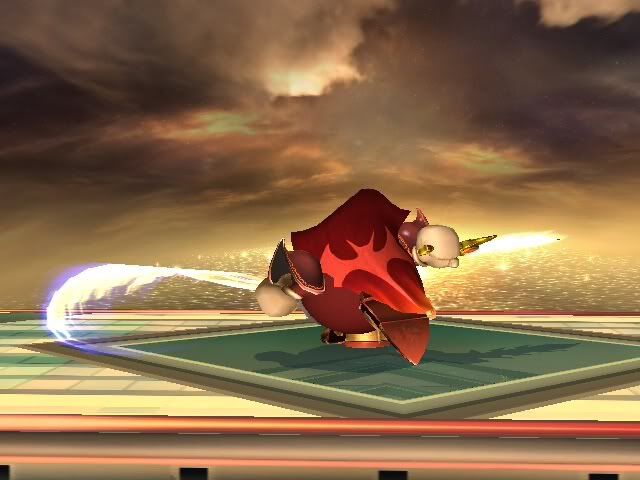
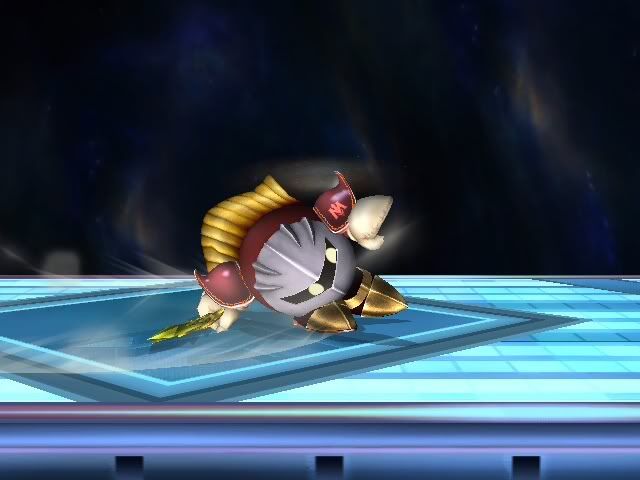
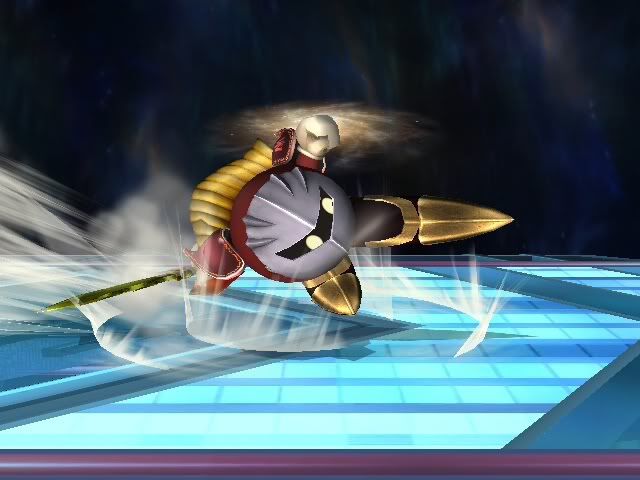
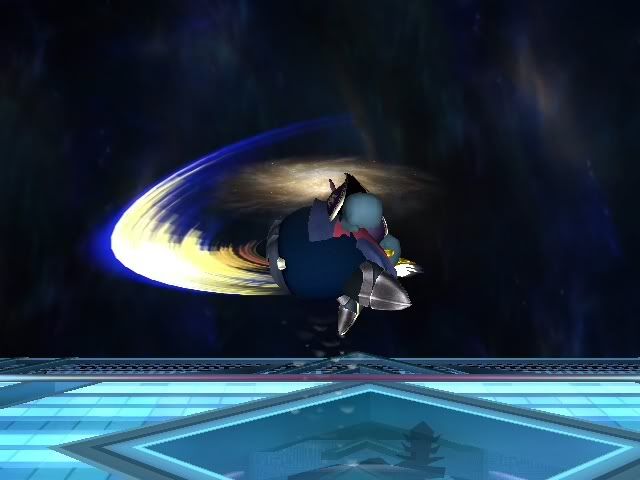
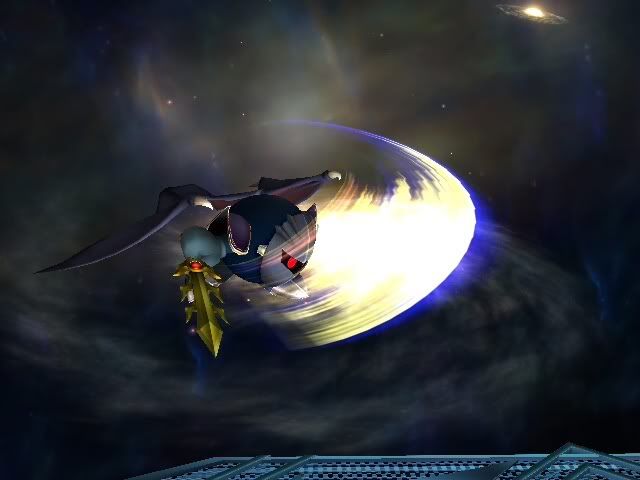
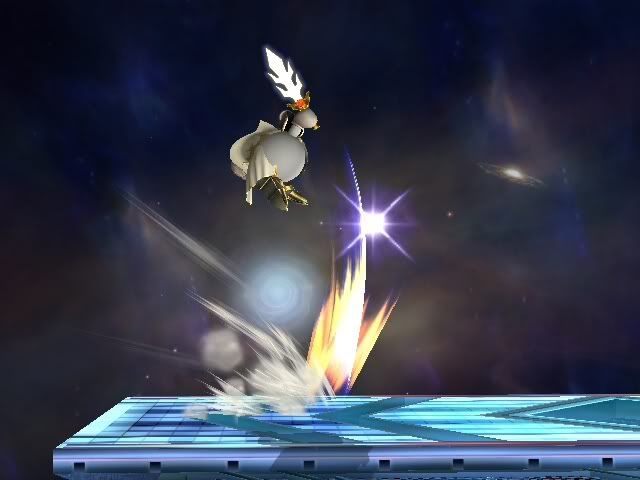
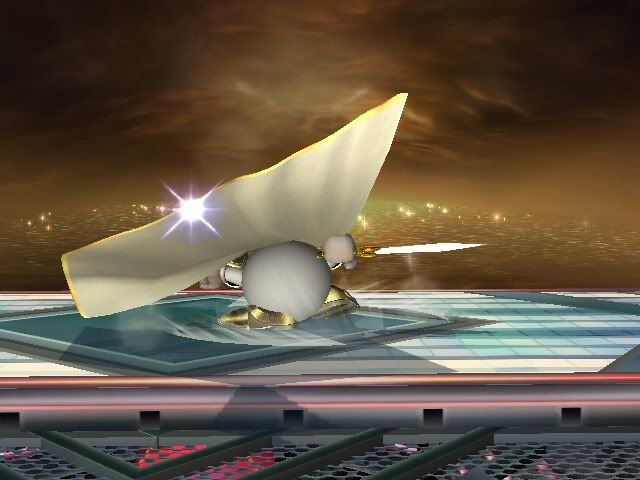
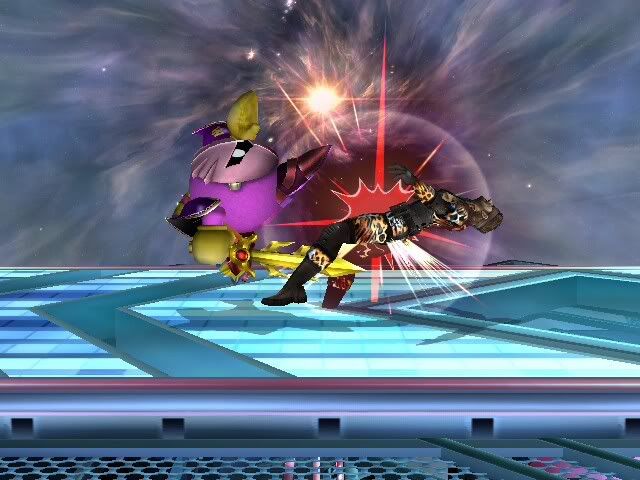
Drill Rush (Drush/Side-B) Recovery Tool | Advanced Tech Move
MK folds himself up and thrusts himself forward with his sword in front of him just like a drill.
Max damage: 1-7%, 3% (10% total) / Min damage: Depends on the amount of hits
Frame data was not listed by Hotgarbage
Range: Great
Max damage: 1-7%, 3% (10% total) / Min damage: Depends on the amount of hits
Frame data was not listed by Hotgarbage
Range: Great
Summary: Sadly, Hotgarbage doesn’t have the framedata on Side-B, but no point in crying over spilt milk, onto the analysis! Side-B is rarely used for offense but it does have its properties. One of which, being the ledge cancel. It is the main offensive use for Side-B, this technique is best used for covering ground fast, and finishing immediately into another move. When spaced right, you can Side-B cancel into any array of moves just like the Up-B cancel.
Here is a video best to show you what I mean: Side-B tricks and cancels .
The main purpose and most effective use is for recovery, which will be elaborated more later on, but Side-B is an amazing recovery move. Learn to control it and utilize it.
How to perform: Press forward or back on the control stick then press B.
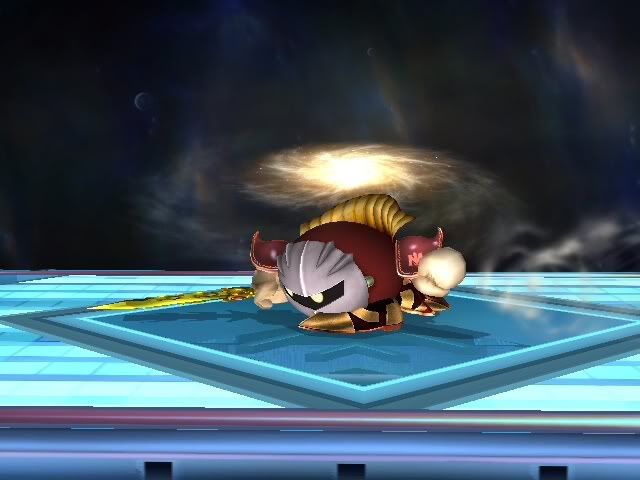
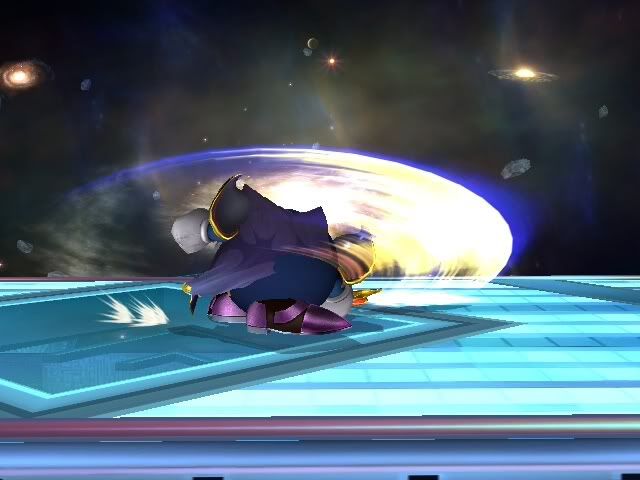
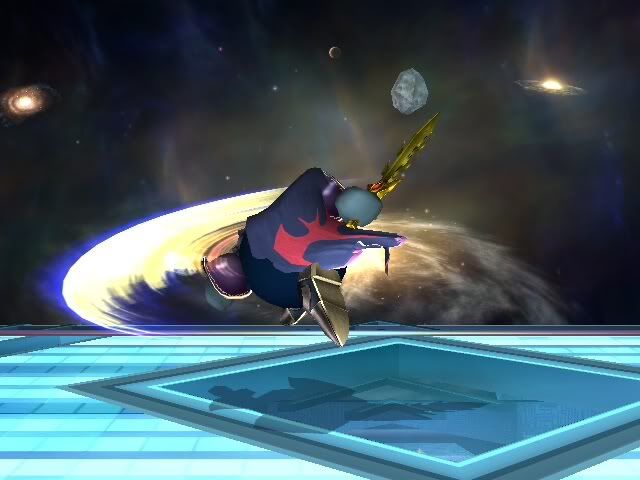
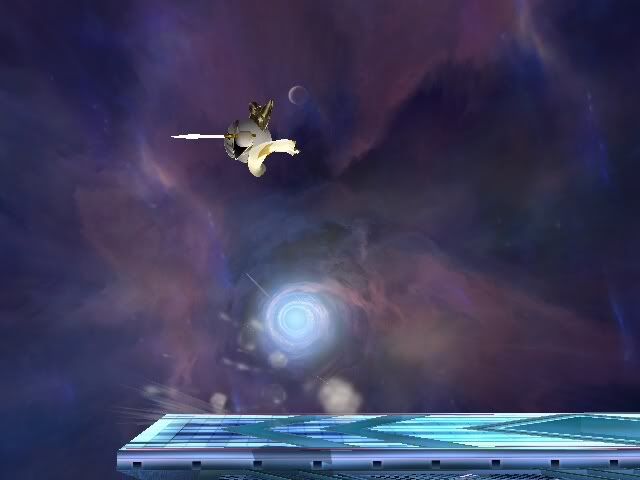
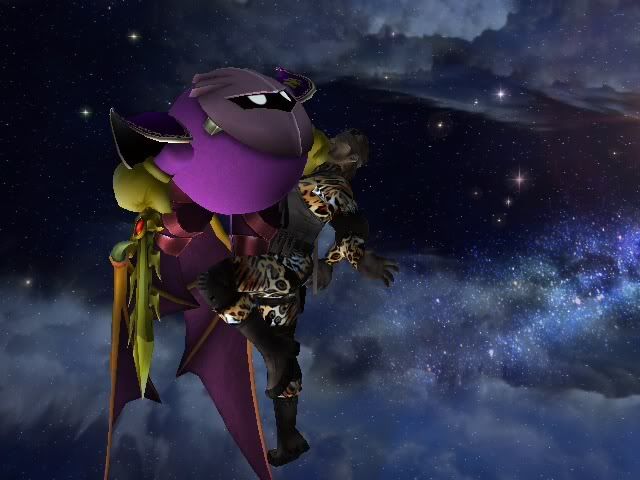
Dimensional Cape (DC/Down-B) | Recovery Tool | Advance Tech Move
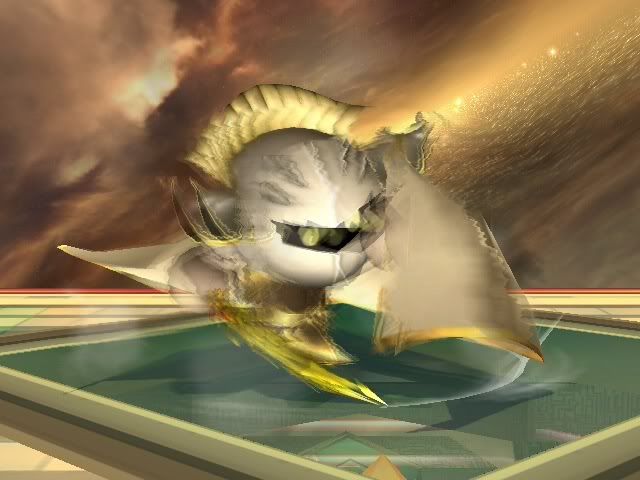
Meta Knight folds his cape over himself and disappears for a brief period of time, reappearing where you direct him in the allotted range he can move in.
Max damage: 14% / Min damage: 6%
Startup: 1-17 / Active/Invincible: 18-26 / Cool down: 27-54
Max damage: 14% / Min damage: 6%
Startup: 1-17 / Active/Invincible: 18-26 / Cool down: 27-54
“Notes: Despite MK turning invisible on frame 13, he does not receive invincibility frames until frame 18. MK can move around starting on frame 14” – Hotgarbage
Range: Varies from Poor to Great
Summary: This move shouldn’t be used for offense. It’s 99% for defense, recovery, and ATs. It’s a decent recovery move from directly below and from diagonal places, but you have better recoveries. The uses I find for it are mind gaming your opponent.
It’s a nice way to escape your foe or get behind them, and if you find yourself out of jumps, the Down-B is a nice way to get to the ground, just be careful of the height that you use it at; you don’t want to use it too high and free-fall.
I’m sure most, if not everyone, knows of the Infinite Dimensional Cape (IDC) glitch. Well this guide won’t be teaching it. It’s banned for all tournament purposes and will get you DQ’d. So for all practical purposes there is no reason to learn it.
How to perform: While grounded or in the air, press down on the control stick then B.
Grabs and Throws [GRTH]
Standing Grab (Grab)
MK leans forward when he grabs which gives him a good grab range
Startup: 1-5 / Active: 6-7 / Cooldown: 8-29
Range: Good
Startup: 1-5 / Active: 6-7 / Cooldown: 8-29
Range: Good
Summary: There isn’t much to say other than MK has a good grab lol. It has good range and should be used when the opportunity presents itself. One main point is that grabs in the MK ditto make up a lot of the match-up. His grab is a good mix up.
How to perform: Press Z while grounded or walking.
Pivot Grab (P-Grab)

Meta does a quick turn around and grabs while still moving backwards.
Startup: 1-7 / Active: 8-9 / Cool down: 10-34
Range: Good
Startup: 1-7 / Active: 8-9 / Cool down: 10-34
Range: Good
Summary: Pivot grabbing is good for mind games. A pivot grab followed up after and Down Throw is a good mind game.
How to perform: Turn around while dashing and press Z.
Dash Grab (D-Grab)

MK rushes forward and lunges at the foe with his hand ready to grab.
Startup: 1-7 / Active: 8-9 / Cool down: 10-39
Range: Good
Summary: Dash grabbing is one of my favorite things to do, it’s very quick and slides your opponent with you towards the edge, which can put your foe in a very bad position. However, if you miss the dash grab you'll be wide open for punishment. Startup: 1-7 / Active: 8-9 / Cool down: 10-39
Range: Good
How to perform: Press Z while running.
Pummel
MK attacks the opponent with the spike on his wing.
Max damage: 3% / Min damage: 1%
Summary: Getting into the habit of doing one pummel per grab is something that you’ll want to get into. Doing 15% instead of 12% is always nice, plus if you can pull off two/three pummels then even better! Max damage: 3% / Min damage: 1%
How to perform: Press Z or A after grabbing.
Down Throw (Dthrow) | Combo Starter
MK puts his opponent under his feet and dances on his/her face
Max damage: 11-12% / Min damage: 5-6%
Max damage: 11-12% / Min damage: 5-6%
Summary: This is MK’s best throw and for good reason. It sets up very nicely for combos though they’re not guaranteed. Though 95% you can follow up with any of the following, depending on your opponent's DI: Fair, Nado, SL, Dash Attack, Nair, Fsmash, and re-grab.
How to perform: Push down on the control stick after grabbing.
Up Throw (Uthrow) | Combo Starter | Semi-KO Move
Meta picks the foe up and rises quickly off screen to slam them back on the grab with great force.
Max damage: 12-13% / Min damage: 6-7%
Max damage: 12-13% / Min damage: 6-7%
Summary: Uthrow can usually be followed up with something like Nado or Uair since it puts your opponent in the air, which is where you want them and where they don’t want to be. At higher percents, around 150% you can KO with it.
How to perform: Push up on the control stick after grabbing.
Forward Throw (Fthrow) | Combo Starter

MK kicks the opponent up and in front over him after doing a back flip.
Max damage: 9% / Min damage: 4%
Max damage: 9% / Min damage: 4%
Summary: Fthrow can lead into a SL which is nice for a quick surprise kill, not only that it puts them up in the air, once again where you want them.
How to perform: Press forward on the control stick after grabbing.
Back Throw (Bthrow) | Semi-KO move
Meta Knight grabs the foe and tosses them behind him with his sword.
Max damage: 10-11% / Min damage: 4-5%
Max damage: 10-11% / Min damage: 4-5%
Summary: Back throw is a just a simple mix up and nice for getting your opponent off stage. At higher percents it can KO those who aren’t ready to DI.
How to perform: Press backwards on the control stick after grabbing.
Defensive Moves [DFMV]
Spot Dodge/Ground Dodge (Sdodge)

MK does a twirl on the ground
Startup: 1 / Active/Invincible: 2-20 / Cool down: 21-25
Summary: MK spins around on the ground, avoiding the hit for a short period without taking out his shield. This move can be buffered into itself, giving your opponent only a few frames to respond to your vulnerability. Startup: 1 / Active/Invincible: 2-20 / Cool down: 21-25
How to perform: Press L or R while holding down on the control stick.
Air Dodge (Adodge)

MK does a twirl, in the air this time.
Startup: 1-2 / Active/Invincible: 3-28 / Cool down: 29-39
Startup: 1-2 / Active/Invincible: 3-28 / Cool down: 29-39
Summary: MK has the best Adodge in the entire game, frame wise. Make sure you use it, but don’t abuse it. Good players thrive on reading Air Dodges.
How to perform: While in the air, press either L, R, or Z.
Front Roll (Froll)
MK makes a side step forward
Startup: 1-4 / Invincibility: 5-12 / Cool down: 13-23
Range: Good
Startup: 1-4 / Invincibility: 5-12 / Cool down: 13-23
Range: Good
Summary: Rolling is a big part of defense and spacing, but like A/S dodging you don’t want to be predictable, because it can lead to big punishments. Use rolls to side step attacks or just to get away from your opponent in an instant. Play smart, not predictable.
How to perform: Press L or R and then forward on the control stick.
Back Roll (Broll)
He makes a side step backwards
Startup: 1-3 / Invincibility: 4-12 / Cool down: 13-33
Range: Good
Startup: 1-3 / Invincibility: 4-12 / Cool down: 13-33
Range: Good
Summary: Just like Froll just backwards. Broll is a nice way to get behind your opponent. Being behind someone is your best option, and leads to many things. Rolling behind your opponent usually ends up in a free grab, but once again you must play smart. Being predictable and spamming rolls will only get you in trouble.
How to perform: Press L or R and the back on the control stick.
Ledge Options [LDOP]
General

Ledge invincibility: 1-46
Minimum Time on Ledge: 25 frames
Maximum invincibility after ledge drop: 21
Notes:Minimum Time on Ledge: 25 frames
Maximum invincibility after ledge drop: 21
- ledge let-go cannot be buffered
- ledge let-go invincibility doesn't stack with action invincibility
Less than 100%
Getup Attack
Damage: 8%
Duration: 55 / Hits on frame: 25 / Hit box Duration: 25-28 / Cooldown: 27
Invincibility: 1-23 / Vulnerable frames: 32 / Shield advantage: -28
Range: Fair
Duration: 55 / Hits on frame: 25 / Hit box Duration: 25-28 / Cooldown: 27
Invincibility: 1-23 / Vulnerable frames: 32 / Shield advantage: -28
Range: Fair
Summary: It's slow but not too bad, though there are better options when getting up from the ledge. The main problem with get up attacks is that they're easily shield grabbed.
How to perform: Press either A, B, or Z while on the ledge.
Getup
MK simply stands up from the ledge
Duration: 34 / Invincibility: 1-30 / Vulnerable fames: 4
Duration: 34 / Invincibility: 1-30 / Vulnerable fames: 4
Summary: Not a bad option, but not your best. Just feel your opponent out and figure out the best way to get onto the stage.
How to perform: Press forward on the control stick while on the ledge.
Jump
Just jumps up from the ledge.
Duration: 16 / Invincibility: 1-15 / Vulnerable frames: 1
Duration: 16 / Invincibility: 1-15 / Vulnerable frames: 1
Summary: Jumping from the ledge is your best option, but don't get predictable with it.
How to perform: Press either X, Y, or up on the control stick while on the ledge.
Roll
MK rolls onto the stage from the ledge
Duration: / 49 Invincibility:1-31 / Vulnerable frames: 18
Duration: / 49 Invincibility:1-31 / Vulnerable frames: 18
Summary: Once again not a bad option, but not your best.
How to perform: Press L or R while on the ledge.
100% and Greater
Getup Attack
Damage: 10%
Duration: 69 Hits on frame: 39 Hit box duration: 39-42
Cool down: 27 / Invincibility: 1-42 / Vulnerable frames: 27 / Shield advantage: -27
Range: Fair
Duration: 69 Hits on frame: 39 Hit box duration: 39-42
Cool down: 27 / Invincibility: 1-42 / Vulnerable frames: 27 / Shield advantage: -27
Range: Fair
Summary: See Less than 100%
How to perform: Press either A, B, or Z while on the ledge.
Getup
Duration: 59 / Invincibility: 1-55 / Vulnerable frames: 4
Summary: See Less than 100%
How to perform: Press forward on the control stick while on the ledge.
Jump
Duration: 19 / Invincibility: 1-19 / Vulnerable frames: 0
Summary: It should be noted that there are ZERO vulnerability frames. Mega safe option.
How to perform: Press either X, Y, or up on the control stick while on the ledge.
Roll
Duration: 79 / Invincibility: 1-62 / Vulnerable frames: 17
Summary: See Less than 100%
How to perform: Press L or R while on the ledge.
Getup Attacks (from the ground)
Sadly I do not have the frame data for these moves
From Belly

Damage: 6% (front), 5% (back)
Range: Fair
Range: Fair
Summary: MK attacks in front then behind him with his sword. This move is decent but rolling away is usually the best option. Mix it up though.
How to perform: Press A while MK is on his belly.
From Back

Damage: 6% (front), 5% (back)
Range: Fair
Range: Fair
Summary: Meta attacks behind then in front. Like the belly get up, this move is decent but again, mix it up.
How to perform: Press A while MK is on his back.
From Trip
Damage: 5% (front), 5% (back)
Range: Fair
Range: Fair
Summary: MK attacks in front then behind. This move isn’t too bad, but it’s best to roll from a trip or stand straight up rather than attack.
How to perform: Press A after tripping.
How to Kill [HTKL]
Netting kills against good players with good DI can become tedious. However, I will list the best kill moves in MK’s arsenal and try to describe the best way to pull off the KO.Dsmash:
This will probably be your main method of killing, especially for you young MKs. It’s fast and deadly, two very good combinations. Though it’s easy for good players to DI. Most of the time Dsmash kills come from punishing ending lag or a whiffed move, sometimes you can walk up to people and Dsmash them as a very simple way of killing, that may seem dumb, but Dsmash is so fast that it can catch your opponent off guard. Usually the best time to try this method is right after being killed and you still have your invincibility frames.
Fsmash:
Like I said before, Fsmash is best used as bait and for mind games. It’s also your best move against broken shield, lag ridden moves on landing and on the ground. This won’t be as reliable as Dsmash because of speed, but it will KO much faster.
Shuttle Loop (Aerial):
Incredible move as aforementioned. ASL is by far MK’s best killing move, and it is rare to punish it even if missed. It kills very early, as early as 60% on the edge of Battlefield, 8% as a stage spike, and 0% when close to blast zones like Delfino or on character with bad horizontal recovery like Link and Marth. It can be set up from Dash Attack or Fthrow, along with just edge guarding your opponent if they try to come from above. Learn to utilize this move.
Shuttle Loop (Grounded):
This move is great for killing because it’s very fast and has invincibility frames to eat through your opponents attack. It kills around 120% without DI, but with good DI people can live a good while against it.
Nair:
This is another good move, once again, for its speed. It has really good knock back, and aerial kill moves are always a plus. It’s hard to kill across the stage with this so it’s best to be closer to the blast zone. It’s a very good edge guarding tool that can net you early kills, and with MK’s multiple jumps he can go very far out to utilize this.
Dair:
Very good gimping tool, not much of an outright kill move, but get your opponent off stage and eat their jump(s) with Dair. Incredible gimping move, and if mastered it can become your biggest asset.
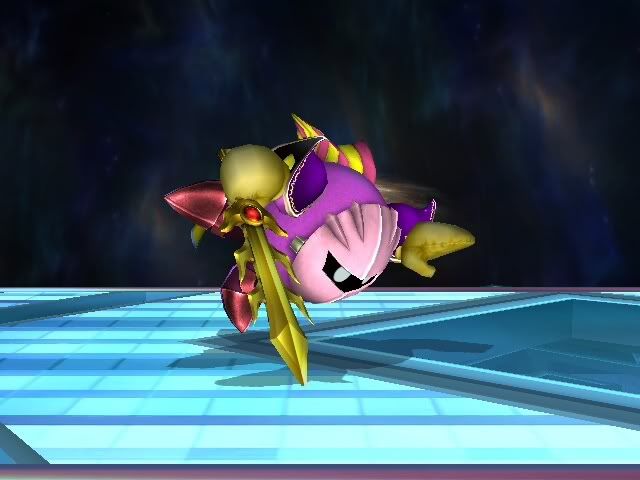
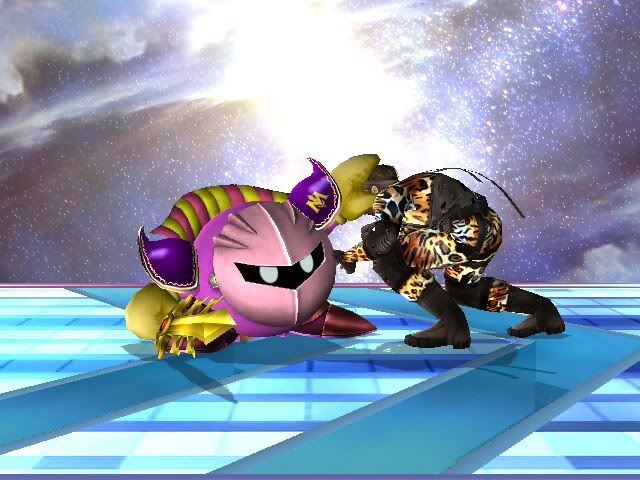
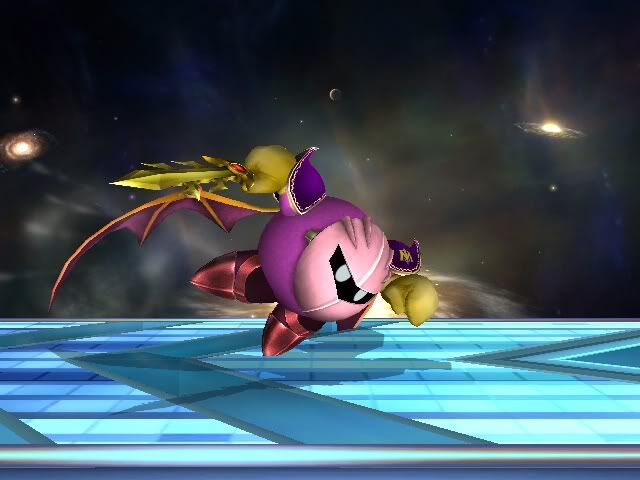
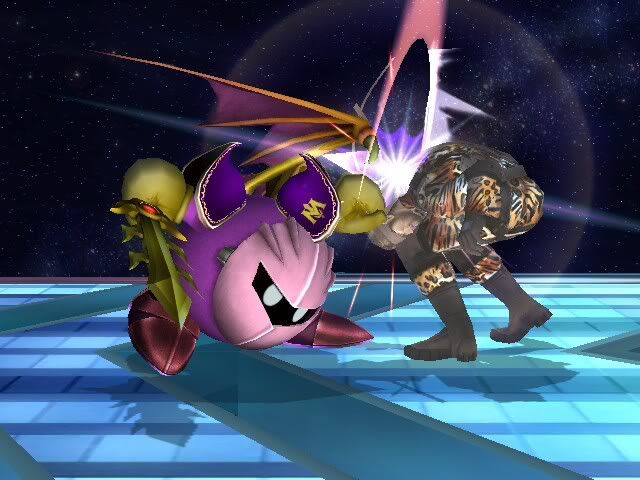
Getting Your *** Back: Recovery [GYAB]
Getting Back to the Stage [GBTS]
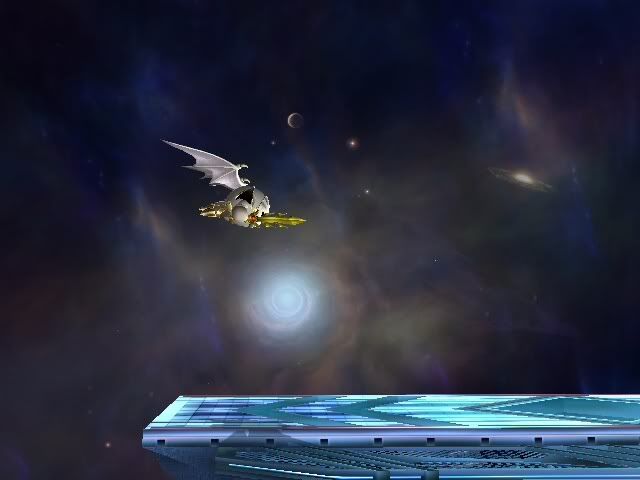
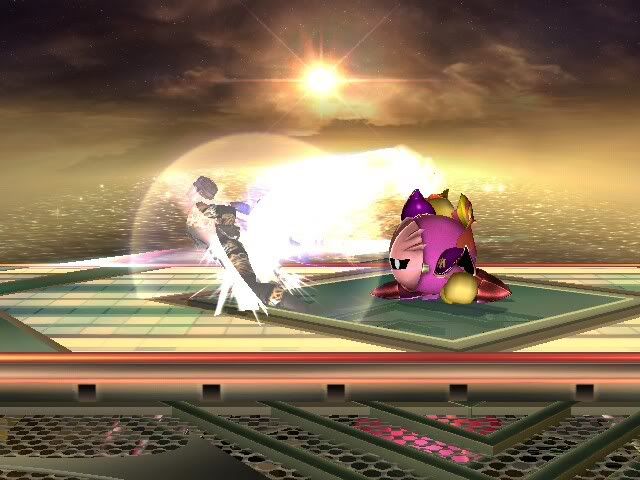
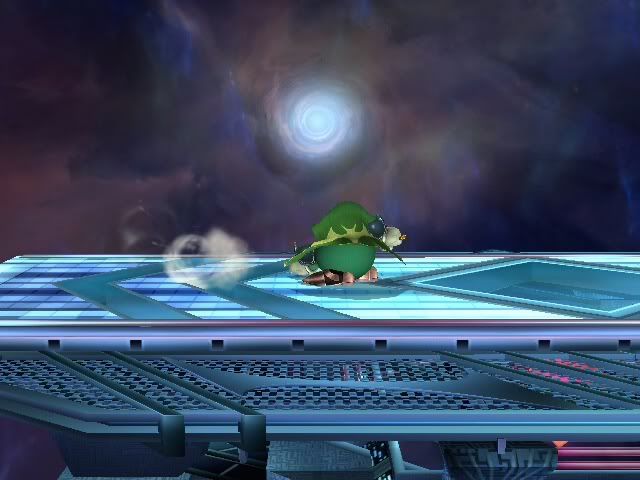
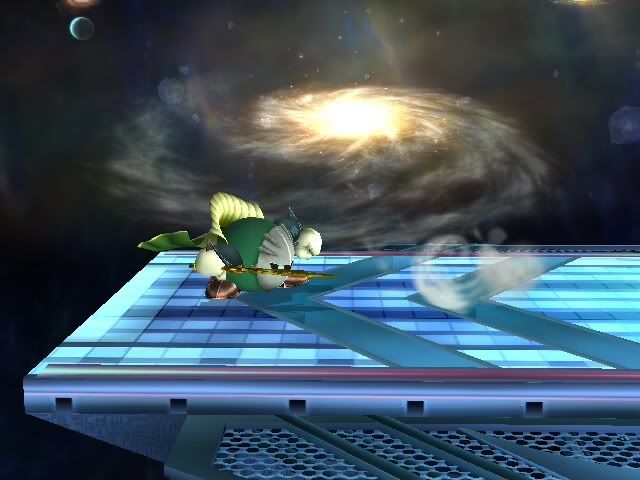
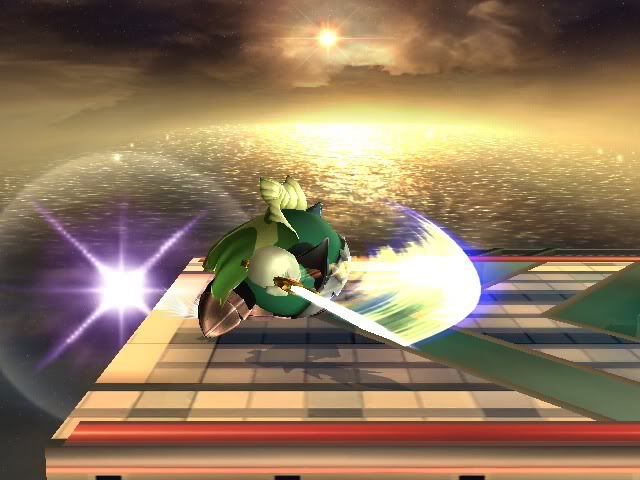
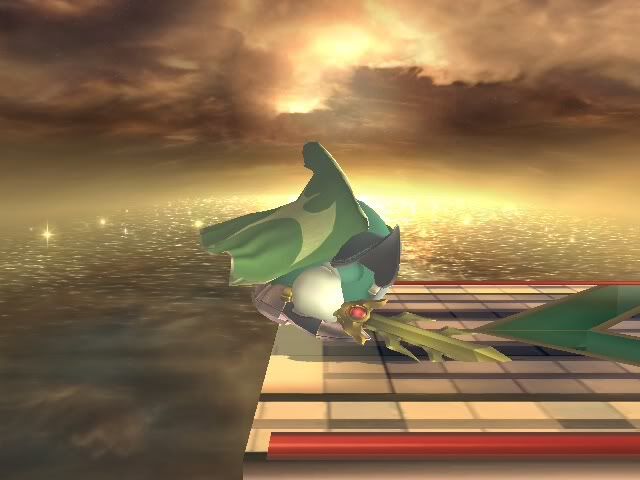
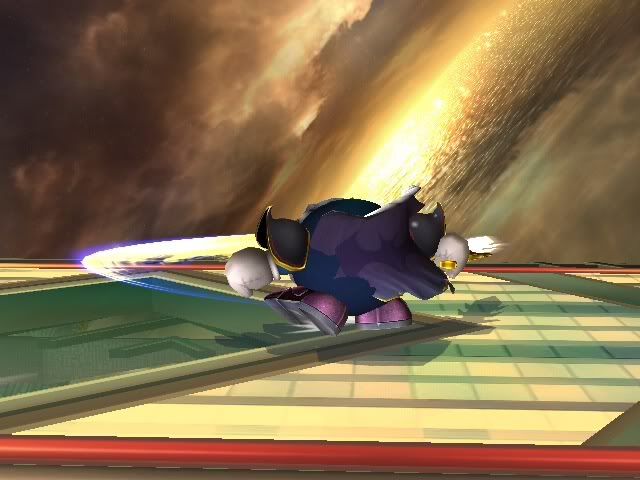
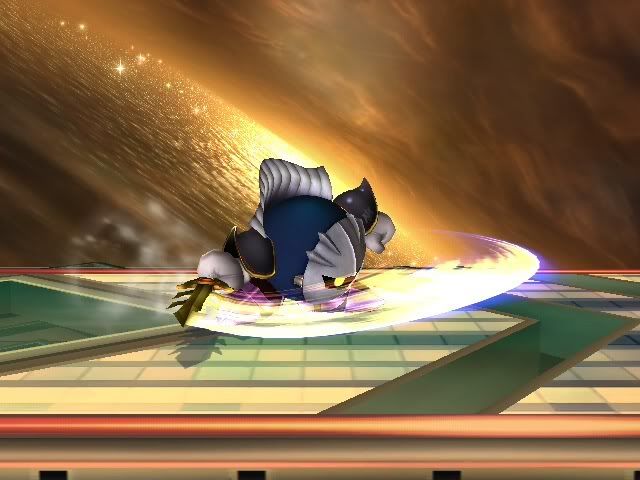
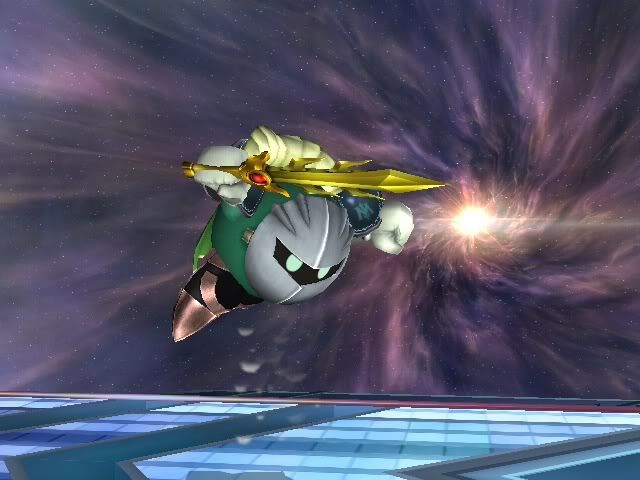
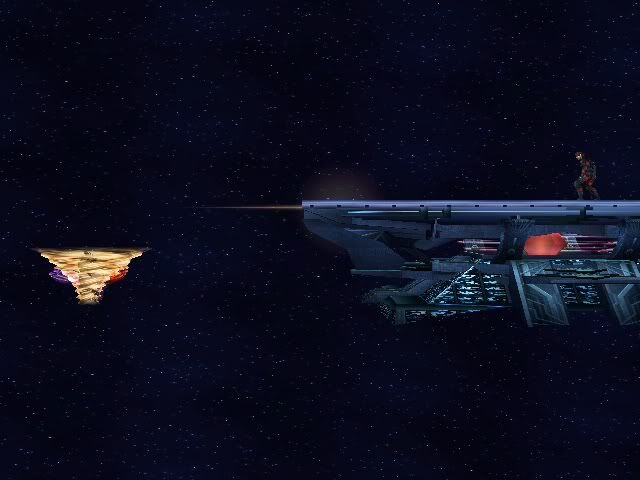
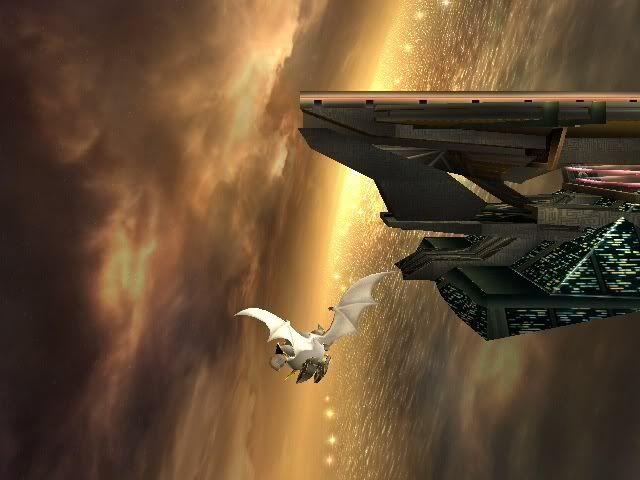
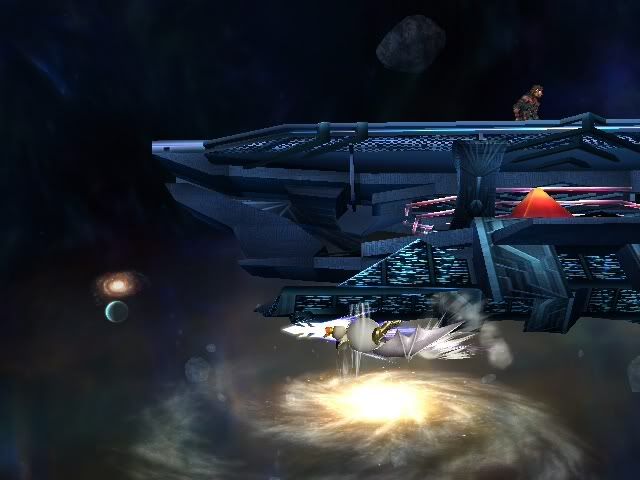
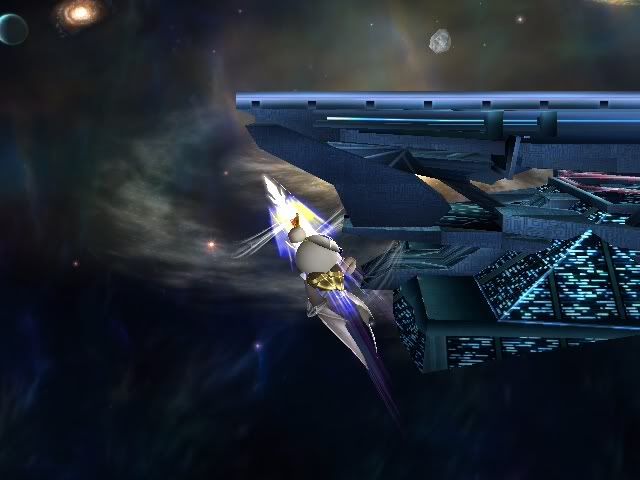
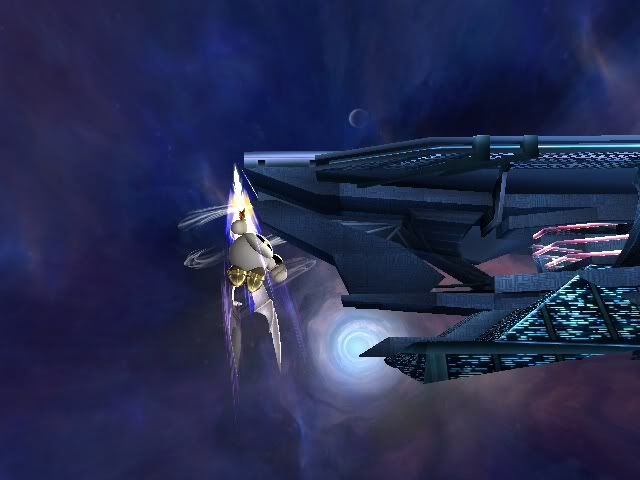
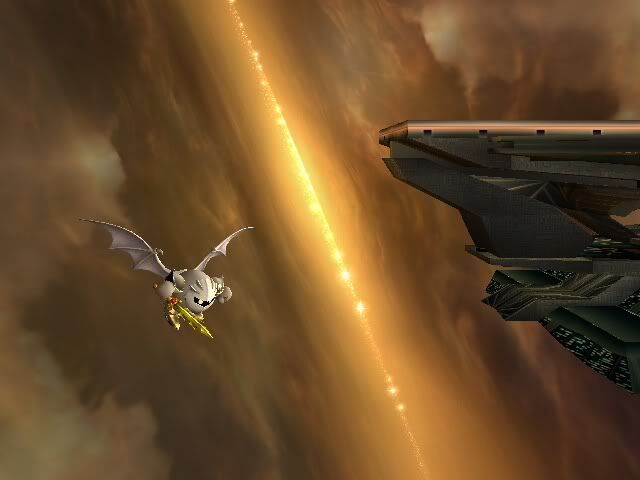
Meta Knight has the best recovery and one of the best defensive games in all of Brawl. I have posted pictures of where MK can recover from with the specified move. In the case of Tornado, he can reach Snake from where his Tornado is starting. Don't forget to click on the pictures to get a better view of his recovery!
Jumping:
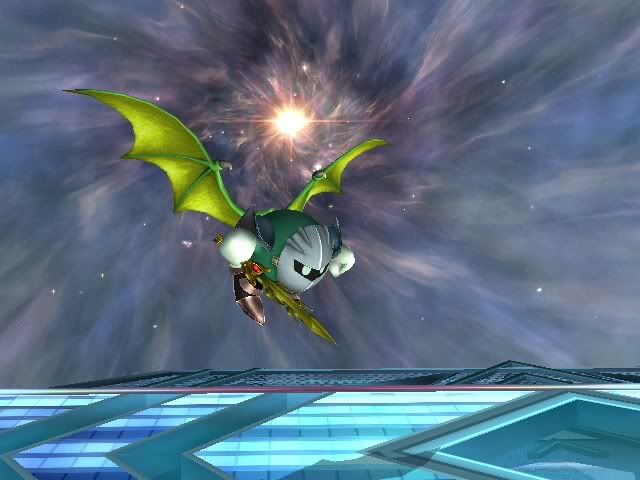
Lets start with his jumps. He has 5 and they cover a lot of height unlike Kirby or Dedede who don’t get much height from their extra jumps. Don’t feel rushed to recover because most of the time you can simple jump back to the stage or ledge. Another aspect about his jumps is that they’re even safer then his already godly Air Dodge. With that in mind it’s usually your best option to jump when coming down to the stage from above, and what I mean by that is if your opponent is heckling you from below, just jump out of the way. About 9 out of 10 times they want you to Air Dodge down so they can read and punish you, but if you simply jump you can eliminate that danger. Play smart with your jumps.
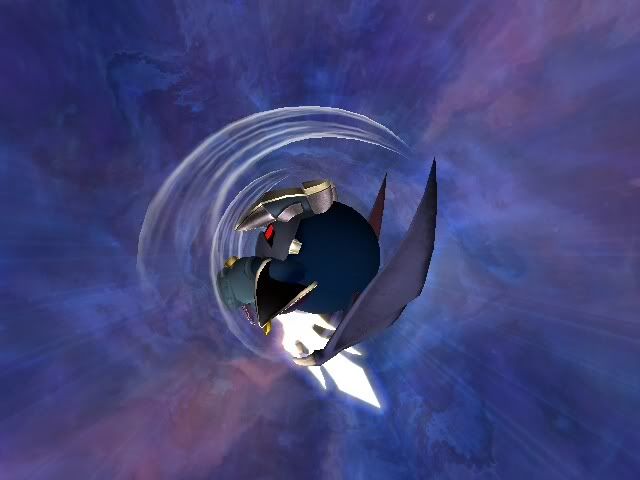
Tornado:
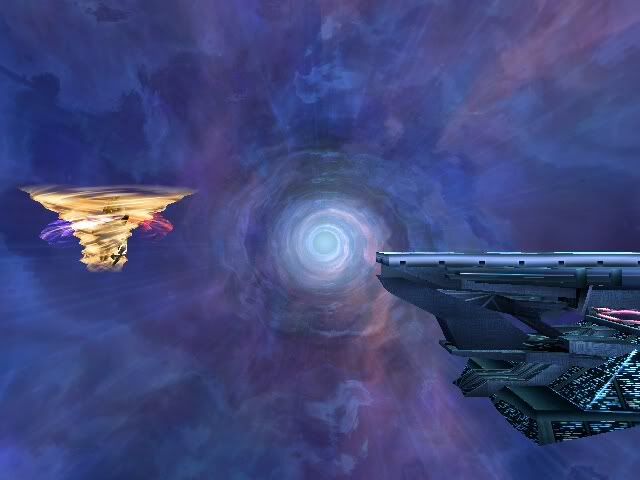
MK’s Tornado is great for recovery for two reasons. One, is its incredible priority, because of how high its priority is your opponent is going to have a very hard time edge guarding you, but as stated before it’s out prioritized by major projectiles, so be careful how you use it to recover. Second reason, it covers a lot of horizontal ground. Just mash that B button and move back to the stage, but be careful that you don’t bounce into the edge, this will push you back away from the stage and most likely kill you if you don’t have enough reaction time. You also need to be smart when coming back with Nado because you need to land on stage, so it’s best to cancel it from the proper height. Also note that you can’t Nado into the ledge like you can with Drush, SL, or DC, even if you do it on your ending frames you will fall past the ledge. In order to catch the ledge of the end of Nado you must be at a proper height above the ledge.
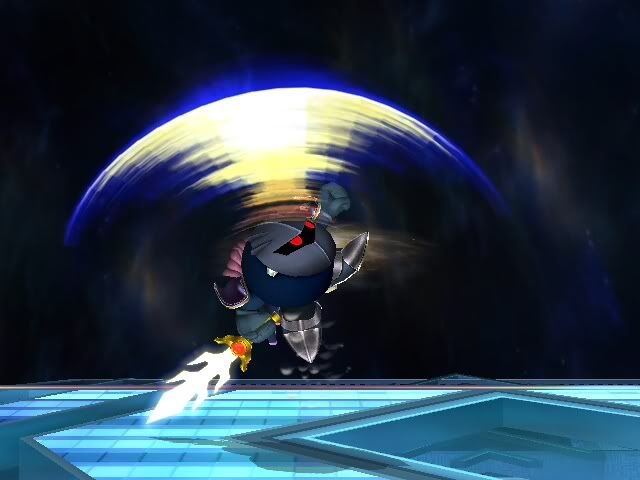
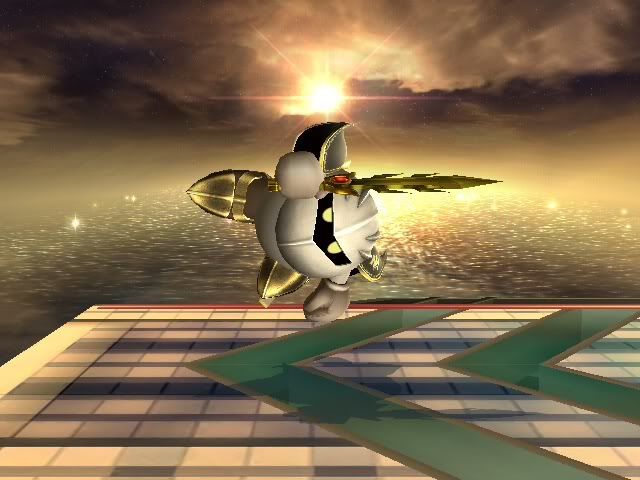
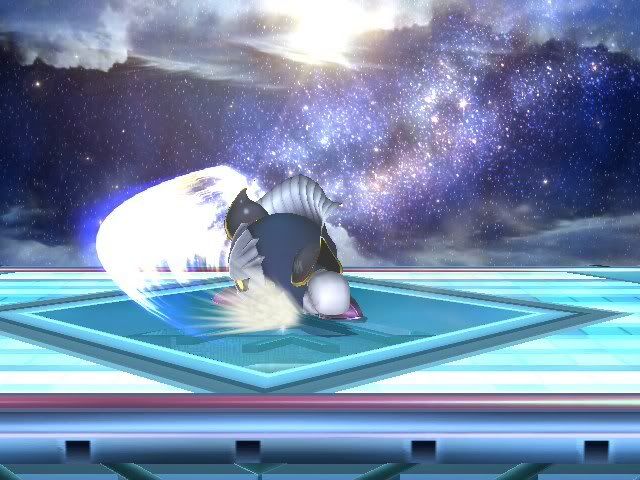
Shuttle Loop:

Its quick and safe. It auto-hugs the ledge when spaced and can be reversed from under the stage, not to mention it ends in a glide allowing you to easily recover from high above the stage. This recovery option is nothing short of amazing and is your best option from below the stage.
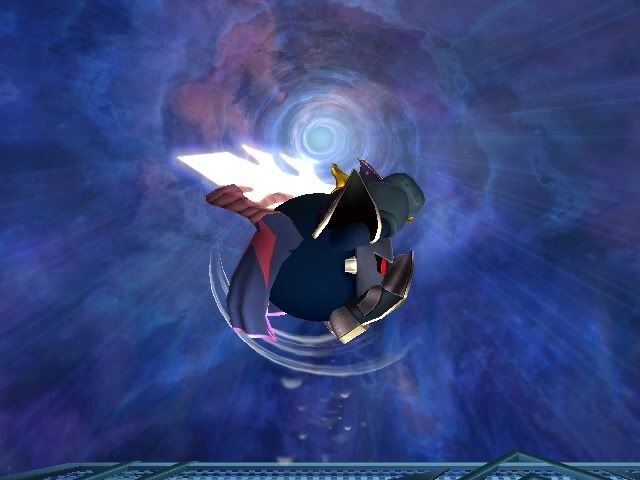
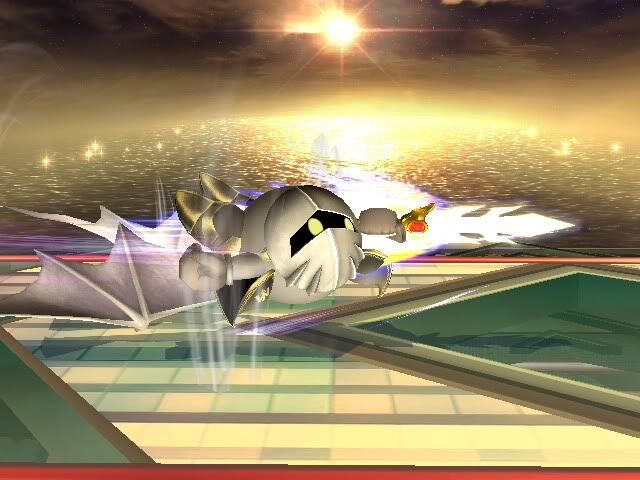
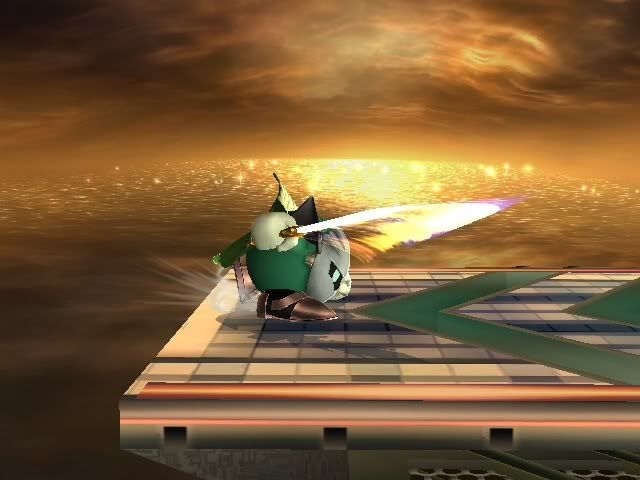
Drill Rush:


Amazing, amazing, and uhh… Amazing! This move gets you back from almost ANYWHERE! Under the stage? Horizontal to the stage? Diagonal to the stage? It’ll getcha back! You’ll be ****in up Snakes in no time! MMM MMM recover *****!
This move is the main reason why MK’s recovery is so good! Learn its properties and utilize it.
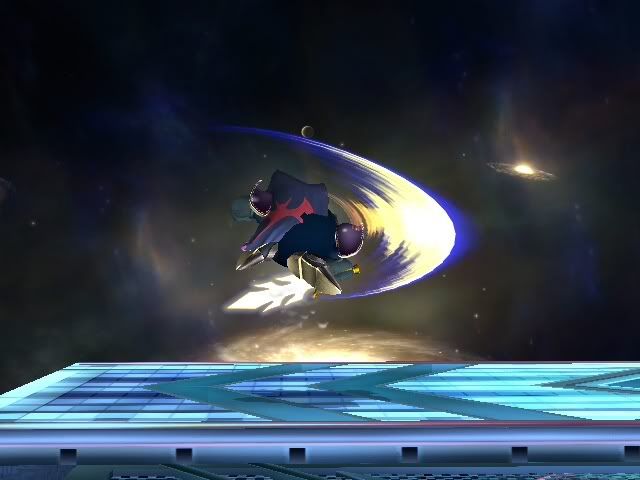
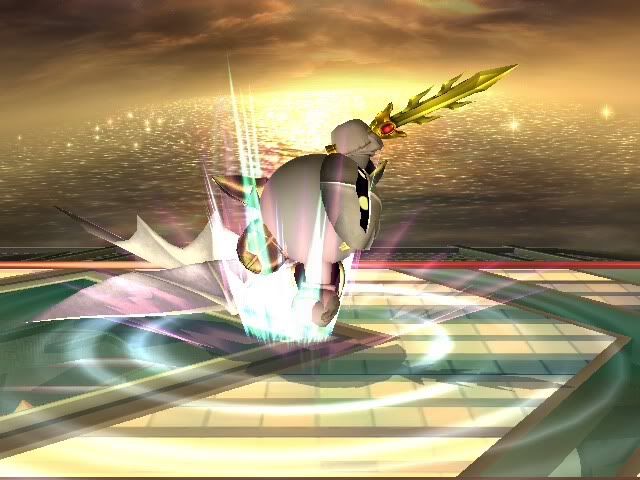
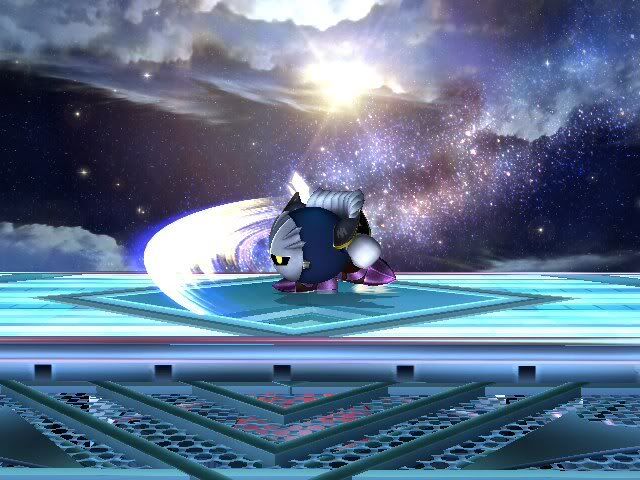
Dimensional Cape:

Not the best recovery but still good. It’s best for diagonal recovery or from directly below the ledge. It also takes some time to control so practice is key.
 )
)